

Remnant 2: The Awakened King just launched with tons of new items to collect and experiment with, and among them are 12 new Amulets. Your choice of Amulet is the most impactful part of your build, and the new ones added in the DLC are no joke.
All new Amulets found in The Awakened King
There are 12 new Amulets in The Awakened King, including several that appear outside of the Forlorn Coast, as well as 28 new rings. A few new Amulets are random drops, meaning they can appear in Campaign or Adventure mode within specific dungeons. In order to get them, you’ll have to farm the hub worlds and side dungeons in Adventure mode.
Birthright of the Lost
- How to get: Random drop in Losomn
- Used for: Playing in a duo
The Birthright of the Lost is a peculiar Amulet that Exposes enemies when you perfect dodge them. The Exposed status increases damage dealt to your victim by 24 percent from all sources, but the bonus decreases the more friendly players are alive.
The description is frustratingly non-specific about how much it reduces damage per person, but we believe it is around eight percent per person. This makes this Amulet most effective with two people in the party, where both players gain a 16 percent damage boost.
That said, this is a difficult Amulet to make work consistently. A perfect dodge is when you avoid damage using your dodge i-frames, so you need to put yourself in danger just to apply this buff. On top of this, some enemies simply don’t give you enough chances to pull this off. In group combat, for instance, you’ll wish you had a straightforward Amulet with a flat damage bonus.
Give one this a pass unless you’re playing with exactly one other player and you’re very confident in your dodging. You’ll be more likely to succeed with this Amulet if you pick the Invader archetype.
Brewmasters Cork
- How to get: Random drop in Losomn
- Used for: Drinking many different Concoctions
The Brewmasters Cork lets you drink two additional Concoctions. It also reduces incoming damage by two percent per Concoction. This normally puts you at three Concoctions and six percent damage reduction, though an Alchemist can have six Concoctions and 12 percent damage reduction with this item. Add the Feastmaster’s Signet for seven and 14 percent DR.
If you’re not an Alchemist, take a pass here. Concoctions are good, but you usually only need one offensive one, or maybe two, if you’re trying to improve your defense as well.
Alchemists push this Cork to the limit. A primary Alchemist can get six Concoctions with the Cork equipped at level 10. This means you can have 15 percent bonus experience, more health, health regen, more mod power, movement speed, and better skill cooldowns. All in one package.
Other Archetypes can benefit somewhat from additional Concoctions, but they’re better off using a different Amulet. If you’re an Alchemist, though, the Brewmasters Cork is a beautiful way to make your Archetype more interesting.
Cost of Betrayal
- How to get: Shoot at the One True King’s former counsel members before his Throne Room
- Used for: High-risk, high-reward builds
The Cost of Betrayal reduces your number of Relic charges to one. While you have a charge, you deal 20 percent more damage. If you spend your charge to heal, you take 20 percent more damage for the next 30 seconds, after which you get your one Relic charge back.
This item is unusual to say the least. A 20 percent damage bonus is impactful, but it comes with a huge safety cost. It isn’t worth it on Hardcore, but the extra damage is consistent and requires no setup, so if you’re willing to take the risk, any build can use it effectively.
That said, we didn’t find it very helpful. Too often, Cost of Betrayal leads to unwinnable situations without outside healing and bonus survivability. This is an Amulet for those incredibly good at the game and doesn’t even reward that skill effectively.
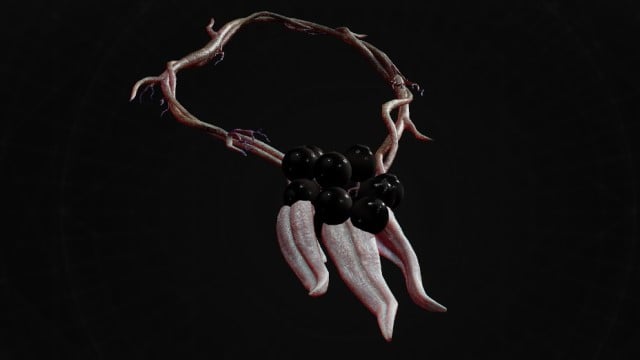
Death-Soaked Idol

- How to get: The Ethereal Manor Event in the Forlorn Coast
- Used for: Status Effect-driven builds
The Death-Soaked Idol boosts your damage by five percent per entity nearby affected by a status, up to 25 percent. For the Ritualist, there is arguably no better Amulet than this. Applying statuses to enemies can be tricky with a single gun, though an Enigma with Fetid Wounds can do a good job.
The Miasma skill is almost necessary to make this work. But boy, does it work. A 25 percent bonus to all damage is incredible. If a boss has adds or you’re simply exploring the map, this is perfect. During one-on-one boss fights, consider swapping this out.
Gift of Euphoria
- How to get: Unlocking a yellow door in the Walk of Remembrance Maze
- Used for: Stamina-spending builds
Gift of Euphoria converts 25 Stamina spent to five percent Critical Chance, up to 25 percent Critical Chance. Spending stamina is usually a job for melee builds, like those with the Champion Archetype, and 25 Stamina is a substantial amount for any other build to burn consistently, even with ring support.
That said, Charge Attack builds will love this Amulet. 25 percent Critical Chance is a blessing, turning on a lot of rings—like Burden of the Gambler or Sapphire Dreamstone—and mutators—like Reinvigorate or Steadfast.
Bear in mind that you’ll need to choose between the Gift of Euphoria or Gift of Melancholy in the Walk of Remembrance. You’ll find this dungeon at the end of the Pathway of the Fallen. Put the dungeon’s key in the yellow door for to get the Gift of Euphoria.
Gift of Melancholy
- How to get: Unlocking a gray door in the Walk of Remembrance Maze
- Used for: Builds that do not spend Stamina
Gift of Melancholy is the exact opposite of Gift of Euphoria in that it gives you a plus 25 percent damage to everything while you’re at maximum stamina. This Amulet is incredible. Any build that uses guns, mods, or skills can reliably stay at maximum stamina during their damage rotations. Just remember that the moment you have to dodge, sprint, or charge up a melee attack, you lose it all.
Once you understand the safe spots of a boss fight or encounter, this Amulet can come in handy. Until then, be ready to lose your 25 percent damage bonus more often than you think.
Gift of the Unbound

- How to get: Talk with the One True King and agree to kill Nimue, then return to Nimue and spare her life. Kill the King, then return to Nimue with the Blood-Marred Vow quest item.
- Used for: High-risk builds focused on Burdens
Gift of the Unbound replaces the negative effects of Burden rings with a 20 percent health reduction. The benefits of each ring while wearing this Amulet are as follows:
- Audacious: Perfect dodges heal 20 percent health.
- Destroyer: All damage up by 15 percent.
- Divine: Half of all self-healing heals allies.
- Follower: Mod power generation boosted by 50 percent.
- Gambler: +10 percent crit chance, +20 percent crit damage.
- Mariner: Generate 10 percent Mod Power for each Skill on cooldown.
- Rebel: Skill cooldown reduced by 15 percent.
- Stargazer: Skill cooldown reduced by 15 percent.
- Warlock: Mod Power requirement reduced by 15 percent.
The winners include Gambler—giving you super-crits and weakspot hits—and Follower—which would normally reduce gun damage significantly.
That said, not all of these rings are worth the cost. You’ll need at least two or three to make it worth your time, which could be worth considering for a Mod Power build. Plus, most Burden Rings don’t have significant enough downsides that are worth chunking your maximum health to avoid. Gambler is the only one whose downside is a huge problem.
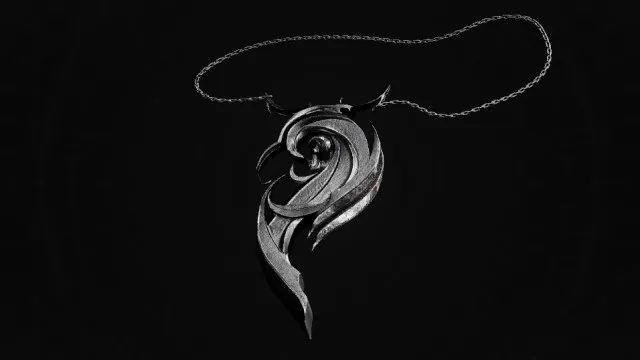
Index of the Scribe
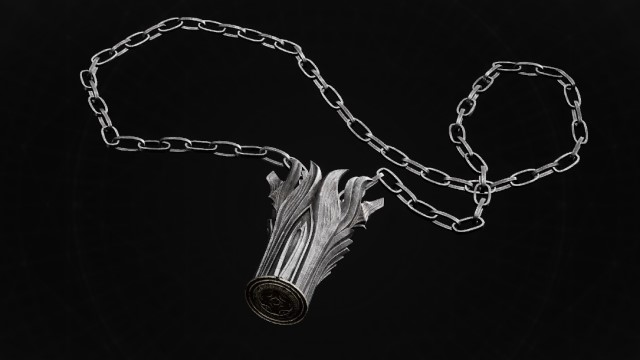
- How to get: Give the Bookbound Amulet to Leywise immediately
- Used for: Mod and Skill builds that can deal Weakspot damage.
The Index of the Scribe pumps Weakspot damage by 35 percent, but only if a skill or mod hits a Weakspot. This is a gigantic boost in damage, but is only truly rewarding if your Mod can hit Weakspots consistently. This isn’t too difficult; Astral Burst can slam a Weakspot at close range, and Bore is a titanic boost to Weakspot damage by default.
Few skills are good at hitting Weakspots, but the Engineer’s Impact Cannon works perfectly. While you don’t have much variety in your build options, 35 percent extra damage is a remarkable damage bonus from a single item. It’s very fun.
Legacy Protocol
- How to get: Random drop in N’erud
- Used for: Skill builds
The Legacy Protocol simply lowers your Skills’ cooldowns by 20 percent and boosts duration by 15 percent. Most skill builds would die for 20 percent shorter cooldowns—unless they’re using the Devouring Loop to cheese them. The 15 percent duration goes beyond basic cooldown reduction, making it handy for the supportive skills of the Alchemist and the Handler.
A good Amulet for a supportive character, though there are slightly better Amulets for purely aggressive builds.
Participation Medal
- How to get: Die many times to a boss on Apocalypse Difficulty
- Used for: General defensive stats
The Participation Medal boosts Health and Stamina by 10 and Move Speed and Damage Reduction by 10 percent.
This amalgamation of defensive stats is actually quite strong. You’ll be significantly tankier and more likely to avoid hits. On Apocalypse, this can turn two shots into three shots, which is a big difference. There are better defensive items, especially when you add Rings to the equation, but this Amulet is absolutely worth considering for any character who’s struggling to stay alive.
Sinister Totem
- How to get: Random drop in Yaesha
- Used for: Status effect builds
The Sinister Totem improves status effect damage by one percent for 15 seconds, stacking up to 50 percent more damage.
50 percent extra status damage is a lot, and turns the basic Burning and Corroded statuses into boss melters. This bonus is also a lot easier to stack than a general-use Amulet like Death-Soaked Idol since you can build it all up on a single boss. It’s perfect for a Ritualist or Archon build, though other Archetypes might have trouble consistently applying debuffs.
Whispering Marble
- How to get: Random drop in Losomn
- Used for: Bulwark builds
The Whispering Marble grants three stacks of Bulwark and improves damage by three percent per Bulwark stack. Bulwark bumps your defense by a slowly decreasing amount, ranging from seven to 25 percent over the course of five stacks.
The Whispering Marble boosts damage by up to 15 percent at max Bulwark stacks, which is very easy to get to with the Marble’s baseline of three. The Fae Bruiser Ring, for instance, grants those two extra stacks by itself. Summoner builds can make it work with Soul Guard, a ring that gives a Bulwark stack per active summon.
This is a fantastic middle-ground Amulet that many builds can access easily. It doesn’t reach the Amulet’s 20 percent damage threshold, but its fantastic damage reduction makes everything worth it.


Published: Nov 25, 2023 04:52 pm