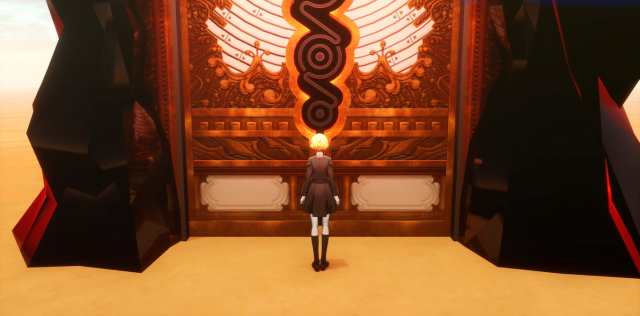
Monad Passages in Persona 3 Reload are a good way to test your team’s skills while exploring Tartarus. These appear alongside border floors and offer exciting rewards to aid you as you explore at higher levels.
You may want to consider your team composition before undertaking these tasks. Knowing what to expect should also make it easier to tackle whatever bosses pop up and prepare your team—all without straining them too much. Here’s what you need to know about all Monad Passage locations and the bosses you face in Persona 3 Reload.
Every Monad Passage boss weakness and location in Persona 3 Reload

The Monad Passages are different from the Monad Doors in Persona 3 Reload. The Monad Passages have a set location, typically before a border door or when you head to the next area, whereas the Monad Doors appear while you’re exploring Tartarus.
Here are the bosses you can expect to fight in Tartarus’ Monad Passages and what you should bring to each fight.
- Yabbashah Floor 91
- Cowardly Maya – No weaknesses
- Rampage Drive – Resistant to all Physical
- Shouting Tiara – Weak to Strike
- Magical Magus – Resistant to all Magical
- Yabbashah Floor 117
- Bronze Dice – Weak to Electric
- Muttering Tiara – Weak to Wind
- Iron Dice – Weak to Ice
- Silent Book – Weak to Wind
- Platinum Dice – Immune to Slashing, Electric, Light, and Dark
- Silent Book – Weak to Wind
- Muttering Tiara – Weak to Dark
- Tziah Floor 143
- Dogmatic Tower – Weak to Electric
- Immoral Snake – Weak to Ice
- Natural Dancer – Immune to Wind and resistant to Fire and Electric
- Vehement Idol – Immune to Dark, and resistant to Ice
- Tziah Floor 171
- Minotaur II – Reflects Slashing, Striking, and Piercing damage
- Haunted Castle – Immune to Dark, resistant to Slashing, Striking, Fire, and Wind, but weak to Light
- Spiritual Castle – Immune to Light, resistant to Slashing, Striking, Ice, and Electric, but weak to Dark
- Intrepid Knight – Immune to Wind, Light, and Dark.
- Change Relic – Immune to Light and Dark
- Harabah Floor 197
- Amorous Snake – Reflects Light, heals with Fire, and is weak to Ice
- Devious Maya – Resist all attacks
- Light Balance – Reflects Dark and Light
- Heat Balance – Reflects Ice and Fire, weak to Electric and Wind
- Sky Balance – Reflects Electric and Wind, weak to Fire and Ice
- Omnipotent Balance – Immune to Fire, Ice, Electric, and Wind
- Harabah Floor 225
- Morbid Book – Reflects Light
- Phantom Master – Immune to Slashing and Dark, resistant to Electric, heals from Ice, and is weak to Piercing
- Black Hand – Heals Fire, Ice, Electric, and Dark but is weak to Wind
- Gold Hand – Immune to Light and Dark, reflects Slashing and Striking damage
- White Hand – Resistant to Slashing, Heals from Ice, Electric, and Wind, but is weak to Fire
- Pink Hand – Heals from Fire, Electric, and Wind but is weak to Ice
- Silver Hand – Immune to Striking, Heals from Fire, Ice, Wind, and Light but is weak to Electric
- Adamah Floor 255
- Hallowed Turret – Immune to Slashing and resistant to Fire and Ice
- Kaiden Musha – Reflects Slashing and Fire but is weak to Ice
- Hakurou Musha – Reflects Slashing and Electric but is weak to Wind
- Tenjin Musha – Reflects Slashing and Striking, heals from Light, and is resistant to Piercing
- Onnen Musha – Reflects Slashing and Dark and heals from Ice and Wind
- Shadow of the Void – No advantages or weaknesses
Persona 3 Reload Monad Passages explained
Monad Depths are no longer locked behind The Reaper fight in Persona 3 Reload. The game lets you access Monad Depths quite early, right after the July Full Moon. You reach the Monad Passage after passing the Monad Doors in Tartarus. Monad Passages always have a fixed location with the same set of enemies.
Monad Passages in Persona 3 Reload contain difficult Shadows you need to overcome. But succeed, and you can win Major Arcana cards—rewards usually reserved only for Full Moon bosses. You can also obtain unique weapons, accessories, and even cosmetics by taking down those powerful bosses, so we recommend exploring them if you’re up for the challenge.
Persona 3 Reload Monad Chambers bosses in Episode Aigis

Episode Aigis has a similar concept. In addition to the usual Monad Door bosses, the DLC has a secret, post-campaign area called Monad Chambers. This zone is as close to a Monad Passage as it gets in Episode Aigis, with a gauntlet of fights awarding drops at the end of each floor. You can return to this area at any time, just like a regular Monad Passage.
The ultimate enemy appears on the fifth floor of Monad Chambers, so make sure to save or drop out before reaching that area. This battle has a series of insta-wipe conditions, just like the Elizabeth fight in the base game, so don’t engage unless you’re absolutely ready. Dying to him will cause you to restart the fight and get caught in another Sisyphean time loop or, even worse, return from the latest save game—which, in our case, was before we went into Monad Chambers in the first place.
- Monad Chambers 1F
- Immortal Gigas: Repels physical attacks, resists Wind, nullifies Light.
- Visceral Maya: Weak to Fire, resists Ice and Wind, nullifies Dark, and Absorbs Electric.
- Strategy: Visceral Maya can be dangerous due to its buffs on Immortal Gigas, so exploit its weakness and make sure you have access to Dekunda.
- Monad Chambers 2F
- Primitive Idol: Resists Fire, Ice, Wind, Elec. Nullifies Light and Dark.
- Sky Balance: Weak to Fire and Ice, repels Wind and Elec
- Heat Balance: Weak to Wind and Elec, repels Fire and Ice.
- Strategy: Primitive Idol is the priority target since it can use Mediarahan to heal all foes to full health. It also uses Break skills on your party so its minions can attack without resistance.
- Monad Chambers 3F
- El Dorado Beast: Resists everything
- Amorous Snake: Weak to Wind, Absorbs Fire, Nullifies Light.
- Strategy: This battle plays out like the Amorous Snake fight in the Harabah Monad Passage, but killing the snake early is even more dangerous. Its Life Drain attacks take 2000 HP from the all-resistant El Dorado Beast, which is the simplest way to take chunks out of its health.
- If the Amorous Snake is dead, use Break abilities to remove the lion’s elemental resistances and set up big damage windows with Charge/Concentrate and a Theurgy.
- Monad Chambers 4F
- Brilliant Cyclops: Resists Strike and Pierce, absorbs Ice, Elec, and Wind.
- Change Relic: Weak to Electric, resists Fire and Ice, nullifies Light and Dark.
- Strategy: Exploit Change Relic’s weakness to Electric to get more follow-up attacks. Physical-based damage dealers should use multi-target Slash abilities. Magic damage dealers can use Break skills or set up Theurgies with Concentrate.


Published: Sep 17, 2024 09:40 am