As the world is torn asunder, we can’t forget about our friends on Volcanic Island. The Importance of Aiding Ernesto is both a fun Oscar Wilde pun and one of five postgame evacuation missions in Dragon’s Dogma 2. Let’s go over how to get everyone out safe and sound.
How to start The Importance of Aiding Ernesto in Dragon’s Dogma 2
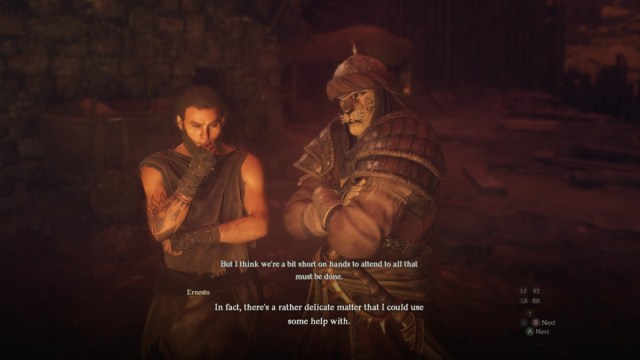
Before you can start The Importance of Aiding Ernesto in Dragon’s Dogma 2, you must first begin the quest Halls of the First Dawn to commence the evacuation procedures. Then, you can start this part of the evacuation as soon as you find Ernesto, the front guard of the small Volcanic Island Camp to the far south.
Halls of the First Dawn is the meat of the postgame of Dragon’s Dogma 2. It’s a group of five different evacuation quests to get everyone from the major settlements to safety. However, before we begin, it’s important to note that this quest becomes significantly easier if you’ve completed three specific quests in base game. Ernesto, for instance, is the recipient of a letter in the quest Twixt a Rock and a Hard Place. If you’ve delivered that letter, he’ll know you immediately and ask no questions. Completing Put a Spring in Thy Step and The Sotted Sage are more helpful for speeding things up.

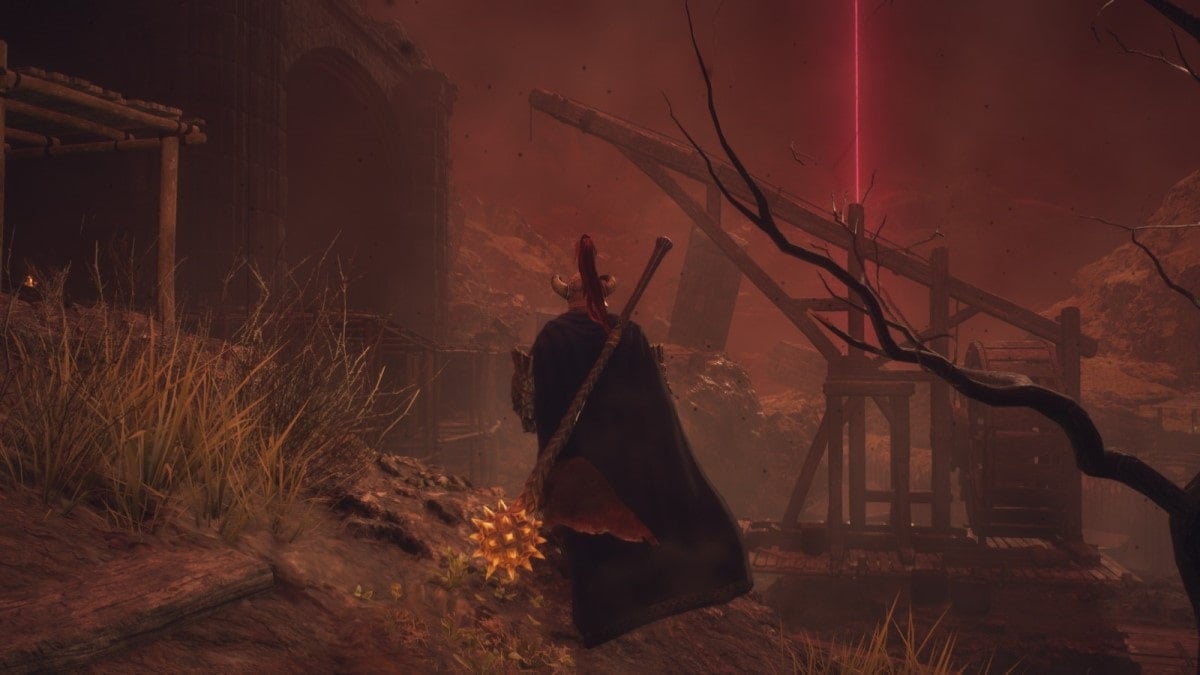
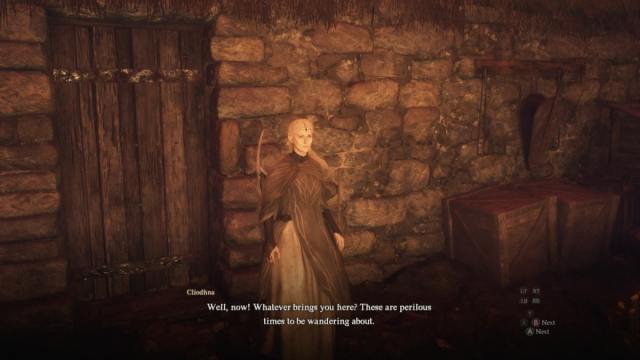
This because the quest mostly concerns itself with moving the Dwarf Gautstafr and his Elven wife Cliodhna to the Volcanic Camp. They live outside the city, past a few ridges. And, with how dangerous the path is, it’s a good idea to clear out the monsters on the way there. Then, depending on your base game quest progress, one of two things happen:
- If you did not complete Put a Spring in Thy Step, get ready for some lifting. Gautstafr suffers from a bad back and needs your help to carry him to town. He requires two hands, so no teleporting while you hold him. He slows you down significantly and needs to be put down before you can perform any sort of mantling. This might be a problem if you traverse the wrong path and run into an enemy Golem or pack of Hobgoblins. Cliodhna is a bit averse to joining society, though this is more flavor than anything else, her husband talks her down.
- If you’ve completed the quest, you’re in the clear. Both Gautstafr and Cliodhna are ready to go to town, since they trust you completely. Gautstafr’s back is also fixed, so he can walk behind you just like any other character.
While the walk over to the Volcanic Island Camp isn’t too far, teleporting with the couple on your tail might be the better choice. Rather than risking either of them getting caught on the terrain or getting lost on a straight path, you can teleport with them and skip all the headache. Just mind your Ferrystone count, because you need a lot of them during the endgame.
Once they’re both in town, you are tasked with finding Ernesto. Thankfully, he’s close by—in the center of town, talking with the local drunk. Approach the two of them to trigger the next part of the quest.
What happens if Gautstafr or Cliodhna disappear during The Importance of Aiding Ernesto?
If Gautstafr or Cliodhna disappear on you during your travels, head back to Windwalker’s Home—where the escort quest starts. That’s where Cliodhna respawned for us when she stopped following, no resting required.
The terrain around Windwalker’s Home is treacherous and full of confusing cliffs that disrupt the pathing AI. Sometimes, and especially during escort quests, your allies won’t show up on the map if they glitch out. In this case, it seems the Dwarf or Elf simply head back home and follow you again once you get close. That is, as long as they don’t die and end up in Battahl’s Morgue.
Interestingly, you can still bring one of them to the Volcanic Camp at a time if this occurs. Neither Cliodhna nor Gautstafr argued when I brought the Dwarf to safety first and then came back for the Magick Archer. The quest didn’t put me in a fail state for this, nor did either member mention anything about it. So, you can always go back and try again if the quest is being a bit buggy.
What should you say to Lamond during the Importance of Aiding Ernesto?
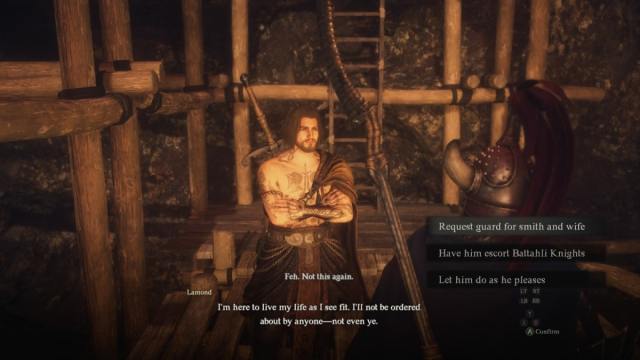
Once you find Ernesto in the center of town, you see him talking to Lamond, who seems like he doesn’t want to join. Intercept him on the way to the springs and request he guard the smith and wife and he’ll join the evacuation procedure. If you’re friendly with him, you can also tell him to lead the Battahli Knights, which the Warfarer finds amusing. However, if you’re not friendly with him, he won’t join if you ask to escort the Knights, and he won’t join either way if you let him do as he pleases.
If you do not have a good relationship with Lamond beforehand, he may refuse to join you. The Sotted Sage quest is enough to max out his affinity, though, so then he’ll join you essentially no matter what. These different dialogue options don’t seem to change the reward for the quest, though they can influence whether you’ll see Lamond in your bunker in the near future.
Once you’ve talked to Lamond and made your decision, head to the front of Volcanic Island Camp to let Ernesto know what you’ve done.
Rewards for completing The Importance of Aiding Ernesto in Dragon’s Dogma 2
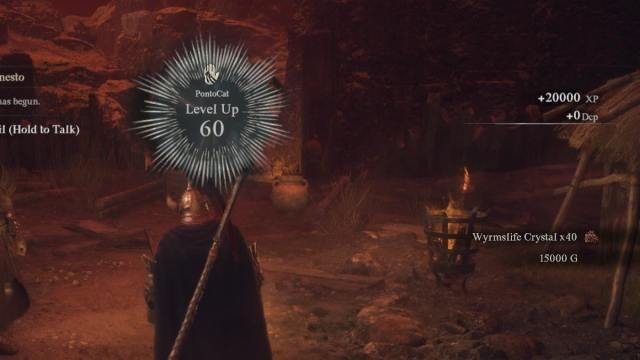
The rewards for completing The Importance of Aiding Ernesto are fairly consistent, no matter what ending type you get. You receive 15,000 Gold, 20,000 Experience, and 40 Wyrmslife Crystals. Compared to other Halls of the First Dawn quests, this is a substantial number of Crystals. All NPCs that agreed to evacuate with you head down to the Seafloor Shrine settlement over the course of a few days, making it easy to buy and smith Volcanic Island gear at your leisure.
Once Gautstafr’s back is healed, he becomes a shop you can freely utilize. He can enhance your weapons with rare Dwarven enhancements, giving them a ton of knockback power or resistance but a lot more weight. He’s one of two Dwarfs capable of doing so, with the other being Brokkr. However, he can’t heal his back during the Unmoored World’s events, so you’ll be out of luck if you didn’t complete Put a Spring in Thy Step first.
Notably, this only evacuates the NPCs of the Volcanic Island Camp—the Agamen Ruins are another quest entirely. If you want the Apothecary of that town to be available to you, head over there and complete the Shepherd of the Pawns quest.


Published: Apr 9, 2024 06:26 am