Killjoy is one of VALORANT’s smartest agents, and it can be challenging to learn how to make the most out of her kit. You have to perfectly know the maps and their corners, as well as her robot’s range to become a true threat.
Although she’s not easy to pick up nor to master, getting kills and helping your team set up is incredibly rewarding when playing Killjoy.
Haven is one of the maps where Killjoy is the most popular. Although she’s not incredibly useful in some parts of the map, A and B’s long corridors and large spike areas offer a multitude of corners where Killjoy can place her robot and has opportunities to control various areas of the map.
Here are some of the best Killjoy setups on Haven.
Best defensive Killjoy setups on Haven: C site
The C site, alongside A, is where Killjoy is the most efficient as a defender. She can control pretty much the whole site when she’s in the right hands, and delay a plant while her allies are coming to help.
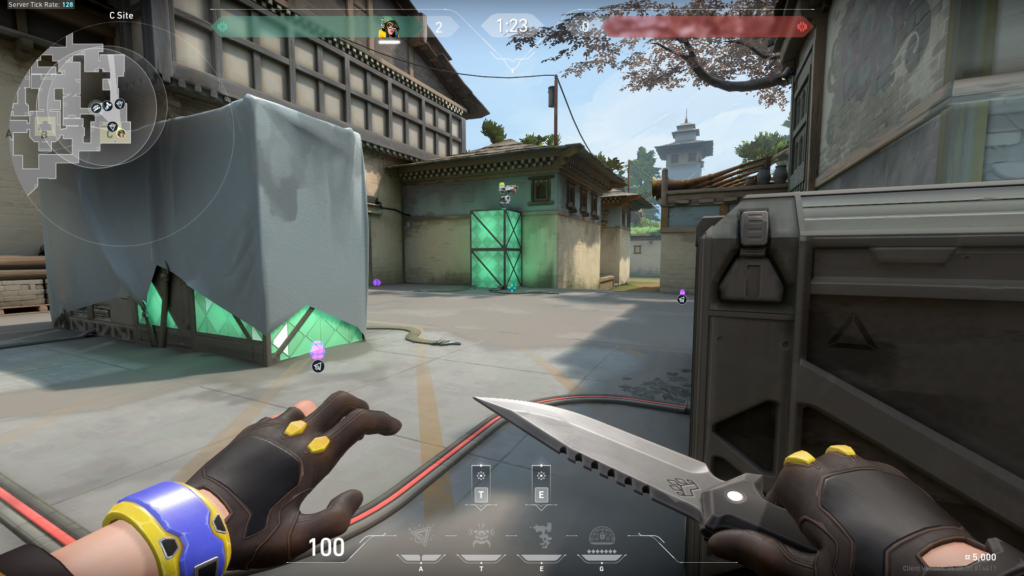
Here is a basic setup for when the round starts. With her turret and Swarm Grenade on the corner of the hallway, she’ll be able to shoot enemies when they’re distracted by both tools, while her Alarmbot protects the short path.
The closest Swarm Grenade, as shown above, can be incredibly useful to delay a plant. There’s no need to panic as Killjoy when enemies take control of the site and plant the spike since she has many tools to disturb them.
If you want to play safer, the robot can also be placed in the left corner, where enemies will be spotted only when they position themselves to plant.
You can also set up the Alarmbot on the back of the point if other allies already cover the path coming from mid. It can disturb players as they’re setting up to defend their plant and give you enough space to shoot them when it’s triggered.
Best defensive Killjoy setups on Haven: B site
Defending B site as Killjoy isn’t the most optimal option in Haven since many other agents are more efficient in this small space. On the other hand, it’s the easiest site to defend in terms of strategy since you don’t have many options.


Here is the most basic setup possible to defend the B site, shown using angles from the left and right. This setup can be switched symmetrically, depending on where you’re planning to stand to defend (usually on the opposite side of the turret).
The turret can also be placed aggressively at the center of the room (always on top of furniture), which is particularly useful if you expect to be flanked and have bought a midrange weapon to efficiently shoot enemies located in mid’s window.
Best defensive Killjoy setups on Haven: A site
This is the site where Killjoy has the most options. Since she can do so many different things, it’s recommended to vary defense setups as much as possible, so enemies don’t know where to look when every new round starts.
You can focus on the long path first, for example, and place your traps in different corners to cover this side of the point, and then do the same thing for the short path. That way, enemies will never know where to look first when pushing the site.


This setup is shown from back and front angles. This is the best location to set up your turret, as it can cover pretty much everything that’s happening on the point. On the other hand, it’ll be more vulnerable there.
If you want to put the turret in a safer spot, you can also place it where the red square was added. It won’t spot enemies from afar but will disturb them when they’re playing aggressively. If you want to cover as much ground as possible, you can put your turret on the top floor’s window of the point.
The Alarmbot and Swarm Grenade placement shown above can also vary: the most important thing to remember is to cover both paths by putting at least one trap on a corner.
Lastly, setting traps all around the middle of the site is very efficient to delay enemy plants by distracting them.


Published: Jan 19, 2023 05:55 am