Without cannons, a ship is defenseless and vulnerable to enemy hostile ship, pirate or not. Whether you are adding cannons to your first Skull and Bones ship or upgrading your artillery, you will definitely need to know how to add cannons.
New Skull and Bones players spend the majority of the tutorial without cannons on their ship. It is only after you find your way to Sainte-Ann and speak with the Blacksmith that you can finally acquire your ship’s defenses. Once you have cannons, whether the weapons are bought or taken, you need to equip the items onto your ship.
If you are trying to load new cannons onto your ship, here’s what you need to know.
Adding Cannons in Skull and Bones, explained
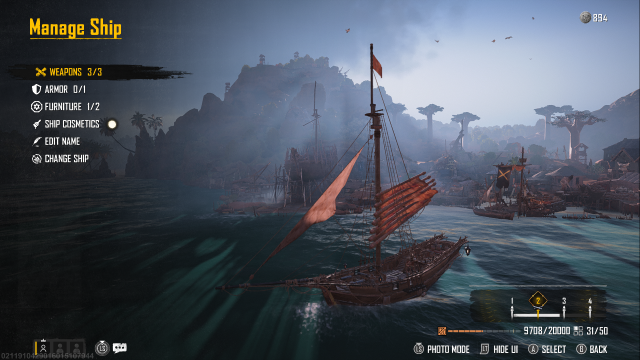
To add cannons to your ship in Skull and Bones, you’ll need to dock your ship and then add your desired cannons through the manage ship menu. There are two ways to acquire cannons in Skull and Bones; you can either purchase your cannons from the blacksmith or salvage the item from sunken ships.
Once your ship is ported, you can return to the vessel to navigate to the Manage Ship option. From here, select the weapons category where you can place your cannons.
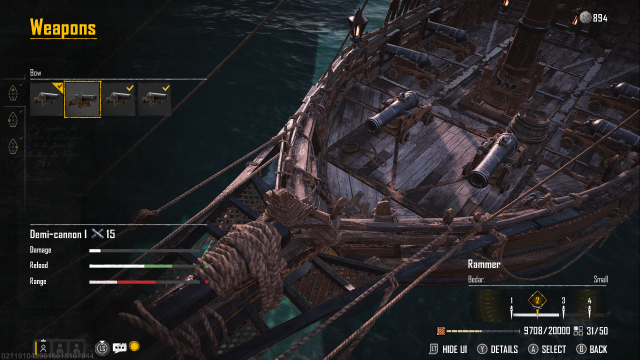
Your ship is divided into three parts: the bow, port, and starboard side. You do not need to add the same type of cannon to all sides. Instead, you should diversify your damage and abilities. I prefer to put shorter range cannons that deal more damage on the bow, while leaving longer range options on the side.
You can earn cannon blueprints by completing quests, finding treasure maps, and boarding enemy ships for better loot. Be aware, many cannons have level requirements with many only being accessible after you reach the Buccaneer rank.








Published: Feb 8, 2024 11:59 pm