Palworld’s world settings offer a deeply customizable experience, allowing you to shape your game beyond the standard Casual, Normal, and Hard presets. You can fine-tune aspects like damage and item gathering before and after creating your world. Here are our suggestions to match the experience you’re looking for.
Palworld world settings explained
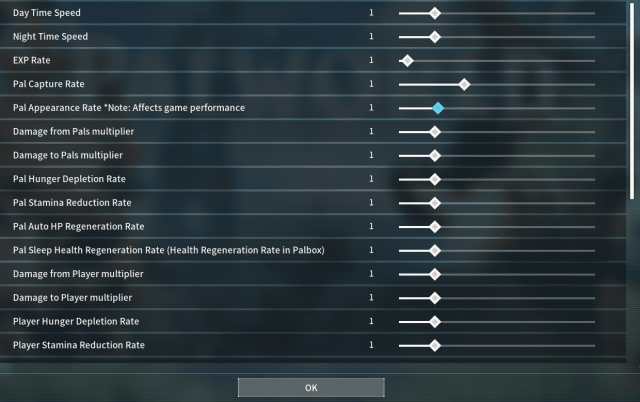
First, you may be wondering what these settings mean and how they affect your gameplay in Palworld. There are many settings you can adjust, so let’s break each one down as simply as possible.
| Palworld setting | What it does |
| Day Time Speed | This determines how long a single day lasts, or rather, how long the sun is up for. The lower the number, the longer daytime lasts. |
| Night Time Speed | As you can probably guess, this determines how long nighttime lasts. Combined with the above setting, you can minimize how often nighttime rolls around in case you’re afraid of the dark. |
| EXP Rate | This determines how much experience you receive. The higher the number, the more you gain. There are multiple ways to gain experience, like catching and defeating Pals, but if you want to speed things up, bump the EXP Rate as high as it’ll go. |
| Pal Capture Rate | This determines how likely you’ll capture a Pal when you throw a Pal Sphere at it. Bumping it to the highest setting doesn’t automatically guarantee captures (we advise you still weaken Pals first), but it makes it easier. |
| Pal Appearance Rate | This determines how often Pals appear in the wild. A higher number means more Pals, which means more capture opportunities. But, as the game itself warns, this will affect performance, so maybe hold back if you want a stable framerate. |
| Damage from Pals multiplier | This determines how much damage Pals deal with their attacks. A lower number will mean hostile Pals won’t hurt you as much if they hit you. But, this modifier applies to your own Pals, too, making them weaker. |
| Damage to Pals multiplier | This is the opposite of the last setting, making any and all Pals take more damage from attacks the higher the number is, be they from you or other Pals. Again, this affects your Pals, too. |
| Pal Hunger Depletion Rate | Pals have a hunger meter that depletes over time. If it runs out, it will eventually lead to your Pals being knocked out. This setting determines how quickly the hunger meter runs down, so a lower number means they’ll last much longer without food. |
| Pal Stamina Reduction Rate | Just like the above setting, this determines how long it takes for your Pals’ Stamina meter to deplete. |
| Pal Auto HP Regeneration Rate | This determines the rate Pals automatically regenerate Health. So, a higher number means they’ll regain Health much quicker. |
| Pal Sleep Health Regeneration Rate (Health Regeneration Rate in Palbox) | This is almost identical to the last setting, only it determines the rate Pal Health recovers while they’re inside your Palbox. |
| Damage from Player multiplier | Just like Pals, you can alter how much damage your own attacks deal. With the highest number, you can potentially one-shot weaker Pals, but remember, you can’t capture Pals if they’re dead. |
| Damage to Player multiplier | The higher the number, the more damage you’ll take from attacks if you fancy making things more dangerous. If you’re unfamiliar with survival games or just want an easy time, drop the number as low as it can go. |
| Player Hunger Depletion Rate | This functions exactly as the Pal Hunger Depletion Rate setting. The lower the number, the slower your own hunger meter drains. |
| Player Stamina Reduction Rate | Again, just like the Pal Stamina Reduction Rate, this affects how quickly your stamina meter drains. With a low number, you can give yourself virtually infinite stamina, meaning you can chop trees or mine rocks for ages. |
| Player Auto HP Regeneration Rate | This determines how quickly your own health recovers after you’ve taken damage. A higher number means it’ll happen quicker, so if you combine this with a low number on the Damage to Player multiplier, you’ll practically be invincible. |
| Player Sleep HP Regeneration Rate | This determines the rate you recover health while asleep. Just like the last setting, a higher number means your health will recover quicker, though if you’ve already bumped up the Player Auto HP Regeneration Rate, you won’t ever need to sleep. |
| Damage to Structure Multiplier | This determines how much damage the structures you build take. If you want to keep your base (or bases) as secure as possible, a lower number means anything you build will be much sturdier and take longer to be destroyed. |
| Structure Deterioration Rate | This determines how quickly your structures will deteriorate over time. If you don’t want the extra hassle of regularly repairing and/or replacing structures, you can drop the number to zero, meaning they won’t deteriorate whatsoever. |
| Maximum number of dropped items in a world | This one’s pretty simple to understand. The higher the number, the more dropped items you’ll find scattered around the world. |
| Gatherable Items Multiplier | This setting applies to resource gathering, like chopping trees for wood or mining for stone. The higher the number, the more resources you’ll receive, which should help minimize the time you spend grinding for specific crafting materials. |
| Gatherable Objects HP Multiplier | This determines how much health objects like trees and rocks have. It effectively includes anything you can gather resources from. A higher number means they last longer and don’t break as easily. |
| Gatherable Objects Respawn Interval | These aforementioned gatherable objects respawn after a while. This setting determines how long it takes for them to become available for resource gathering again. So, a smaller number means they’ll respawn faster. |
| Dropped Items Multiplier | This setting applies to items dropped by Pals after you defeat one. The higher the number, the more items you’ll receive. |
| Time (h) to incubate Massive Egg | This determines how long it takes for you to incubate and hatch eggs. Despite the setting name, it seems to apply to all eggs, not just Massive ones. The lower the number, the faster eggs will hatch. |
| Enable Raid Events | Pretty self-explanatory: This setting simply turns Raid Events on and off. |
| Death penalty | This determines how punishing death is. There are several options, but the standard one means dying makes you lose all your items and equipment. You can make things even harsher by dropping all your Pals on death as well. If you’re after a less stressful experience, there’s an option to turn the penalty off completely, so you won’t lose anything if you die. |
| Max number of guilds | This setting appears to determine how many guilds you can join. The number goes as high as 100, but we can’t imagine anyone would ever need to join that many. |
| Max Pals Working at Base | This determines how many of your Pals you can have working at your base. The maximum number is 20, though you won’t get this straight away; you’ll still need to upgrade your base first. |
Most Palworld settings are described by a number that represents a ratio of the standard value, not an absolute value. For example, for Day Time Speed:
1 – Day Time passes at normal speed.
2 – Day Time passes twice as fast.
0.5 – Day Time passes twice as slow.
Options that naturally require a number are the exception, like Max Pals Working at Base and Max Number of Guilds. In this case, the number is the actual final value, and not a ratio.
Best Palworld Custom Settings explained
Palworld, like most survival games, has plenty of custom world and server settings. These custom settings result in significant gameplay changes and should be cautiously altered.
Super Sandbox
| Setting | Value |
|---|---|
| Difficulty | Custom |
| Day Time Speed | 1 |
| Night Time Speed | 1 |
| EXP Rate | 20 |
| Pal Capture Rate | 2 |
| Pal Appearance Rate | 1 |
| Damage from Pals multiplier | 0.1 |
| Damage to Pals multiplier | 5 |
| Pal Hunger Depletion Rate | 0.1 |
| Pal Stamina Reduction Rate | 0.1 |
| Pal Auto HP Regeneration Rate | 5 |
| Pal Sleep Health Regeneration Rate | 5 |
| Damage from Player multiplier | 5 |
| Damage to Player multiplier | 0.1 |
| Player Hunger Depletion Rate | 0.1 |
| Player Stamina Reduction Rate | 0.1 |
| Player Auto HP Regeneration Rate | 5 |
| Player Sleep HP Regeneration Rate | 5 |
| Damage to Structure Multiplier | 1 |
| Structure Deterioration Rate | 0 |
| Maximum number of dropped items in a world | 3,000 |
| Gatherable Items Multiplier | 3 |
| Gatherable Objects HP Multiplier | 3 |
| Gatherable Objects Respawn Interval | 0.5 |
| Dropped Items Multiplier | 3 |
| Time (h) to incubate Massive Egg | 0 |
| Enable Raid Events | OFF |
| Death penalty | No Drops |
| Max number of guilds | 20 |
| Max Pals Working at Base | 20 |
Adjusting these settings transforms Palworld into a more laid-back, sandbox-style adventure. With them, you become incredibly resilient, starting with absurd power. Just a couple of encounters, like defeating two Chikpi, can rocket you to level five, granting you 26 Technology Points.
Stamina becomes virtually infinite, and even the mightiest Pals and Bosses seem less intimidating. With this setup, the focus shifts from survival to enjoying the creative aspects of Palworld, like perfecting automation processes and designing an impressive base.
Less survival, more action
| Setting | Value |
|---|---|
| Day Time Speed | 1 |
| Night Time Speed | 1 |
| EXP Rate | 1 |
| Pal Capture Rate | 0.8 |
| Pal Appearance Rate | 1.5 |
| Damage from Pals multiplier | 2 |
| Damage to Pals multiplier | 0.8 |
| Pal Hunger Depletion Rate | 0.1 |
| Pal Stamina Reduction Rate | 0.1 |
| Pal Auto HP Regeneration Rate | 1 |
| Pal Sleep Health Regeneration Rate | 1 |
| Damage from Player multiplier | 0.8 |
| Damage to Player multiplier | 1.2 |
| Player Hunger Depletion Rate | 0.1 |
| Player Stamina Reduction Rate | 0.1 |
| Player Auto HP Regeneration Rate | 1 |
| Player Sleep HP Regeneration Rate | 1 |
| Damage to Structure Multiplier | 1 |
| Structure Deterioration Rate | 0 |
| Maximum number of dropped items in a world | 3,000 |
| Gatherable Items Multiplier | 3 |
| Gatherable Objects HP Multiplier | 3 |
| Gatherable Objects Respawn Interval | 0.5 |
| Dropped Items Multiplier | 3 |
| Time (h) to incubate Massive Egg | 0 |
| Enable Raid Events | No Drops |
| Death penalty | ON |
| Max number of guilds | 20 |
| Max Pals Working at Base | 20 |
Adjusting these settings helps streamline the survival elements of Palworld. Both you and your Pals experience hunger less frequently, and your Stamina concerns practically vanish. To balance this ease, you can amp up the challenge in combat by reducing the damage you and your Pals inflict and increasing the damage you receive from enemies.
If you’re feeling particularly bold, pushing these adjustments further can transform your Palworld experience into something akin to a Soulslike game, adding an extra layer of difficulty and intensity to the battles.
Less action, more survival
| Setting | Value |
|---|---|
| Difficulty | Custom |
| Day Time Speed | 1 |
| Night Time Speed | 1 |
| EXP Rate | 2 |
| Pal Capture Rate | 2 |
| Pal Appearance Rate | 1 |
| Damage from Pals multiplier | 0.8 |
| Damage to Pals multiplier | 1.5 |
| Pal Hunger Depletion Rate | 1.5 |
| Pal Stamina Reduction Rate | 1.5 |
| Pal Auto HP Regeneration Rate | 1 |
| Pal Sleep Health Regeneration Rate | 1 |
| Damage from Player multiplier | 1.5 |
| Damage to Player multiplier | 0.8 |
| Player Hunger Depletion Rate | 1.5 |
| Player Stamina Reduction Rate | 1.5 |
| Player Auto HP Regeneration Rate | 1 |
| Player Sleep HP Regeneration Rate | 1 |
| Damage to Structure Multiplier | 1 |
| Structure Deterioration Rate | 1.5 |
| Maximum number of dropped items in a world | 3,000 |
| Gatherable Items Multiplier | 0.5 |
| Gatherable Objects HP Multiplier | 0.5 |
| Gatherable Objects Respawn Interval | 1.5 |
| Dropped Items Multiplier | 0.5 |
| Time (h) to incubate Massive Egg | 72 |
| Enable Raid Events | ON |
| Death penalty | Drop all items |
| Max number of guilds | 20 |
| Max Pals Working at Base | 10 |
Opting for these settings will add a layer of complexity to survival in Palworld. Hunger sets in quicker, and managing Stamina becomes a constant concern, potentially making you allocate more points to this stat than you initially planned.
To compensate, you can tweak the damage settings to gain an edge over Pals, ensuring you and your Pals are tougher and more resilient in confrontations. With these adjustments, your gameplay will likely lean toward resource gathering and base building, with less emphasis on combat.
Literally stupid-impossible
| Setting | Value |
|---|---|
| Day Time Speed | 1 |
| Night Time Speed | 1 |
| EXP Rate | 0.1 |
| Pal Capture Rate | 0.5 |
| Pal Appearance Rate | 1 |
| Damage from Pals multiplier | 0.1 |
| Damage to Pals multiplier | 5 |
| Pal Hunger Depletion Rate | 5 |
| Pal Stamina Reduction Rate | 5 |
| Pal Auto HP Regeneration Rate | 0.1 |
| Pal Sleep Health Regeneration Rate | 0.1 |
| Damage from Player multiplier | 0.1 |
| Damage to Player multiplier | 5 |
| Player Hunger Depletion Rate | 5 |
| Player Stamina Reduction Rate | 5 |
| Player Auto HP Regeneration Rate | 0.1 |
| Player Sleep HP Regeneration Rate | 0.1 |
| Damage to Structure Multiplier | 0.5 |
| Structure Deterioration Rate | 10 |
| Maximum number of dropped items in a world | 3,000 |
| Gatherable Items Multiplier | 0.5 |
| Gatherable Objects HP Multiplier | 0.5 |
| Gatherable Objects Respawn Interval | 3 |
| Dropped Items Multiplier | 0.5 |
| Time (h) to incubate Massive Egg | 240 |
| Enable Raid Events | OFF |
| Death penalty | ON |
| Max number of guilds | 20 |
| Max Pals Working at Base | 1 |
Why would you do this to yourself? Why not get punched in the face and stomach simultaneously by a professional boxer? These settings welcome you to a world where being sneezed on by a Pal means instant game over, your punches tickle more than they terrorize, and your stamina drains quicker than your kitchen sink. And for the grand finale, you’ll starve faster than it takes your coffee to cool down. Happy gaming!
You’ll probably take several minutes to get started and capture your first Pal, which will turn into your worst experience in Palworld. But you might be a peculiar individual who wants to try this one out. The settings above will make Palworld a quick and brutal experience.
My favorite approach: Variable settings
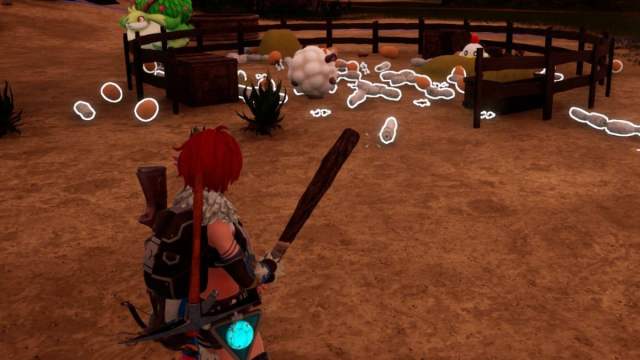
What draws me to Palworld is the flexibility to tweak the world settings to suit my playstyle. The game lets you modify settings before entering the world after it’s already created. So, I generally keep everything around Normal, except for Hunger and Stamina depletion, which I set to the lowest. I’m not a fan of these mechanics; they ruin the fun of fighting and capturing Pals.
For tougher challenges, like a boss fight that’s too intense to tackle solo, I temporarily crank up my player damage to get through it, then dial it back down. Some might see this as cheating, but it’s all about fun for me. The same goes for farming-specific items like Leather—I temporarily increase wild Pal spawns and drops to speed things up, then revert to the usual settings.
You should also take into account whether you intend to play solo. If you want to tackle the game with more players, take into consideration the experience they want to have as well. Save the most absurd settings for your solo worlds.
I only sometimes resort to these adjustments, but I love having the option. Whether I’m in the mood for a relaxed play session or up for a challenge, I love tweaking Palworld’s settings to fit how I want to experience the game on any given day.
There you have it! Now you know everything you need to know about the best Palworld custom settings. Enjoy.







Published: Apr 17, 2024 07:02 am