Nintendo Switch version 14.0.0 isn’t just moving to a new set of numbered patches, it is also finally giving players the ability to organize their installed games and software by making groups.
This has been one of the most asked for features when it comes to the Switch’s user interface, as prior to this, players were limited to organizing games by general labels such as software title and date last played.
With this groups feature, players can create up to 100 groups, which can feature a max of 200 titles per group—though it is unlikely anyone will ever reach that cap. The same software can also be included in multiple groups at once if you want to organize by genre, developer, completion status, or a number of other potential group names.
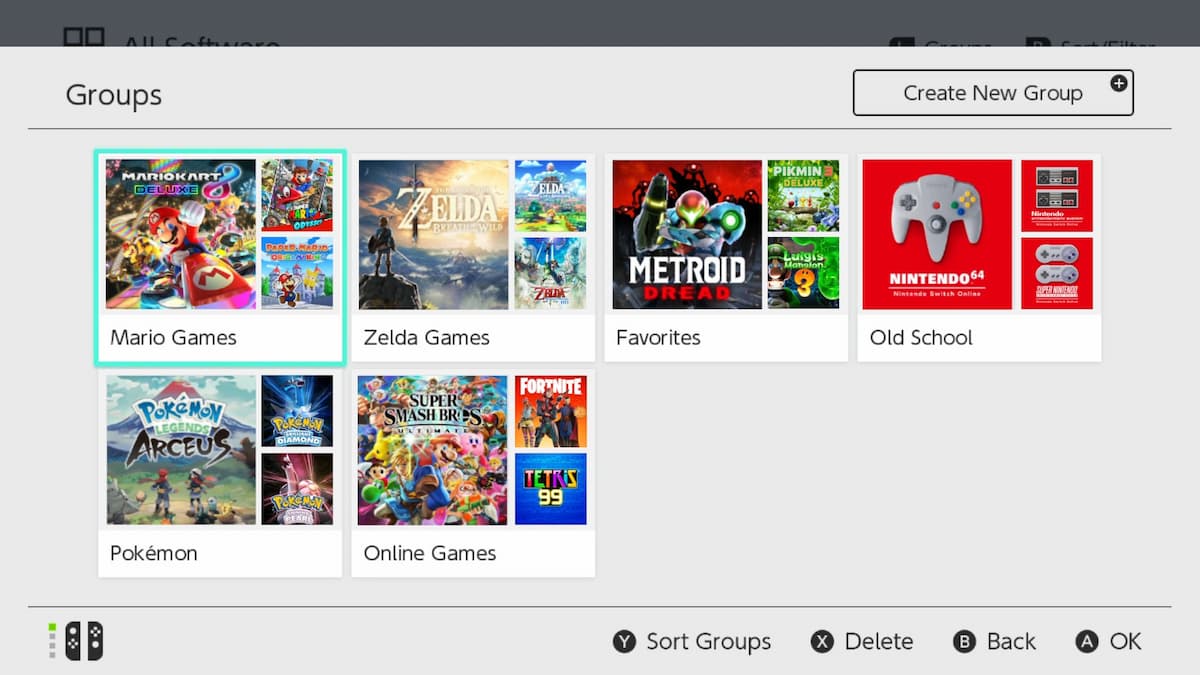
The only thing users need to do to access groups is update their Switch to version 14.0.0, or later, and have at least 13 different software titles installed on their system. From there, just follow these steps to get organizing.
Making groups on Nintendo Switch
- Make sure your Nintendo Switch system has been updated to version 14.0.0 or later and has 13 or more pieces of software installed.
- On the Home menu, scroll all the way to the right and select “All Software.”
- Press the L Button to view your software by group (or open the Group menu for the first time.)
- The first time you create a group, an image will appear showing you how to make a new group. you’ll get a popup where you can select Create New Group.
- After creating your first group, simply use the + Button to create a new group.
- From your installed software list, select the items you want to add to a group.
- Finalize your selection by clicking “Next.”
- Re-arrange the software titles if you want to.
- Finalize your selection by clicking “Next.”
- Name your group.
Once you finish naming your group it will appear in your Group menu.











Published: Mar 21, 2022 09:48 pm