The Druid might be one of the most undervalued classes in Baldur’s Gate 3. With the ability to cast spells, wear good armor, and turn into an Owlbear, you can’t go wrong with these wise warriors. That said, there are Druid subclasses that reign supreme in any campaign.
You’ll want to be mindful about which subclass you wish to pick for your Druid. Are you going to serve as a frontline tank? Will you primarily deal damage? Or do you want them to rely on their spells to change the course of a battle? You have to consider these questions for your Druid, and these are the best Druid subclasses you can pick in Baldur’s Gate 3 to help answer those questions.
Table of contents
When do you choose your Druid subclass in Baldur’s Gate 3?

A Druid chooses between their three subclasses, also known as Circles, at Druid level two in Baldur’s Gate 3. You have the Circle of the Spores, the Circle of the Moon, and the Circle of the Land to choose from. Druids get the first benefit of their subclass simultaneously, and additional major class features at levels six and 10. The Druid subclasses get minor benefits—such as more Wild Shapes options or better spell choices—between these levels.
The Circle of the Land is the only Druid subclass with additional choices beyond level two; both the other subclasses have pre-determined features.
The best Druid subclass options in Baldur’s Gate 3

The best Druid subclass in BG3—in a very close race—is the Circle of the Land. The extra spell slots and bonus spells are prepared to make Land Druids influential and versatile members of any BG3 party. In addition, compared to tabletop DnD 5E, Circle of the Land enjoys many of the same buffs as a Moon Druid while keeping its impressive spellcasting. It’s a close race for a reason; Moon Druids are viable, sporting fantastic endgame combat forms with the Myrmidons.
3) Circle of the Spores
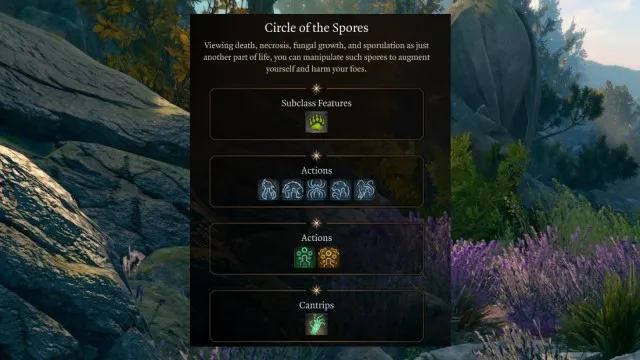
| Level | Feature Unlocks |
|---|---|
| Two | Bone Chill, Halo of Spores, Symbiotic Entity |
| Three | Learn Blindness and Detect Thoughts |
| Five | Learn Animate Dead and Gaseous Form |
| Six | Halo of Spores damage to d6, Fungal Infestation (Four Times) |
| Seven | Learn Blight and Confusion |
| Nine | Learn Cloudkill and Contagion |
| 10 | Halo of Spores damage to d8, Spreading Spores |
- Role in party: Melee damage dealer, melee tank, summoner
Sadly, the only Circle we don’t recommend for your Druid is Circle of the Spores. This archetype’s gimmick comes from Halo of Spores, a reaction that allows the Druid to deal a small amount of damage to a nearby target. In addition, this Druid gets an alternative version of Wild Shape called Symbiotic Entity. While under the effects of this buff, you deal additional damage with melee weapons, gain a small pool of extra health, and your Halo of Spores hit harder.
The idea behind this Druid is simple. You activate Symbiotic Entity out-of-combat and refresh it when it goes down. While under this effect, you can still cast spells and use the various weapons and magic items BG3 litters battlefields with. Items like Jaheira’s Sylvan Scimitar can prove useful for this build, as can dual-wielding two scimitars, since it’s one of the few ways to spend Wild Shape charges while still wearing armor and using weapons. This is also one of the few Druids with a spammable bonus action thanks to the Symbiotic Entity’s ability to fling spores about at level 10.
Where this Druid stumbles is how massively BG3 improved Wild Shape. Symbiotic Entity is a powerful buff but doesn’t improve your Druid quite as much as Wild Shape. For example, while a Wild Shaping Druid gets to swing three times a round like a Fighter by level 10, Symbiotic Entity leaves your Druid with a single attack. This leaves you with a melee-centric tank worse at damage—and arguably tanking—than turning into an Owlbear.
That’s not to say Circle of Spores is useless. It learns powerful spells, gets necromantic abilities, with up to four bonus zombies per day for free, and can deal good melee damage with specific multiclass. It also has the subclass-specific Armor of the Sporekeeper, which boosts spellcasting and necrotic Damage and can allow you to spread different kinds of spores. This armor and subclass are well worth trying for Halsin or Jaheira for a fun change of pace. But, an Act Three armor set will unlikely make this archetype any more viable for the acts beforehand. Thank goodness Withers is so cheap with the respecs.
2) Circle of the Moon
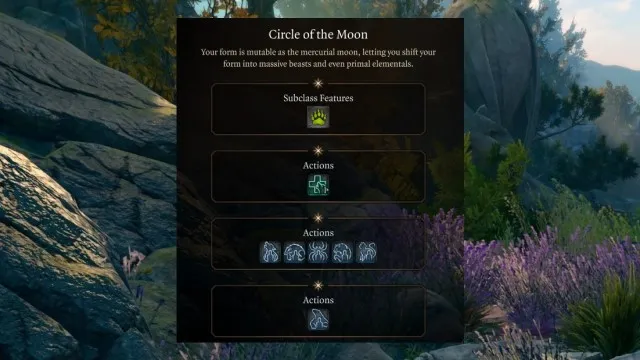
| Level | Features |
|---|---|
| Two | Lunar Mend, Wild Shape: Bear |
| Four | Wild Shape: Dire Raven |
| Six | Primal Strike |
| Eight | Wild Shape: Sabre-Toothed Tiger |
| 10 | Wild Shape: Air, Earth, Fire, or Water Myrmidon |
- Role in party: Melee damage dealer, melee tank
While it takes the number two slot, don’t underestimate the power of a Moon Druid in BG3. A Circle of the Moon Druid specializes in Wild Shape. They can become an animal as a bonus action, spend spell slots to heal while transformed, and get access to the most substantial Wild Shape options in the game.
All Druids get very powerful Wild Shapes, like the Owlbear. But the Moon Druid can become three more animals: a tanky Bear, a very useful flying Dire Raven, and the unstoppable war machine that is a regenerating Saber-toothed Tiger. In addition, at level 10, Moon Druids can become elemental Myrmidons. While these shapes take both of your Wild Shape charges, they come alongside incredible abilities, from high-damage stuns to teleports and area-of-effect damage. Since feats like Tavern Brawler and Savage Attacker work for Wild Shape Druids, you can quickly and effectively use these forms to wrack up damage.
The only issue for a Moon Druid is that, besides the extra shapes and the bonus action transformation, it isn’t much better than a Spores or Land Druid at fighting while in their shape. The time to transform is a big deal for these shapeshifters, but other Druid archetypes can use Haste or a Potion of Speed to make Wild Shaping during turn one a bit easier, or they can enter combat already transformed and not worry about doing so during turn one. Then, Moon Druids have extra forms and natural attacks that overcome basic resistances.
However, Moon Druids are more than Wild Shape—their spells are quite strong. A common idea is to cast a concentration spell and then Wild Shape. Spells like Wall of Fire or Spike Growth are great ideas to cast before a fight becomes serious.
This archetype is really something, especially during endgame combats, and the ability to gain hundreds of health as a bonus action gives them so much durability. But we think one other Druid is more useful for your party.
1) Circle of the Land

| Level | Features |
|---|---|
| Two | Natural Recovery, Bonus Druid Cantrip |
| Three | Second Level Land Spell Selection (Arctic, Coast, Desert, Forest, Grassland, Mountain, Swamp, or Underdark) |
| Five | Third Level Land Spell Selection |
| Six | Land’s Stride: Difficult Terrain |
| Seven | Fourth Level Land Spell Selection |
| Nine | Fifth Level Land Spell Selection |
| 10 | Nature’s Ward |
- Role in party: All-around caster
The Circle of the Land Druid is the most substantial Druid option in BG3. It focuses on spellcasting and cantrips, can regenerate spell slots, and learns up to 10 spells from other classes through different Land selections. They also gain the ability to ignore difficult terrain, become immune to disease and poison, and become better at fighting natural things.
Depending on the Land spells you select, the Circle of the Land Druid can become a powerful damage-dealing caster, a support-oriented one, or something in between. Options like Underdark (Level Two) are great for your Druid’s defense, while Mountain (Level Three) can vastly improve your Druid’s ability to deal damage. We recommend checking out Underdark at almost every level, but consider picking up Haste from Arctic or Grassland (Level Three). Haste is extremely powerful, and having another caster able to spread actions around is smart. Just think about picking up the Resilient feat or improving your Constitution save.
That being said, Land Druids aren’t just strong because they learn new spells. At levels two, three, and every two levels after, a Land Druid can regenerate an extra spell level a day. So, like a Wizard, you can get up to six bonus spell levels at level 12. That means a Druid can cast five Hastes per day, or get an extra Wall of Fire up alongside a Mirror Image.
Another good thing about a Land Druid is they can Wild Shape twice per short rest. While not nearly as good at it as a Moon Druid, you can still deal upwards of 75 damage per turn with Owlbear Shape as a Land Druid. That means you have sixth-level spellcasting, the ability to regenerate spells, and an Owlbear sitting in your back pocket. That level of versatility is gigantic—no class in the game can mimic this level of durability and spellcasting prowess without magic items and complex multiclassing.
Others Asked
What choices does a player have when creating a character in Baldur's Gate 3?
Players can choose their character's race, class, subclass, abilities, proficiencies, and background when creating a character in Baldur's Gate 3.
What is the best Bard subclass in Baldur's Gate 3 according to the text?
The best Bard subclass in Baldur's Gate 3 is the College of Lore.
What is the recommended subclass for Bards in Baldur's Gate 3 and what benefits does it provide?
The recommended subclass for Bards in Baldur's Gate 3 is the College of Valor. It provides benefits such as Medium Armor Proficiency, Shield Proficiency, Martial Weapon Proficiency, and Combat Inspiration, which adds bonuses to allies' Attack Rolls, Ability checks, Armor Class, weapon damage, or Saving Throws. It also grants an Extra Attack at level six.













Published: Dec 23, 2024 04:24 pm