No weapon has quite the impact on a round of VALORANT like the Operator. The Operator is a low rate-of-fire but high-damage sniper rifle, one that serves as an homage to the AWP from CS:GO. And like its predecessor, the Operator can one-shot kill fully armored enemies with a torso hit or headshot.
In VALORANT, agent choice is critical to any amount of success, and agents like Jett and Chamber have the means of escaping via abilities that allow them to hold more aggressive and riskier angles with the Operator. But regardless of your agent, if the Operator ends up in your hands, you should have a sense of some of the ideal spots to sit in and angles to hold with it on both sides of every map.
Here are the best spots and angles to hold with the Operator in VALORANT, sorted by map.
Ascent
Attack: Watching Bottom Mid/Market from Top Mid
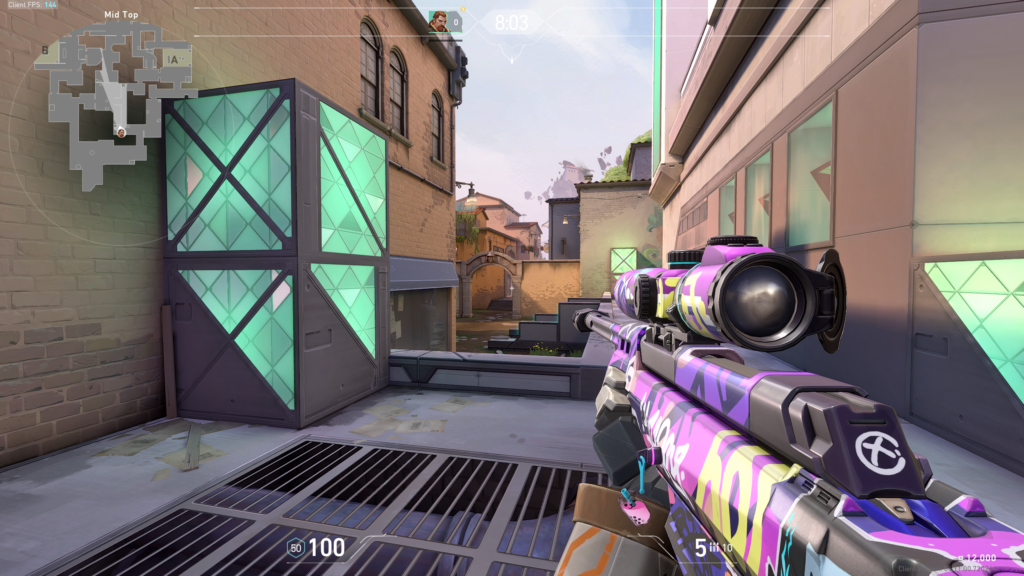
This angle affords the attacking side a lot of mid control since the Operator can pick off or at least call out anyone holding from Market or the Bottom Mid. This lets the attacking team potentially stack up on Catwalk for an A execute.
Defense: Watching A main entrance from Rafters
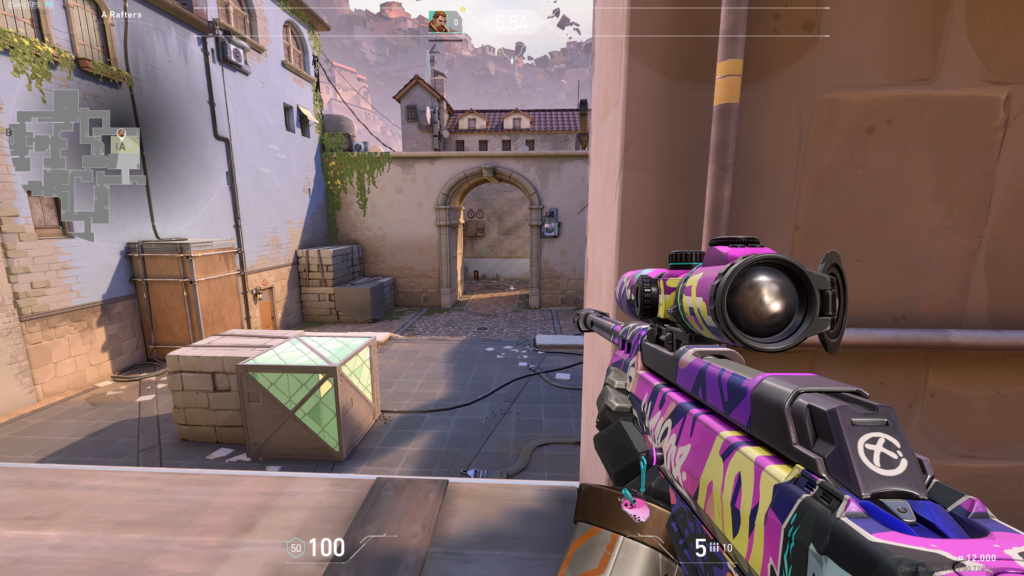
The elevated angle and instantly available cover makes holding A with the Operator far easier than holding B. You have the option to either back out toward defender spawn or, if covered via utility, take a cheeky angle by dropping down below Rafters.
Split
Attack: Watching Mid/Vent from B Link/Bottom Mid
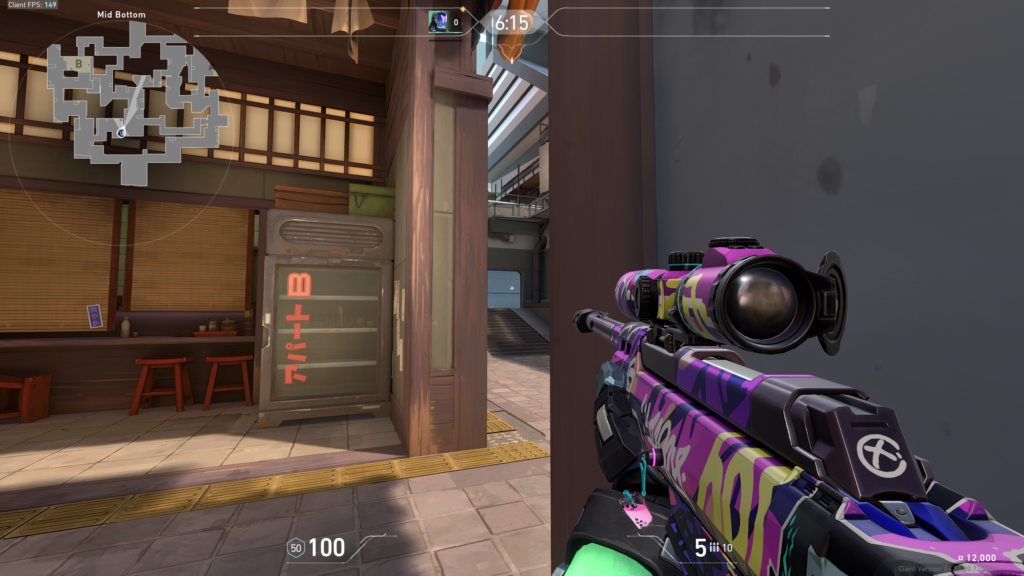
Split’s tight corners and short corridors make using the Operator on the attack a little tricky, but your best bet is holding Mid and watching Vent from the bottom of Mid. The spawn shields should favor the attacking side in the case of an Operator duel and Mid control is paramount to finding success on the attack.
Defense: Watching A Main/Ramp entrance from A Screens
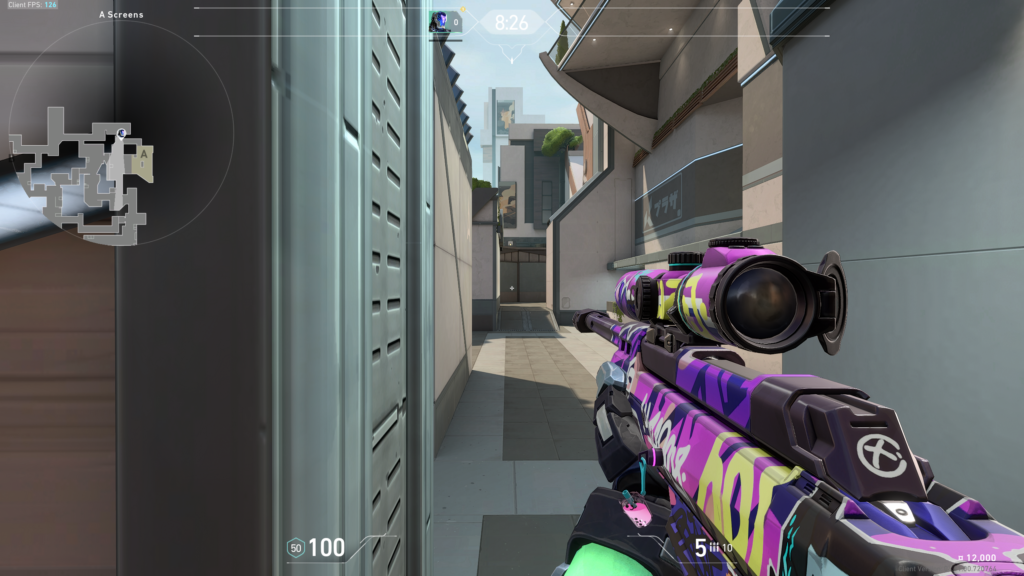
Holding the A Main/Ramp cross can effectively cut off two different pathways to both the A site and Heaven. Someone holding from Screens has the option to back out completely in the face of aggression or match that aggression by quickly jumping into Elbow, giving them options of holding the site or the Heaven window with the Op.
Fracture
Attack: Watching B site and B Main from Tree
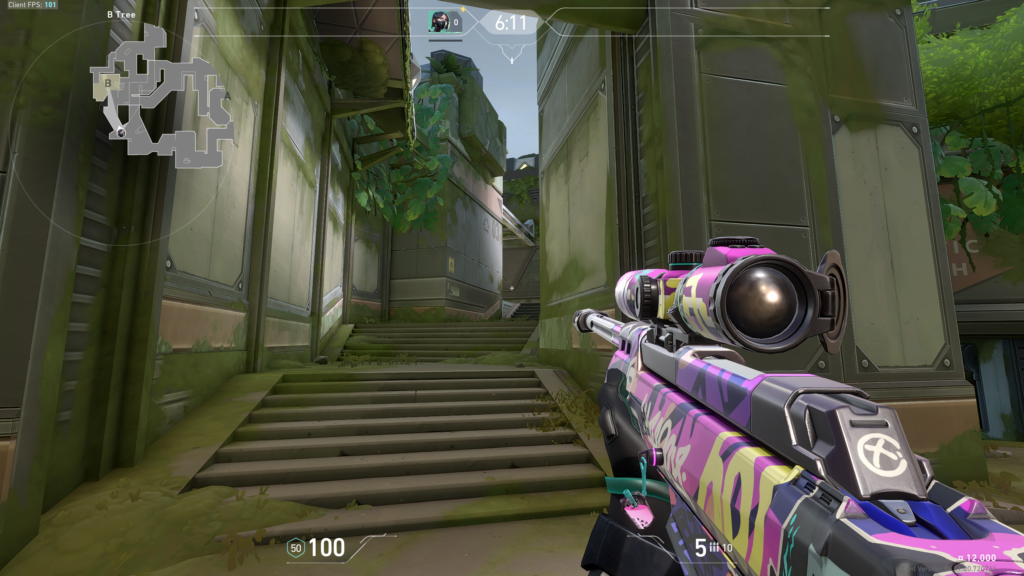
Fracture’s unique map design doesn’t give an Operator user a ton of great angles to hold, especially on the attack. Your best bet is to slowly push B Main and clear different defensive holding angles one at a time: B site, the B Tower opening, B Link, Canteen, etc.
Defense: Watching A Main from Lower A site
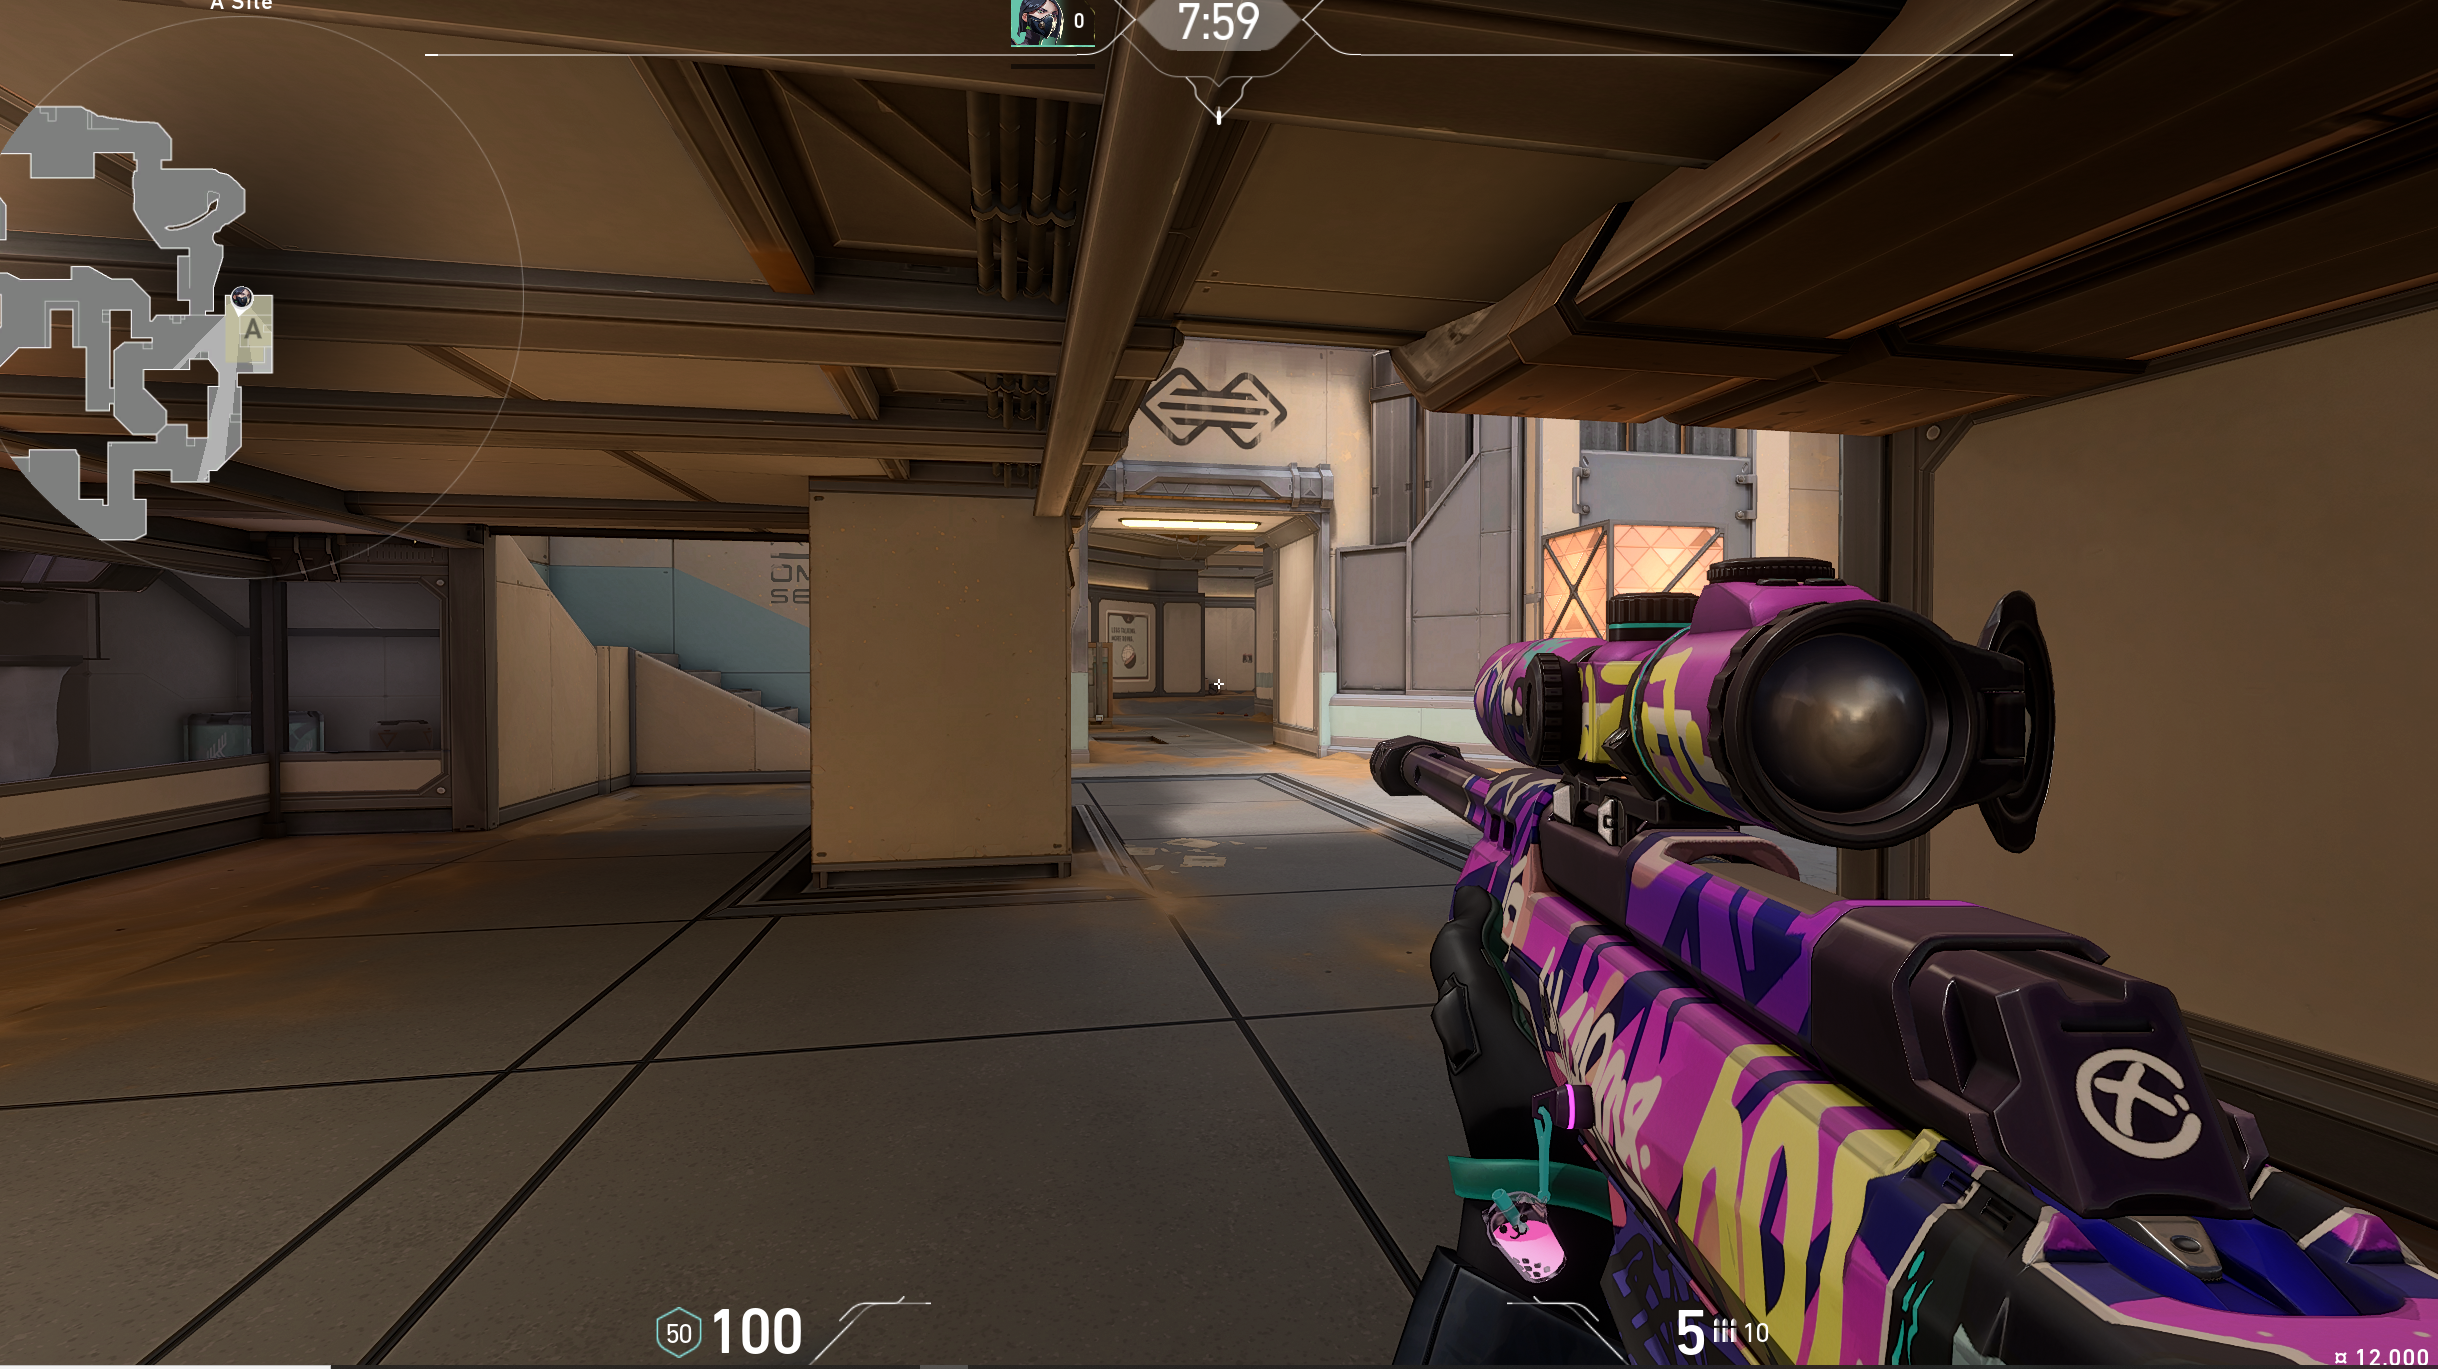
Defending on Fracture with the Operator isn’t particularly easy either, but this unique angle could prove to be fruitful. It’s an uncommon spot that may catch an attacker pushing A main off guard, and the wall to your right offers you some protection from Drop. Additionally, if you hear enemies coming through Door or Ropes, you can either hide or pivot around the lower part of the A site, using the pillar as cover.
Bind
Attack: Holding B Long/Garden/Teleporter from Fountain
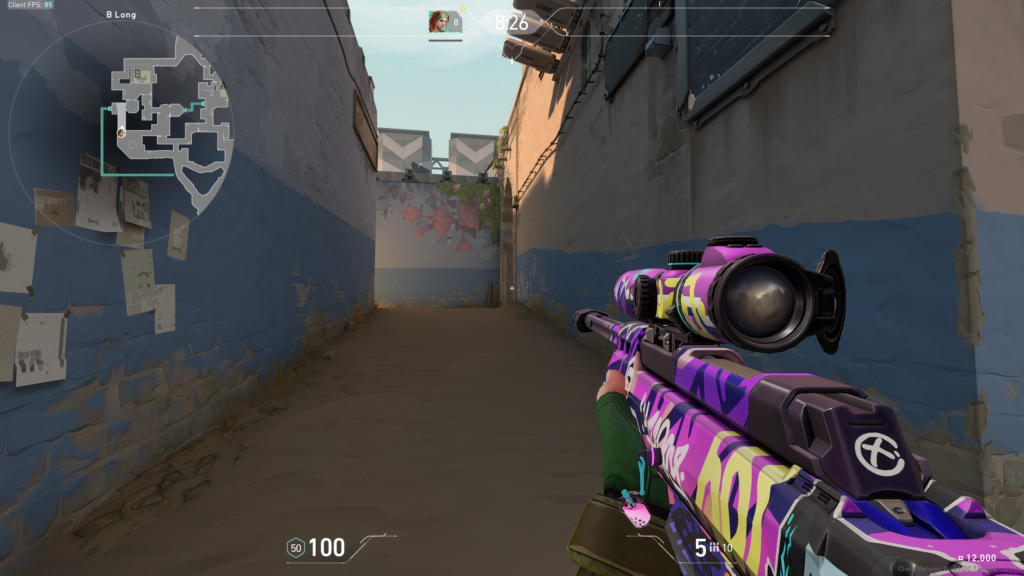
Obtaining B Long control affords the attacking side lots of options and map control. The Operator can catch an aggressive peeker or push up to get an early pick on a player sitting in site. Even if you don’t get a pick, making enough noise can draw over other defenders, and with B Long control, you can use the teleporter to make a quick play on A.
Defense: Watching A site from Tower
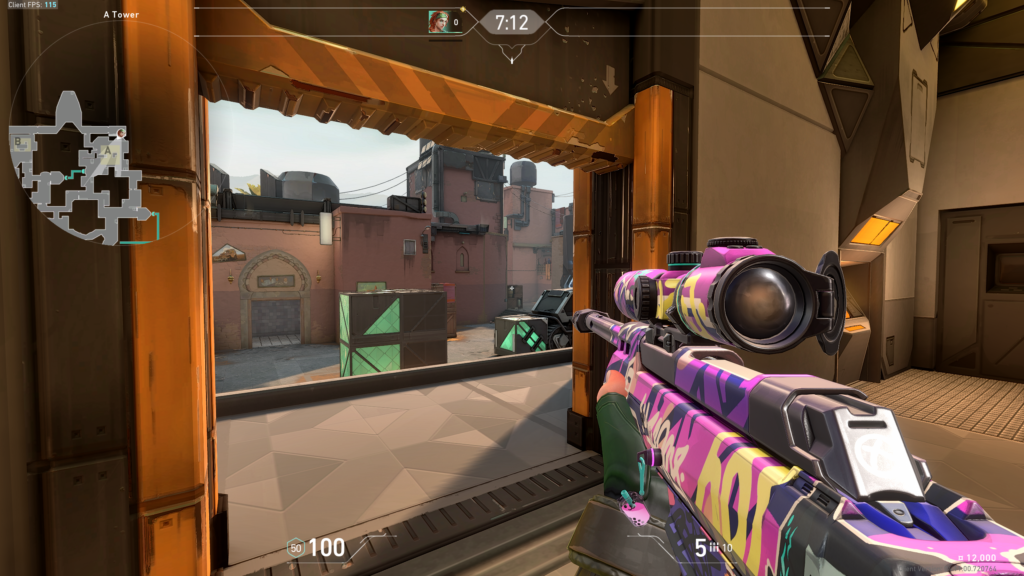
This elevated angle from Tower on the A site gives the defending Operator so much coverage. The Operator in Tower can get picks on players in A main or Showers or Lamps, depending on their angle.
Breeze
Attack: Watching B Main from Window
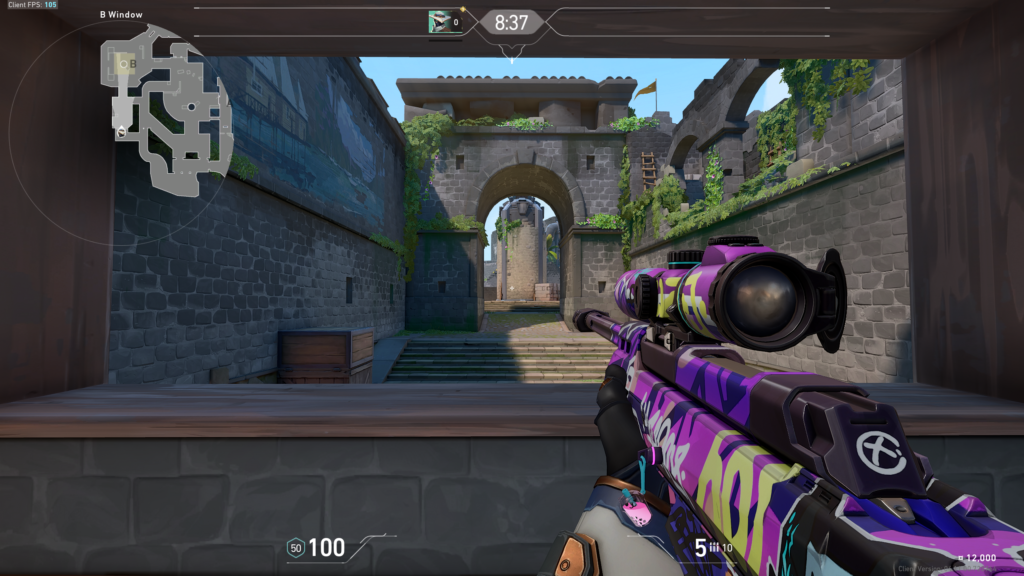
The B Window is a common spot for Operator use on Breeze. It provides cover for the attacking side to set up utility for a B execute and it’s a prime position for holding a post-plant angle.
Defense: Watching A Cave (through Pyramids) from back of A/container
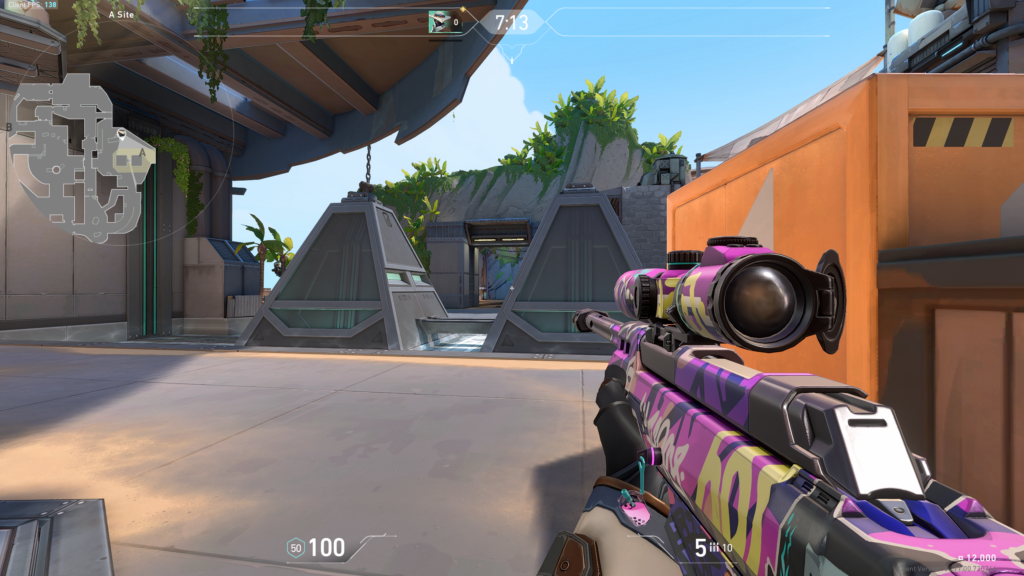
Holding this angle from the back of the A site offers the Defender and their Operator a lot of options. You can pick off an attacker peeking too wide or pushing too far, and both the orange Container and the Pyramids can be used for cover.
Icebox
Attack: Watching A from Belt
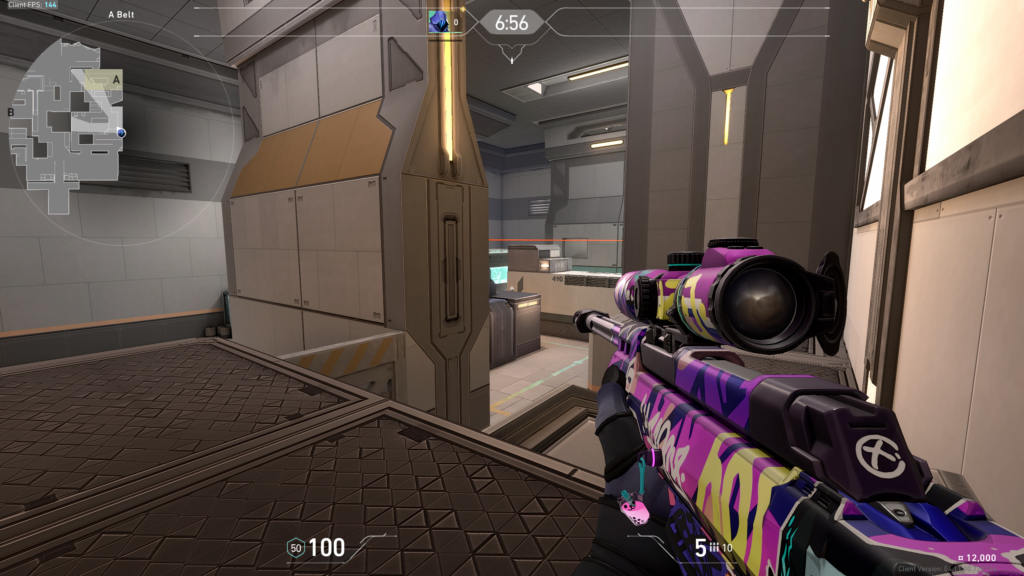
The A Belt offers the attacking Operator a lot of space to move around, allowing you to clear out numerous defensive angles and hiding spots. It’s also a great position to hold in post-plant scenarios and gives the player the option to either get to Nest or catch off rotators coming through the attacker spawn.
Defense: Watching B Green/Garage from B Yellow
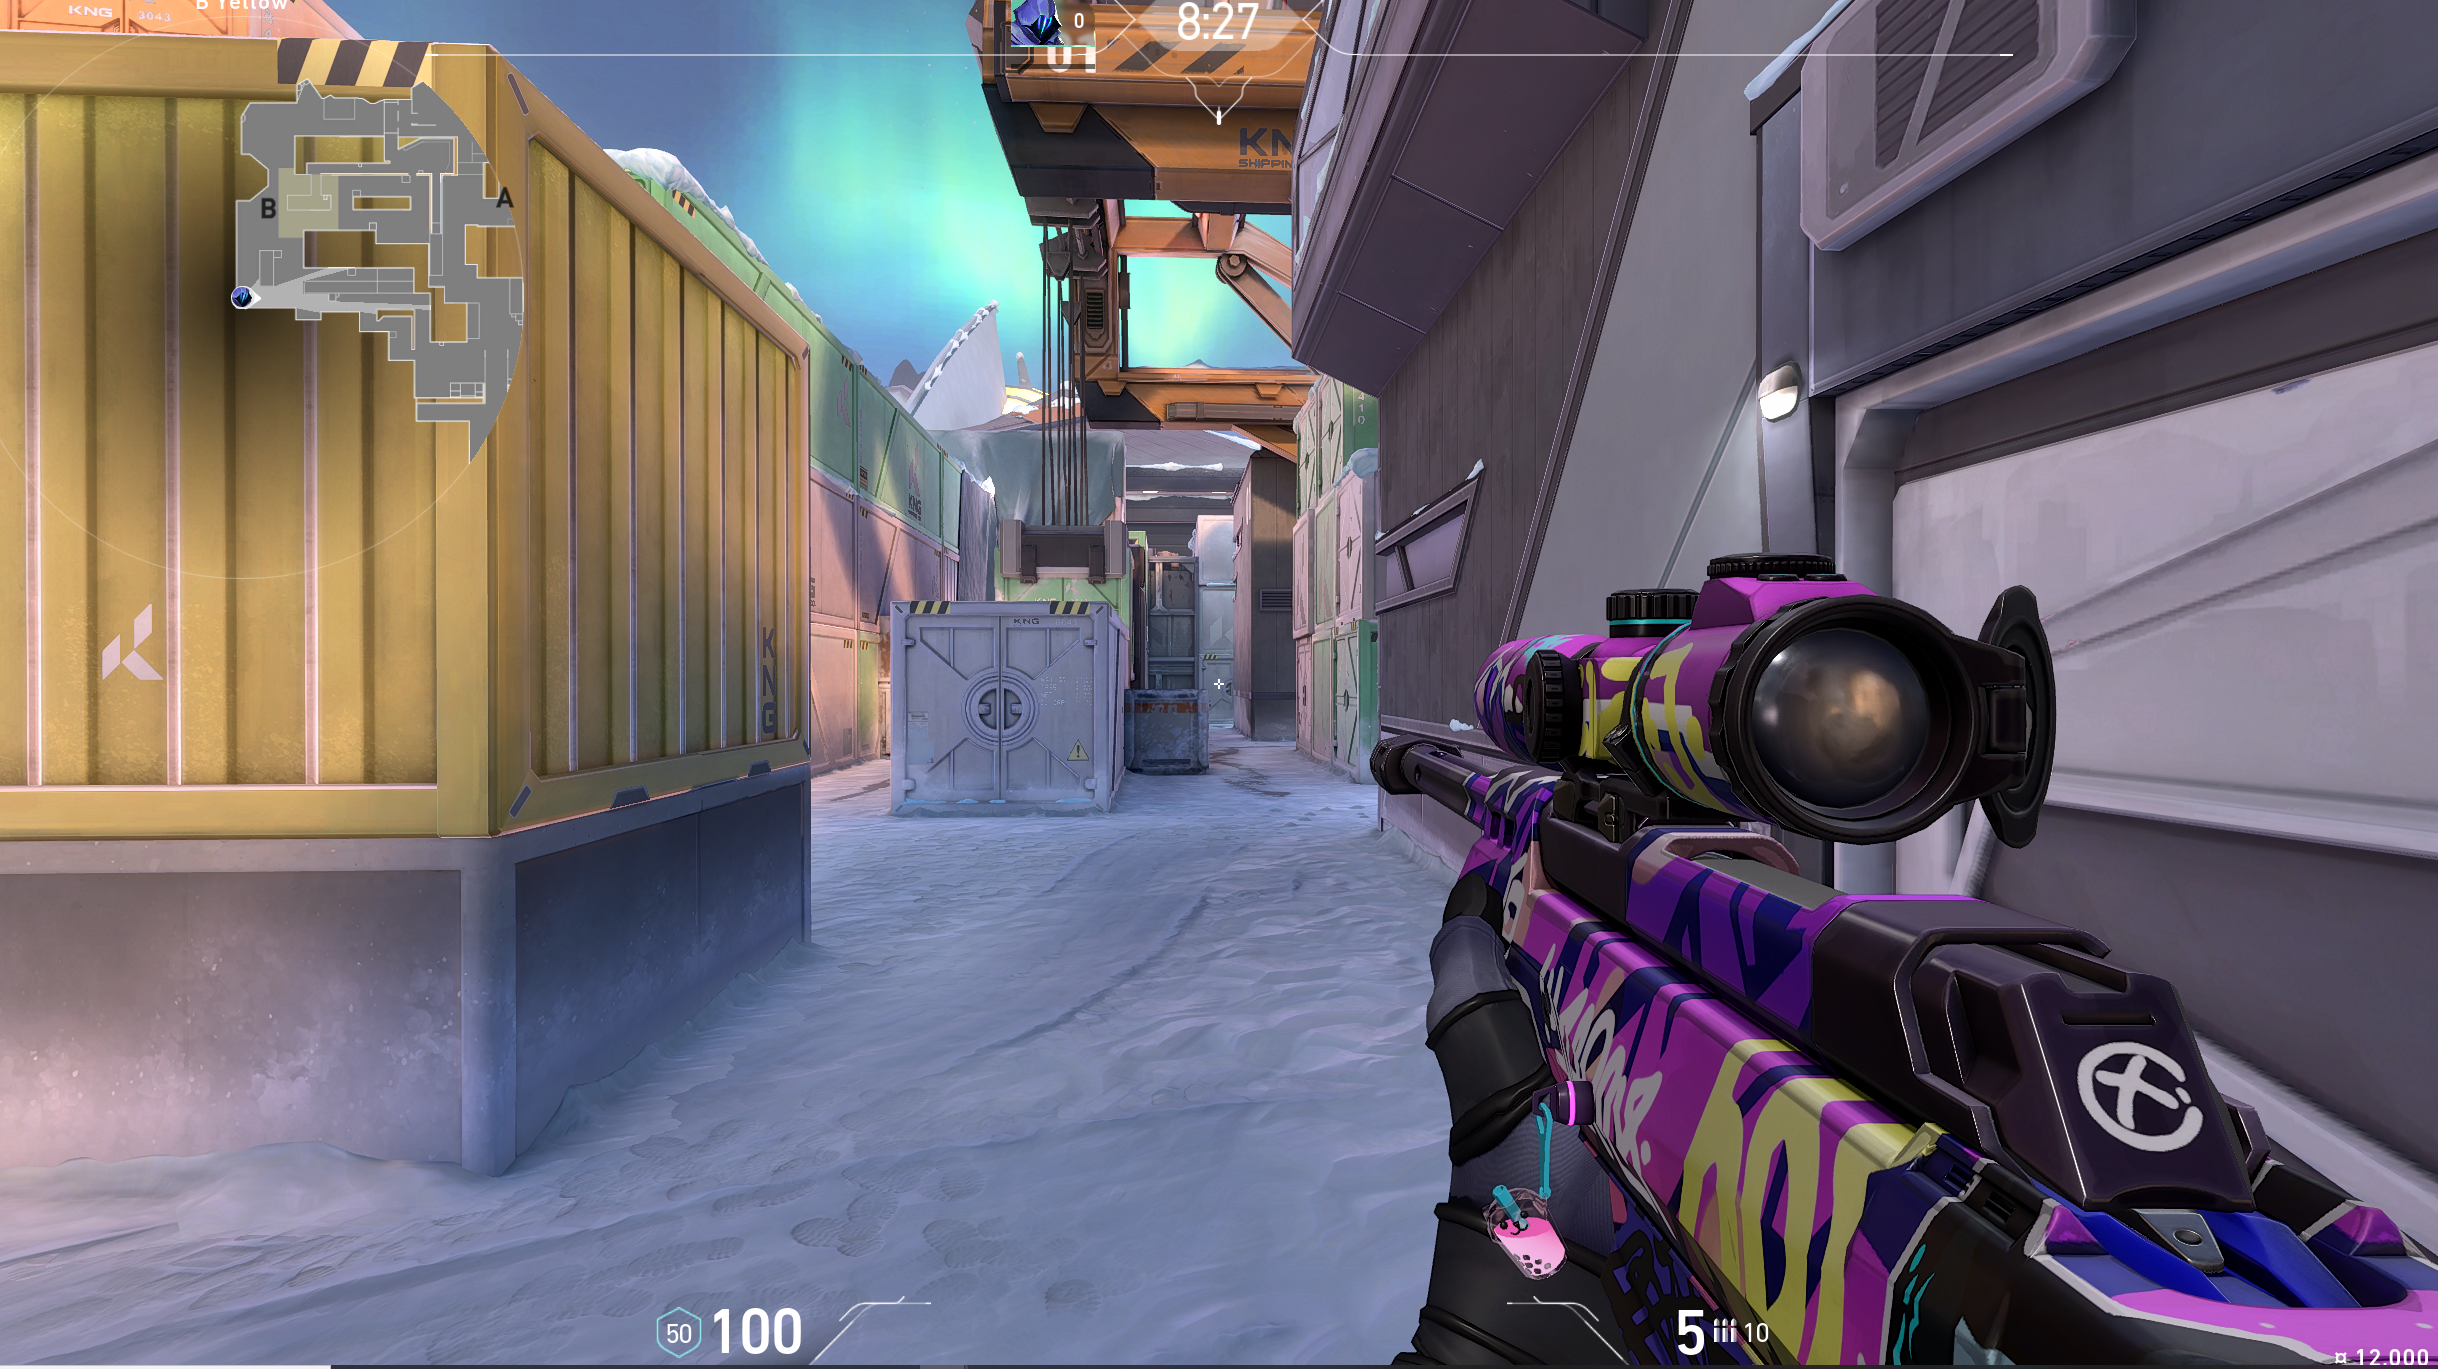
The go-to defensive angle for the Operator on Icebox is holding B Green/Garage from B Yellow. This angle lets the Operator catch players peeking B Green or trying to cross B Green through Garage. The Yellow container of course offers plenty of cover to retreat to, and there are several spots on B you could retreat to as well in the face of lots of aggression.
Haven
Attack: Holding C Long
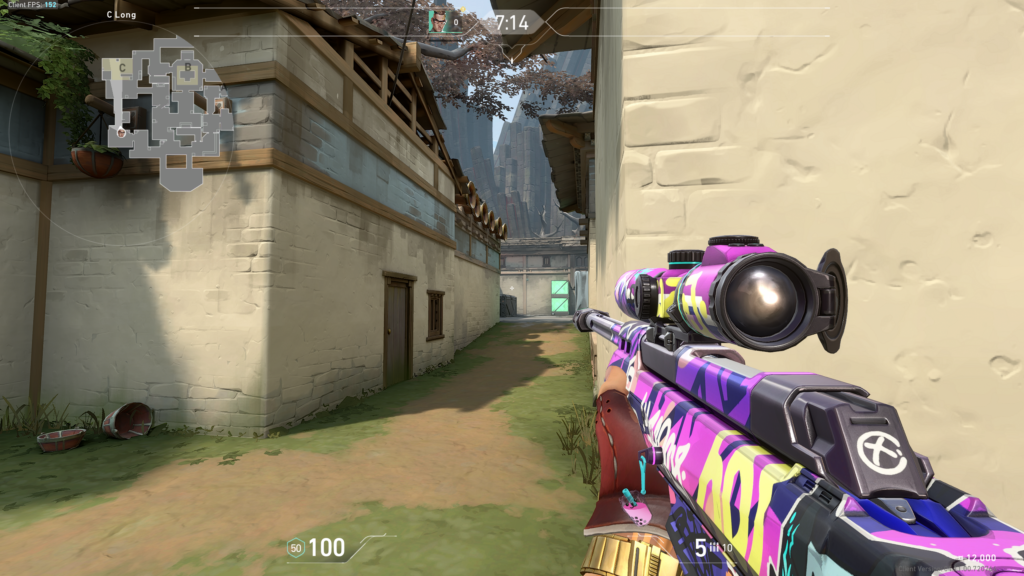
Holding Long C with the Operator gives the attacking side the control they need to set up an execute on the C site. Additionally, attackers pushed up through Garage can sandwich the defenders on the C site and pick off the players that the Op can’t hit from this angle.
Defense: Holding Mid from B
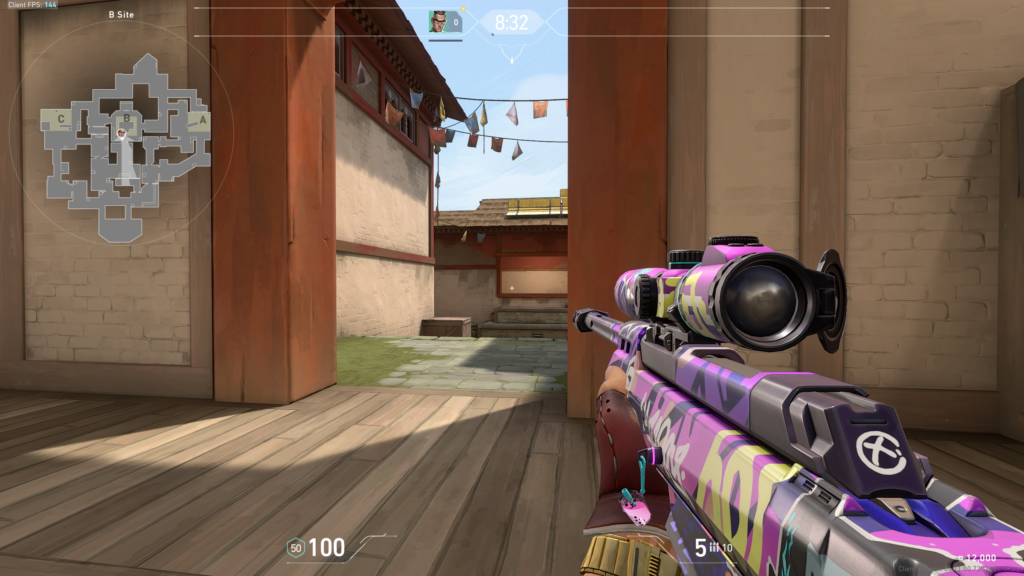
This spot is ideal solely because any attacker trying to peek Mid Window has to come for the left side, whereas an Operator can sit on either the left or the right. Additionally, with so many teams electing to go for fast B executes, an early pick with the Operator can shut those plans down instantly.


Published: Jun 13, 2022 7:29 PM UTC