Roblox is hosting The Hunt event across multiple games, where you need to collect badges to unlock exclusive cosmetics. A tough quest is to complete The Hunted quest for Pressure, a horror game where you navigate through the Hadal Blacksite.
There are 25 games where you can earn badges in Roblox The Hunt, and each game has a distinctly different quest for you to complete. Pressure is a challenging horror game where you’ll have to solve puzzles, track down passwords, and escape brutal monsters trying to catch you.
There are only a few defenses against these creatures, and you’ll have to be quick to escape them. Here’s what you need to know about how to complete The Hunted quest in Pressure for Roblox The Hunt event.
Table of contents
The Hunted quest in Pressure walkthrough
When you choose to start Pressure, make sure to click that you’re doing this for The Hunt event, and you’ll be taken to the event hub and you can start the quest. You’ll proceed through a submarine, and arrive at your destination. When you get here, you’ll learn that you’re the only who can successfully navigate this underground facility.
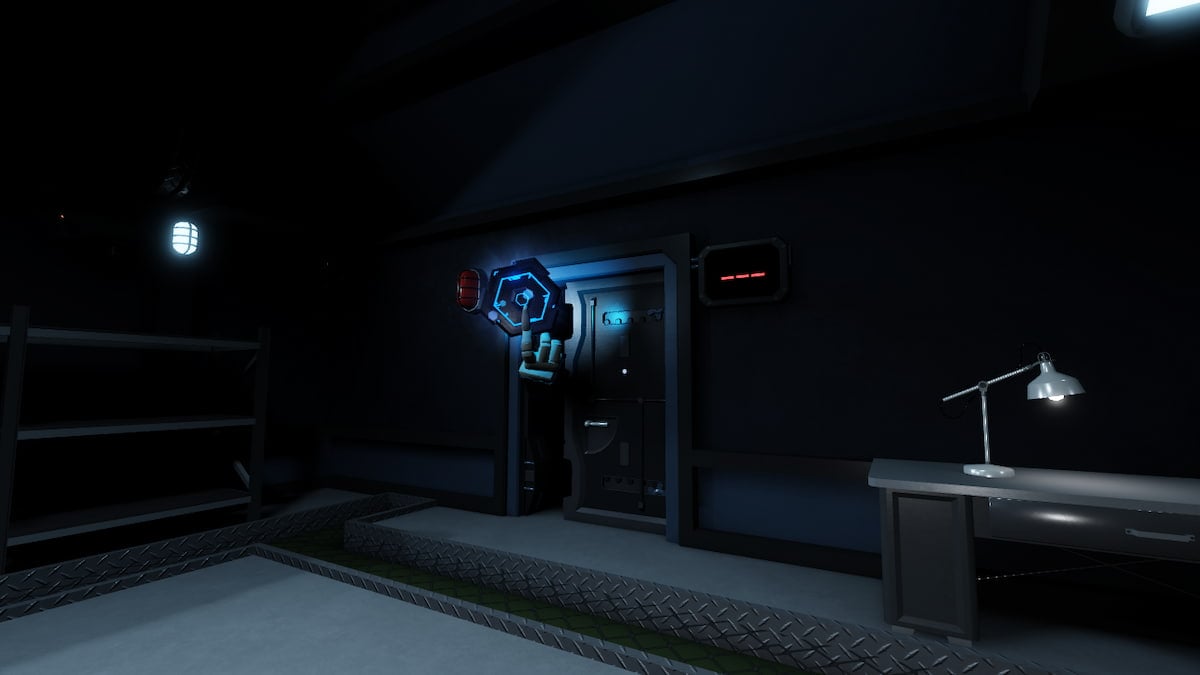
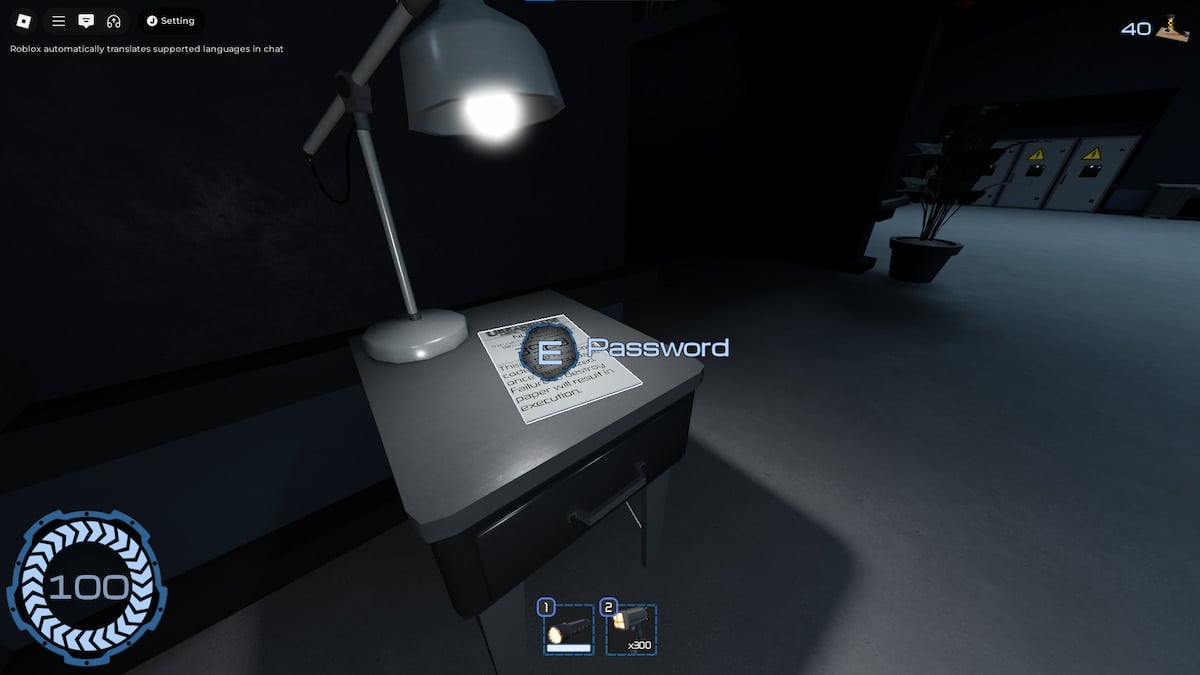
The first door introduces you to the basic mechanics of the game, as it requires a special password for you to unlock it. You can find the password on the left side of the room, on top of a filing cabinet. Pick it up, and proceed to the door to enter the code.

The code, and any other code you use to find all doors in Pressure, are randomly generated. If you lose and have to start over, the codes you previously used won’t work. You’ll have to pick up the sheets of paper again to get the new codes. This is a more complicated badge to get, compared to the one in Fisch.
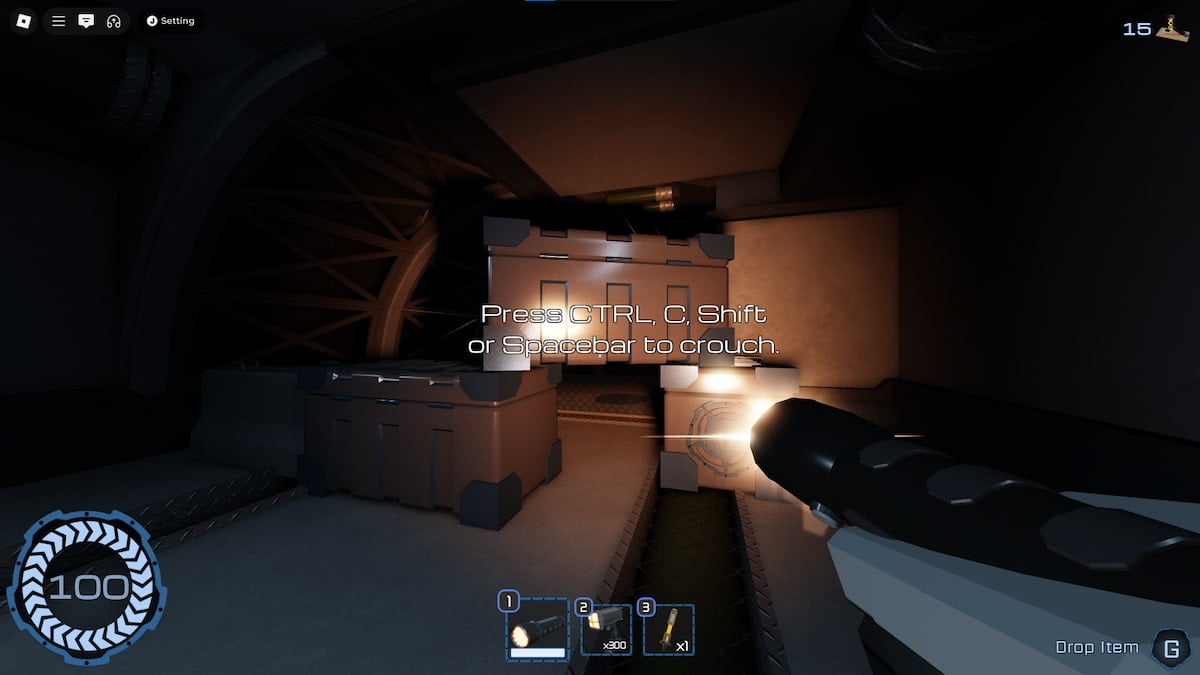
After you get through this door, explore the starting area. You should find an item called the BL1 (Neloprephine). It’s a helpful item that you can use to heal yourself if you ever take damage, and there’s a good chance of this happening as there are multiple monsters in the facility. Grab this one at the starting area, and then proceed to the left, where you’ll encounter several boxes you have to crouch under. This is where the real game starts, and you have to be careful.
How to deal with the monsters in The Hunted in Pressure
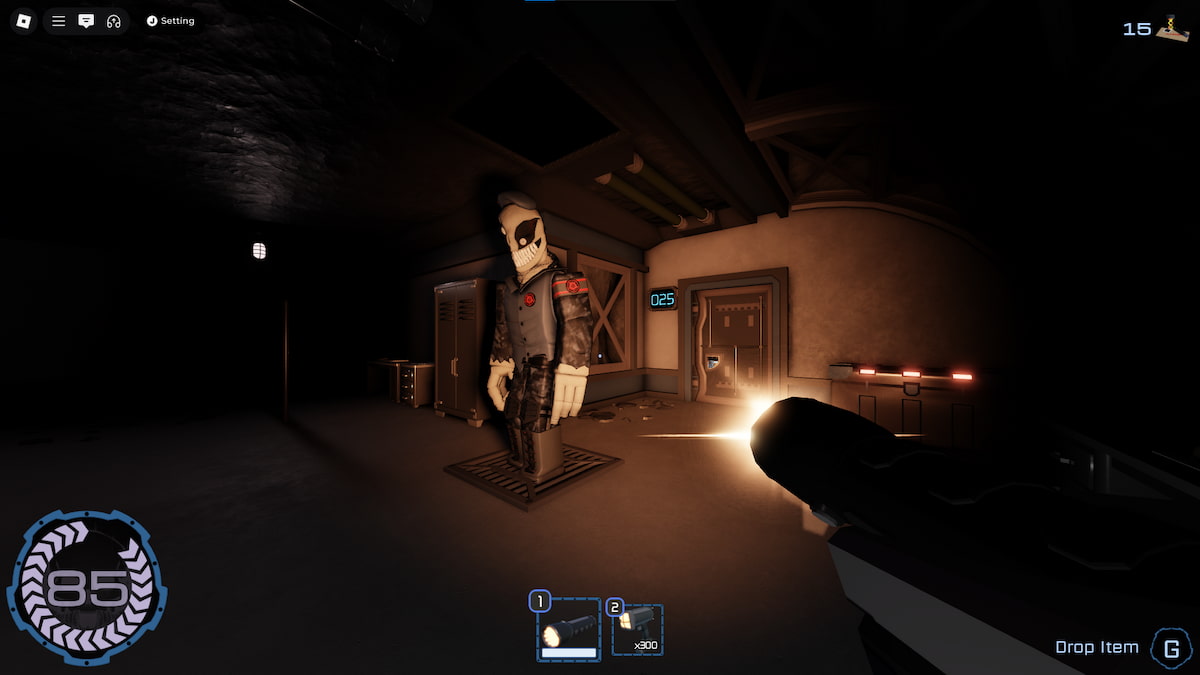
You have to deal with three monsters during The Hunted quest in Pressure. The first is the tall one that appears shortly after you crouch underneath the boxes. This is the most consistent creature as it’s always following you, but it stops moving while you look in its direction. When you break eye contact or have to look forward, it disappears and attempts to appear behind you. It can only deal damage while behind you, but it does 30 points of damage. You can take several hits from it before you have to start over.
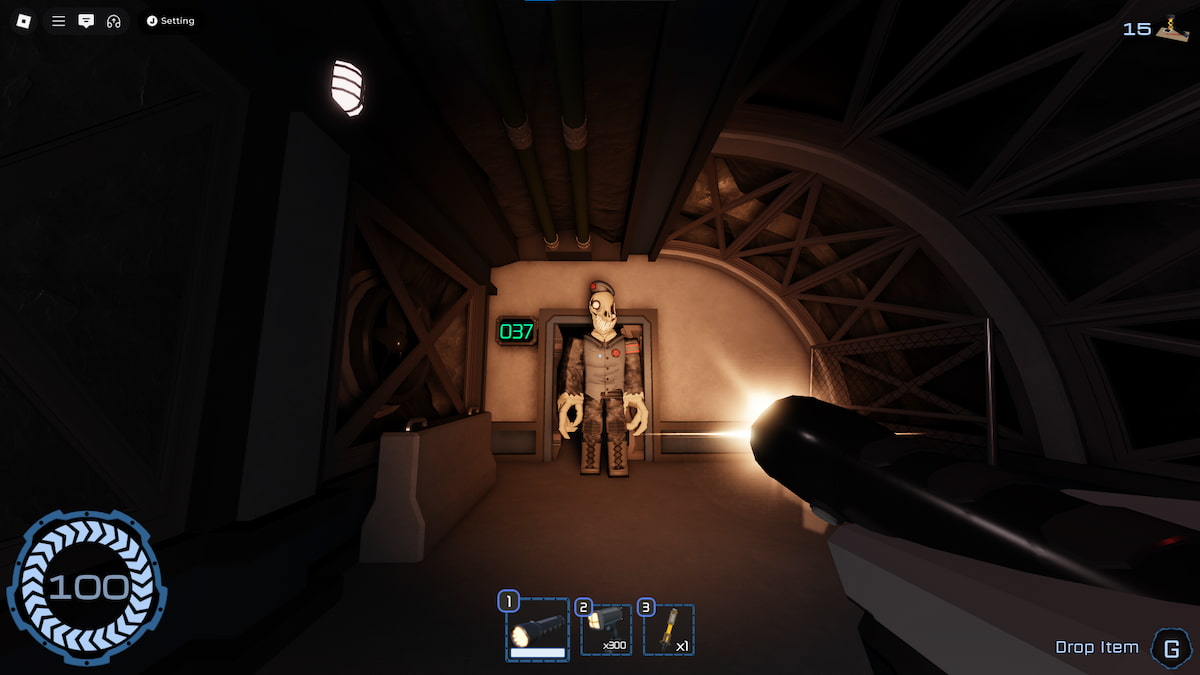
The other next are skeletons that appear with a distinct sound effect. You have to use your x300 flashlight against them, shooting them and causing them to fall to the ground. This iteam can prevent them from coming after you, making them easier to deal with than the tall monster.
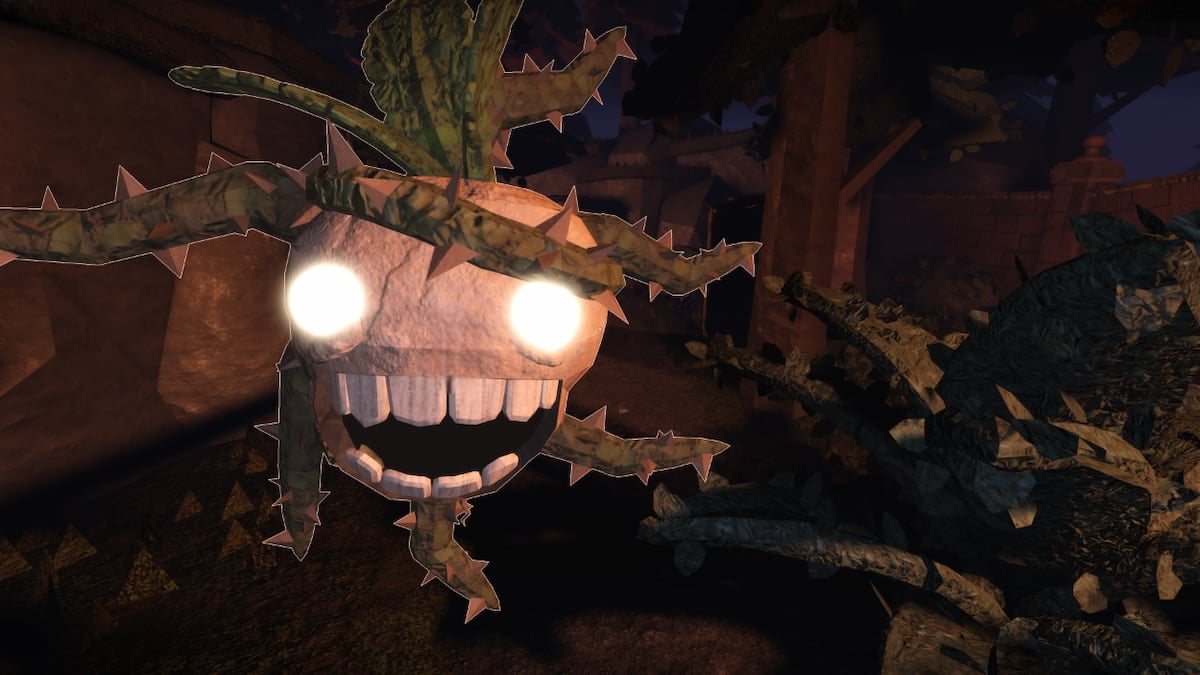
However, the third monster is the toughest. It’s a creature you don’t hear coming after you until it’s too late, making it difficult to get a screenshot. It looks like a massive fish face chasing you in the dark. The only way to escape it is to hide in a locker until it disappears. The best indication that it’s coming is when you hear the enormous monster constantly chasing after you, also hiding in a locker. If he’s hiding, it’s time for you to hide in the closest locker. A good way for this to happen is to keep this monster close to you and not have a considerable distance away from you.
This is the primary gameplay loop of The Hunted in Pressure. You’ll be consistently dodging these monsters and attempting to find passwords for locked doors. You’ll know you’re going the correct way by finding the rooms with green numbers on them, and they should be going down from 41, which was the first door you opened.
How to get through blue numbered doors in The Hunted in Pressure
The blue doors in The Hunted won’t let you unlock them unless you have a password. Similar to the first door you had to enter, a sheet of paper in the room contains the correct numbers you need to use to open it. This sheet of paper could appear on the top of a desk or inside a drawer. While you’re looking for this sheet of paper, keep your eyes on your large friend, or he’ll use this opportunity to attack you.
However, he won’t attack you when you’re using the code on the door. He’ll patiently wait for you to complete it and proceed through the door. He might be attacking you, but at least he has some dignity to not outright attack you during that point.
How to complete The Hunted in Pressure
The Hunted is a procedurally generated dungeon, which means we can’t provide you with a full rundown of how every room works for you. Each time you boot up The Hunted, there are different doors, routes, locked doors, passwords, and encounters every time you play. We can give you a distinct rundown on the primary mechanics of how this encounter works, but we can’t show you everything. Reaching the end is up to you.

You’ll know you’ve reached the end when you find your way to the third room, and there’s a panel where you activate the bridge. Wait for the bridge to reach the other side, and activate it again to return it to the base, where you’ll wave goodbye to your large monster friend who’s been following you since the beginning.
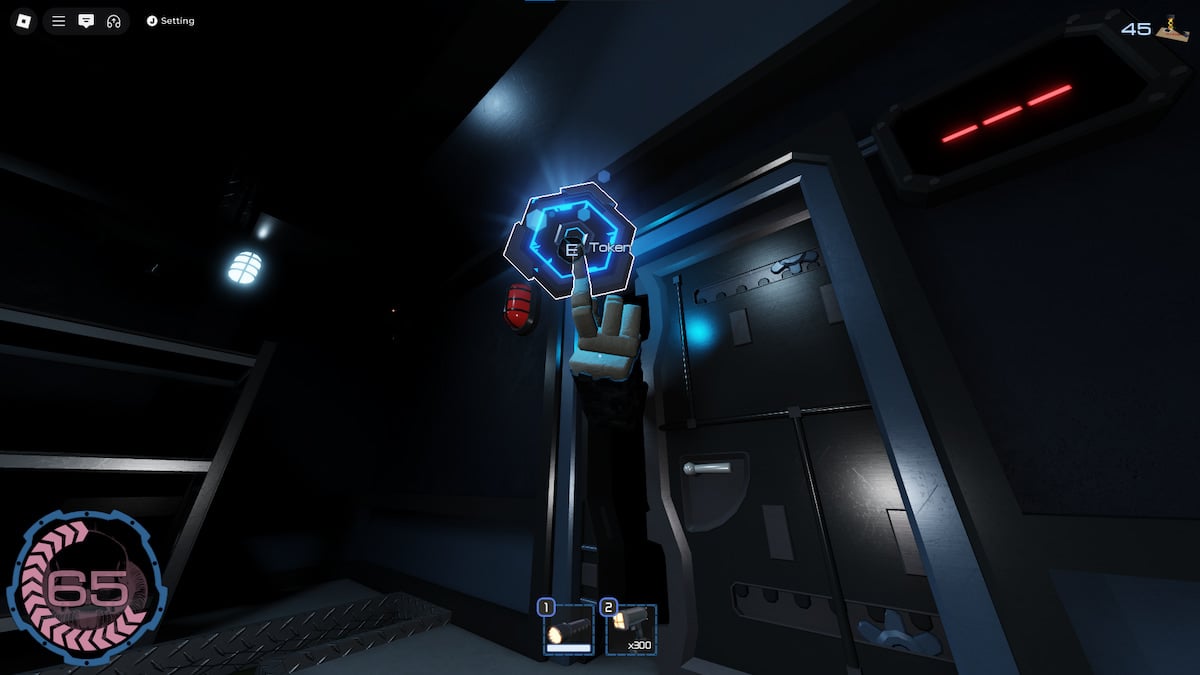
Before you leave the facility on the final control panel, your Hunt Token is yours to grab, and then you can try unlocking the rest of the tokens in other Roblox games.


Published: Mar 13, 2025 10:27 pm