
Ubisoft’s Prince of Persia: The Lost Crown brings back a classic element of action and platform games of yore: puzzles. A few of these puzzles, like the Sacred Archives, can be quite tricky, as you’ll have to use mind-bending abilities to manipulate time and space.
The Sacred Archives puzzle is an almost-mandatory puzzle to solve, since it will unlock one of Sargon’s most reality-warping powers, Clairvoyance. The puzzle is divided into four sections, each more complex than the last. To resolve all four, you’ll need a perfect blend of cleverness, agility, and impeccable timing. Let’s dig in.
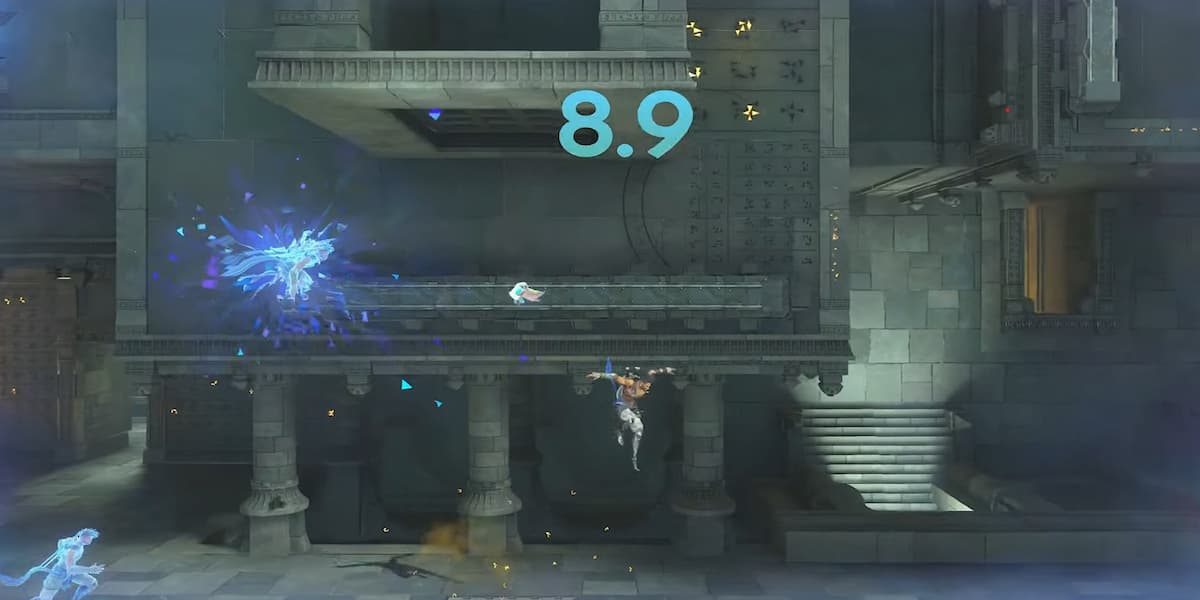
Sacred Archives puzzle location in Prince of Persia: The Lost Crown
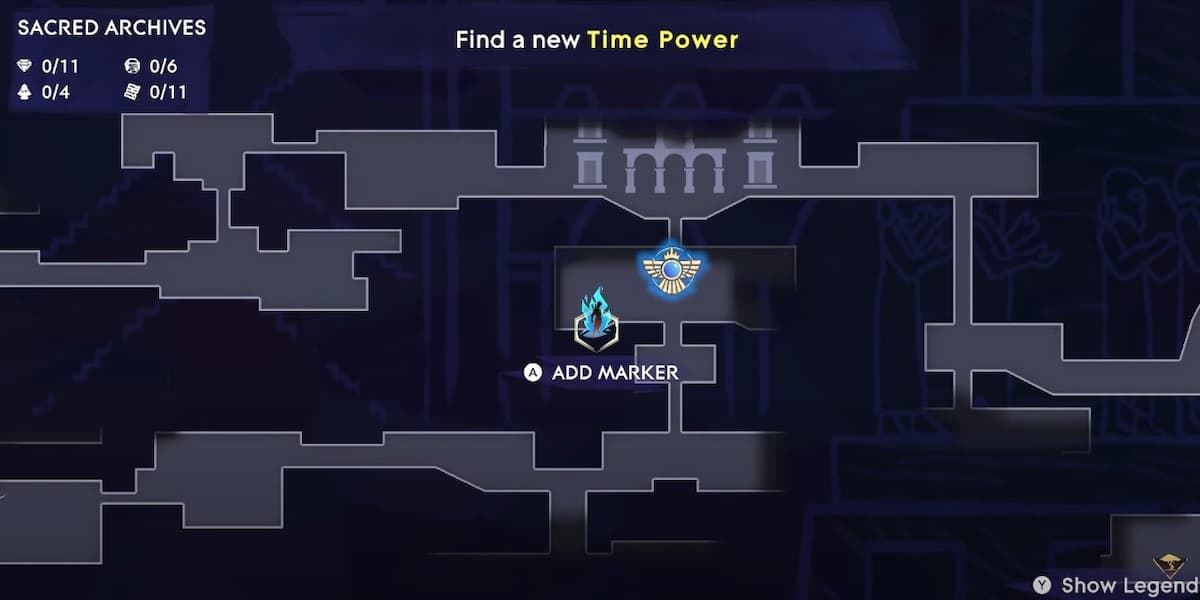
Once you’ve advanced enough in The Lost Crown, you’ll acquire the Shadow of Simurgh time ability. This will open up a new and unexplored route on the map, making the Sacred Archives accessible for exploration. The puzzle chamber is located to the west of the Secret Archives zone. A blue wall blocks the entrance that forces you to take a detour around the chamber. Simply continue along the hallways, first going west, then turning south and east, until you reach the lower part of the chamber. There, you will find the entrance to the first chamber.
How to solve the Sacred Archives door puzzle
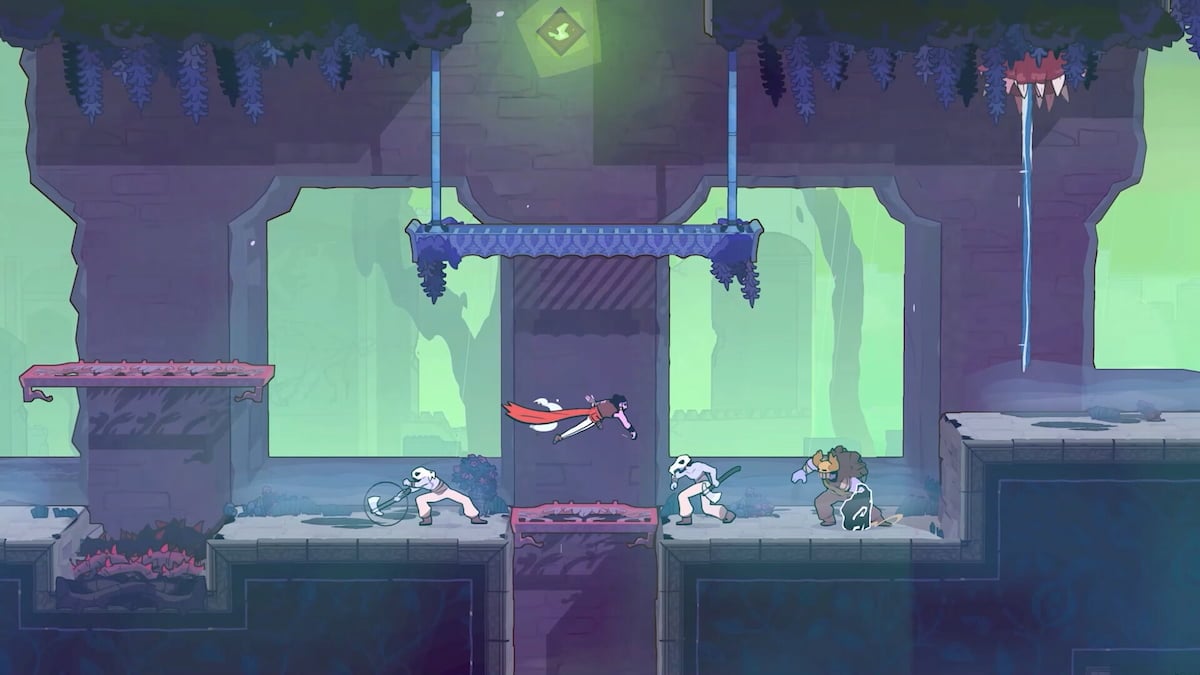
The complexity of these four secret rooms comes from the timely use of different versions of Sargon throughout each puzzle. You must activate switches and utilize your powers to secure the tablet at the closing of each trial, all while racing against time. These puzzles will put your newly acquired Shadow of Simurgh ability to the test, without which this side quest is impossible to solve.
How to solve the bottom left door puzzle
The initial room serves as a straightforward initiation to the puzzle mechanic, where you utilize three distinct Sargons to engage switches and reach your objective. Before you start, keep in mind that this The Lost Crown puzzle will put your doppelganger ability to the test. Just use your first and second Sargons to activate the switches on the left and right walls, respectively, then dispatch your third Sargon to collect the tablet.
- The first Sargon crawls up the left wall and pulls the lever.
- The second Sargon crawls up the right wall and pulls the lever over there.
- The bottom left door will open, allowing the third Sargon to grab the tablet.
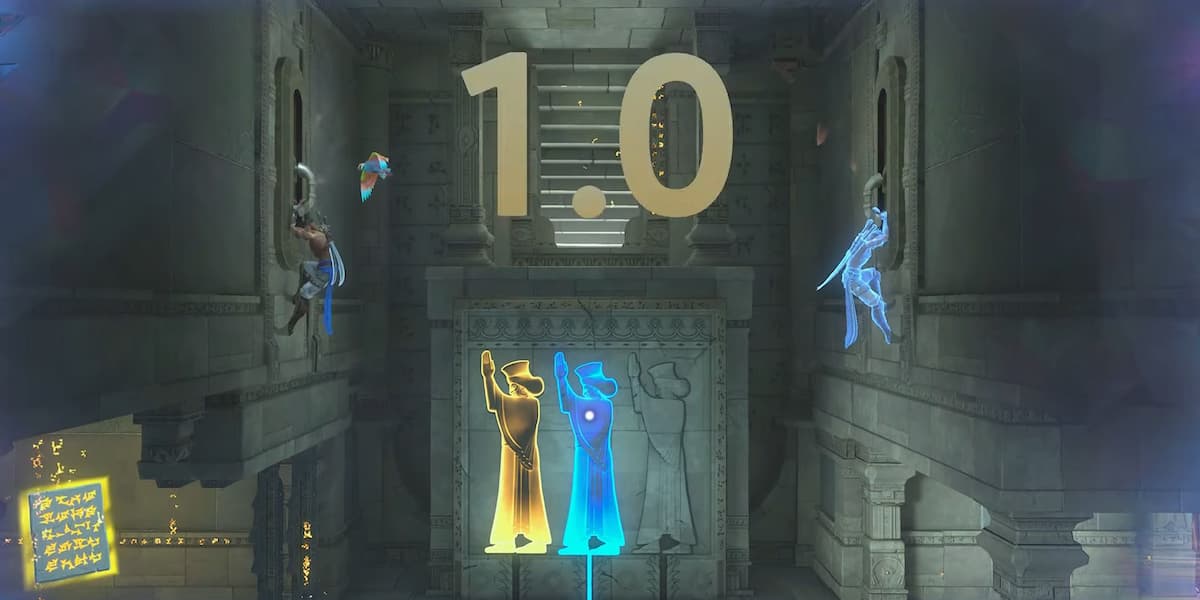
How to solve the top left door puzzle
Here, you need to run as fast as you can to the top left corner of the puzzle. Once there, create a copy of Sargon using the Shadow of Simurgh ability before the time runs out. This will allow your second Sargon to use the first Sargon as a warp point, thus giving him enough time to reach the pressure plate further up. Your third and final run with Sargon needs to get to the middle platform and wait for the second Sargon to activate the pressure plate, which will open up a door to the right. You then need to double jump to the right to reach the tablet.
- The first Sargon runs to the top left corner and activates the Shadow of Simurg ability.
- The second Sargon teleports to the warp point created by the first Sargon and crawls up to a pressure plate that opens the door to the tablet.
- The third Sargon jumps up on the middle platform and waits until the second Sargon pushes down the pressure plate. The third Sargon can then jump left to grab the tablet.
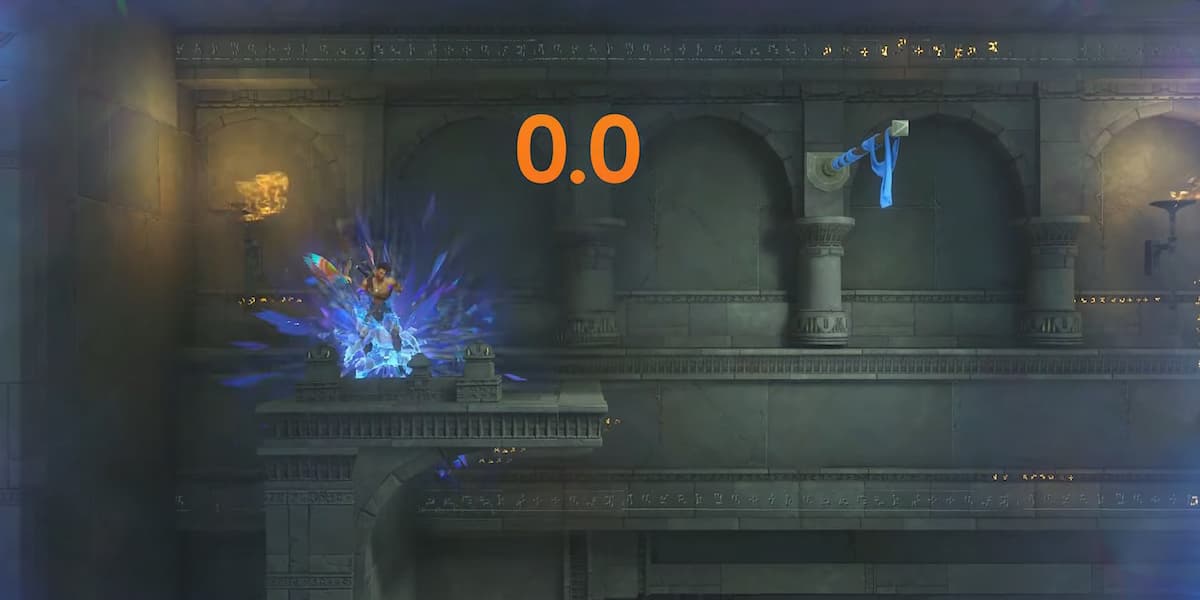
How to solve the bottom right door puzzle
Here is where things start to get slightly more challenging. The first Sargon needs to do a couple of things in a perfectly timed manner for the second and third Sargons to accomplish their portion of the puzzle successfully. Leap to the platform using your first Sargon, and then hop onto the right wall to trigger the pull-down lever. Wait about three seconds, then jump back to the central platform and position yourself right above the pressure plate.
With your second Sargon, wait until the first Sargon operates the switch, causing a wall to emerge to the left. Then, with your second Sargon, ascend to the next level and engage the pull-down switch on the left wall. Finally, with your third Sargon, trace the route taken by the second, ascending to the higher level. Then, pause for the first Sargon to press the pressure plate, which will activate a platform enabling you to reach the room’s top and seize the tablet.
- The first Sargon jumps to the right wall to pull down the lever. Wait about three seconds. Jump back down to the floor to push down the pressure plate.
- The second Sargon needs to wait a moment for the first Sargon to push the lever, making a wall appear to the left of the screen. You can then jump up to it and pull down the lever on the left wall.
- The third Sargon will follow the exact same path as the second Sargon. You then have to wait for the first Sargon to push down on the pressure plate, which will open up the platform for you to reach the upper level and grab the tablet.
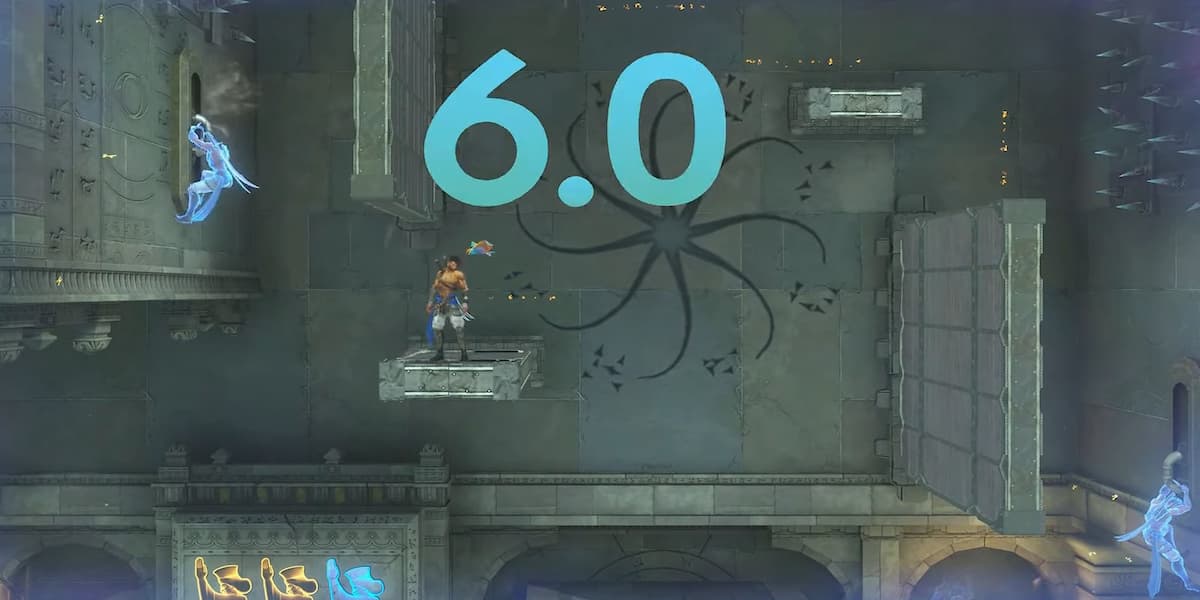
How to solve the top right door puzzle
The fourth and last puzzle room is by far the most difficult of them all, as it will challenge you to use all the previously learned abilities and timing to perfection. Direct your first Sargon to the room’s base to trigger the pressure plate, which will lower a platform and open a trapdoor. Stay on the plate for about four seconds, then quickly step off.
Then, utilize your second Sargon to leap onto the platform activated by the first, swiftly wall jump through the trapdoor, and activate the switch above. Drop back down to the platform. You then have a very narrow window to race past the closing trapdoor just as the first Sargon steps away from the pressure plate. When you reach the other side, use the Shadow of the Simurgh ability to set up a warp point.
Now, I would like to reiterate that the second Sargon run in this puzzle is extremely tricky, and it will very likely take more than one attempt for you to get it right. Just be patient—you got this. Finally, when the first Sargon has engaged the platform, teleport your third Sargon to the warp location created with the second Sargon using Shadow of the Simurgh. There, await the ascent of the second Sargon through the trapdoor and the activation of the switch, upon which a new wall will pop up to the right. Wall jump your way up to the room’s summit to collect the last tablet.
- The First Sargon has to drop down to step on the pressure plate. Wait for about four seconds, then step off the pressure plate.
- The Second Sargon needs to jump on the platform activated by the first. Then, wall jump up to activate a switch. Drop down and activate Shadow of Simurgh just as the first Sargon steps off the pressure plate.
- The Third Sargon must wait for the first to push down the pressure plate. Then, warp to the second Sargon’s warp point. Wait for the second Sargon to pull the switch, allowing you to wall jump to the top of the room and grab the tablet.
All Sacred Archives puzzle rewards
Cracking the fourth puzzle unlocks the way to the room’s central fifth door, distinguished by its blue color. Enter and proceed along the path to the right to discover a feather, bestowing the game-changing Clairvoyance ability. This new power lets you alternate between two dimensions, facilitating passage through the luminous blue barriers and bypassing the Jailer.
The four chambers puzzle hidden inside the Sacred Archives zone is considered one of the most complex brain-teasers in the whole game. Kudos to you for finishing this one!


Published: Jan 24, 2024 05:09 am