The massive Point Hope lighthouse map in Phasmophobia hides one of the most complex puzzles the ghost-hunting game has ever seen. If you can complete this tricky Easter egg, you get to claim the special Ferryman of the Drowned Badge.
Here’s how to complete the Point Hope Ferryman of the Drowned Badge Easter egg in Phasmophobia.
Table of contents
- How to get the Phasmophobia Point Hope Easter egg
- How to complete the Point Hope pool table puzzle in Phasmophobia
- Use the key to unlock the cabinet at Point Hope in Phasmophobia
- Where to find the missing gear at Point Hope in Phasmophobia
- How to ring the bell at Point Hope in Phasmophobia
- How to find the secret cave UV Light message at Point Hope in Phasmophobia
- How to trigger the Point Hope Easter egg in Phasmophobia
- How to get the Ferryman of the Drowned Badge and ID Card in Phasmophobia
- Ferryman of the Drowned ID Card and Badge appearance in Phasmophobia
How to get the Phasmophobia Point Hope Easter egg

To complete the Easter egg at Point Hope and claim the Ferryman of the Drowned Badge in Phasmophobia, you need to work on a complex puzzle that spans across various floors of the lighthouse map. Your end goal is to see some flying ghosts swirling around the building, but it takes quite a few steps to get to this point. The tasks you need to complete are:
- Throw three specific balls into any hole at the pool table.
- Use the hidden key to unlock the cabinet.
- Locate the missing gear.
- Ring the bell three times.
- Read the secret cave message.
- Trigger the Easter egg.
- Claim the Ferryman of the Drowned Badge reward.
Before you tackle this puzzle, I highly recommend you create a custom mode with a friendly ghost so you don’t have to worry about any pesky ghost hunts and can instead focus solely on the puzzle.
How to complete the Point Hope pool table puzzle in Phasmophobia
The first step is to throw three different balls into the holes on the pool table on the fourth floor. You need to throw the green ball, the blue ball, and then the orange ball in this exact order to solve this puzzle.
Head up to the fourth floor at Point Hope and walk to the back of the room to find a pool table. There are lots of balls scattered across the table, but only three of them work for this puzzle.

On the wall in this room, there are three paintings of shells in different colors. The order of these colors is green, blue, and orange, which means you need to find these balls on the table and throw them in the same order.
There are lots of balls that are quite similar in color scattered across the table, which can make it tricky to figure out which ones you need. The trick here is to look for the one with a green stripe, the one with a blue stripe, and the solid bright orange one, as pictured below.

There are lots of orange and yellow balls scattered across the table, so be extra careful when grabbing it and be absolutely certain that you choose the correct one. If you pick up and throw the wrong one, you have to exit the contract and start over again.
Once you locate all three balls, you need to pick them up and throw them in a very specific order.
- Pick up the green ball just like you would any other piece of equipment.
- Throw the green ball into any of the holes on the table.
- Pick up the blue ball.
- Throw it into any hole.
- Pick up the orange ball.
- Throw it into any hole.
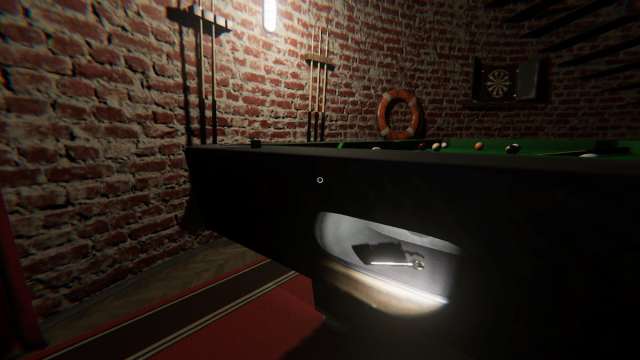
As soon as the solid orange ball goes in the hole, you should hear a click and jingle as a secret box containing a key opens. Walk over to the end of the pool table by the fireplace and look down. There’s a small hole that was empty before but now has a key you can grab to move on to the next step in this puzzle.
Use the key to unlock the cabinet at Point Hope in Phasmophobia
With the key in your inventory, head up to the ninth floor so you can use it to unlock the cabinet. Once you reach the top of the stairs on this floor, turn right and walk forward slightly to spot the locked cabinet you can now open.
Inside the cabinet, you’ll find that one gear slot is empty, which means you have a new puzzle to solve.

Where to find the missing gear at Point Hope in Phasmophobia
The missing gear for the locked cabinet is located on the eighth floor to the left of the cluttered desk where you can find the Monkey Paw if it’s the Cursed Possession that spawned. It’s pretty well hidden, so here are the exact steps you need to find it.
- Walk up or down to the eighth floor depending on where you start.
- Look for the messy desk that has a wooden rocking horse on it. It’s located right in between the stairs that lead up and the stairs that lead down.
- Walk over to the left edge of the desk and look down to see a spilled bucket of red paint.
- Look right behind the metal bucket to find a golden gear you can pick up.

Once you have the missing gear, head back up to the ninth floor and insert it in the locked cabinet. The massive gears above your head will then start turning and grinding, which means you can move on to the next step of the puzzle.
How to ring the bell at Point Hope in Phasmophobia
As soon as you get the gear in and see the bigger gears start turning, rush all the way to the first floor of the Point Hope map and head outside to find the bell sitting in between the lighthouse and your truck. Ring the bell three times and you’ll hear a swooshing noise to let you know this part of the Easter egg puzzle is now complete.
If you don’t hear the noise, you may have rang the bell too fast or slow, so try again at a medium pace. I’ve had trouble getting the bell to work after messing it up the first time, so you may have to exit the contract and restart the puzzle if you can’t get the swooshing noise to occur.
How to find the secret cave UV Light message at Point Hope in Phasmophobia
After ringing the bell three times, grab a UV Light. The next part of the puzzle is super finicky and glitchy, so bring either a Tier II or Tier III UV Light if you can. I’ve never been able to get the UV Light step to work with only a Tier I UV Light. It may still be possible, but it’s certainly not easy which means it’s best to use one of the other tiers if you have them or team up with players who have better gear if not.
Once you have a UV Light, make your way all the way up to the very top floor of the lighthouse to reveal a hidden message. This part can be pretty tricky depending on what weather you’re working with, so here’s how to find the secret message.
- Travel to the very top floor of the lighthouse.
- Open the door and walk outside to the small circular balcony.
- Head right and look out at the ocean.
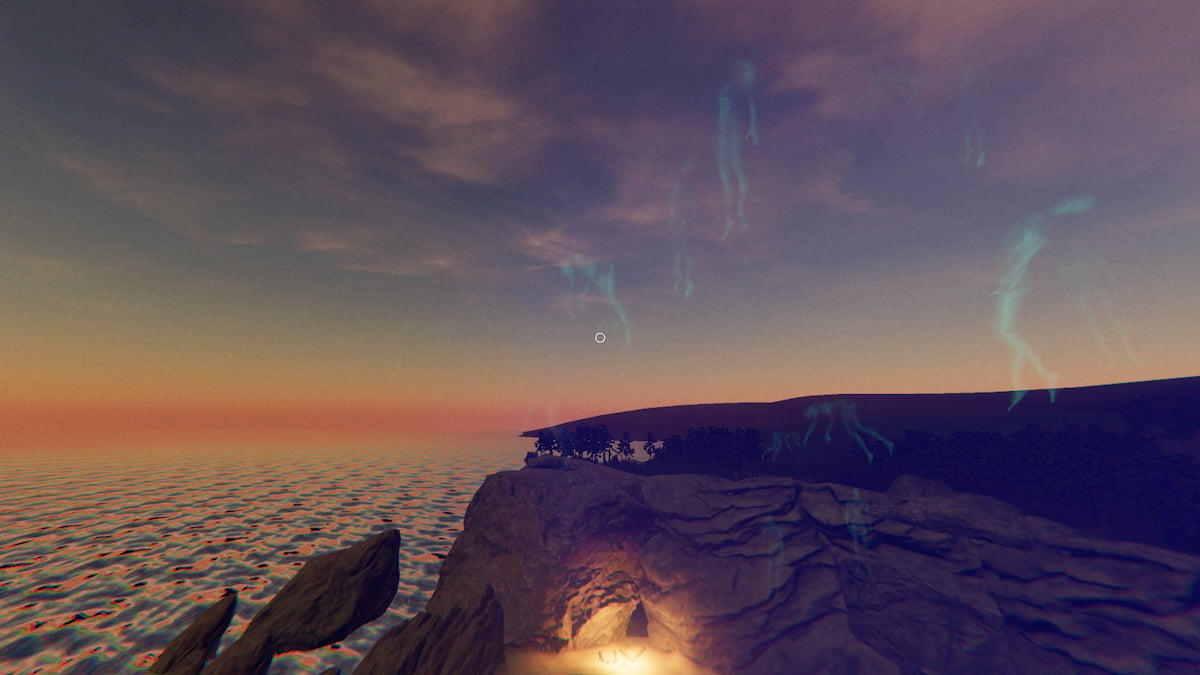
- Keep walking around looking at the ocean until you spot a cave that’s brightly lit up with the word UV in front of it. If it’s foggy or rainy, you might not be able to see the word UV, but the fire should still be visible.

As soon as you see this cave, you’re ready to trigger the final stage in this puzzle, which is the Easter egg you’ve been working toward all this time.
How to trigger the Point Hope Easter egg in Phasmophobia
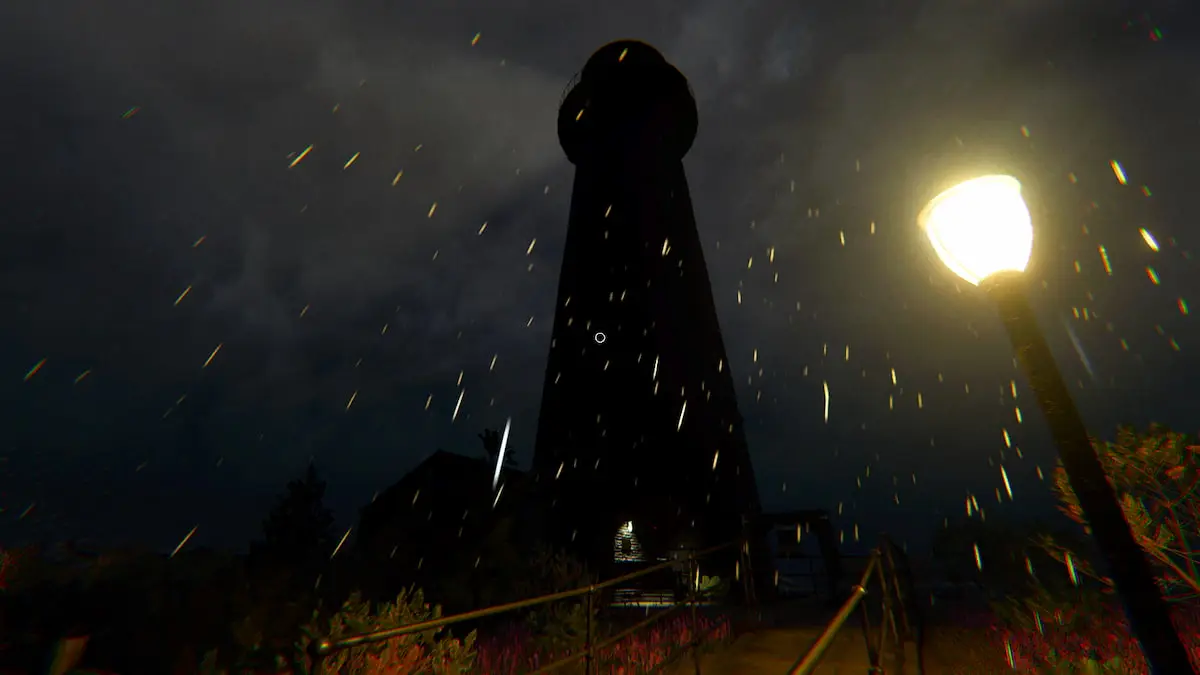
You can activate the Easter egg at Point Hope by shining a UV Light at the massive lighthouse light on the top floor of the map. Turn on your UV Light and get as close as you can to the massive light to trigger it. The light must be on and moving for this to work, so if the fuse box goes out, locate and turn it on before proceeding.
You’ll know you’ve successfully activated the Easter egg event if the lighthouse light turns purple and you start to hear faint whispers. Walk back out to the balcony and you’ll see floating green ghosts wherever the purple light inside the lighthouse shines.
How to get the Ferryman of the Drowned Badge and ID Card in Phasmophobia
The Ferryman of the Drowned Badge unlocks automatically once you finish the entire puzzle and end the match. You get the Badge when reviewing whether you got the ghost type right and all other contract statistics, which means it can be equipped immediately after.
Ferryman of the Drowned ID Card and Badge appearance in Phasmophobia
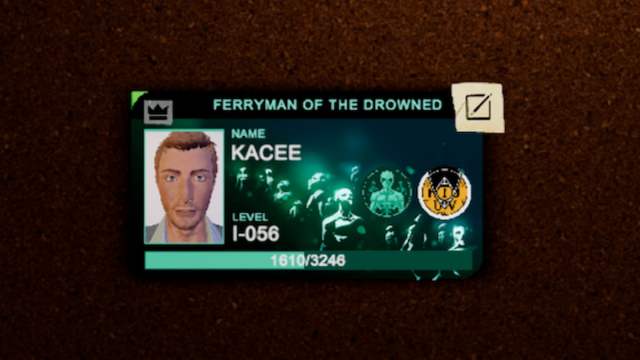
The Ferryman of the Drowned ID Card is a vibrant sea green color and features lots of floating ghosts scattered across it. These characters are similar to the ones you see floating around the lighthouse at the end of the puzzle. The circular Badge included on this ID Card has three ghosts standing together. This ID Card and Badge are also animated with a slight shimmer that ripples across all of the ghosts in the design.
If you’re after more ID Cards and Badges for your collection, consider working on Achievement Hunter and Lighthouse Keeper next. You also might want to learn all Cursed Possession locations so you can find and use these items to assist you in your investigations as needed.


Published: Jan 3, 2025 01:50 pm