
The vast magical world of Hogwarts Legacy has so much for players to do that most witches and wizards might not even realize how powerful they can truly become. One method of gameplay that can drastically change how well players perform in battle is by equipping the best gear in Hogwarts Legacy.
Related: How to discover more gear traits in Hogwarts Legacy
There are a lot of different aspects to consider with gear in the open-world RPG, and it is important to know the best ways to go about utilizing it.
Whether you’re unsure where to start or hoping to figure out how to make your gear as powerful as possible, here is a complete guide to everything that you need to know about gear in Hogwarts Legacy.
Hogwarts Legacy best gear: All gear rarities
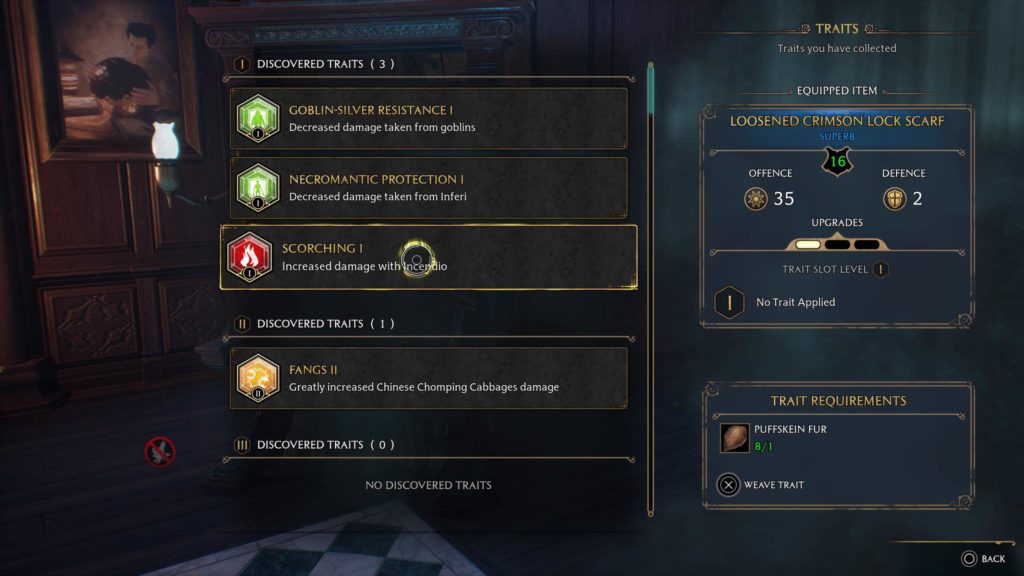
Before you decide to equip a piece of gear with a trait or upgrade a piece of gear, you may want to consider what level of rarity it is and what statistics it comes with. There are four different rarity levels which are as follows.
- Well-Appointed (Green): This is the lowest tier of gear and generally has the weakest statistics. This gear cannot have gear traits equipped on it and also cannot be improved at the Loom.
- Superb (Blue): This is the second tier of gear and generally comes with fairly decent statistics. Only level-one gear traits can be applied to this gear and this gear is the cheapest to upgrade, but this is because the upgrades aren’t as powerful on this level of gear as the other higher ones.
- Extraordinary (Purple): This is the third tier of gear and generally has good statistics. This level of gear can have level one or level two traits equipped on it and is more costly to upgrade due to the more powerful potential it comes with.
- Legendary (Gold): This is the highest tier of gear that is possible to obtain and generally comes with the most powerful statistics possible. Gear of this level is very costly to upgrade but worth the investment due to the powerful results that will be gained. All gear traits of any level can be applied to this gear.
Essentially, what this means is that the best gear to equip in Hogwarts Legacy will almost always be of Legendary rarity because it offers high base stats and powerful trait upgrade options.
You can view the rarity level of your gear by noting the color or hovering over it in the Gear section of your Field Guide.

How to equip gear traits in Hogwarts Legacy
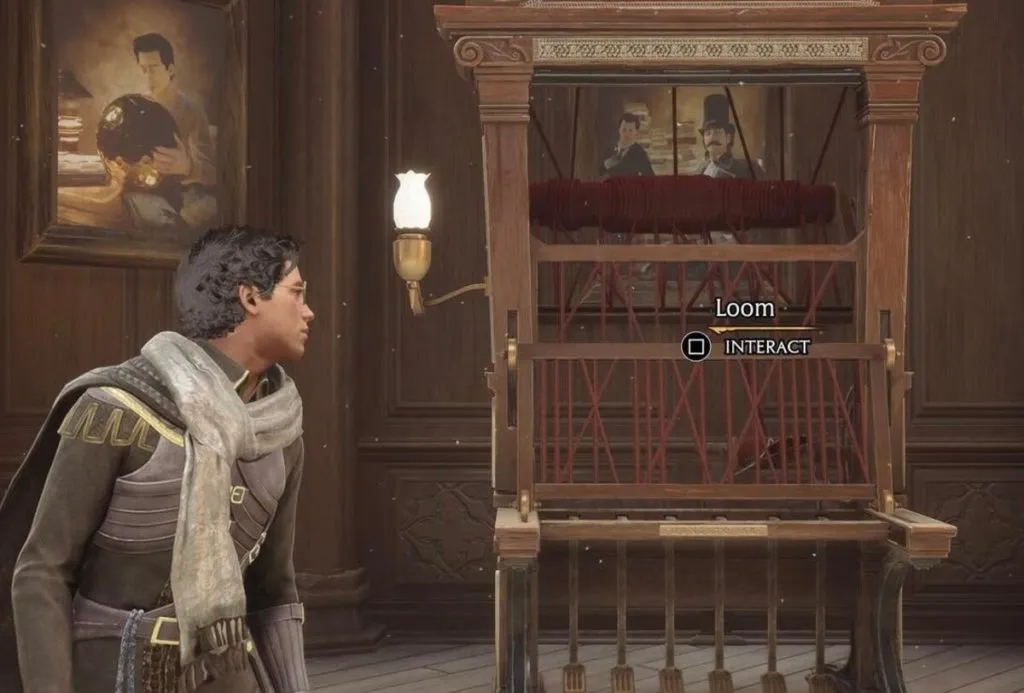
Gear traits are very easy to equip once players have completed the “The Elf, The Nab-Sack, and the Loom” quest. Finishing this quest will grant players a special loom that they can utilize to enhance their gear.
To equip gear traits, approach the Loom in the Room of Requirement and select a piece of gear to equip a trait on. Depending on which trait players choose, creating resources will be required to apply the upgrade, but as soon as players have these resources they can then attach a gear trait to the desired piece of gear.
Best Hogwarts Legacy gear traits
The best gear traits for you will depend on what combat style you lean into. If you utilize the dark arts constantly then it will be worth investing in gear traits that amplify those skills, while players that frequently deploy plants in combat will instead want to focus on traits related to them. The spells that you most frequently cast in combat and any foes you particularly struggle with should also be taken into account.
With all of this in mind, the best traits that players can utilize in Hogwarts Legacy are as follows.
The best traits to add to your gear:
- Ancient Magic III: This will allow players to make their already overpowered Ancient Magic abilities even more overwhelming for foes by increasing the damage that it deals.
- Concentration III: One of the best general gear traits is the highest level of Concentration, which drastically increases the damage that is dealt by all spells that cause damage against foes.
- Ancient Magic Focus III: Ancient Magic is one of the most powerful tools at players’ disposal in Hogwarts Legacy. Ancient Magic Focus III will ensure that players get to summon their powerful skillset more often by increasing the rate that the Ancient Magic meter refills.
- Disarming III: It’s quite difficult for most foes to attack you without a weapon, and the Expelliarmus charm takes their weapon away from them. Players can strengthen this already powerful spell even more with Disarming III, which increases the damage that is dealt by Expelliarmus.
- Unforgivable III: The Unforgivable curses are immensely powerful tools of destruction. If you find yourself leaning into the dark arts in Hogwarts Legacy then you’ll want to equip Unforgivable III to increase the damage that all three curses deal.
- Ambush III: If sneak attacks are your go-to in Hogwarts Legacy, then you’ll want to equip the maximum level of the Ambush gear trait. This will significantly increase the damage dealt against opponents while you are concealed by the Disillusionment charm.
- Destruction III: Confringo is a powerful spell to utilize in combat, so any player that finds themselves casting it frequently will want to add Destruction III to increase its damage output.
- Explosive III: Bombarda and Confringo are quite similar which means that players should generally choose one or the other for combat. If you prefer Bombarda, then equip Explosive III to increase the fiery damage that the spell will cause.
Outside of these gear traits, all of the other gear traits that are for specific spells are also incredible if you find yourself utilizing the spell that the trait is for frequently.

All gear traits in Hogwarts Legacy
While the previously mentioned traits are the best ones that players can equip, there are also many more beyond this. Here is a complete list of all the gear traits that players can unlock in Hogwarts Legacy and the effects that they grant.
Every gear trait in Hogwarts Legacy:
- Ambush I: Increases the spell damage that is dealt when the player is concealed by the Disillusionment charm.
- Ambush II: Greatly increases the spell damage that is dealt when the player is concealed by the Disillusionment charm.
- Ambush III: Significantly increases the spell damage that is dealt when the player is concealed by the Disillusionment charm.
- Amphibial Protection I: Decreases the damage taken from Dugbogs.
- Amphibial Protection II: Greatly decreases the damage taken from Dugbogs.
- Amphibial Protection III: Significantly decreases the damage taken from Dugbogs.
- Ancient Magic I: Increases the damage dealt by Ancient Magic.
- Ancient Magic II: Greatly increases the damage dealt by Ancient Magic.
- Ancient Magic III: Significantly increases the damage dealt by Ancient Magic.
- Ancient Magic Focus I: Increases the rate that the Ancient Magic meter refills.
- Ancient Magic Focus II: Greatly increases the rate that the Ancient Magic meter refills.
- Ancient Magic Focus III: Significantly increases the rate that the Ancient Magic meter refills.
- Anti-Venom I: Decreases the damage taken from spiders.
- Anti-Venom II: Greatly decreases the damage taken from spiders.
- Anti-Venom III: Significantly decreases the damage taken from Spiders.
- Binding I: Increases the damage dealt by Petrificus Totalus.
- Binding II: Greatly increases the damage dealt by Petrificus Totalus.
- Binding III: Significantly increases the damage dealt by Petrificus Totalus.
- Concentration I: Increases the damage dealt by all damaging spells.
- Concentration II: Greatly increases the damage dealt by all damaging spells.
- Concentration III: Significantly increases the damage dealt by all damaging spells.
- Control I: Increases the damage dealt by the Ancient Magic Throw.
- Control II: Greatly increases the damage dealt by the Ancient Magic Throw.
- Control III: Significantly increases the damage dealt by the Ancient Magic Throw.
- Cruelty I: Increases the damage dealt by Crucio.
- Cruelty II: Greatly increases the damage dealt by Crucio.
- Cruelty III: Significantly increases the damage dealt by Crucio.

- Cushioning I: Decreases the damage by trolls.
- Cushioning II: Greatly decreases the damage taken by trolls.
- Cushioning III: Significantly increases the damage taken by trolls.
- Deafening I: Increases the damage dealt by Mandrakes.
- Deafening II: Greatly increases the damage dealt by Mandrakes.
- Deafening III: Significantly increases the damage dealt by Mandrakes.
- Destruction I: Increases the damage dealt by Confringo.
- Destruction II: Greatly increases the damage dealt by Confringo.
- Destruction III: Significantly increases the damage dealt by Confringo.
- Disarming I: Increases the damage dealt by Expelliarmus.
- Disarming II: Greatly increases the damage dealt by Expelliarmus.
- Disarming III: Significantly increases the damage dealt by Expelliarmus.
- Explosive I: Increases the damage dealt by Bombarda.
- Explosive II: Greatly increases the damage dealt by Bombarda.
- Explosive III: Significantly increases the damage dealt by Bombarda.
- Fangs I: Increases the damage that Chinese Chomping Cabbages cause.
- Fangs II: Greatly increases the damage that Chinese Chomping Cabbages cause.
- Fangs III: Significantly increases the damage that Chinese Chomping Cabbages cause.

- Goblin-Silver Resistance I: Decreases the damage taken from goblins.
- Goblin-Silver Resistance II: Greatly decreases the damage taken from goblins.
- Goblin-Silver Resistance III: Significantly decreases the damage taken from goblins.
- Herbology I: Increases the damage dealt by all plants.
- Herbology II: Greatly increases the damage dealt by all plants.
- Herbology III: Significantly increases the damage dealt by all plants.
- Laceration I: Increases the damage dealt by Diffindo.
- Laceration II: Greatly increases the damage dealt by Diffindo.
- Laceration III: Significantly increases the damage dealt by Diffindo.
- Lupus Protection I: Decreases the damage taken from Dark Mongrels.
- Lupus Protection II: Greatly decreases the damage taken from Dark Mongrels.
- Lupus Protection III: Significantly decreases the damage taken from Dark Mongrels.
- Manipulation I: Increases the damage dealt by the target of Imperio.
- Manipulation II: Greatly increases the damage dealt by the target of Imperio.
- Manipulation III: Significantly increases the damage dealt by the target of Imperio.

- Necromantic Protection I: Decreases the damage taken from Inferi.
- Necromantic Protection II: Greatly decreases the damage taken from Inferi.
- Necromantic Protection III: Significantly decreases the damage taken from the Inferi.
- Protego Shielding I: Decreases the damage taken from Dark Wizards.
- Protego Shielding II: Greatly decreases the damage taken from Dark Wizards.
- Protego Shielding III: Significantly decreases the damage taken from Dark Wizards
- Scorching I: Increases the damage dealt by Incendio.
- Scorching II: Greatly increases the damage dealt by Incendio.
- Scorching III: Significantly increases the damage dealt by Incendio.
- Unforgivable I: Increases the damage dealt on cursed targets.
- Unforgivable II: Greatly increases the damage dealt on cursed targets.
- Unforgivable III: Significantly increases the damage dealt on cursed targets.
- Venom I: Increases the damage that Venomous Tentacula causes.
- Venom II: Greatly increases the damage that Venomous Tentacula causes.
- Venom III: Significantly increases the damage that Venomous Tentacula causes.
Related: How to transmog gear in Hogwarts Legacy


Published: Feb 12, 2023 10:01 am