Escape First Alchemist is a magical escape room puzzle game with a weirdly enthusiastic narrator. Whether you are playing solo or as a team of up to four, you may find some of these puzzles tricky.
Don’t worry, we have every collectible and puzzle solution right here to help you out.
Table of contents
- The Entrance
- The Laboratory
- The Courtyard
- Shrink Potion
- Study
- Ship in the Case Puzzle
- Decay Potion
- Alchemical Sight Potion
- Tower of Elements
- Steam Room
- Constellation Room and Puzzle
- Steam Room Puzzle
- The Night And Day Room
- Lift Potion
- Wind, Earth, Water, Fire Gem Puzzle
- Orange Banner – Wind Gem
- Green Banner – Earth Gem
- Blue Banner – Water Gem
- Red Banner – Fire Gem
- Time Potion
- Force Potion
- The Cellar
- Obelisk Puzzle
- Telescope Puzzle
- Orange Star
- Green Star
- Pink Star
- Purple Star
- Pale Blue
- Charged Gemstone Puzzles
- Charged Fire Gem
- Charged Earth Gem
- Charged Wind Gem
- Charged Water Gem
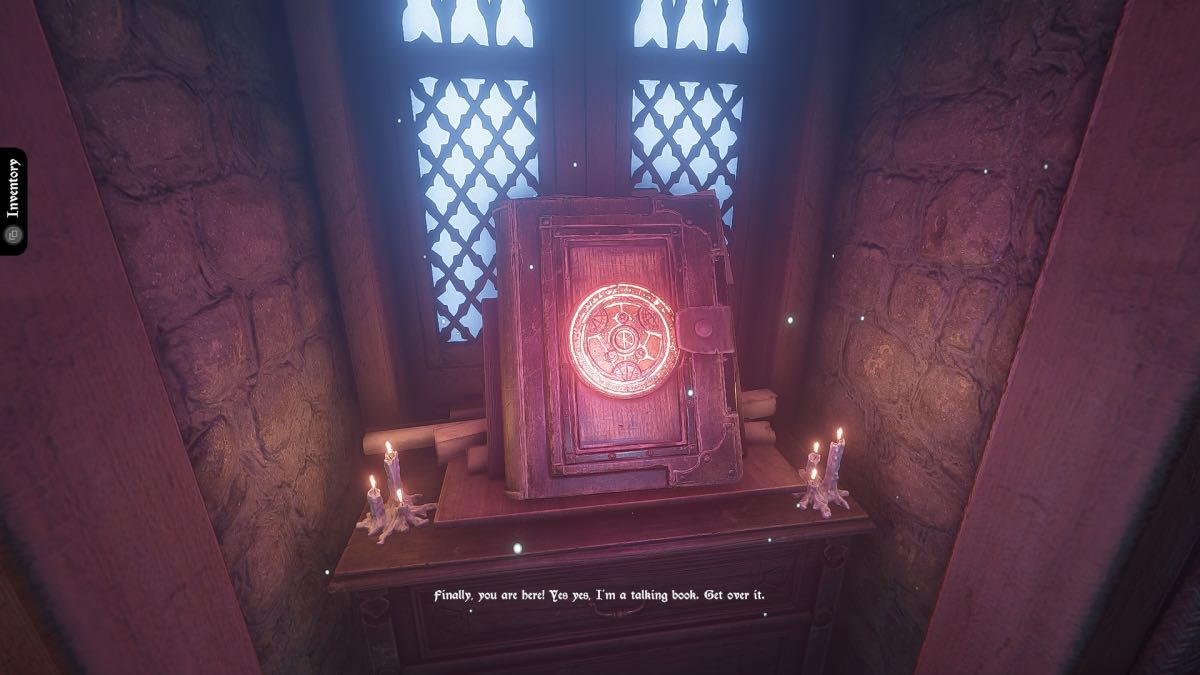
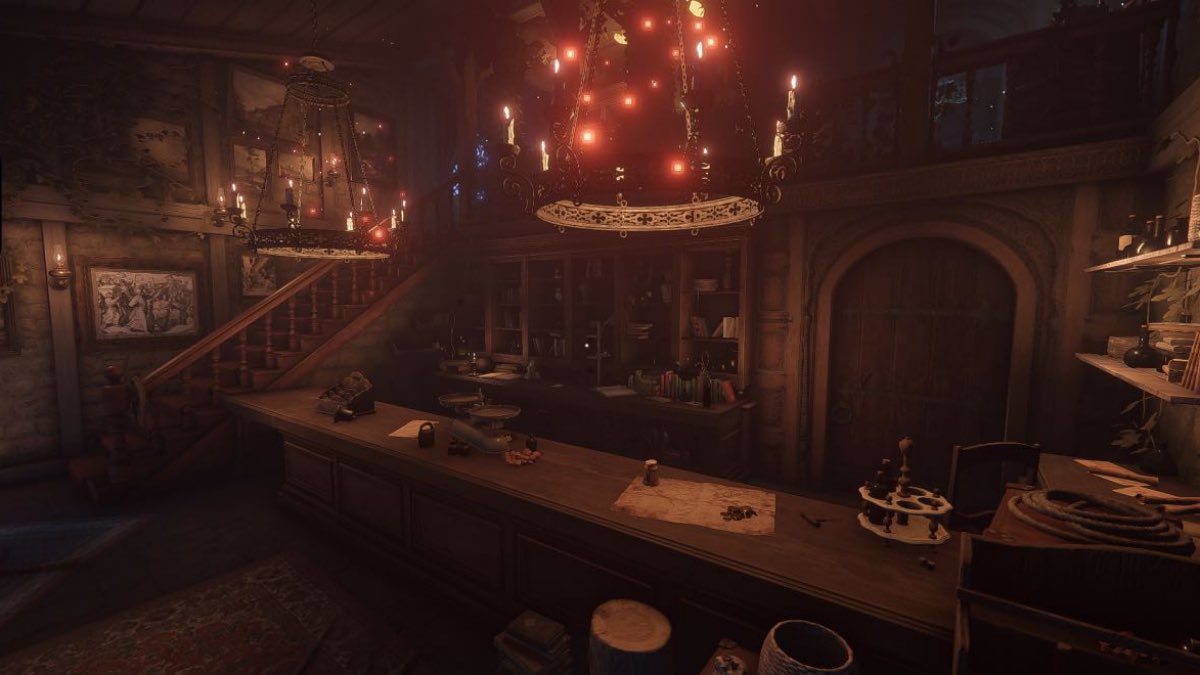
The Entrance
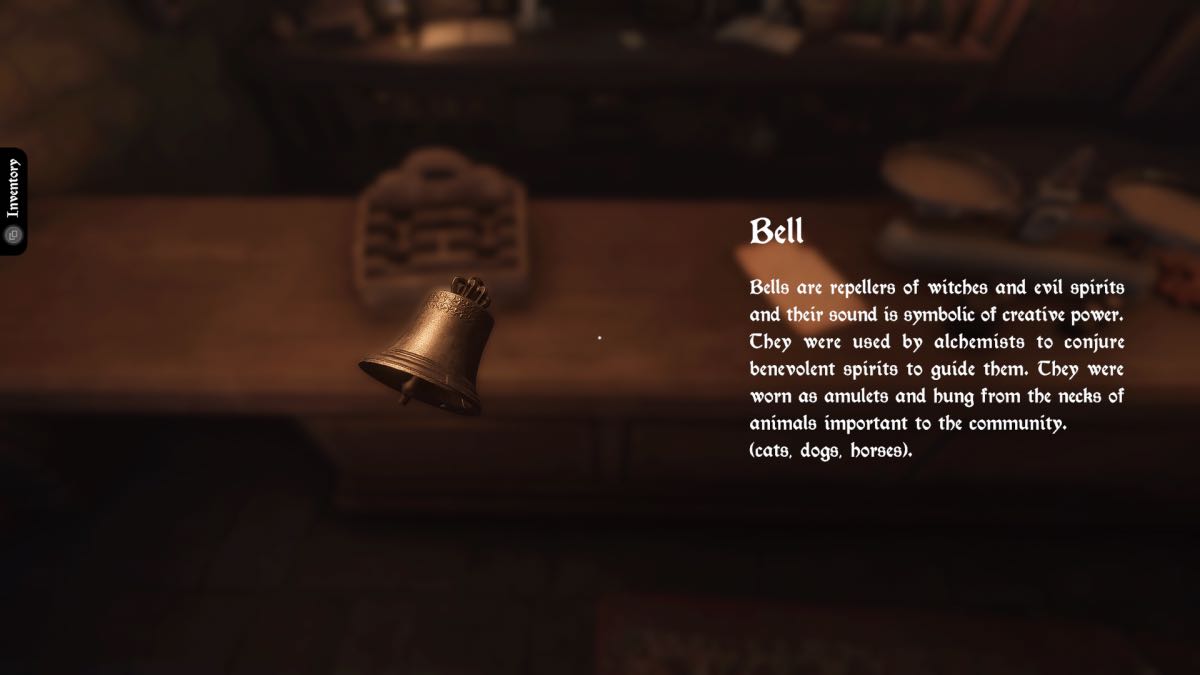
To start, go to the book in the second window area. This is your narrator for the entire game, so get used to his upbeat game show host vibe. Check behind the bar in this area and find a Letter and a Bell. The bar has a hinged part on the left that you can lift, and it shows a pattern underneath it. This is important for later on.
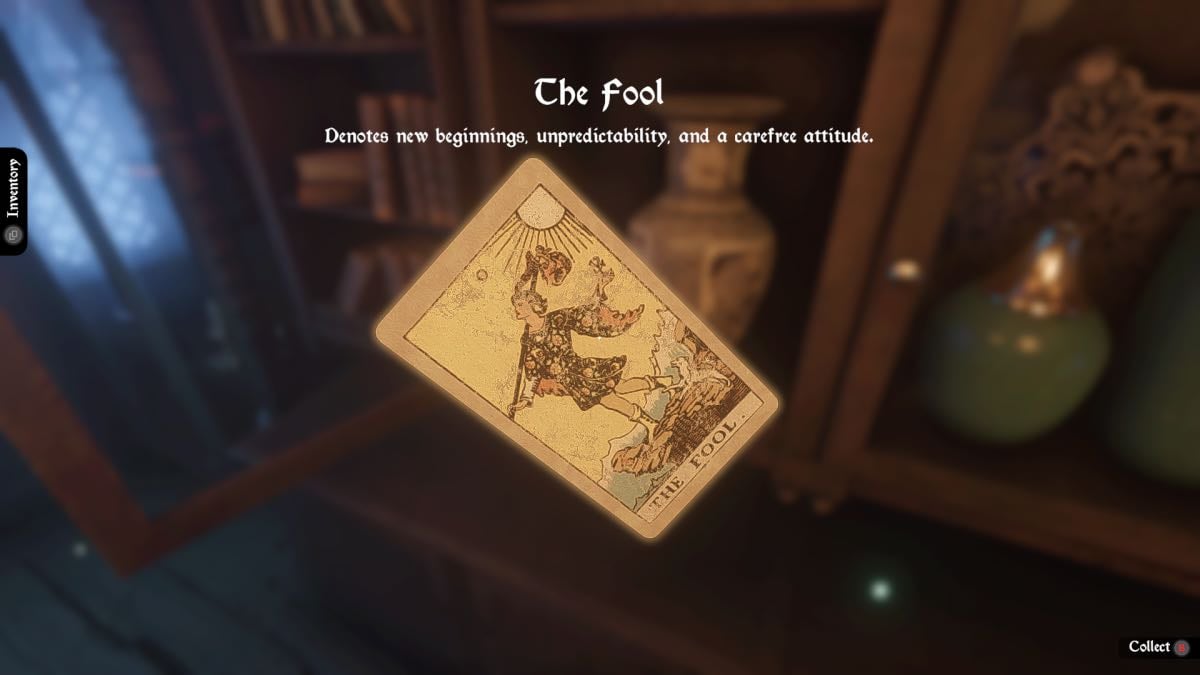
Look behind the bar to find your first tarot card: The Sun. The large door behind the bar is locked, so head upstairs to the glass cabinets. Open the cabinets to find another tarot card: The Fool. Open the next cabinet door to find two vases. Remove these (just drop them on the floor) to find a shape behind them.
By combining the numbers here with the corresponding numbers on the bar door downstairs, you will find the clue spells out ELEMENT. Pick up another tarot card from the desk: Judgement. There is a combination lock on the door on this landing. Enter the password ELEMENT and go through.
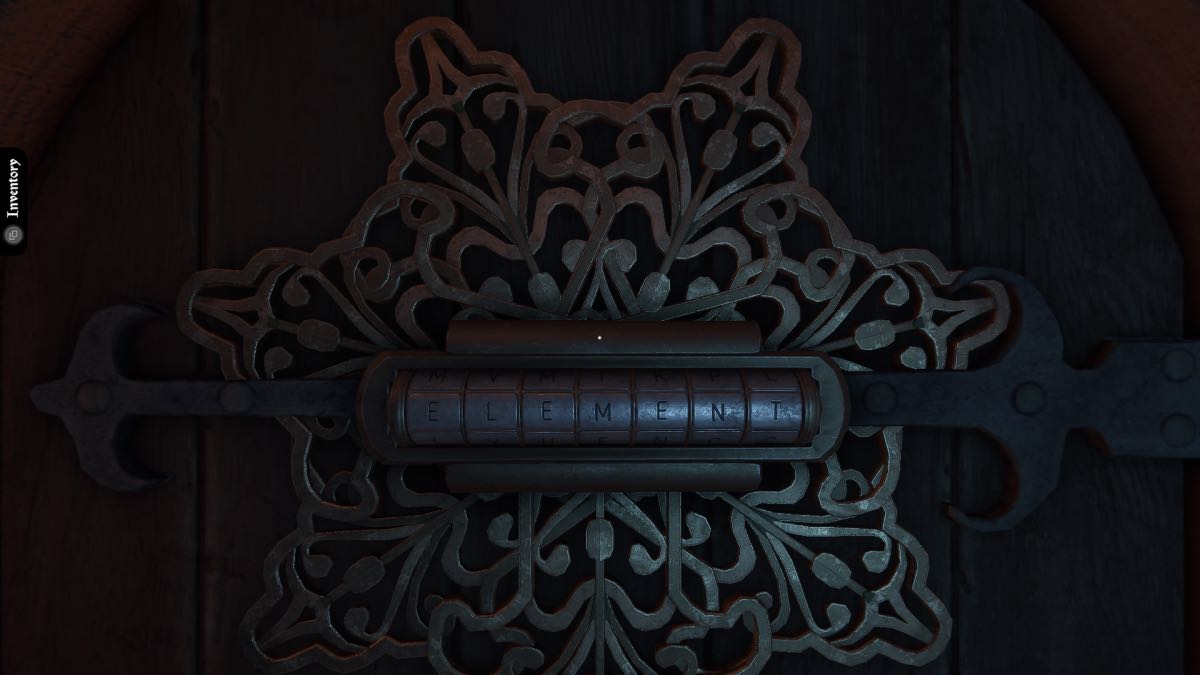
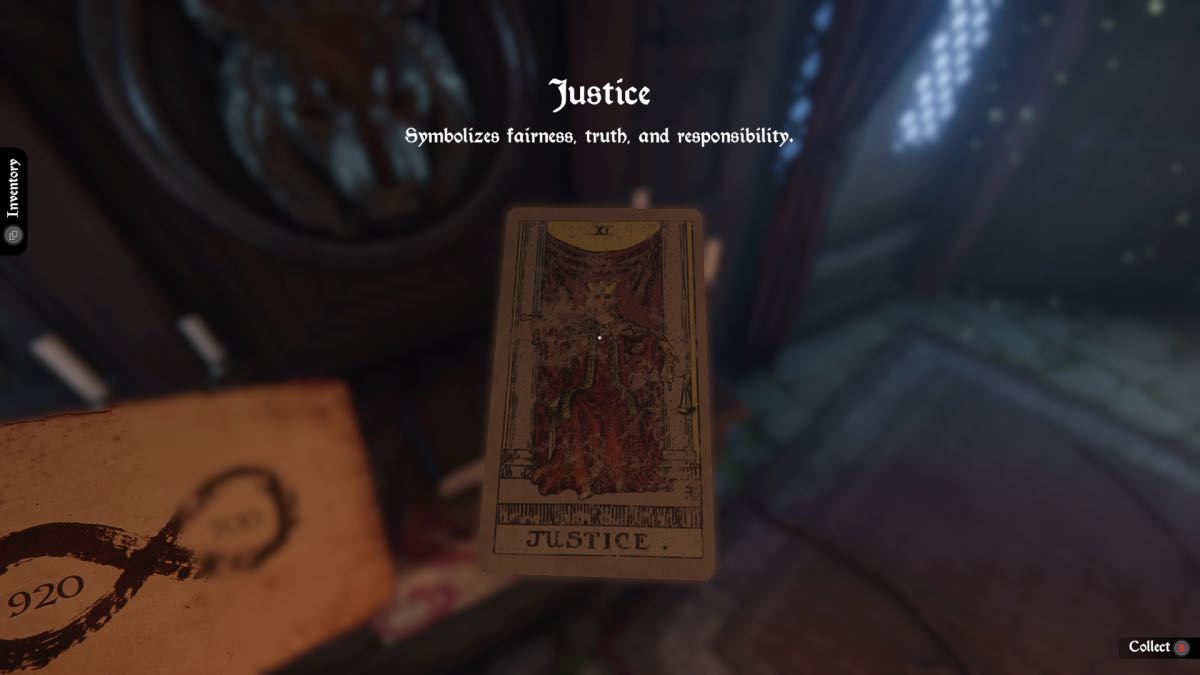
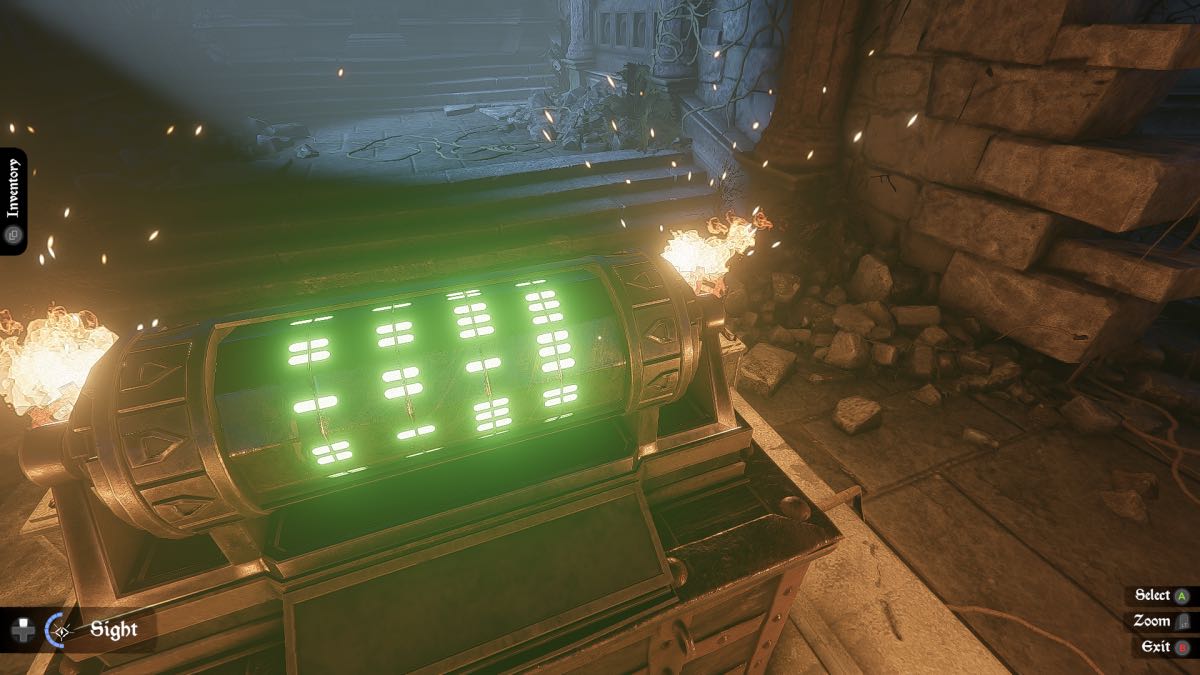
Check the set of drawers on the right and take your next tarot card: Justice. There is a piece of paper nearby with another clue on it: an infinity symbol with the numbers 920 700. There is also a horn on the bookshelf to examine.
Go back downstairs to the first window with the pink device and rotate the clock hands until the first shows 9:20 and the second shows 7:00. Take the cube and put it in your inventory for safekeeping. Head upstairs and put the cube on the door. When it is unlocked, take the cube back and go through the door.

The Laboratory
Find your next tarot card by the metal containers on the left: The Lovers. Go across the room and find another: The Queen of Pentacles. Examine the letter here.

There is a recipe book and a place to brew potions in this room. Turn the page to the Light Potion page, and follow the instructions:
- Add red crystals
- Use the latch to set the intensity to two
- Add sulfur, mushroom, and chalk
- Stir the pot.
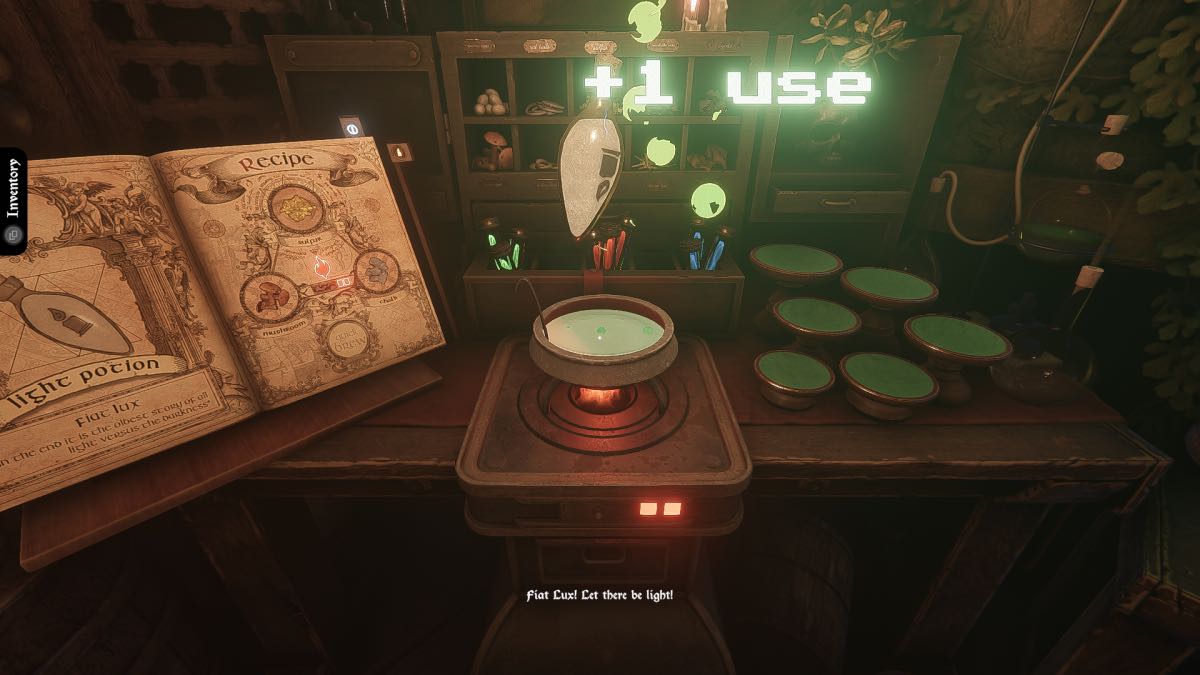
When you stir the pot, you must succeed with the skill check, or you will have to start again. Try to hit the +1 part to gain twice the amount of potion and to gain the Double Quantity achievement. Drink the Light Potion, and make a few more. Take one potion and throw it into the air, or at a friend, to get the Think Fast achievement. Go downstairs and through the door.
The Courtyard
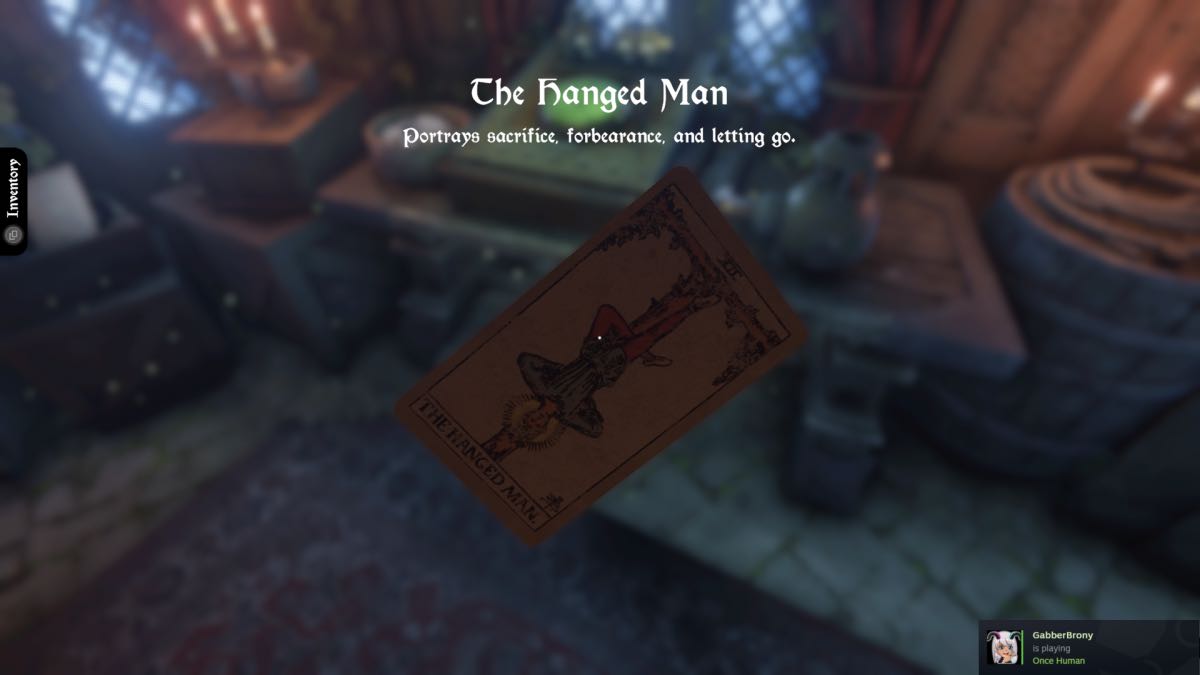
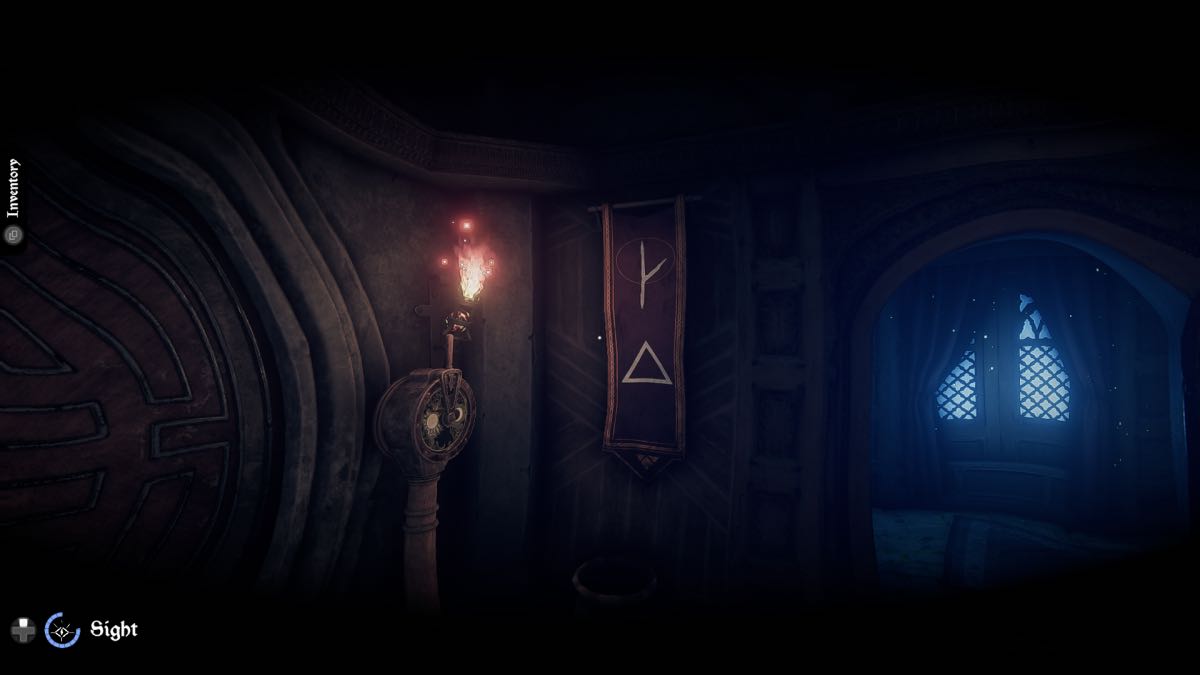
In this area, you will find a tarot card of The Hanged Man on the bench to the right. At the crates to the left there is another letter to read and a Grimoire to examine. Take note of the symbols on the orange banner in this room.
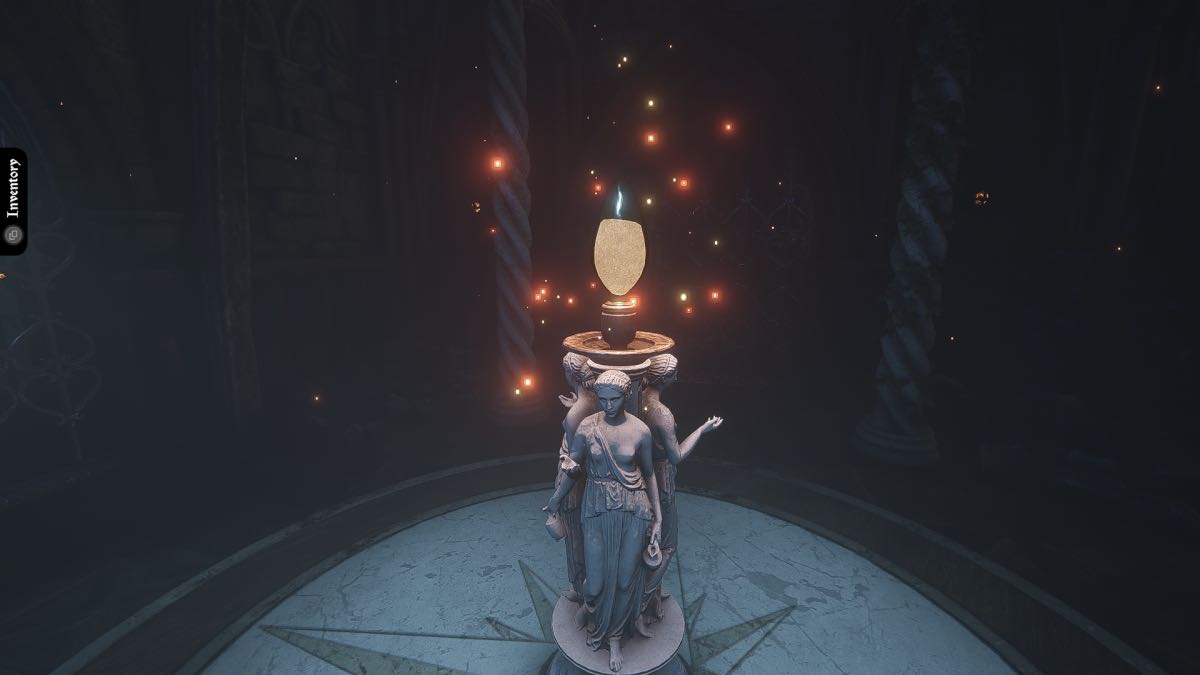
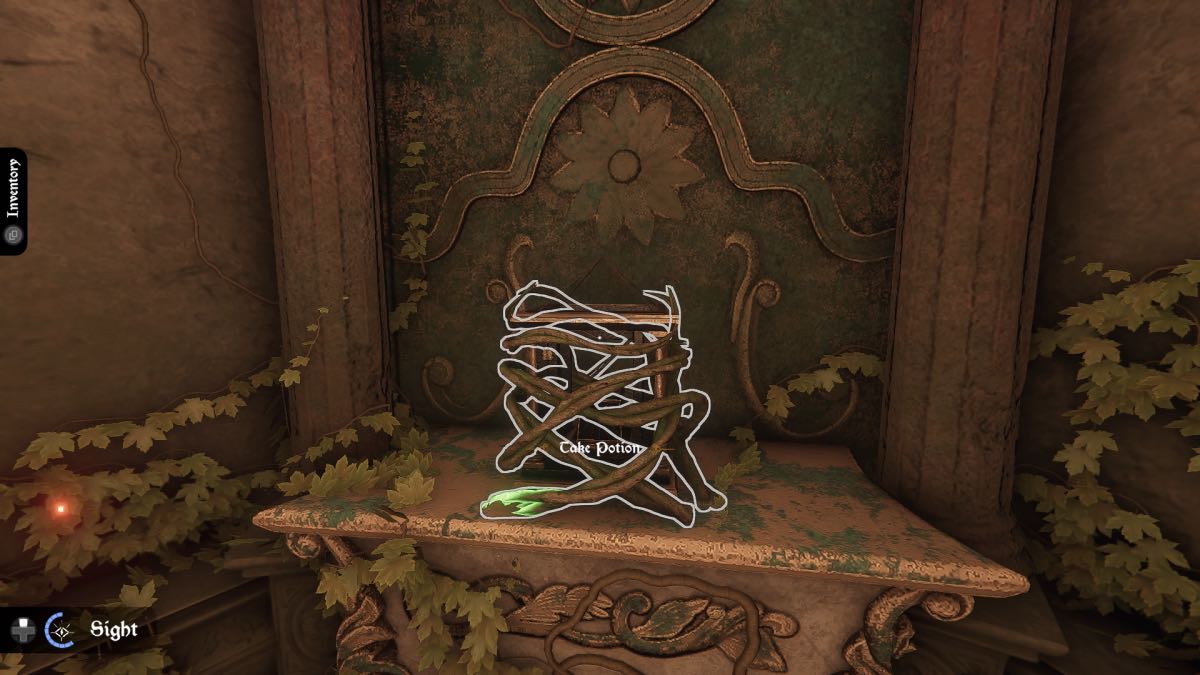
Head down into the dark area and place a Light Potion on the pedestal in the center. The area will light up. Go to the King and Queen statues, and get the Emperor tarot card from the floor.
Go to the left alcove in this area and place the cube on the panel. Take the cube back and take the honeycomb. Go back to the laboratory.
Shrink Potion
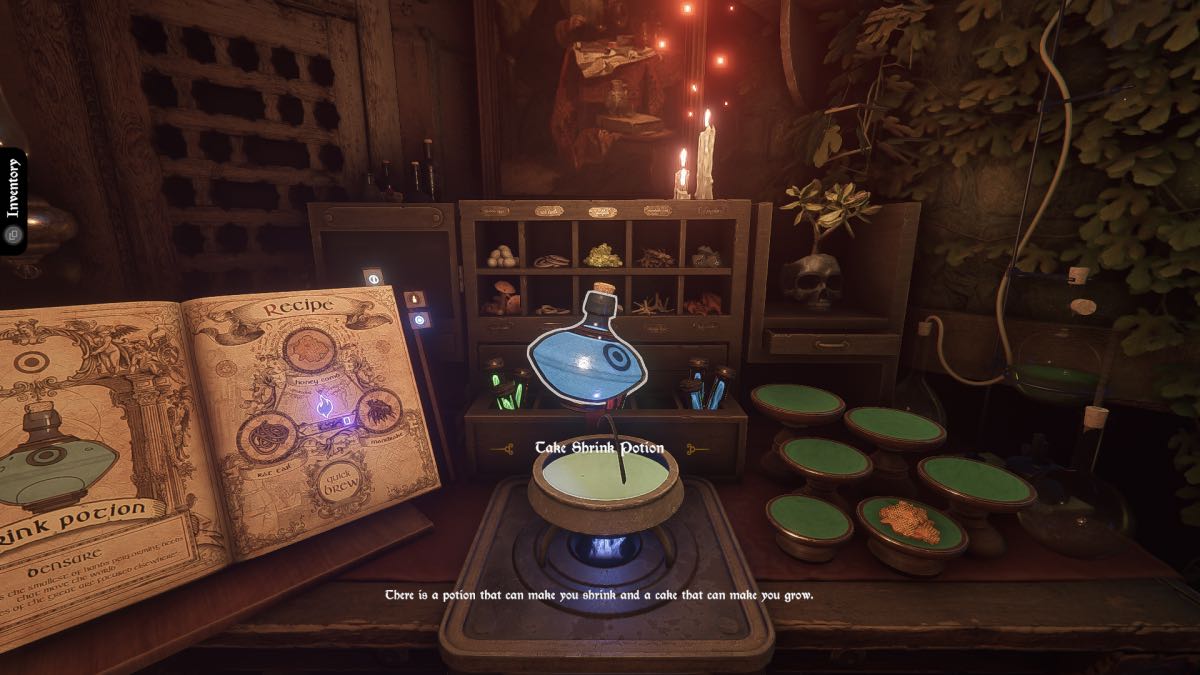
It is time to make another potion. Turn the page on your book to Shrink Potion and follow the instructions:
- Add blue crystals.
- Use the latch to set the intensity to one.
- Add honeycomb, rat tail, and mandrake.
- Stir the pot.
Take the potion and drink it before making a few more with the Quick Brew button. Head back down to the Courtyard and go to the left to find a tunnel. Use a Shrink Potion to fit through the tunnel.
Study
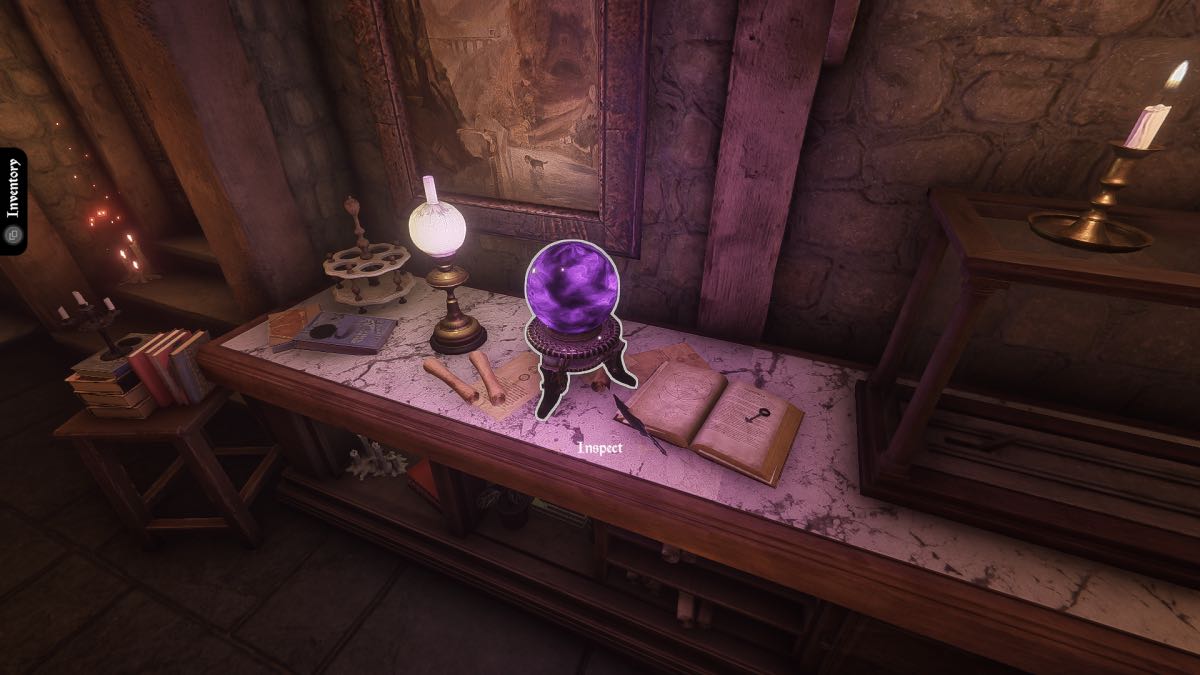
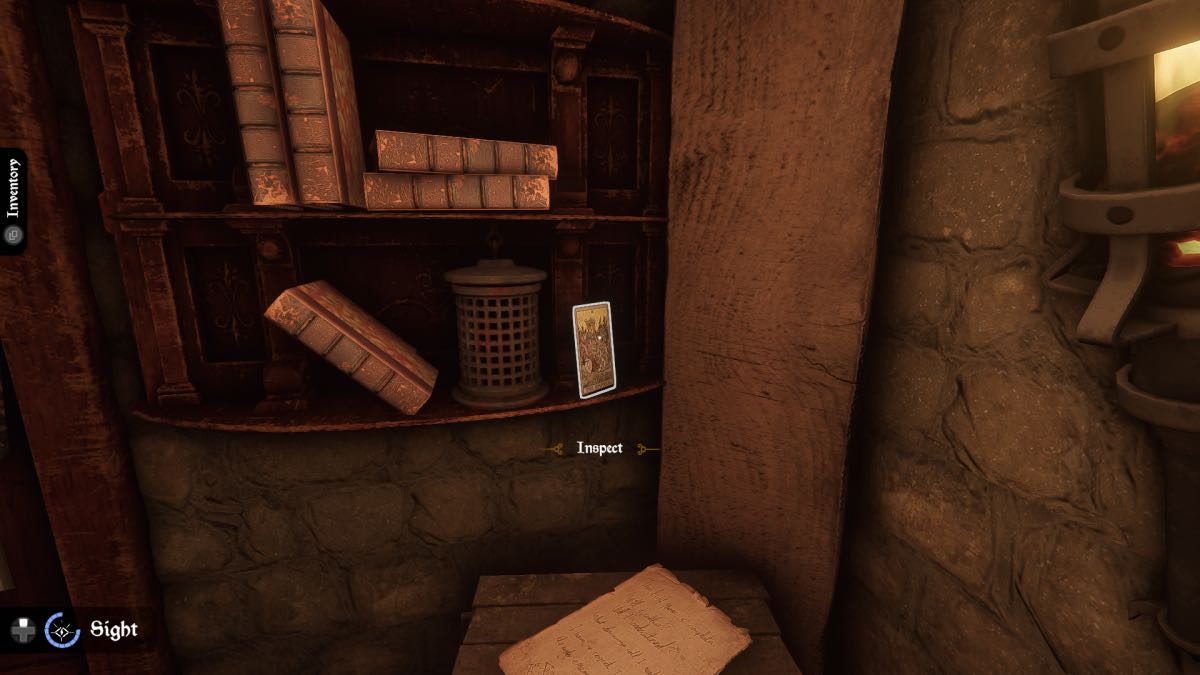
Through the tunnel is the study area. Here, you will find a mystical sphere on the bench to the right. You will also find a Tower tarot card on the crate nearby. On a barrel in the corner of the room is an athame to examine.
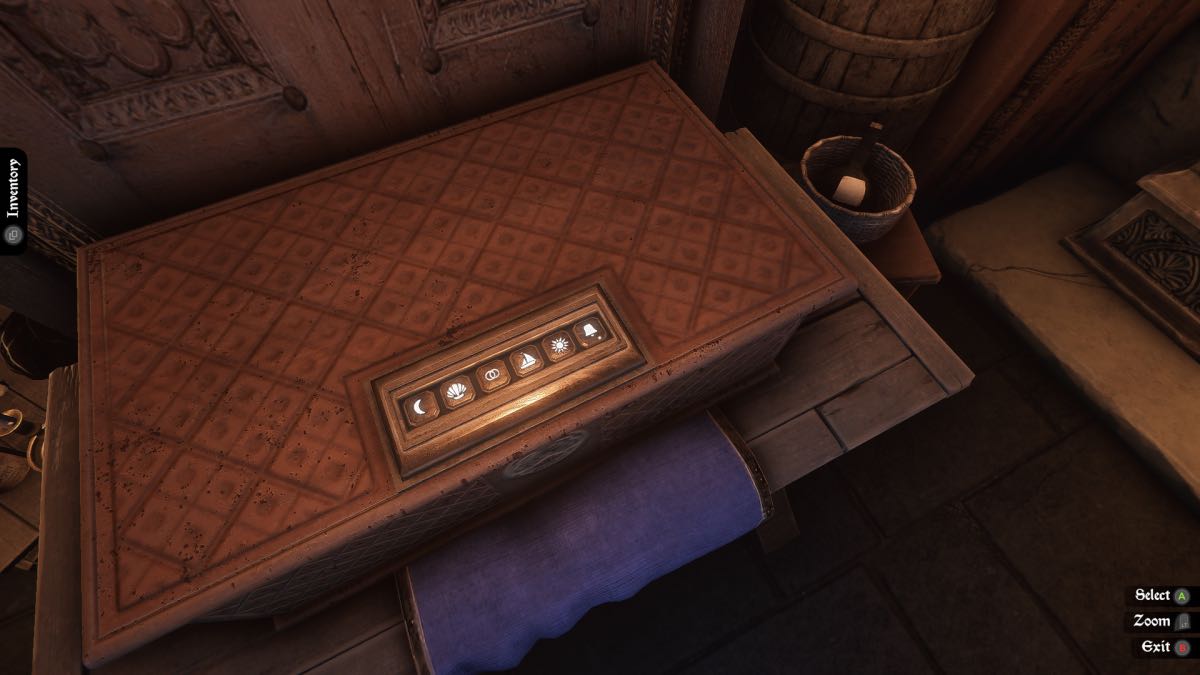
Ship in the Case Puzzle

Check out the ship in the glass case. Turn the handle and the cupboard will open underneath. Take the paper and read the riddle before heading to the chest opposite and pressing the buttons in order:
- Moon
- Sun
- Ship
- Shell
- Rings
- Bell
Remove the rotten vine. Unlock the door to the left so you can move freely without having to use the tunnel. Go back up to the Laboratory.
Decay Potion
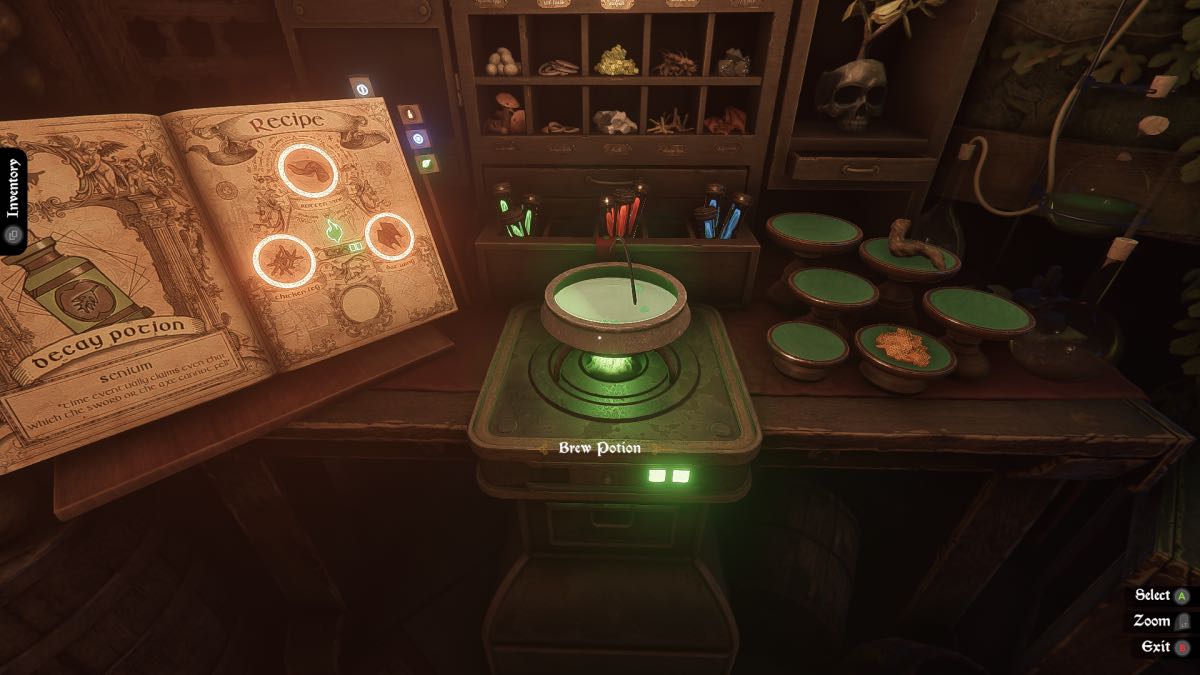
It’s potion time once again so open the book up to the Decay Potion tab and start crafting.
- Add green crystals.
- Use the latch to set intensity to two.
- Add rotten vine, chicken leg and bat wing.
- Stir the pot.
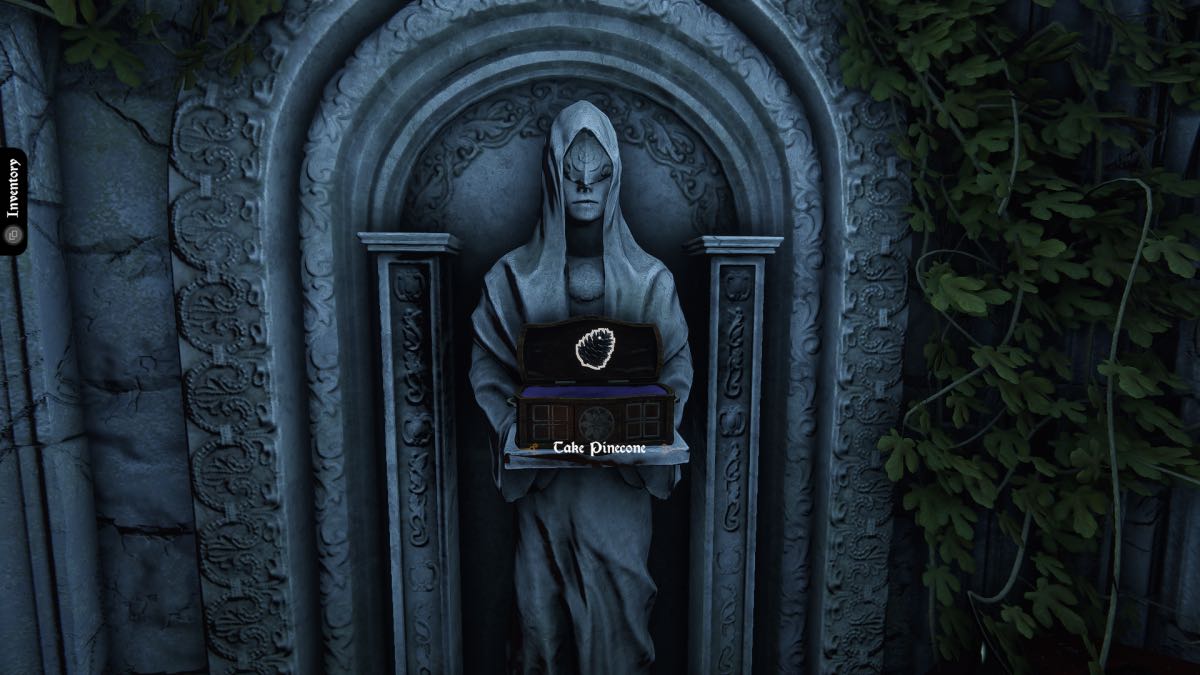
Take and drink the Decay Potion. Make a few more potions using the Quick Brew button before going back to the Courtyard. Use one of the Decay Potions on the twisted roots and vines to the right. Use the cube on the panel, remove the cube and take the pinecone. Go back to the Laboratory.
Alchemical Sight Potion
There is another potion recipe in your book, so turn the page to the Alchemical Potion tab and follow the instructions:
- Add blue crystals.
- Use the latch to set the intensity to three.
- Add pinecone, bat wing, and iguana egg.
- Stir the pot.
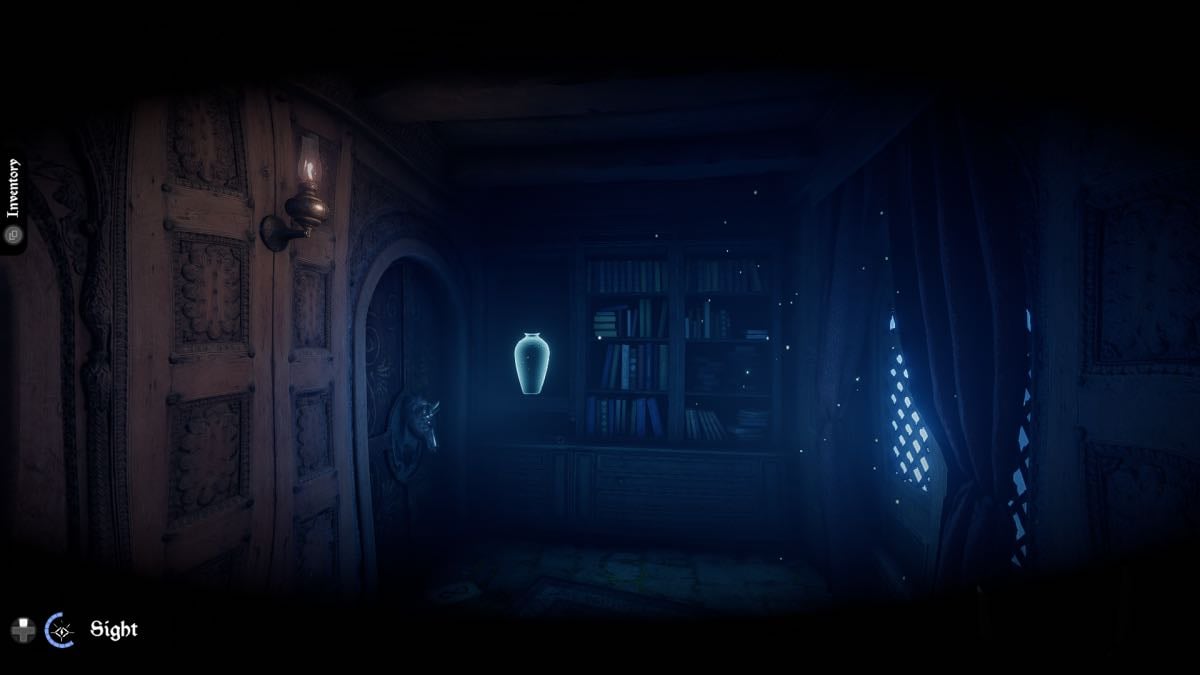
Once again, you have to be brave and drink the potion. Next, make a few more Alchemical Potions for your inventory. Head to the first upstairs corridor area, where you found the infinity symbol clue and the horn on the bookshelf.
Use the Alchemical Sight and find the two glowing places here. Reveal them to find a green banner with symbols, and a vase. Pick up the pot and throw it to find a key inside. Head to the Study.
In the Study, use your Alchemical Sight to reveal a blue banner with more symbols. Head to the Laboratory and use the key you found on the door in the back and go upstairs.

Tower of Elements
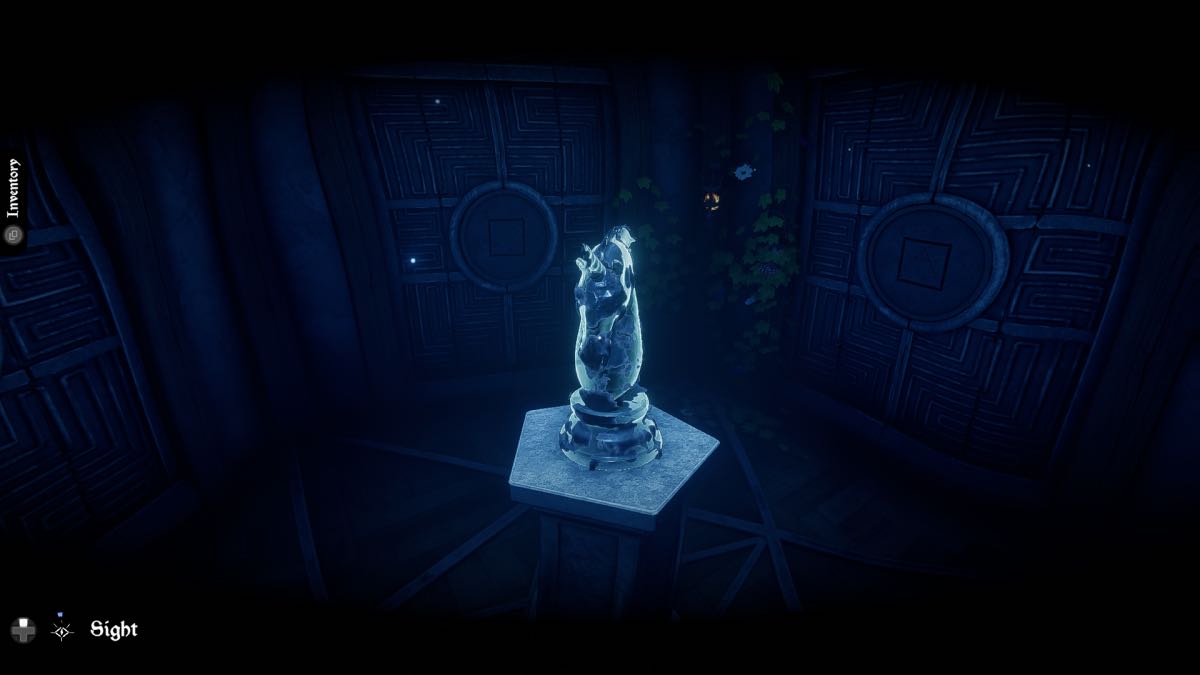
Use your Alchemical Sight here to find a unicorn statue. Take the charged horn and head back to the upstairs corridor. Use the charged horn on the door, take the horn back and enter.
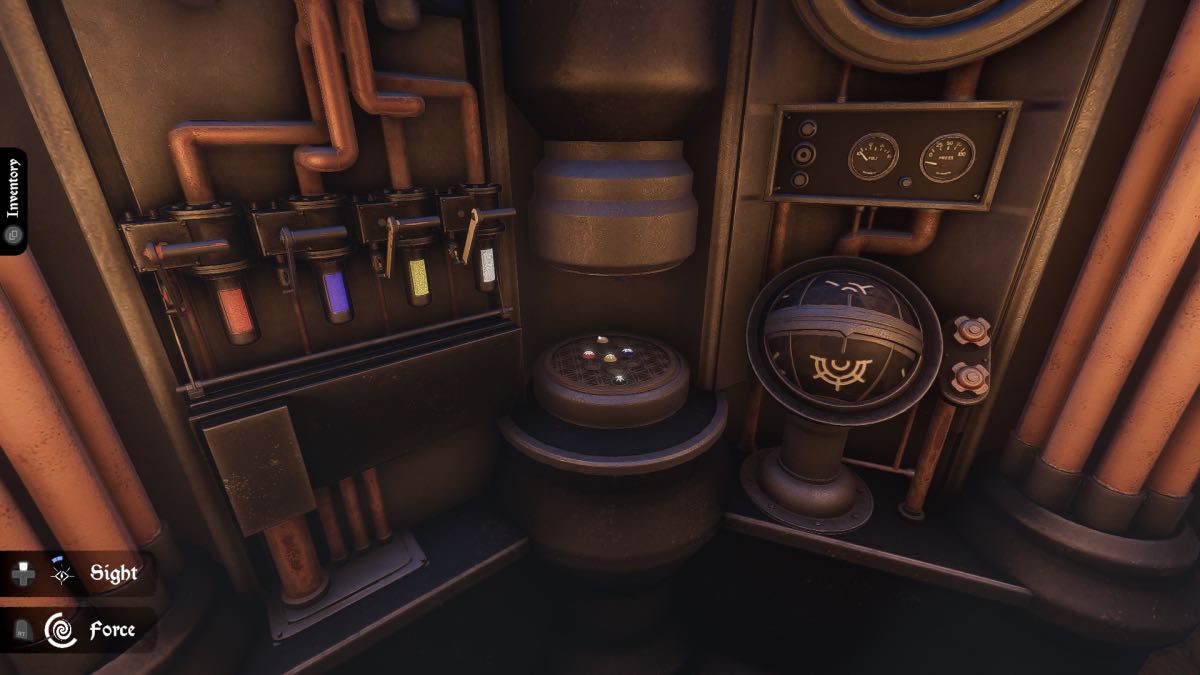
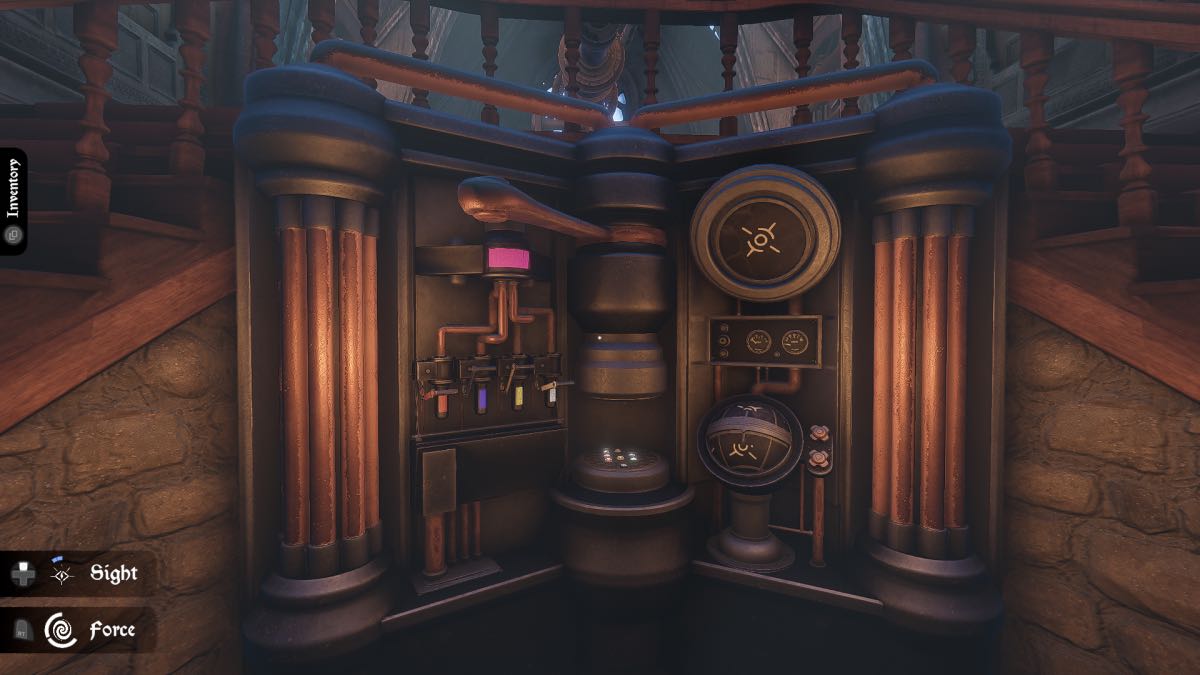
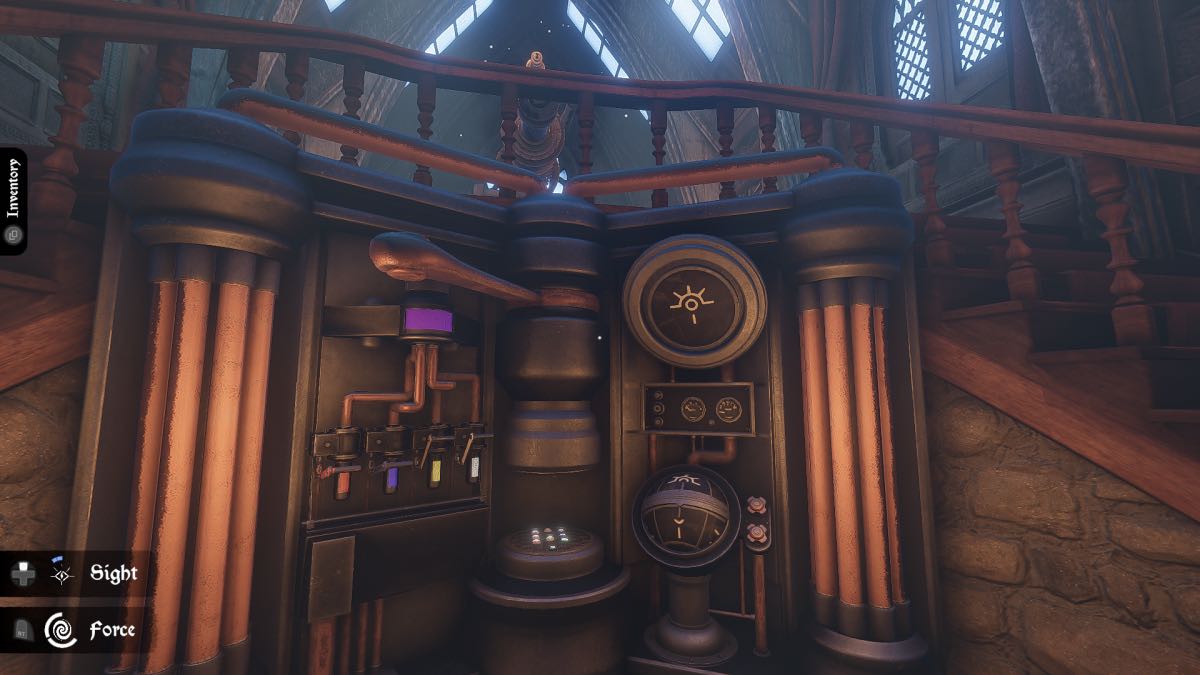
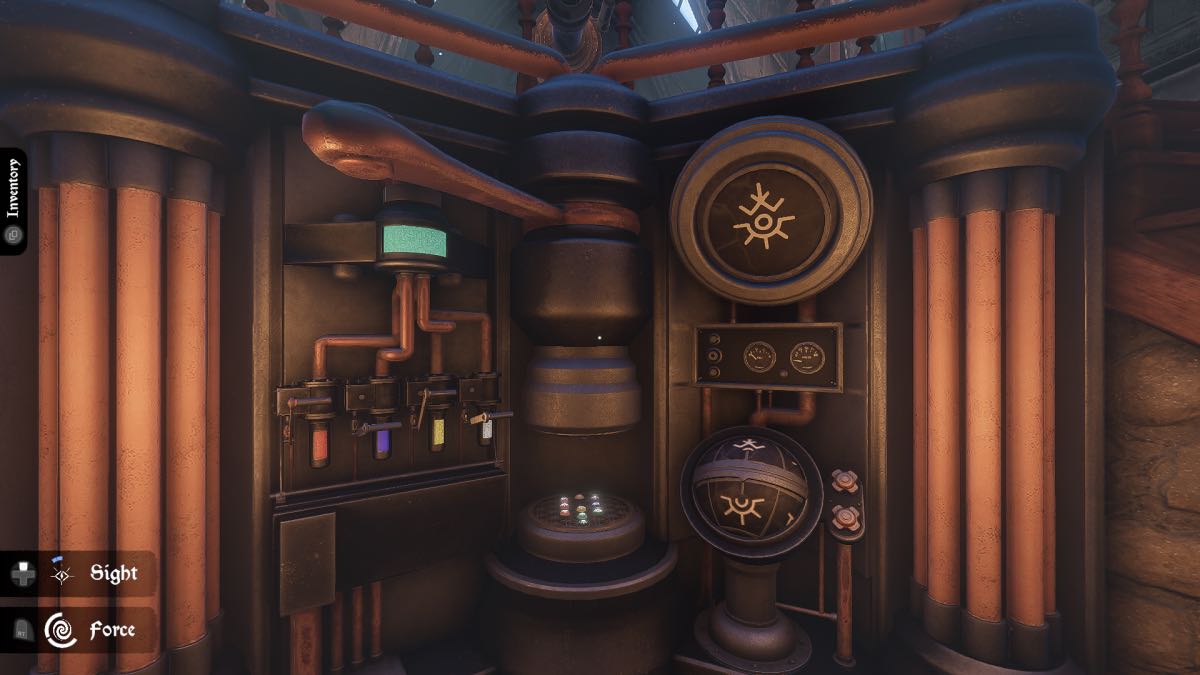
Steam Room
Use the Alchemical Sight to find a red banner with symbols and another cube panel. Use the cube to unlock and go through to the Constellation Room.
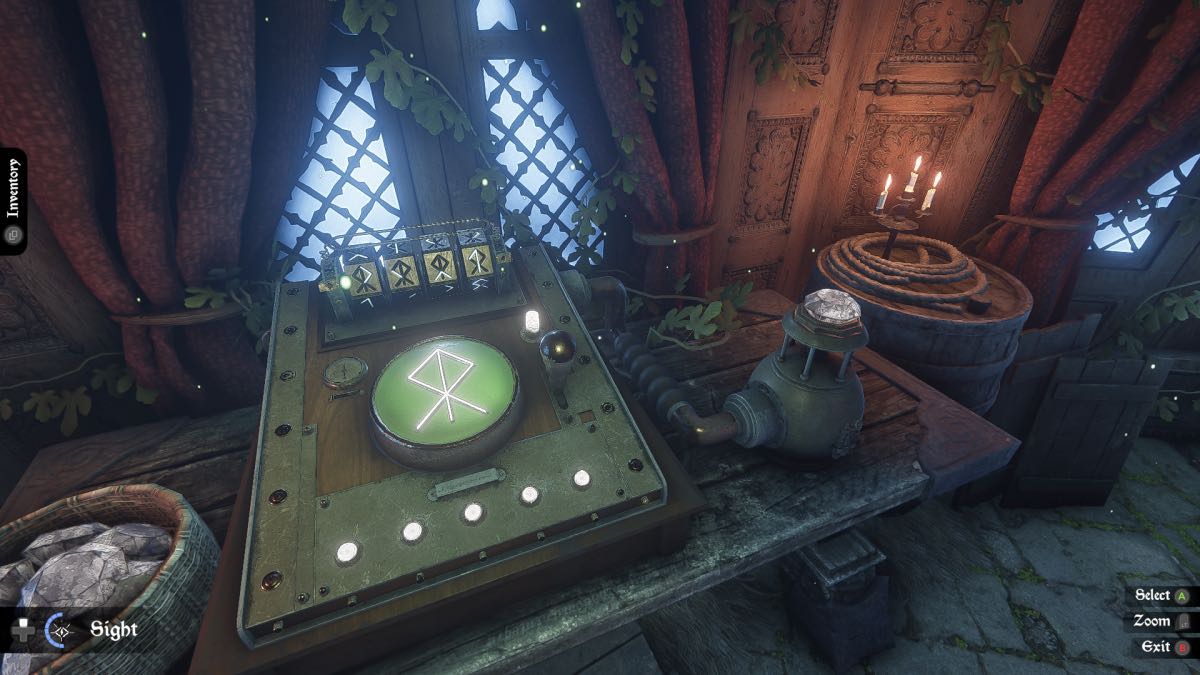
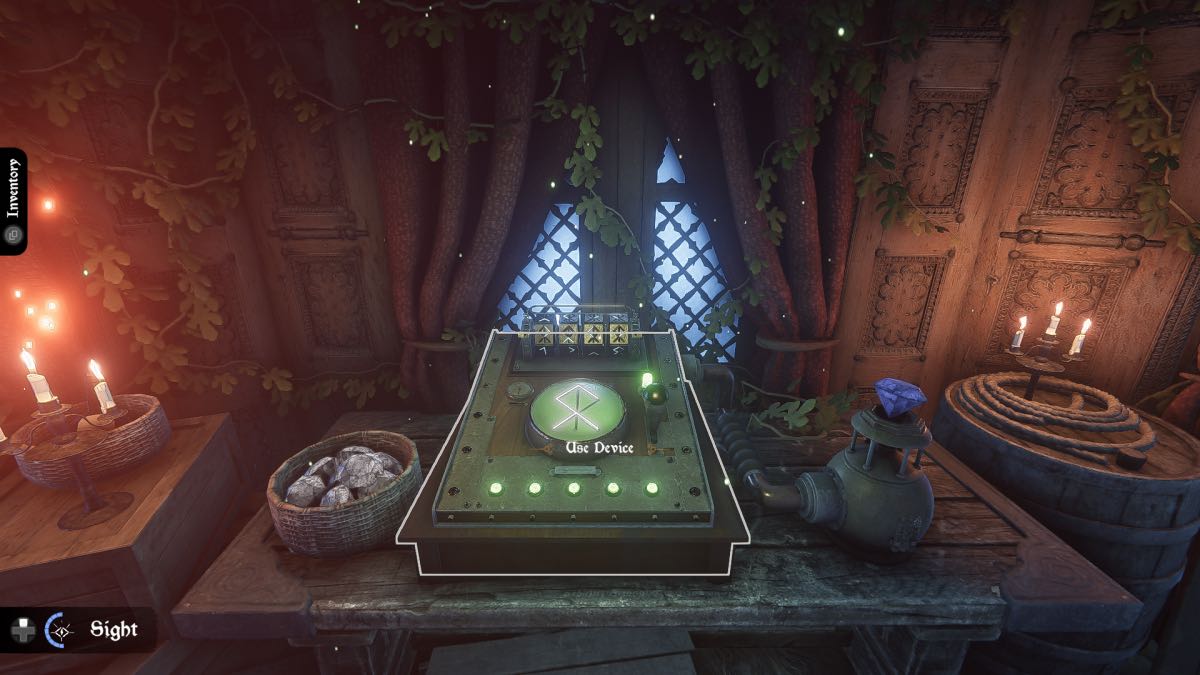
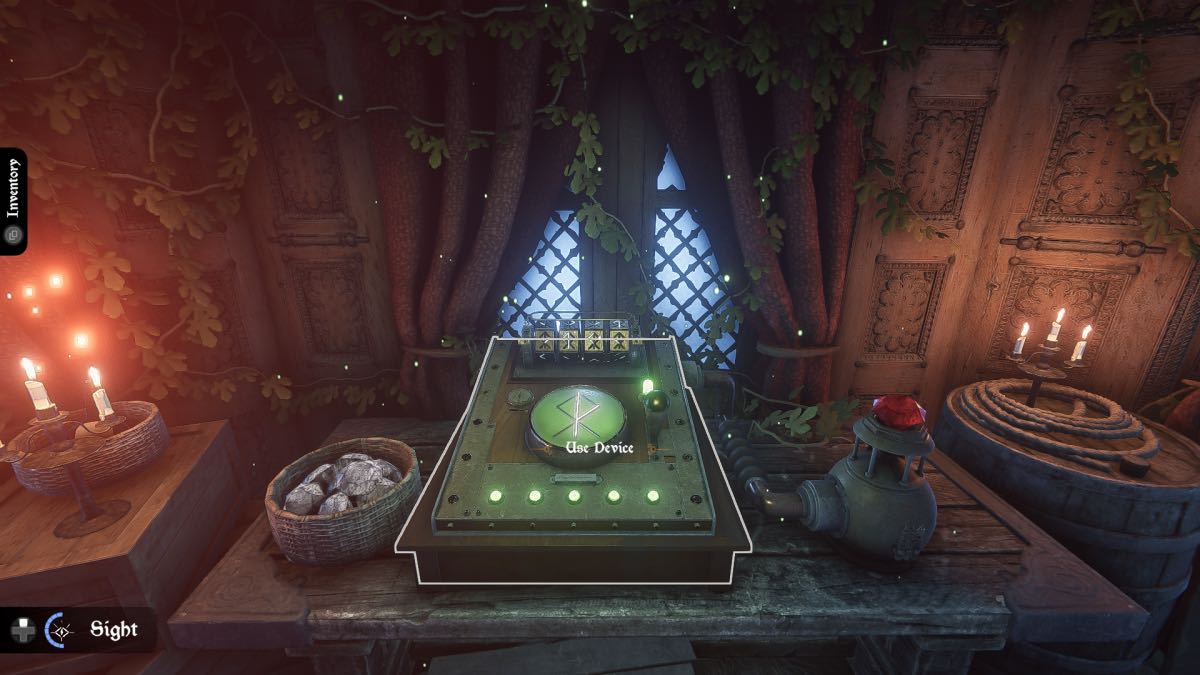
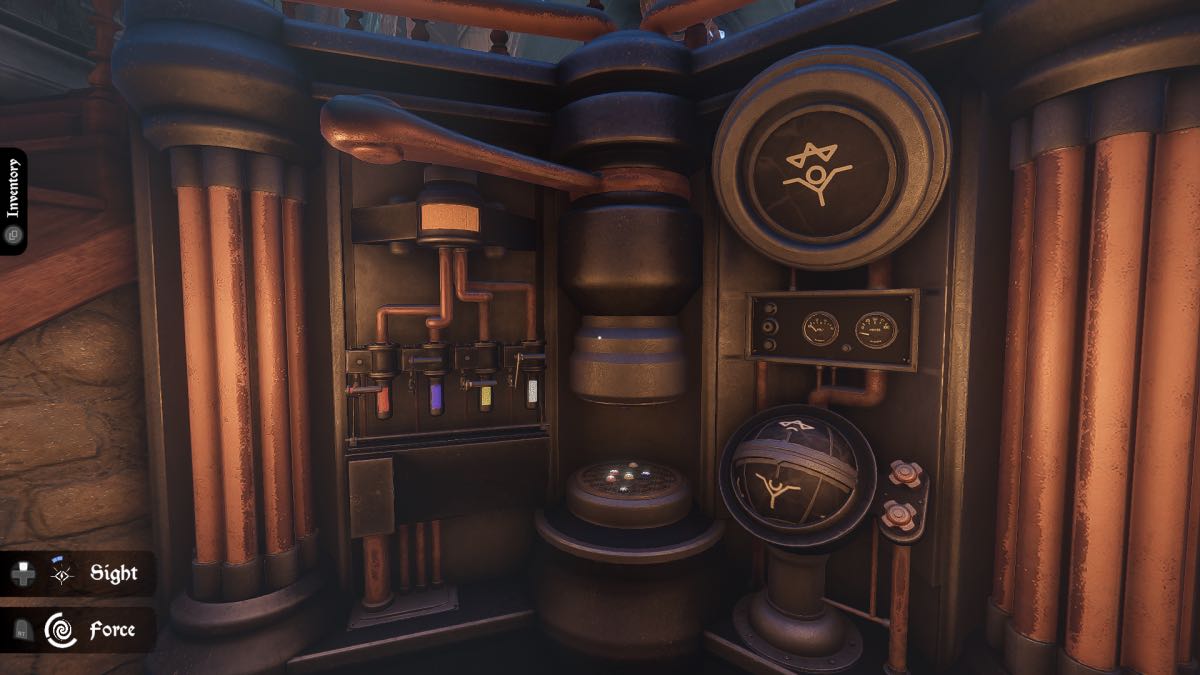
Constellation Room and Puzzle
There is a Talisman to examine on the table to the right, a letter on the crate nearby and an Empress tarot card on the shelves.
Open the curtain and then check out the machine with the dial. This puzzle requires you to press the buttons in the order that the constellations appear above. Imagine the dial as a clock face and press them in this order:
- 2:00
- 8:00
- 10:00
- 12:00
- 3:00
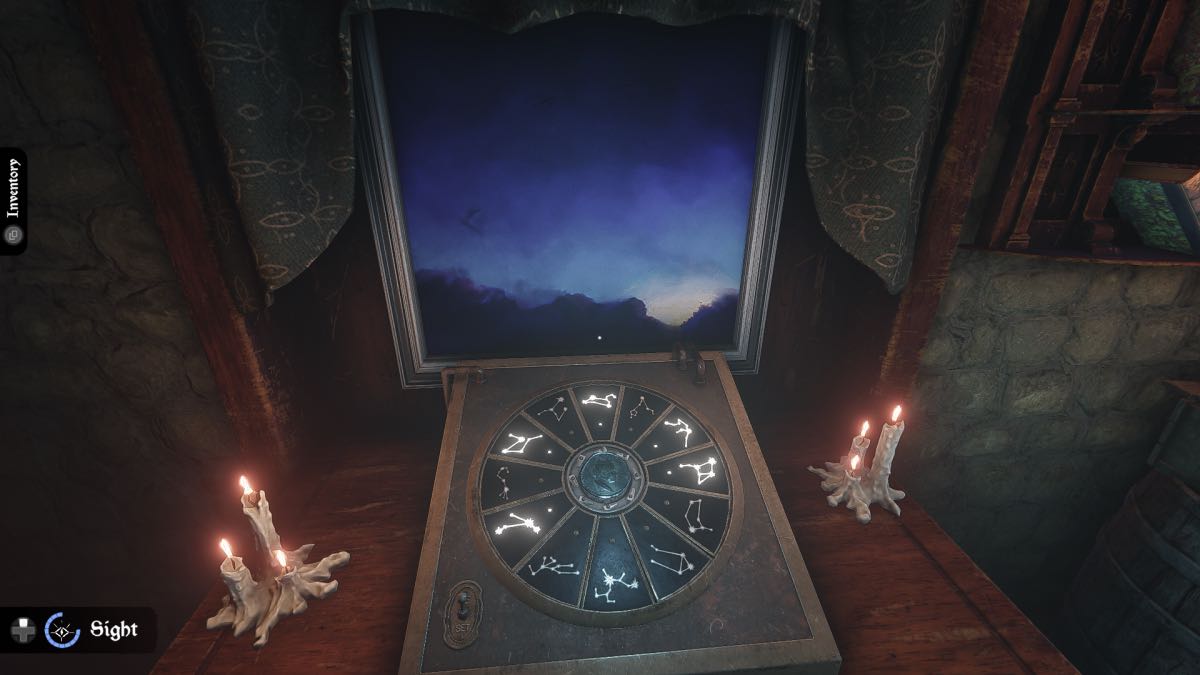
Grab the Silver Coin and go back to the Steam Room.
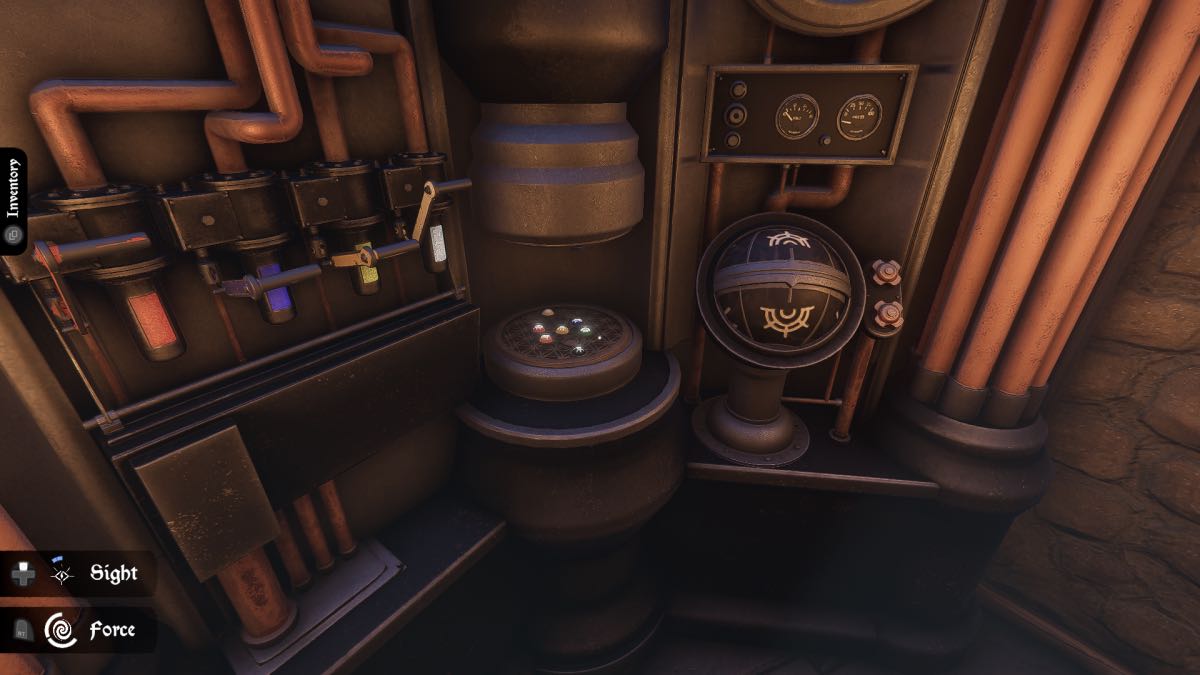
Steam Room Puzzle
Look at the machine with the steam coming from it. This puzzle has three parts, each one requiring you to move levers to stop the steam leaking. The lever you use depends on where the steam is coming from, and the steam jets are generated randomly for each player. The solution stays the same, however:
- Bottom left steam jet: Lever 1
- Top left steam jet: Lever 2
- Top right steam jet: Lever 3
- Bottom right steam jet: Lever 4

Keep using the correct levers until the gauge goes up to six and triggers part two. For part two, the gauge has to reach 60, and the right lever depends on the color of the lights:
- Green: Lever 1
- Blue: Lever 2
- Yellow: Lever 3
- Red: Lever 4
Finally, the third stage requires you to use your Alchemical Sight and find the illusion on the panel to the left. Turn each lever a number of times in order:
- 1st lever x4
- 2nd lever x3
- 3rd lever x2
- 4th lever x1
This will power the Night and Day Door behind you. Pull the lever to the left and go through.
The Night And Day Room
Head all the way to the end to find a letter. Head back and up some steps to find a Magician tarot card sitting on the ledge. Use a Decay Potion on the vines to get to the cabinet and take the Sun Eye.
Leave the room and pull the lever to the right. Head back in and go to the steps halfway into the room. Use the Alchemical Sight to see the illusion and open the cabinet. Take the Moon Eye.
Go to the chest in the center of the room and spin the sections until the bars show one bar, two bars, one bar, three bars. Take the feather and go back to the upstairs corridor.
Go to the lion on the wall and add the Sun and Moon Eyes. Take the Gold Coin before going to the Laboratory.
Lift Potion
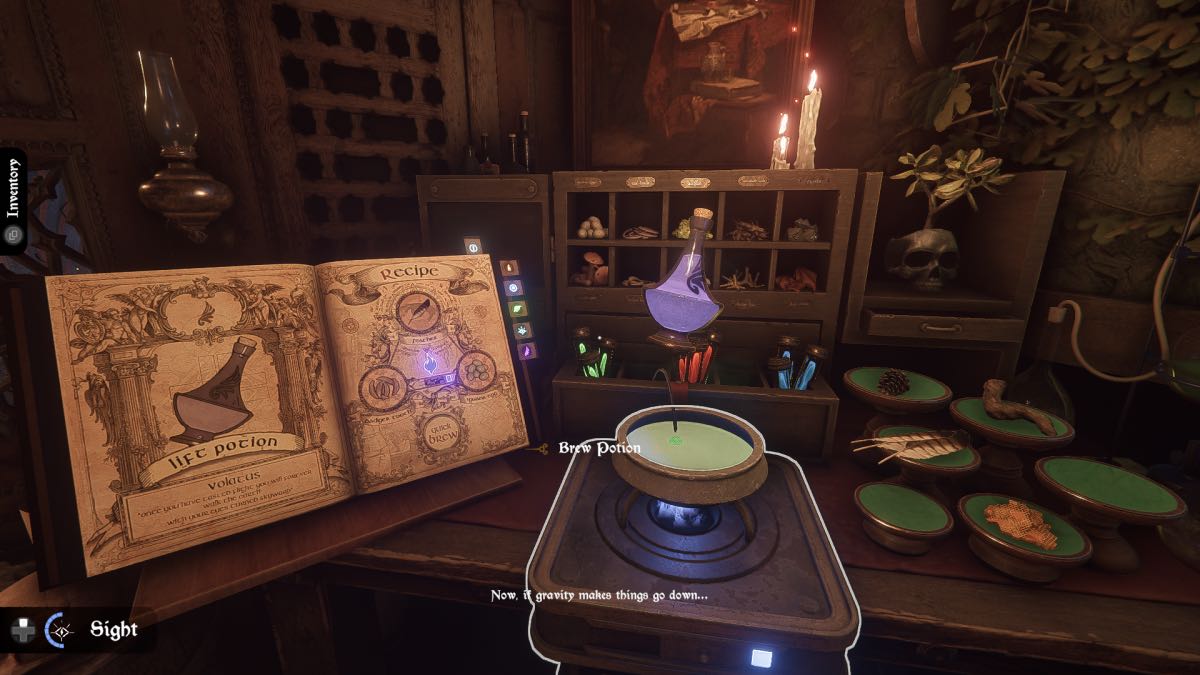
That’s right, it’s brewin’ time again. Use the instructions to brew up a Lift Potion:
- Add blue crystals.
- Use the latch to set the intensity to one.
- Add the feather, badger tooth, and iguana egg.
- Stir the pot.
Take the potion and down it before making a few more with the Quick Brew button. Head to the Courtyard.
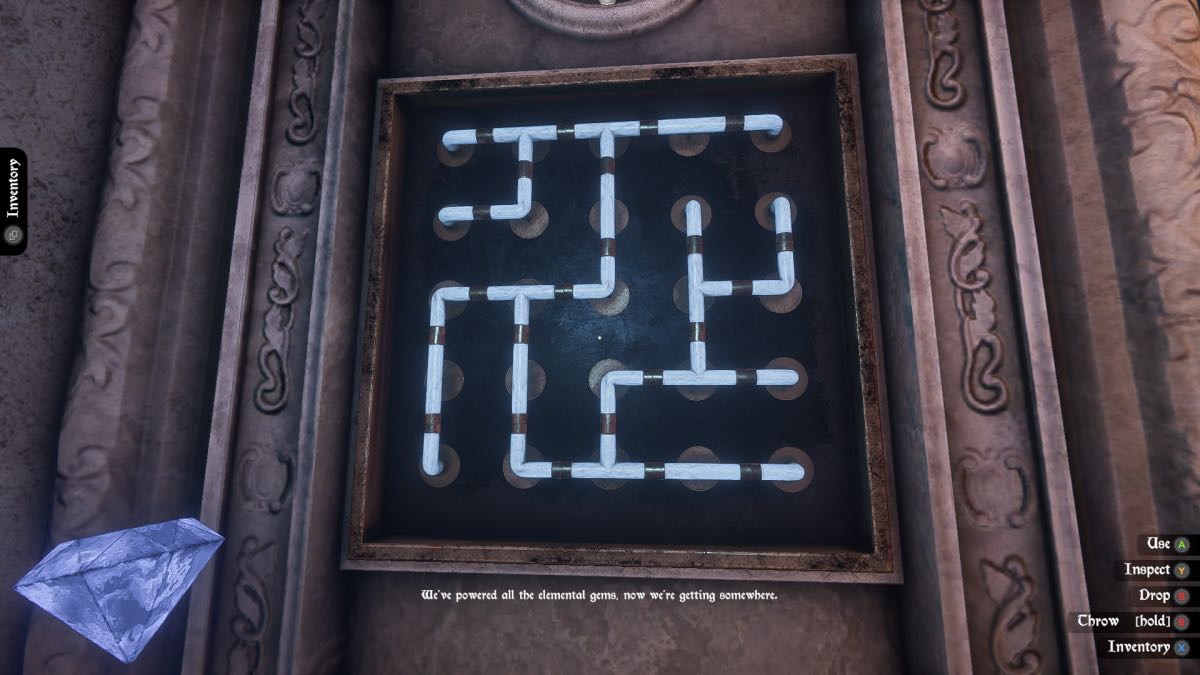
Wind, Earth, Water, Fire Gem Puzzle
Use the Shrink Potion on the hexagon to the right in the Courtyard. Pick it up and take it to the machine in the room just off the Courtyard. This is where the banner symbols come into play. You need to move the hexagon wheels until they create the top symbols you saw on each banner. Pull the lever each time to craft each gem.
Orange Banner – Wind Gem
Green Banner – Earth Gem
Blue Banner – Water Gem
Red Banner – Fire Gem
Go back down to the King and Queen statue and drop in the two coins and the unicorn horn. Take the now-charged horn. Drink a Lift Potion and get up to the platform above.
Grab the Moon tarot card from the left ledge, and put the cube in the panel. Take the cube back and then grab the Ammonite Fossil before heading back to the lab.
Time Potion
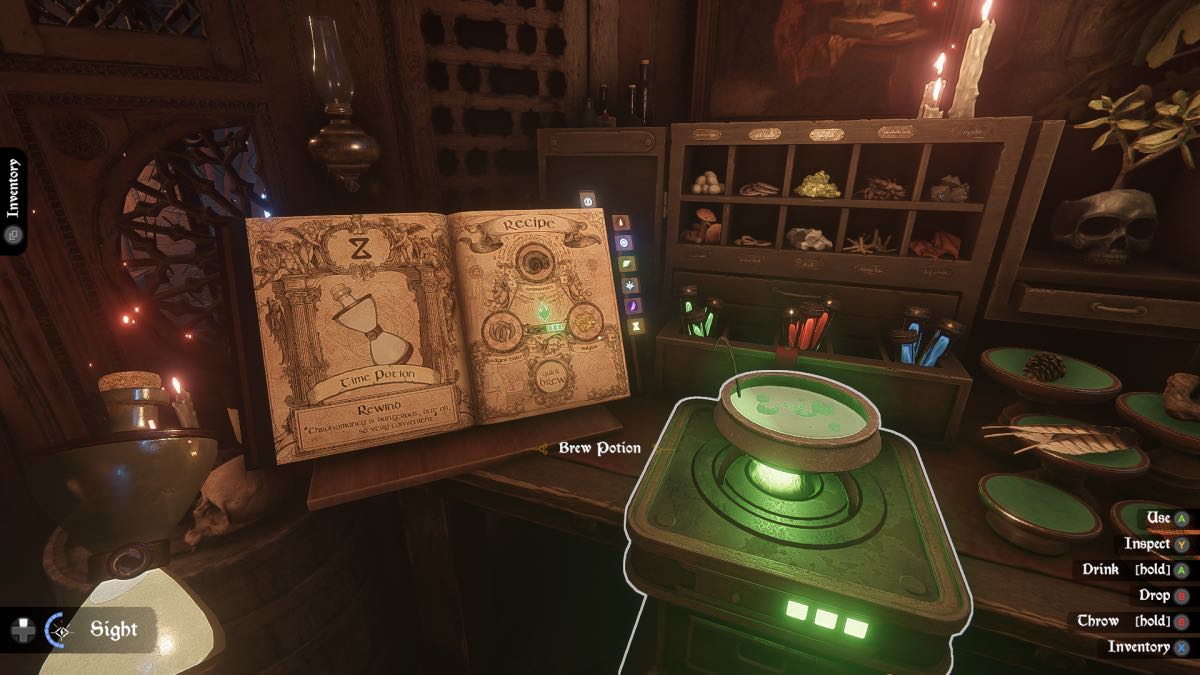
It is time to make a Time Potion, so turn to the right page in the spell book and follow the instructions as always:
- Add green crystals.
- Use the latch to change the intensity to three.
- Add the ammonite, badger tooth and the sulfur.
- Stir the pot.
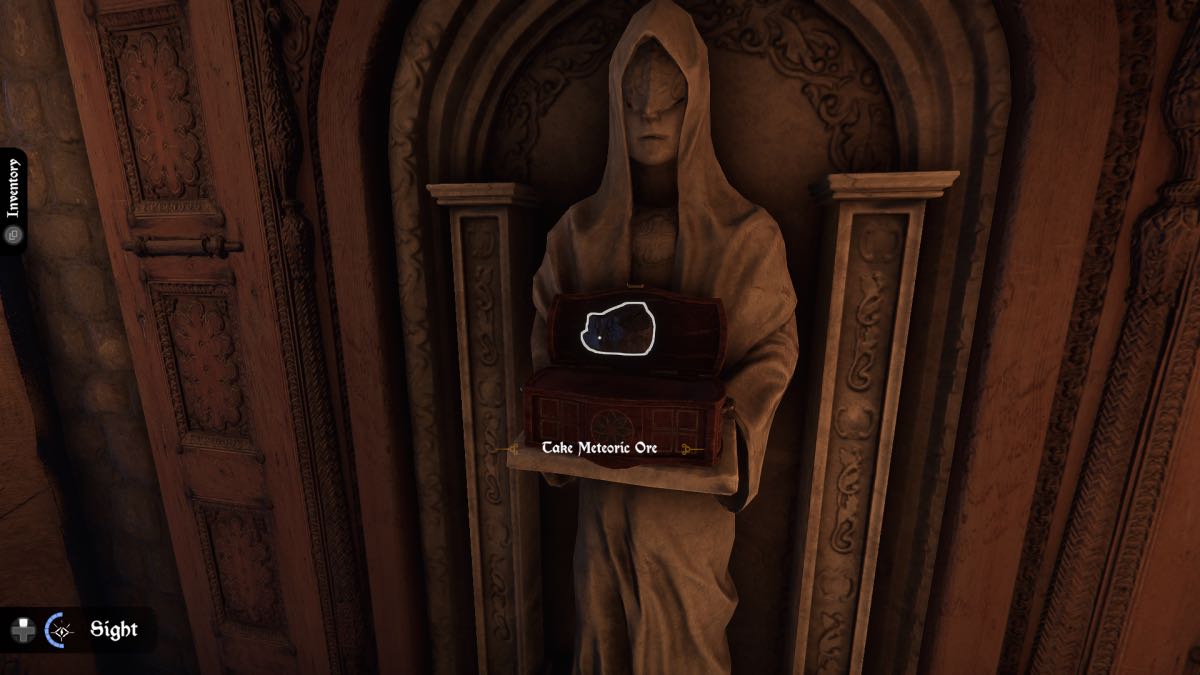
Drink one Time Potion, then make a few more for your inventory. Go to the Constellation Room. Use the Time Potion on the broken door and insert the cube. It will transform into a tetrahedron. Take it and the meteoric ore, then go to the lab.
Force Potion
This is your final potion to craft, and by doing so, you will gain the Master Brewer achievement. Turn the page to find the Force Potion recipe and follow the instructions:
- Add red crystals.
- Use the latch to set the intensity to two.
- Add meteoric ore, chalk, and pyrite.
- Stir the pot.
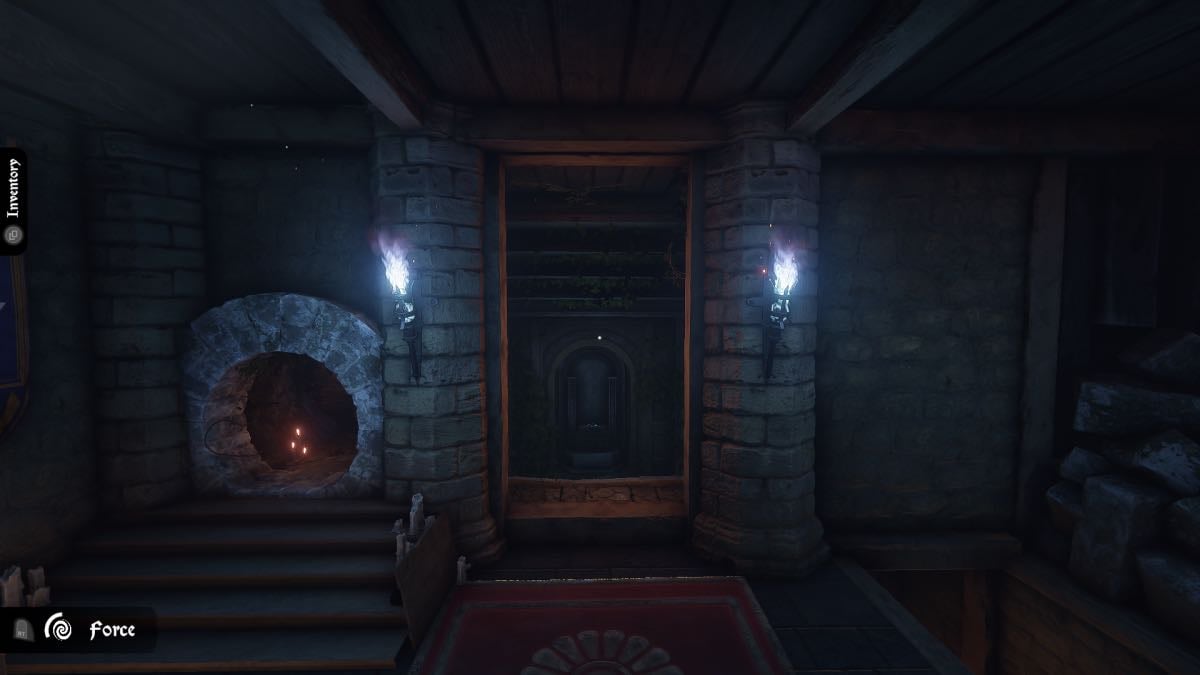
Drink the final potion to get the Iron Gut achievement. That one potion will last for three force pushes but it is always worth brewing a few more potions anyway. Go down to the Study and use a Time Potion on the rocks to reveal a stairway leading down to the Cellar.
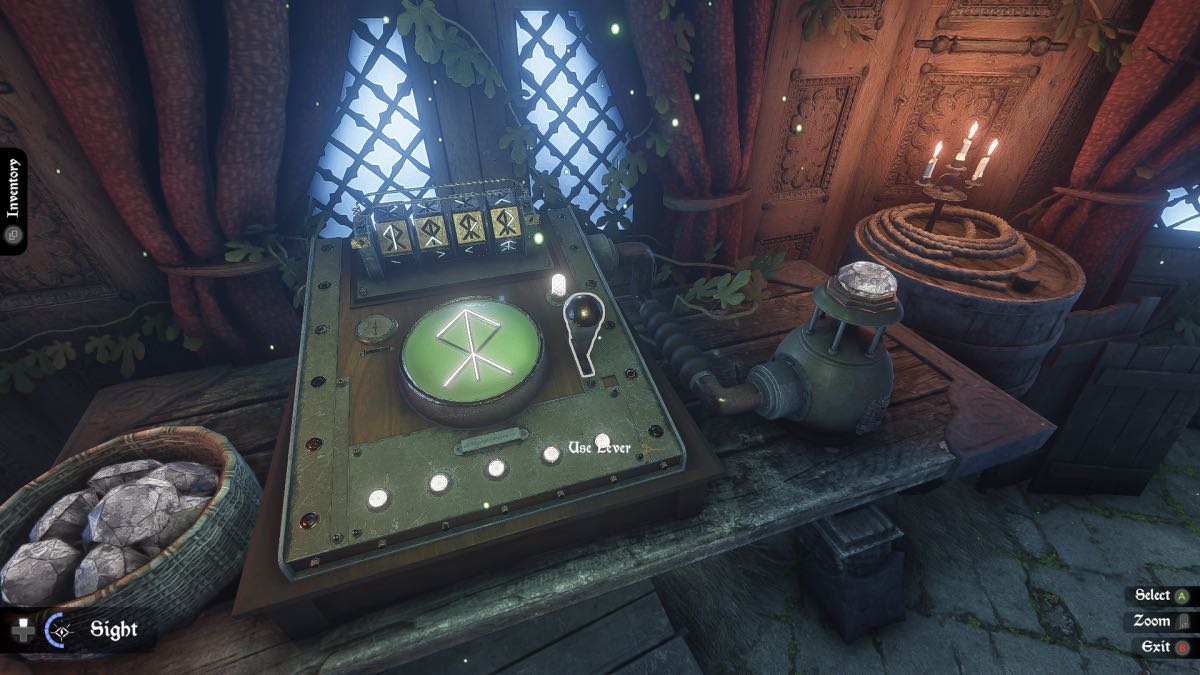
The Cellar
Use a Light Potion in the center of the room. Find a skull to examine by the potions desk, and a Devil tarot card and an ankh on the bookshelves. Use Alchemical Sight to reveal a gemstone in the book and gain the I See U achievement. Rotate the gem clockwise until one lock opens, then counterclockwise until the second opens, then clockwise for the third, and counterclockwise for the last lock. Take the magic wand from inside and look at the symbols inside the book.
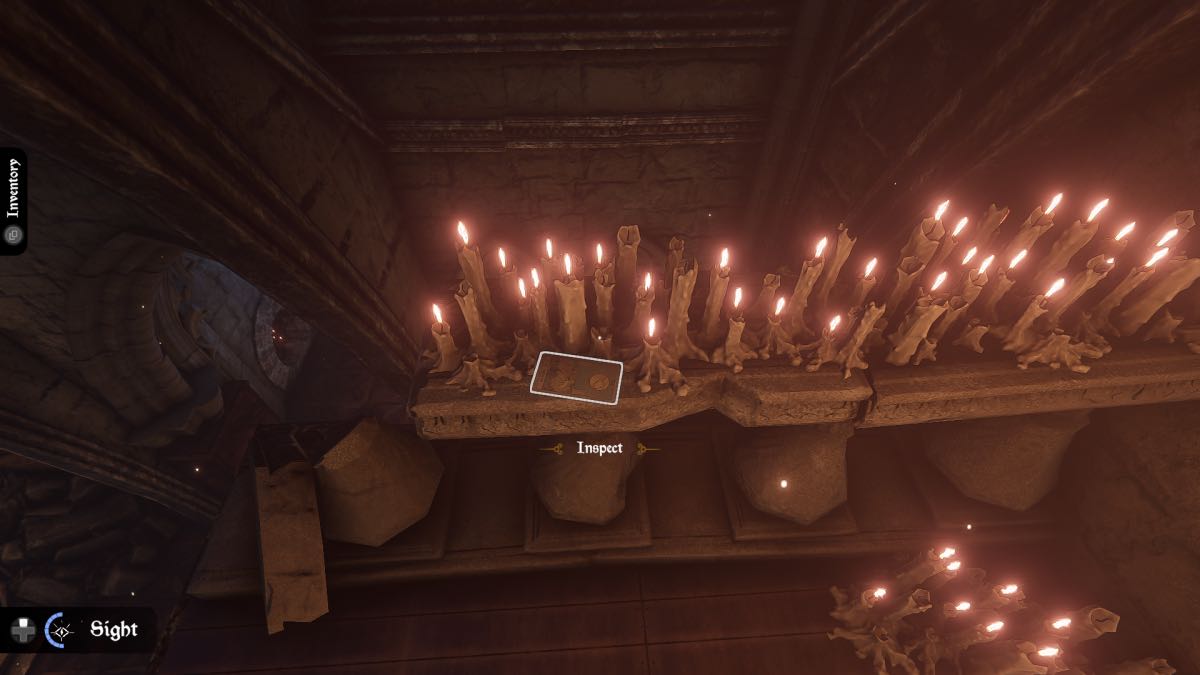
Use the force power to break a weak wall here and check out the room. There is the final letter here, gain the Archivist achievement by reading all six, and there is an Ace of Swords tarot card nearby.
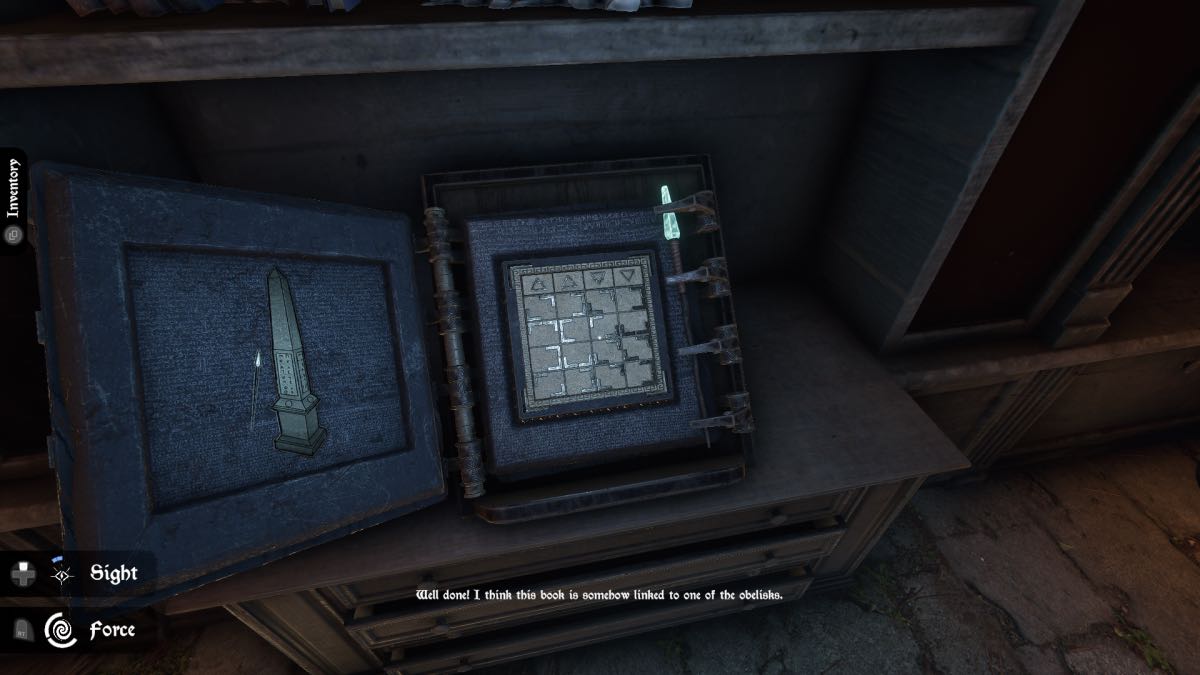
Obelisk Puzzle
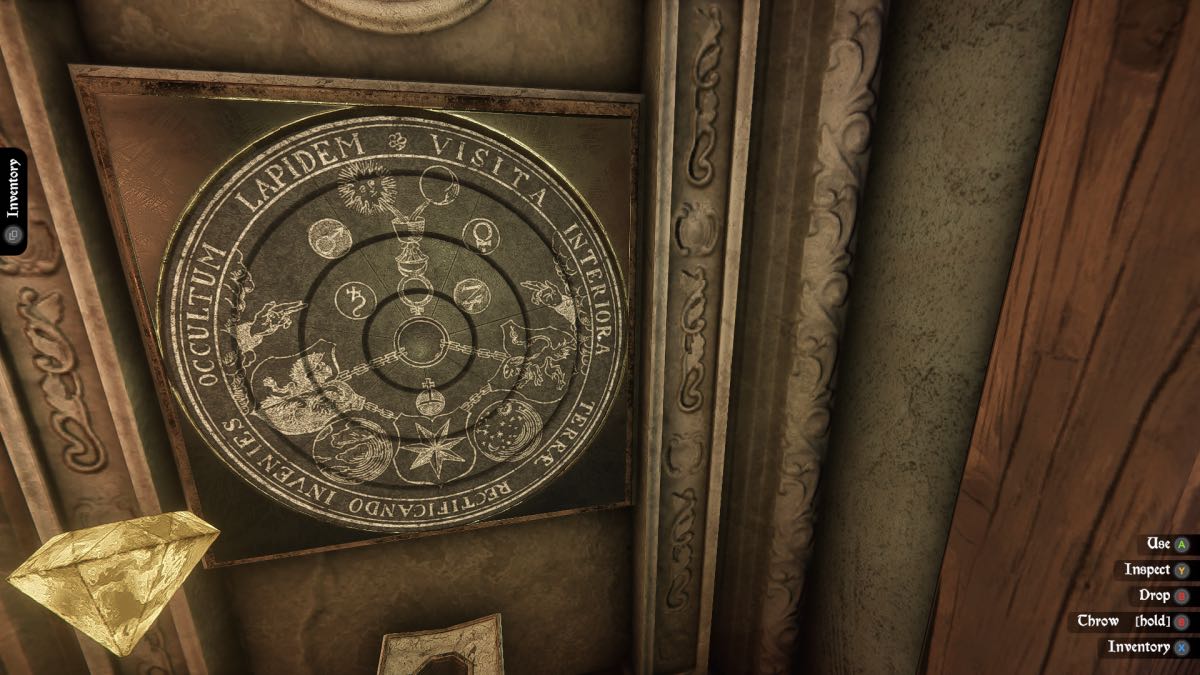
Place the tetrahedron on the panel on the wall and then put it back in your inventory. Take the salt crystal. Use a Lift Potion on the obelisk in the center of this room. There is a triangle on the base, and symbols on the panels. You will need to refer to the book you just unlocked to find the correct symbols to highlight with the wand.
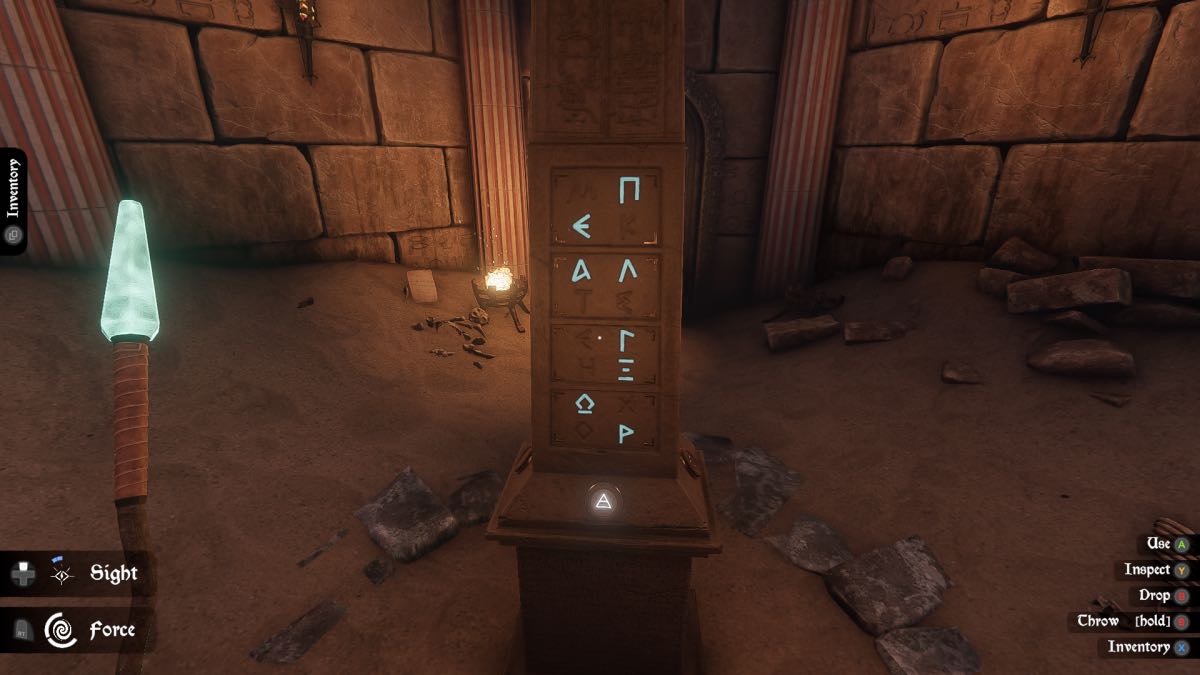
The book shows which ones to tap, indicating the correct ones with corner icons or brackets. You will know when you have chosen the right ones when they cannot be changed any more, and the Staff of Light appears.
Head through the painting portal.
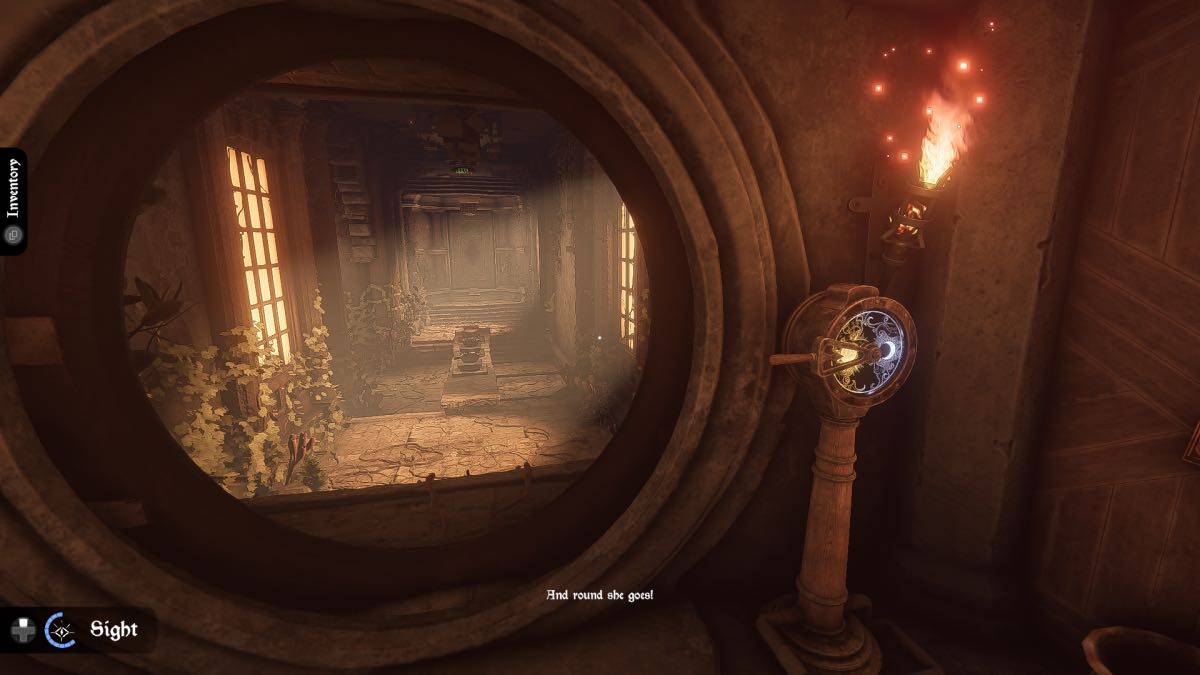
Telescope Puzzle
Take the round amulet from the left and put it on the workspace, central to the stairs. Go up to the telescope and look through. Find a colorful star and rotate the telescope until a symbol covers it. This symbol will need to be recreated on the machine downstairs.
Use the levers on the left to choose the right color, and create the correct symbol using the round part to the right. Do this for each color: orange (red+yellow), green (blue+yellow), pink (red+white), purple (blue+red), and pale blue (blue+white).
Orange Star
Green Star
Pink Star
Purple Star
Pale Blue
Go back to the study and force push a section of the wall to find another room. Put the tetrahedron on the panel and take the Mercury Crystal. Go to the Night and Day room.
Set it to the Day Room. Go inside and use the force push on the wall halfway inside. Grab your final tarot card: Death. This gives you the Collector achievement. Examine the chalice here, too, to gain the Curious achievement. Head to the end of the main area and put the amulet on the small platform. Leave and set the room to the Night Room.
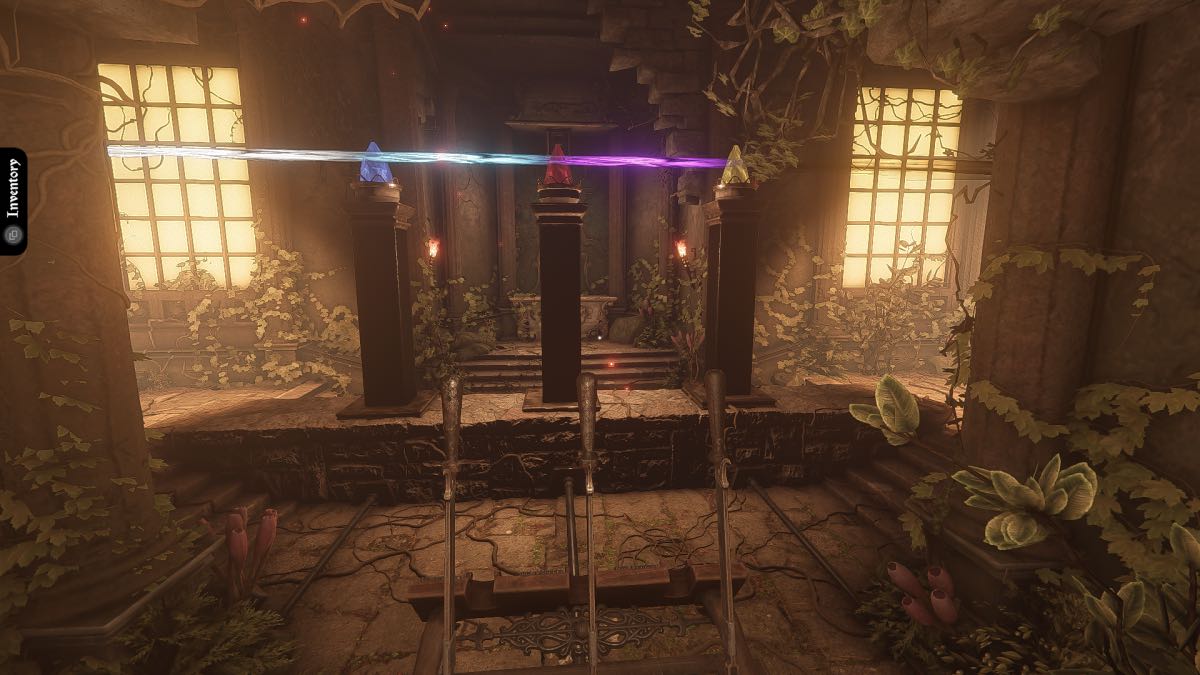
Use a Time Potion on the ruined obelisk. Go to the end of the room and use the tetrahedron on the chest, and take the Sulfur Crystal. Exit and switch the room to Day again. Place the crystals in the right slots and use the levers to raise all three until the light beam hits all three.
Go to the end of the room and interact with the Light Sphere device. Arrange the light spheres until they match the amulet on the platform below. Take the staff and head to the Tower of Elements, the room with the unicorn head.
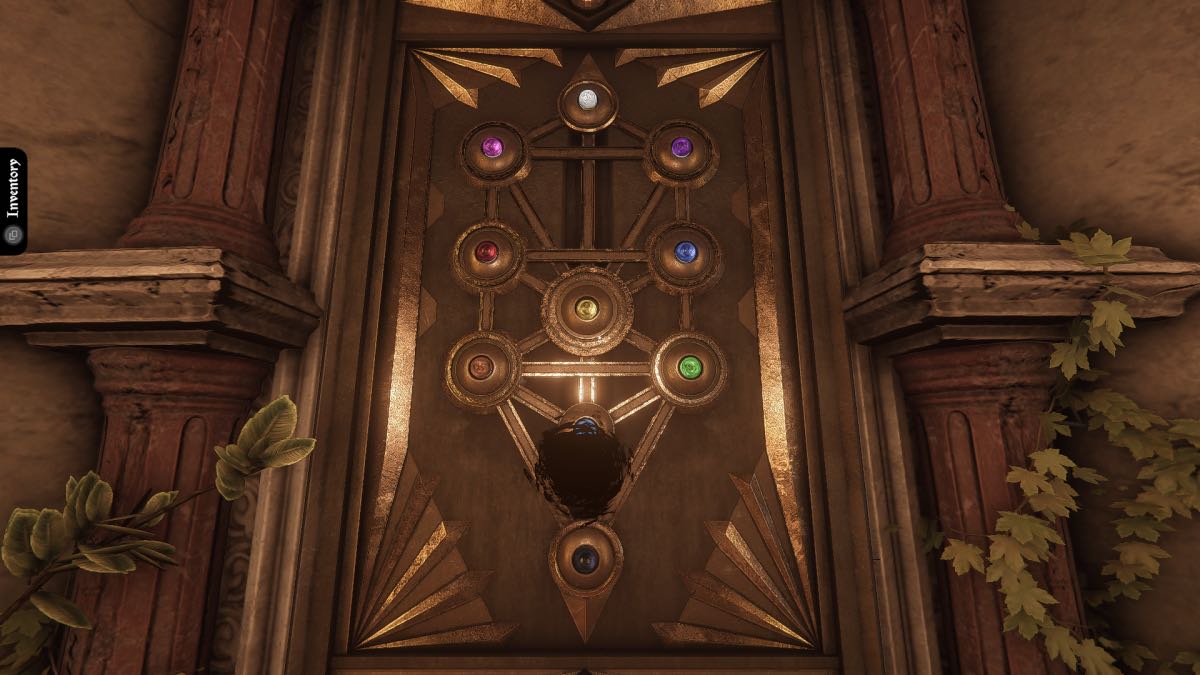
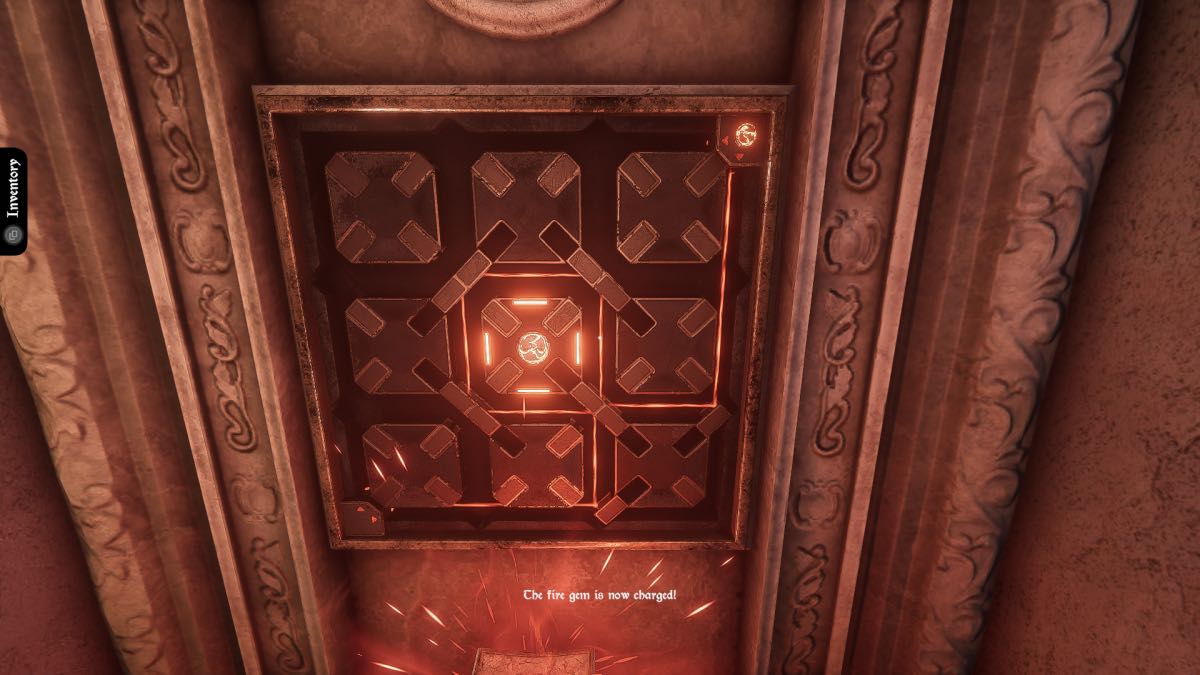
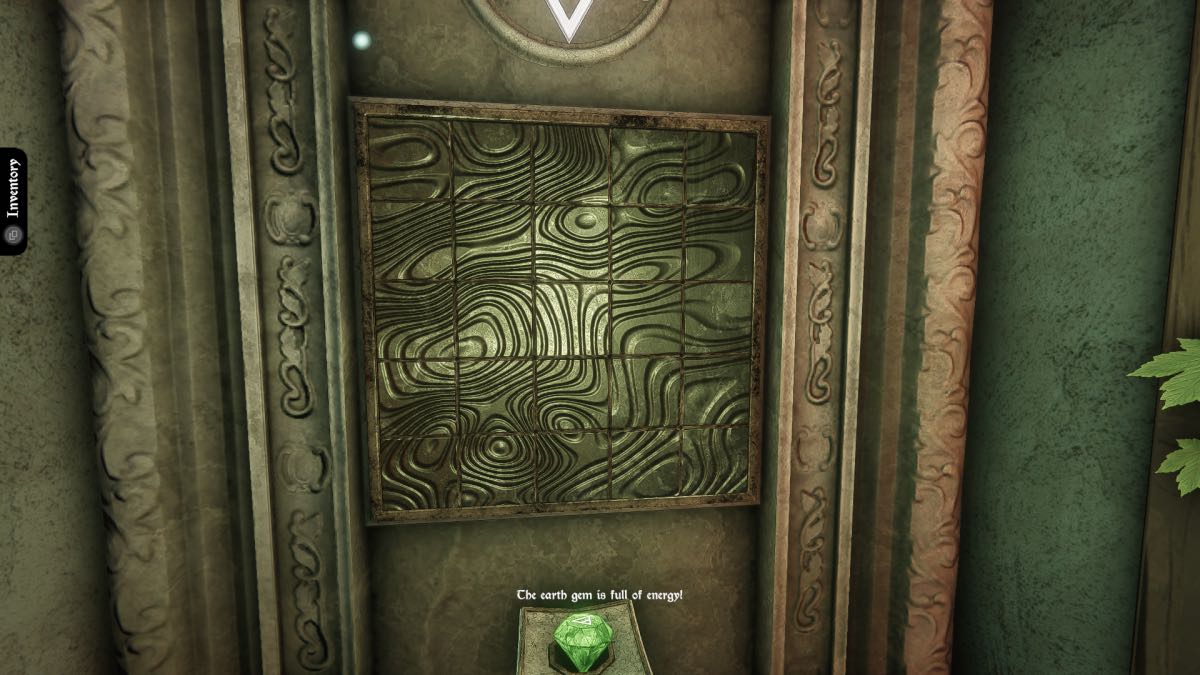
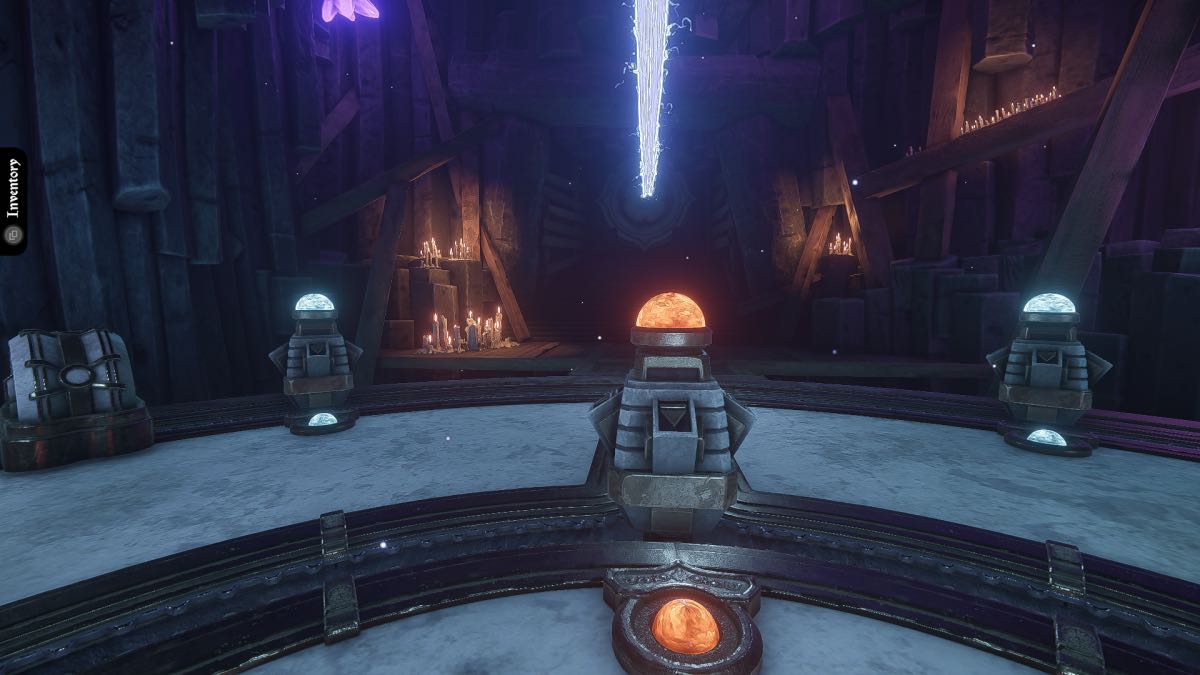
Charged Gemstone Puzzles
Place the charged horn in the statue, then place each gem in the correct panels (they shine briefly with the color of the gemstone). Solve each puzzle to charge the gemstones.
Charged Fire Gem
Charged Earth Gem
Charged Wind Gem
Charged Water Gem
Go to the Study and put the charged gems on the wall in the right slots. Put the tetrahedron on the panel and wait for the door to disappear. Follow the red light, and then place the staff and snake staff in place.
Ahead is a platform with blue and orange machines. It is your job to move each one so they are all color coded, with all orange in the center and all blue around the outside. Once this is done, the sigil will start to glow.
Walk through and answer the three questions. Your answers will determine the speech at the end, and your choice to go ahead or go back determines which of the two endings you experience. You can always save the game and go back to experience both if you want.
For more magical puzzle walkthroughs, why not try Lost Lands 10?


Published: Jul 23, 2025 09:53 pm