Salvage has arrived as one of the headlining activities in Destiny 2’s Season of the Deep, inviting players to group up in matchmade fireteams of six and find lost Golden Age for the Drifter.
While season 21 also urges players to check out Deep Dives, another type of activity said to be evolving with each passing week, Salvage, offers the more traditional experience guardians have grown accustomed to in the long-running series with new playlists like Defiant Battlegrounds and Dares of Eternity.
With seasonal challenges to complete, Sonar Station vendor reputation to earn, and both Deep and Reckoning gear to acquire, here’s a guide on what to expect from Salvage in Destiny 2.
Destiny 2 Salvage guide
The standard Salvage playlist can be found on the left side of the H.E.L.M. map and has a recommended Power level of 1,750. Salvage does have elemental Surges and Threats that impact incoming and outgoing damage that players should take note of, but not any sort of Champions.
Upon firing up the mission, players will find themselves in one of two areas of Titan: the New Pacific Arcology or the Salvage Rig. The gameplay loop is just about the same for both.
The first step tasks players with securing the area by simply clearing out all the Hive in sight.
Related: All fishing locations in Destiny 2 Season of the Deep
Once that’s done, can begin the Salvage operation and interact with a rally flag to begin the second section of the activity. This part essentially revolves around players completing several objectives at Job Sites to ultimately get the attention of enemy forces on the seafloor, where the final boss will then be located.
There are a total of five different objectives players can randomly be given:
- Engineering: Repair the crane.
- Ordnance Disposal: Locate and destroy the Hive Ritual Crystals, and then defeat the Ritualist Wizards.
- Ordnance Disposal: Disarm Fallen explosives, and then defeat the Fallen Demolitionists.
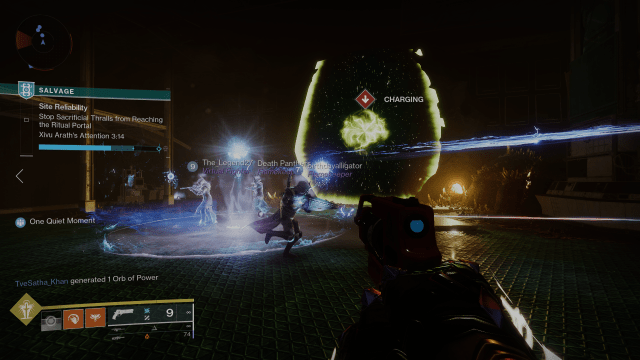
- Site Reliability: Stop the sacrificial Thralls from reaching the ritual portal.
- Site Security: Defend combatants during salvage transmat.
There are indeed two different jobs titled Ordnance Disposal, at the time of writing, but it remains to be seen whether this is a bug. Nevertheless, these objectives are fairly straightforward to accomplish as all of the steps are explained and marked on the HUD.
As players are progressing through these objectives, they’ll notice there is a bar and a timer on their screen. This is because in order to earn the maximum amount of Destiny rewards, players will want to get all three jobs done in time. If not, they’ll simply be taken directly to the final boss stage whenever the time expires.

Once this second section is done, players will be teleported to the seafloor to locate the disruption. This part of the activity doesn’t have any combat but instead features the Pressure Resistance meter mechanic. Players will need to collect air bubbles while traversing deeper to the final boss room to survive.
At the time of writing, the active final boss in Salvage is Azshradat, Celebrant of Xivu Arath. According to the Triumphs, there is a second one named Uorgotha, Scourge of the Deep, but it seems its encounter will be rotated in at another time.
There are two stages in the encounter with Azshradat.
After regrouping at the rally flag and breaking the floating crystal, players will be tasked with defeating Azshradat’s four Runekeepers. This introduces the ritual rune mechanic of the entire sequence as players will notice that there are four plates scattered around the room, each with its own Hive symbol. During each rune disruption phase, one of the plates will have the same symbol as the big one floating in the center of the room.
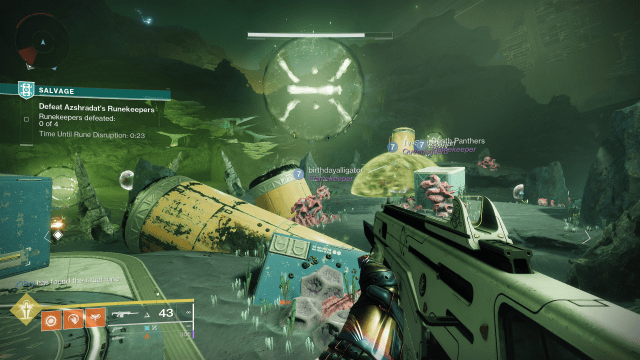
Players will need to identify which of the plates is matching with the one in the middle as that will be the active ritual rune. When stood on, the active plate will give you a buff that allows you to remove the shields of Azshradat’s four Runekeepers. As such, those not paying attention to any of this may make the encounter take longer as the people on the correct plate need the Runekeepers to come in their lines of sight.
After taking down the Runekeepers, Azshradat will be awakened and players will simply need to follow the same formula with the plates to take down its shield and, ultimately, its orange health bar.
At the end of the mission, be sure to open up the chest that spawns; the rewards of which can be improved with Salvage Keys.


Published: May 25, 2023 07:26 pm