Sons of the Forest is the hottest new horror survival game that sets players loose on a brand-new island filled with wildlife and cannibals. Fortunately, players can create a variety of traps to take down animals for food and any mutants that threaten your base. You’ll just need to make sure that you have the right resources and set up the traps effectively.
These traps will go a long way toward securing your base and making sure that you have food to eat whenever you want. Here’s all the information you need to know about all of the traps in Sons of the Forest and how to craft them.
All the traps in Sons of the Forest
There are two different kinds of traps: those meant for specific species of smaller animals and those meant for larger prey, whether they be deer, cannibals, or mutants. Regardless, it’s wise to have a variety of traps in useful places around your base and areas where small animals spawn. This will ensure your safety and source of food.
If you find that your animal traps aren’t catching anything, you may need to move them to a better spot that isn’t bugged or has a better chance of spawning animals.
Small Animal Trap
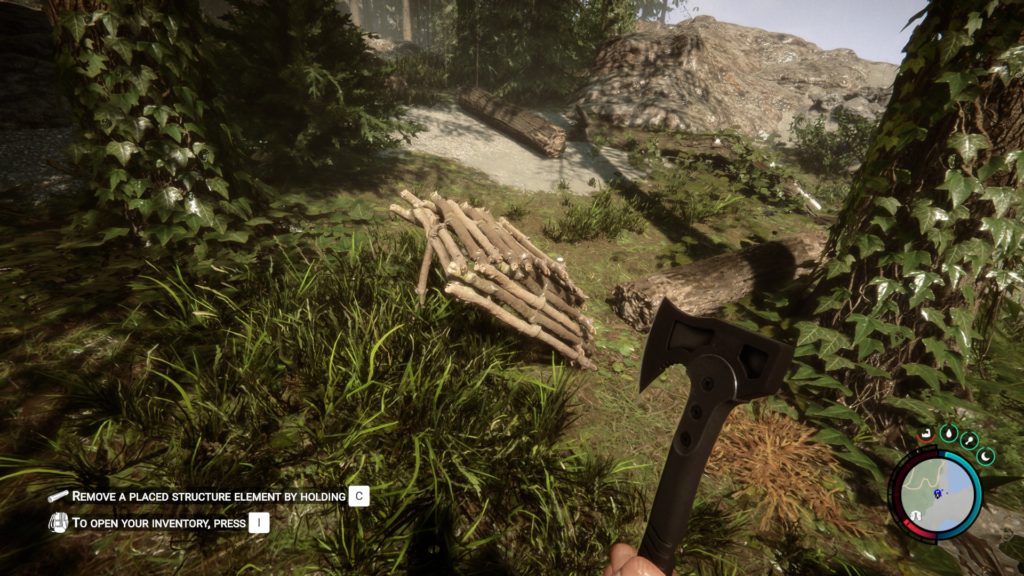
These traps are used to catch small animals like rabbits, squirrels, and any other small animal unfortunate enough to trigger the mechanism. It’s a fairly simple trap, with a stick propping up the cage that will allow the trap to drop on the animal. This will cause it to fall on the target, trapping them until the player resets the trap.
The Small Animal Trap consists of 14 sticks and it can be used to catch a variety of small game that will provide raw meat that can be turned into fulfilling meat.
Fish Trap

The fish trap is similar to the Small Game Trap in its simple construction and the type of meat that it brings in, providing a consistent source of meat for those who are willing to keep checking the traps. It can only hold one fish per trap reset, so it may be wise to create many traps in a certain area so that you can maximize each trip out to the water.
This one requires a lot more sticks than the Small Game Trap, with players needing to collect 25 to complete it. It may be best to use Kelvin to collect a lot of sticks if you plan to make a lot of the traps at once since you’ll be over 100 sticks deep before you even know it.
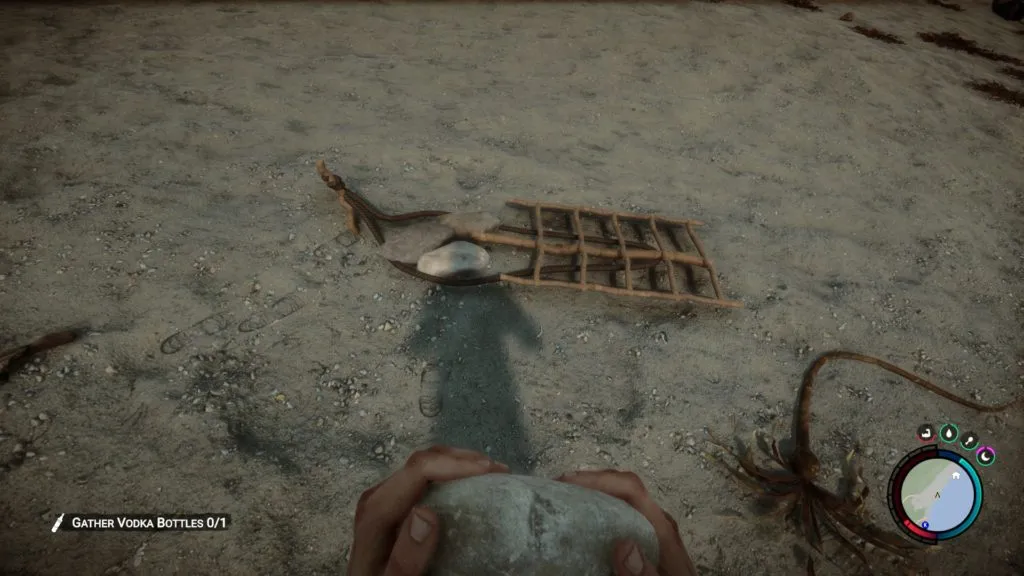
Bird Trap
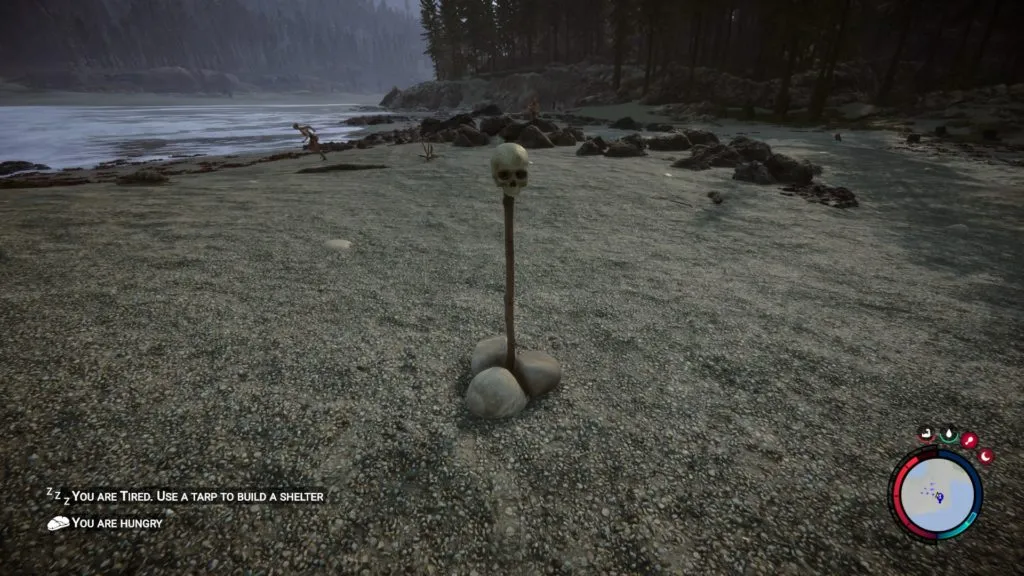
While not technically a trap in the same way the others are, this small craftable structure works great in two different ways. It will spook any cannibals that come near your base, and it will also work to attract birds who will land on the skull. This will provide the player with a great source of feathers for arrows and meat to keep you fed.
This structure is as simple to build as it appears, with a description of it being shown in the building book. Players will need to place a stick on the ground vertically, with a skull on the top. The three rocks at the bottom are optional, but they will provide stability to the stick and keep it from being knocked over.
Bonemaker Trap
This is one of the blueprint traps that’s meant to fight against the larger prey on the island by doing exactly what the name says. When triggered, this trap will spring up and erupt fire from a port in the center, setting whatever runs through it on fire. After killing a cannibal, this trap can continue to burn them until they’re reduced to a pile of bones.
The Bonemaker requires a variety of basic ingredients like sticks, leaves, rope, and rocks. One of the harder-to-get crafting ingredients is Bottled Vodka, and you may or may not have spawned with some when you begin the game. You’ll find some throughout the rest of the game, but it’s not an actively available resource, so make sure you like where the trap is placed. Thankfully, you don’t need to refill the vodka with each use.
This is the only trap that poses a danger to the player who makes it as well, setting them on fire for a considerable period.
Fly Swatter Trap
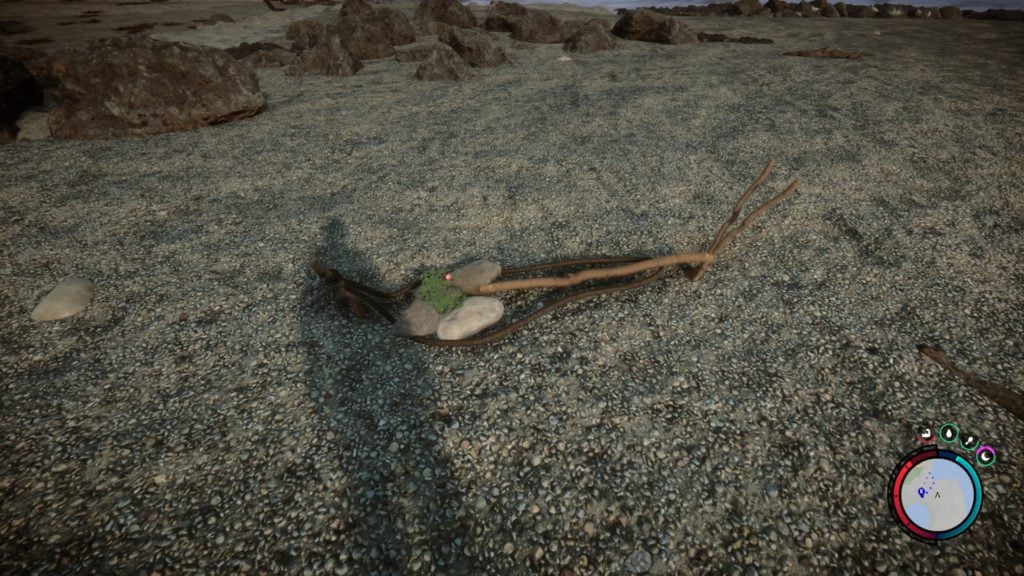
These traps fling upward, damaging enemies and knocking them back when they walk into them. If you place them around the main entry position of the cannibals, it’s likely that you can stand behind them and unleash arrows on your enemies. They’ll need to be reset after each use like all the other traps, so make sure you’re planning your defenses carefully.
This is a simple big trap that can be used against the different cannibals or mutants that might find their way to your base. All you need is 10 sticks, a few rocks, and a rope to tie it all together. This is a much more affordable trap compared to the Bonemaker, which will be much more strenuous on resources.
Defensive Wall
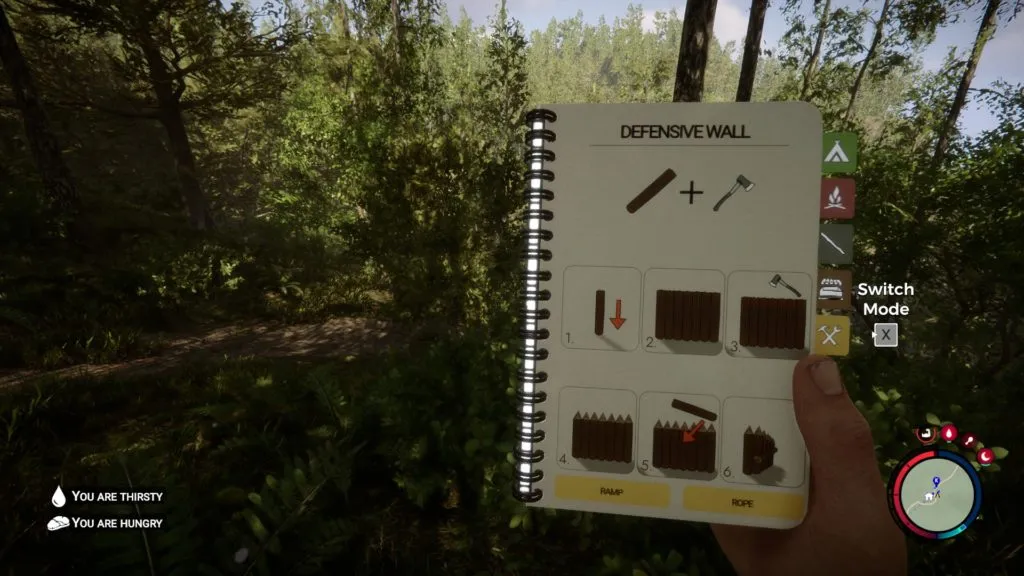
The defensive wall offers protection against any enemies that might approach your base from the front, but it also has the benefit of the spikes on top to damage any enemy that tries to climb over. While not necessary, by making the wall two rows deep, you improve both its stability and the effort required by certain mutants and cannibals to climb over it.
To build a Defensive Wall, you’ll need to get a bunch of logs and line them up in a straight line using the game’s UI. After you’re satisfied with the first row, aim your axe at the top until the red highlight of a point is shown, making the walls harder to climb over. Once the first row is complete, repeat the same process for the second row. Add a log horizontally across the middle to make it more sturdy.
Once you have a Defensive Wall, you can consider building a lookout tower on the inside that allows you to keep an eye on anyone who might be coming to close to your base.

Published: Mar 2, 2023 04:02 pm