
Like all FromSoftware games, Armored Core 6 is packed with secrets stashed in hard-to-reach places. Some of the best parts in AC6, including weapons, are hidden, and they could give you the edge you need in combat. If you want to know where to find all the secret parts in AC6, look no further than this guide.
Table of contents
- Which missions have secrets in AC6?
- Where to find all hidden chests in AC6
- WRECKER Head, Core, Arms, and Legs
- IA-C01W1: NEBULA Plasma Rifle
- IA-C01G: AORTA Generator
- WB-0010: DOUBLE TROUBLE Chainsaw
- BC-0600: 12345 Booster
- WB-0000: BAD COOK Flamethrower
- EPHEMERA Head, Core, Arms, and Legs
- IA-C01F: OCELLUS FCS
- IA-C01B: GILLS Booster
- IA-CO1W3: AURORA Light Wave Cannon
- IA-CO1W2: MOONLIGHT Light Wave Blade
Which missions have secrets in AC6?
Only chapters two, three, and four have secrets in Armored Core 6. Importantly, you need to complete the mission after collecting any secret parts, otherwise, they won’t be added to your parts list—so be sure to bring a capable build with you.
Here are all the missions in AC6 with secret parts to collect:
Chapter Two
- Infiltrate Grid 086
Chapter Three
- Survey the Uninhabited Floating City
- Tunnel Sabotage
- Eliminate “Honest” Brute
Chapter Four
- Underground Exploration – Depth 1
- Underground Exploration – Depth 2
- Underground Exploration – Depth 3
- Unknown Territory Survey
- Reach the Coral Convergence
Chapter Five (in NG++ specific mission)
- Regain Control of the Xylem
Yes, you read that correctly. To get the hidden Coral parts from the Chapter Five mission, you have to reach Chapter Five in New Game++. That’s the only way to access the “Regain Control of the Xylem” mission.
Where to find all hidden chests in AC6
You can find all of AC6’s secret parts in chests fairly well hidden inside the above missions. They usually require you to kill additional enemies, some of which are especially challenging in the late-game (Autonomous Grinder Wheels, I’m looking at you), so make sure you have enough health and ammo to survive the fight and finish the mission afterward.
WRECKER Head, Core, Arms, and Legs
You can find the WRECKER Head, Core, Arms, and Legs in separate chests scattered around the first mission of Chapter Two, Infiltrate Grid 086. Three are inside the refinery building and one is shortly after you leave.
The HC-3000: WRECKER Head is in a chest behind you after you drop down through a hole in the ceiling shortly after entering the indoor area. Turn around when you land, and you’ll find the chest at the end of the corridor.
Each WRECKER part offers decent Armor Points (AP) to beef up your AC’s health. They’re also on the more energy (EN)-efficient side of things when it comes to bulkier pieces. Of course, being bulkier, the WRECKER parts also give you a lot of extra weight that will slow down your AC’s top speed and lower the EN output of your generator.
To get the CC-3000: WRECKER Core, when you enter the room with a large furnace at the top, jump over the furnace and drop down the other side. You’ll find yourself in a large open room, and the chest containing the Core is behind you, against the wall.
After grabbing the Core, fly back up to the furnace, but this time, turn left and enter the pipe. It can be tricky to land inside the pipe, especially if you’re using an agile AC with a lot of jump height, but you’ll manage it eventually. Head through the pipe, and you’ll find yourself at the top of a vertical cylinder—drop down, and you’ll find the AC-3000: WRECKER Arms at the end of a long room. Beware, though, because an enemy mech will ambush you, but it doesn’t put up much of a fight.
Head back up the vertical shaft and through the pipe until you reach the furnace again. Then, go left and through the door to leave the refinery. You’ll be in a large, open area with lots of platforms. Fly up and to the right: The 2C-3000: WRECKER Legs are at the end of the tracks on a long, curved platform toward the right-hand side of the upper area. The chest is guarded by two weak mechs that you’ll dispatch easily.
You need to finish the level to keep the parts, which means beating the Smart Cleaner boss. Bring a capable build, and refer to our in-depth guide if you’re having trouble.
IA-C01W1: NEBULA Plasma Rifle
The IA-C01W1: NEBULA Plasma Rifle is hidden on an alternate route in the Tunnel Sabotage mission in Chapter Three. After entering the tunnel at the beginning of the mission, head to the first objective marker, which sends you to the roof of a gray building.
Your next objective marker is roughly 2,500 meters away, down inside the cave. Instead of heading toward the next marker, fly up and to the left, over the piston bridges, until you reach an open room with a few enemies and a sniper at the back. Take care of the baddies, and you’ll find the chest containing the NEBULA Plasma Rifle on a raised ledge at the top of the platform.
This is one of the few Plasma weapons in the game, and while it’s not the best, it is useful to have an option for plasma weaponry in your arsenal in case you need to inflict some heavy impact damage or melt some shields.
IA-C01G: AORTA Generator
You can find the IA-C01G: AORTA Generator on the Chapter Three mission Survey the Uninhabited Floating City. Follow the mission marker to your first objective and shut down the first ECM fog control device.
Head further into the city, following the curved railway, until you see three buildings in the distance—one large building between two thinner buildings. Fly toward the roof of the middle building, and you’ll find the chest containing the AORTA Generator at the end.
The AORTA Generator regenerates energy slower than other Generators, and you might think its stats are mediocre, but has a much larger capacity. It also makes your AC’s boost contrails a nice, Coral-soaked red—ideal for creating the Gundam cosplay of your dreams.
There’s a similar crimson generator with better stats you can get, but for that, you have to reach Rank 9 in the Loghunt Program by collecting Battle Logs.
WB-0010: DOUBLE TROUBLE Chainsaw
The WB-0010: DOUBLE TROUBLE Chainsaw is inside a chest at the very start of the Eliminate “Honest” Brute mission in Chapter Three. To get there, head down from your starting platform toward the objective marker.
Go past the objective marker and keep flying further down until you reach a platform covered in laser sensors. The chest containing the DOUBLE TROUBLE Chainsaw is out in the open in the middle of the platform.
This is a great choice of weaponry if you enjoy getting up close and personal with some melee damage. It has a unique feature that lets you charge it up and keep that charge held until you release it upon an unlucky foe. You can even move around while keeping it charged.
BC-0600: 12345 Booster
After grabbing the DOUBLE TROUBLE Chainsaw in the Chapter Three mission Eliminate “Honest” Brute, continue on and fly down toward the direction of the objective marker. You’ll come across a platform that looks like a giant turntable, with multiple intersecting roads.
At the turntable, make a right and fly through the tunnel. Head down toward the end of the long metal platform until you reach what looks like a crane. On top of the crane is a chest containing the BC-0600: 12345 Booster part.
This booster won’t give the highest Thrust stats, but it’s a great all-rounder choice that’s fantastic for your EN load and ultra-lightweight.
WB-0000: BAD COOK Flamethrower
Further on in Eliminate “Honest” Brute, you’ll encounter an area with enemies protected by an electric dome-shaped barrier. Ignore the enemies and fly straight over the barrier, hugging the wall to the right until you reach a small opening.
Head through the passage and you’ll drop down into another room with laser sensors. The chest containing the BAD COOK Flamethrower is on the floor, on the right-hand side of the room, guarded by a few lesser enemies.
This is a weapon you won’t like being on the opposite end of. It has a lot of ammo, takes a long time to overheat, and dishes out plenty of damage. The biggest downside is that it doesn’t do much impact damage, and it can’t stagger or interrupt enemies.
EPHEMERA Head, Core, Arms, and Legs
The IA-C01L: EPHEMERA Legs are easy to get. In Chapter Four, at the start of the Underground Exploration – Depth 1 mission, you activate an elevator and descend into a vertical shaft. Drop down until the shaft closes and you aren’t able to descend any further.
There’s an opening on one of the walls at the bottom of the shaft with a platform and a small room. At the back of the room is a chest containing the EPHEMERA Legs.
The IA-C01A: EPHEMERA Arms are in Underground Exploration – Depth 2. After defeating G5 Iguazu, proceed forward and you’ll be attacked on a bridge by a mech with blue lasers. Ignore it and immediately turn to the right, then jump off the bridge, following the cliff face down past the rock platforms until you find one platform at the bottom with an entrance to a circular tunnel.
Enter the tunnel and follow it to the end. There’s a jump pad on a raised platform—use it to gain some altitude, and you’ll see the chest containing the EPHEMERA Arms on a platform at the back. You can also get the GILLS Booster in this level, so make sure to grab it before completing the mission.
The IA-C01C: EPHEMERA Core is in Underground Exploration – Depth 3. After descending into the large open cave at the start of the level, you’ll immediately see a circular structure in the middle of the cave. The whole area is heavily defended by laser snipers, so watch out. On the far side of the central ring is a bridge connecting the ring to the cave wall.
The EPHEMERA is one of the lighter sets, but it doesn’t sacrifice any AP in the process. Much like other lightweight pieces, they don’t offer much Attitude Stability, but they are very energy efficient. If you’re only looking for the highest stats, the EPHEMERA Head is one of the best in the entire game with plenty of AP, Attitude, Stability, and System Recovery.
Fly past the central ring and toward the other side of the cave, and at the end of the bridge (where it meets the cave wall) is a chest containing the EPHEMERA Core. You can also find the OCELLUS FCS in this area, so make sure to grab it as well before you finish the mission (keep reading for exact directions).
The IA-C01H: EPHEMERA Head is in the mission Unknown Territory Survey. Descend into the hole and follow the path down. The EPHEMERA Head is in a chest at the bottom of a series of drops. It’s along the main mission pathway, so it’s hard to miss this one.
IA-C01F: OCELLUS FCS
You’ll find the IA-C01F: OCELLUS FCS in the Underground Exploration – Depth 3 mission in a chest on the outer catwalk in the large open cave area. After descending into the cave at the start of the level, immediately head to the right and continue along the catwalk.
The platform you’re on ends—fly over the gap until you reach another catwalk at the same altitude. A chest containing the OCELLUS FCS is hidden behind nine barrel-shaped generators at the edge of this platform.
This is the FCS of choice for players who love close-range combat—but only if you really love fighting up close and personal. The OCELLUS FCS is completely maxed out in terms of its close-range effectiveness, and incredibly lacking when it comes to both medium and long-range combat.
IA-C01B: GILLS Booster
On the Underground Exploration – Depth 2 mission, after you’re attacked by the mech with blue lasers on the bridge, jump off the bridge and fly down and to the right. You’ll see another bridge and a tunnel lit with yellow light—head through here, and there’s a door to continue the mission straight ahead. Instead, turn right, and you’ll enter a wide, open room. There’s a chest containing the GILLS Booster at the back.
This booster is a strong choice for those who want to give their AC some pure Thrust capability, but it’s just a bit on the heavier side. It makes up for this, however, with its respectable Upward Thrust and QB Thrust power as well.
IA-CO1W3: AURORA Light Wave Cannon
At the start of the Reach the Coral Convergence mission in Chapter Four, instead of heading toward the mission waypoint, go right and follow the level boundary until you see a broken highway and a chunk of land near the cliff edge with a ruined building. On the roof of the building, you’ll find a chest containing the AURORA Light Wave Cannon.
This back unit uses laser and pulse technology, so it’s great for peeling shields and does some nice impact damage. It even recharges for another use pretty quickly, but it takes a long time to lock onto enemies.
IA-CO1W2: MOONLIGHT Light Wave Blade
We’ve published a full guide on how to get the Moonlight Sword in AC6 that describes the route to find it in more detail. In a nutshell: From the start of the Reach the Coral Convergence mission, fly left and over the highway until you reach the broken bridge. Fly over to the bridge, defeat the wheel enemy that ambushes you, and then head all the way down the bridge until you reach the end.
Jump off the broken end of the bridge into the waterlogged ruins below and you’ll see the chest containing the IA-CO1W2: MOONLIGHT Light Wave Blade just in front of you, sitting on a small island in the water. Beware that you’ll be ambushed by more wheel enemies, so be prepared for a tough fight.
The MOONLIGHT Light Wave Blade‘s damage isn’t sensational compared to other melee weapons in Armored Core 6, but it shoots a projectile that can hit enemies at range. It’s also excellent at destroying enemy shields.
IB-C03W3: NGI 006 Coral Missile Launcher
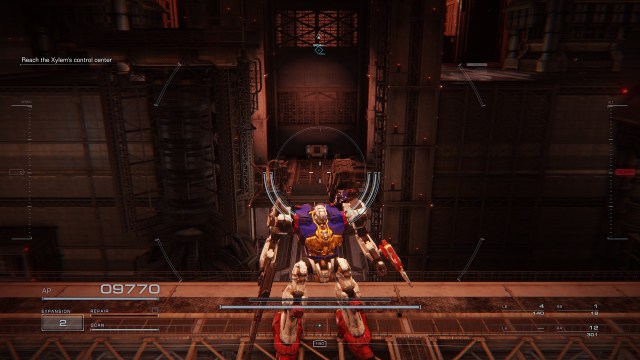
This is one of the easiest chests to grab, and one of the easiest chests to miss. The second you start the “Regain Control of the Xylem” mission in Chapter Five of your NG++ run, head immediately to your left. You’ll drop down a small ledge, and voila—the chest containing the IB-C03W3: NGI 006 Coral Missile Launcher is yours.
While its name may make you think it acts like other missile launchers, this one’s a bit different. It launches Coral-infused missiles that pursue enemies, but they’re slow. This weapon is far from ideal for taking on fast-moving foes, but if you’re fighting something large, it can be a big help. Especially because a fully charged missile that hits its mark deals loads of stun damage.
IB-C03W4: NGI 028 Coral Shield
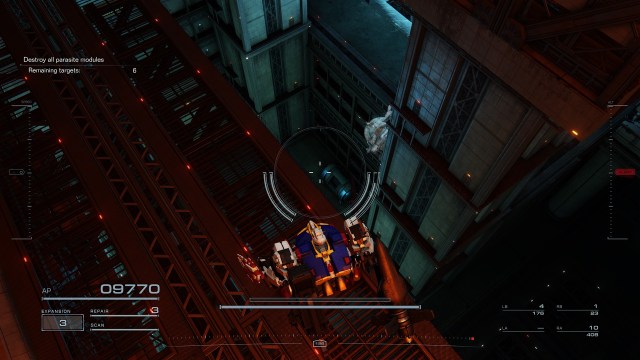
This chest can be a bit tricky to find, as the whole level is a twisted, vertical maze of steel. When you’ve only got two Parasite Modules left to destroy, you’ll know you’re near the chest. It’s nestled in a little alcove as you head toward a larger, more empty room. Take caution, however, as some electrifying pests will try to drop onto you when you’re near the chest.
If you’re worried about finding the chest while the time limit is ticking away, you can destroy all of the Parasite Modules to get rid of that pesky time limit. Then, you’ll be free to explore to your heart’s content and nab that chest.
Inside, you’ll find the IB-C03W4: NGI 028 Coral Shield. This is a fairly unique shield, as it actually surrounds you with a full 360-degree bubble. All the other shields only cover your front. The extra coverage is great, but the only downside is that stronger shots or sustained fire can penetrate the bubble a bit quicker than a normal shield. Still, this is a great shield for taking on hordes of foes with bullets and explosives coming at you from all angles.


Published: Aug 16, 2024 04:58 am