Unlocking the dresser in Perosi’s Room requires solving one of the hardest puzzles in Alone in the Dark. The dresser is locked by a three digit, rotating padlock—only instead of numbers, the slots contain zodiac symbols.
In the same room, you’ll find six paintings that you can flip around at will, a journal about astrology, and a family tree painting. Figuring out if or how any of that is even connected to unlocking the dresser is up to you, and it’s a daunting task to say the least. Here is how to solve the Astrology puzzle in Alone in the Dark.
All pieces of the Painting Astrology puzzle in Alone in the Dark
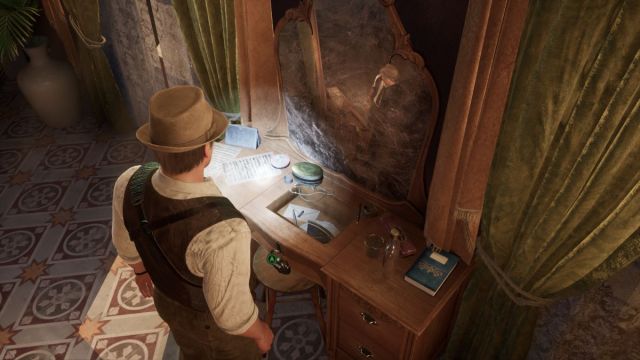
This puzzle is convoluted enough that it warrants a checklist of the relevant parts before jumping into a piece by piece walkthrough. The relevant pieces of this puzzle are:
- The padlock on Perosi’s Dresser
- This is where the correct code needs to be entered.
- Perosi’s Journal
- The cipher inside the journal allows you to connect each Astrology symbol to a corresponding name/number.
- The Objectives tab
- You can complete the puzzle without this, but the third Objective page in Chapter Two is the only place you can learn that the Astarte Artist Colony used their zodiac signs as signatures.
- The Astarte Artist Colony Picture
- You need to take notes of three names and their corresponding numbers to solve the other painting puzzle.
- The six paintings with rot on them
- You can flip these paintings to reveal their artists’ names on the back. Flip them until only the names of Astarte Artists are showing.
There you have it: You can use these five pieces of the puzzle to open Perosi’s Dresser and retrieve the piece of the Astronomical Clock plate inside of it. Simply knowing what the actual pieces of the puzzle are might be all you need to solve it, but if not, read on for a step-by-step walkthrough.
How to solve the six painting puzzle in Perosi’s Room
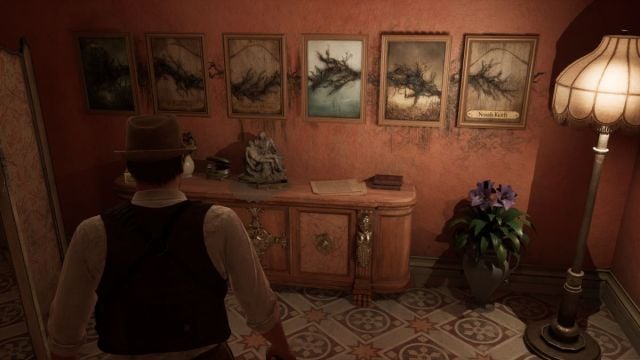
There are two ways you can approach solving the puzzle, which is made up of six reversible paintings. If you’re on Modern mode, the game will actually give you a hint to flip the paintings until you form a continuous path of rot across them. On Old School mode, you aren’t given this clue, and in my case, this led me to figuring out an alternate way to correctly align the six paintings.
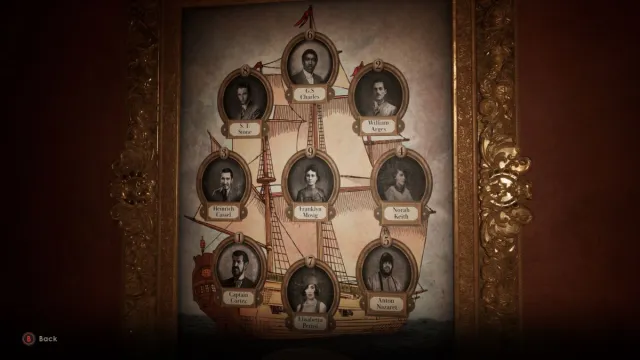
If you flip all six around, you can read all of the artists’ names. Cross-reference them with the Astarte Artist Colony family tree painting on the other wall, and you can see that three of the artists from the six paintings are included in the family tree. The three artists are:
- William Arges: the artist of the second painting
- Franklyn Mosig: the artist of the third painting
- Norah Keith: the artist of the sixth painting
Flip the paintings until only these three names are showing (which, in turn, also forms a continuous path of rot across the canvases). Once the second, third, and sixth paintings are flipped, you will hear a little “ding” sound as though you’ve unlocked something. Don’t get distracted—the sound was only informing you that you’re on to something. Nothing in the room has actually changed yet.
How to use the solved painting puzzle to get the dresser code
Now that the six paintings are “solved,” you can use them to figure out three numerals that you need to convert to Astrology symbols for the padlock. If you open your Objectives tab at this point, it will tell you that the Astarte Artist Colony used these Astrology symbols as signatures, because they were apparently all born in different months.
Take note of the three names from the six painting puzzle: William Arges, Franklyn Mosig, and Norah Keith. Remember that the names also occur in that order from left to right, because the order does matter.
Have a look at the Astarte Artist Colony painting again. As you can see, each member has a number next to their name. William Arges has the number two next to his name, Franklyn Mosig has the number nine, and Norah Keith has the number four. This gives you a three digit code: 2-9-4. This is a start, but the padlock requires symbols, not numbers.
At this point, you might recall that Perosi’s Journal (which you picked up from the bed in the same room) has a circular cipher of 12 Astrology symbols. Aquarius is labelled one, while Scorpio and Sagittarius are labelled 10 and 11 respectively. This is enough information to fill in the blanks and assign numbers to the other nine symbols.
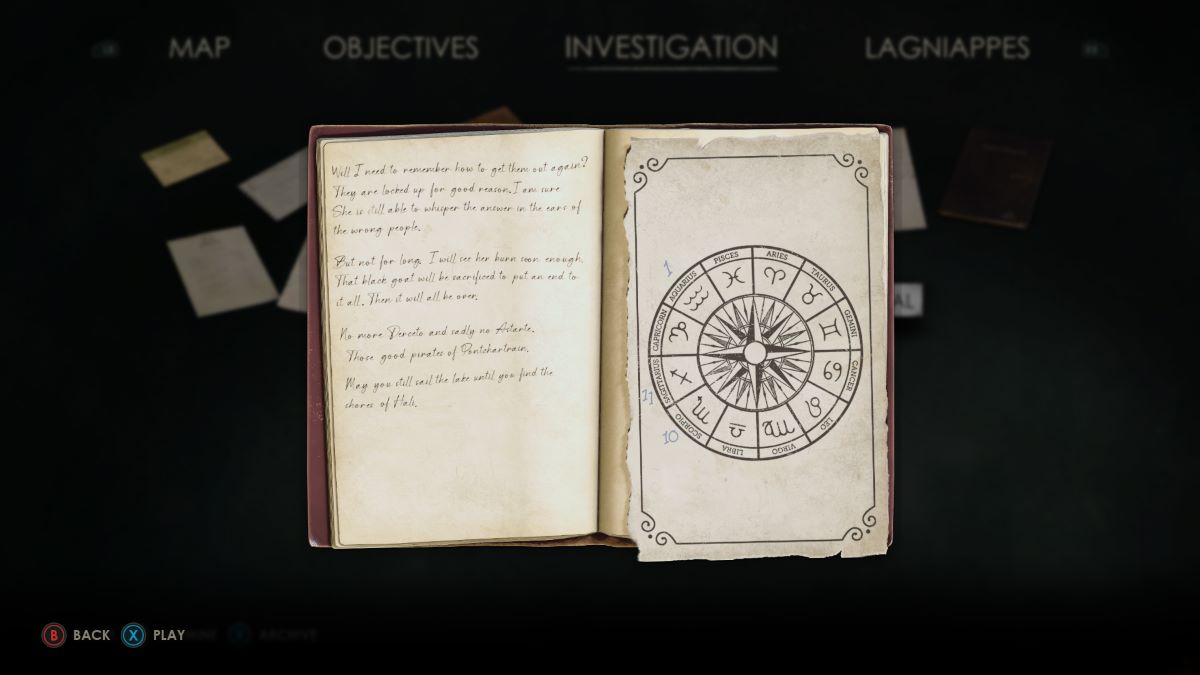

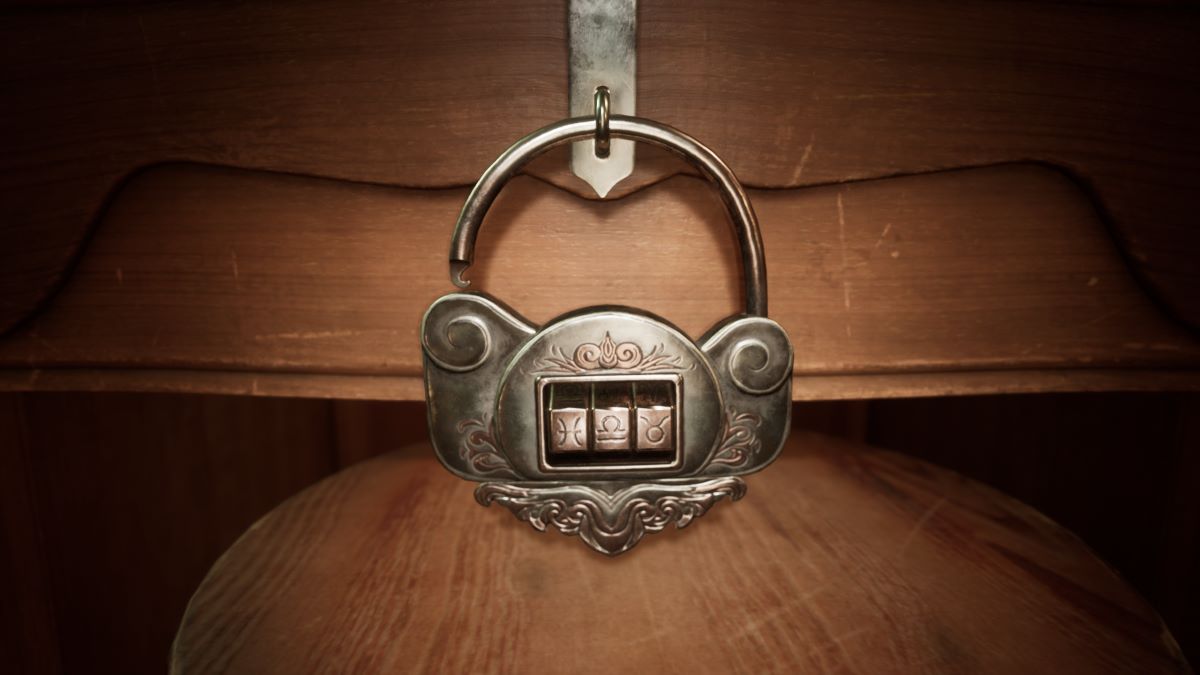
This means the number two represents Pisces, the second symbol, while nine represents Libra and four represents Taurus. You’ve now turned the code 2-9-4 into Pisces-Libra-Taurus. Take note of the corresponding symbols from Perosi’s Notebook, and input those symbols in the padlock. Congratulations: You’ve just solved one of the most unhinged puzzles in Alone in the Dark.




Published: Mar 20, 2024 06:20 am