There’s no such thing as an easy boss in Armored Core 6, but compared to CEL 240, the others might as well be. This fight requires you to basically be perfect the entire time, and one tiny mistake will cause the whole thing to slip away from you.
CEL 240 is an AC like boss empowered by Coral. It flies around the map at dizzying speed, and launches what feels like 20 attacks every second. The idea behind this build is pretty much to fight fire with fire and beat CEL at its own game. This means we’re building everything from the weapons up—starting with the right firepower, and then finding the parts to work with them.
Rather than going for a heavy build, we actually want to be as light as possible while ensuring we can support some big guns. The reason for this is that every one of CEL’s attacks deals so much damage and stagger that you simply can’t outlast it. Get hit by one thing, and there will be dozens more immediately following. To beat CEL, we must become CEL—fast and deadly.
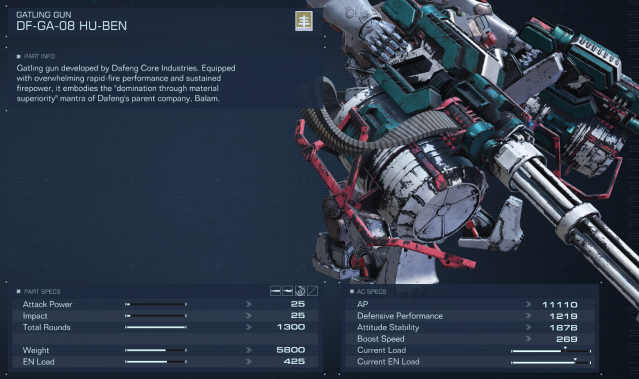
Right arm—Gatling Gun
As I mentioned, the weapons are the focus of this build, and there basically isn’t a single choice you can justify over the Gatling gun. It has incredible ammo reserves (you’ll need it), constant pressure, it hits like a truck, and it benefits greatly from Direct Hit Damage (damage to a Staggered opponent).
You really won’t have any option to hurt CEL when it isn’t Staggered, so we want all of our eggs in this basket.
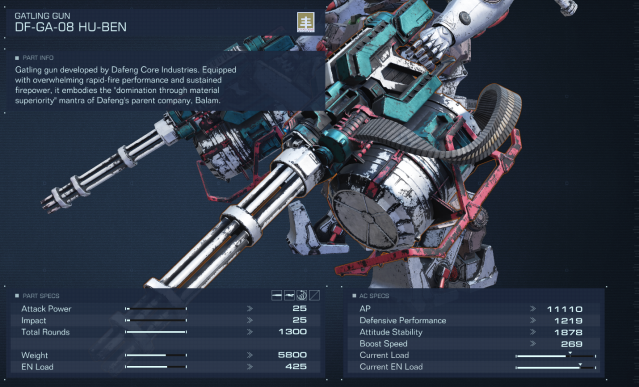
Left arm—Gatling Gun
I said all of our eggs, and I meant it. The only thing better than one Gatling gun is two Gatling guns. If I could replace my AC’s head with a Gatling gun, I would.
All jokes aside, you can run something else in your left hand if you really want to, but I wouldn’t recommend it. You simply will not out-DPS a Gatling gun on a Staggered opponent, and you simply won’t be damaging CEL when it isn’t staggered. This double Gatling gun combo can do half of CEL 240’s health in a single Stagger.
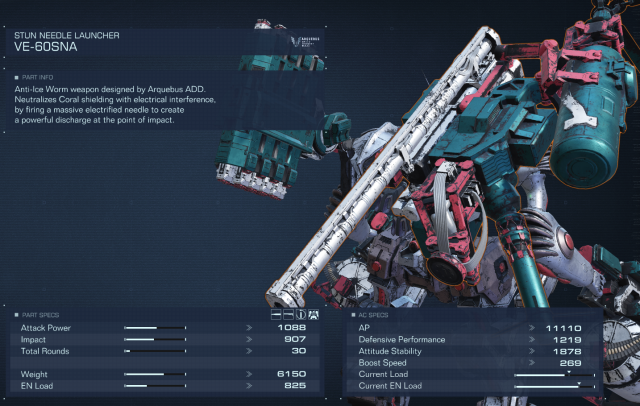
Right shoulder—Stun Needle Launcher
This builds off of our Stagger philosophy. The Stun Needle Launcher is pretty objectively the best weapon in Armored Core 6 no matter what fight you’re heading into, but right now we’re using it specifically for the projectile speed and great Impact. CEL 240 is fast. VERY fast. Even with a fantastic projectile speed, you’ll still have to be very meticulous about timing your shots (which I’ve covered in this strategy guide for defeating CEL 240). If your projectile isn’t fast, it won’t matter how good your timing is. CEL will dodge it.
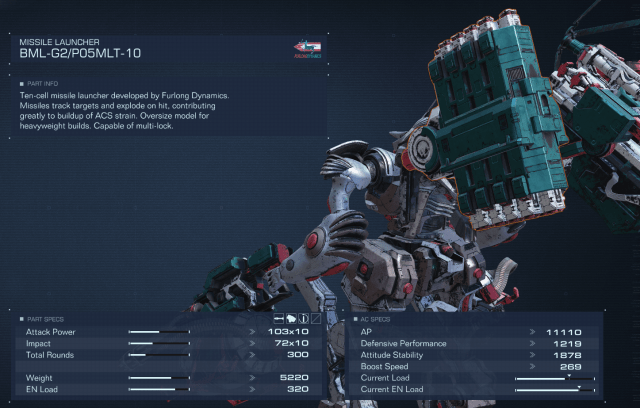
Left shoulder—10 cell Missile Launcher
This one comes down a little more to preference. All options are not on the table for the left shoulder, but there is one other viable choice. A second Stun Needle Launcher. If you run a second Needle Launcher, you’ll be able to Stagger CEL with one well-timed attack, however, you won’t have any way to pressure CEL outside of that.
The 10-cell missile Launcher contributes to the single-attack Stagger but also offers pressure outside of that. Just before you see your opening for a Stun Launcher shot, throw the missiles out. If your Stun Launcher shot lands, the missiles certainly will, and that will be enough to Stagger CEL.
This is the more versatile option, as you don’t have to stop moving for a moment to fire. If you ever find yourself in dire straights and needing just that last little bit of Impact (this will happen often against CEL), you don’t want to have to stop moving to get it.
Related: Best weapons in Armored Core 6
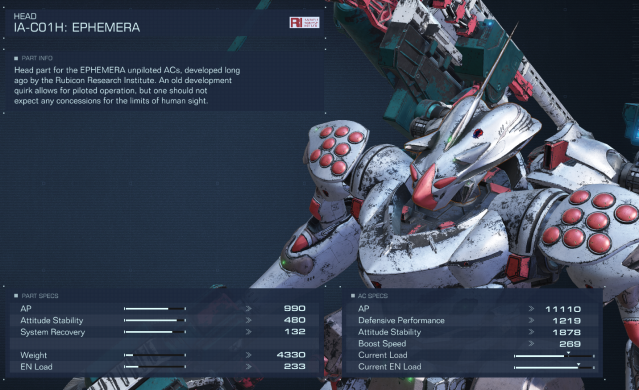
Head—Ephemera
We’re entering the realm where we have a little more leeway in our parts. That said, I picked this specific head part for the fantastic Stability and Recovery. CEL hits a lot and hits hard. It’s very important you don’t get bogged down with Impact, or you will die.
Related: All head parts in AC6
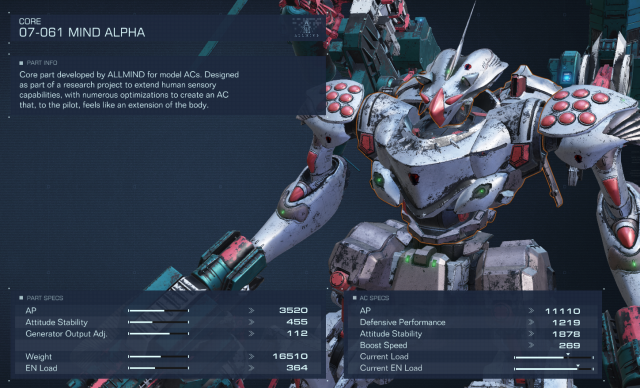
Core—Mind Alpha
This core is a great all-around option. It’s decent at everything and bad at nothing. If you’d like, you can play to one extreme or another, however, I don’t see any reason to do so. The Mind Alpha is slightly lacking in Stability, though we make that up and more with the Ephemera head. This core doesn’t consume a lot of energy (leaving space for more powerful guns).
Related: All core parts in AC6
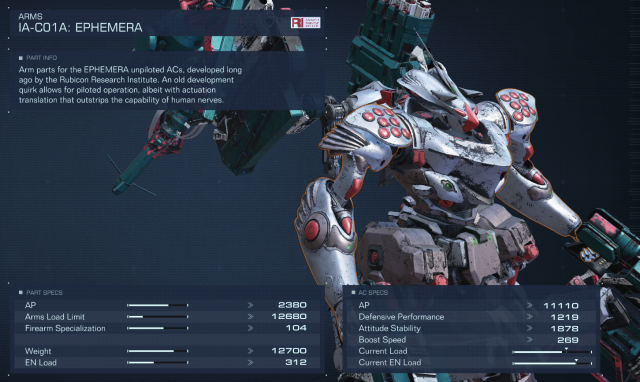
Arms—Ephemera
The arms are a little tricky, as you need something bulky enough to carry two Gatling guns. This alone limits your options. The reason I chose Ephemera is because this pair has a good Firearm Specialization score, which allows for an easier time tracking targets. CEL 240 is extremely fast—if you can’t track well, you won’t ever land anything.
Related: All arm parts in AC6
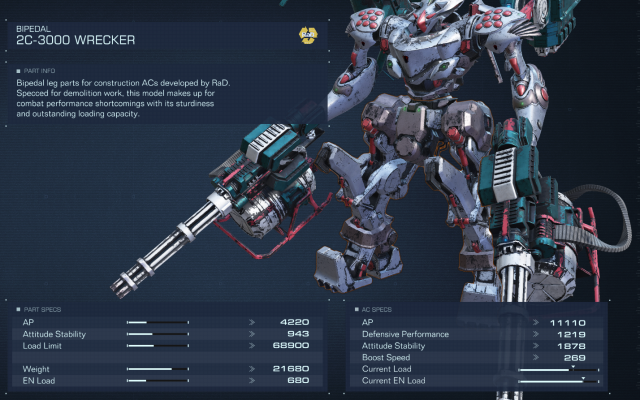
Legs—Wrecker
The Wrecker legs are the best blend of weight and mobility you’ll find. These things can carry an absolutely massive amount of weight for bipedal legs, and still allow you to have the universal mobility of the category. Remember, our entire focus for beating CEL is to match their movement speed and power.
Another option would be to run the popular tank build, however, I found this design to be severely lacking in vertical movement and precision. You can zip around at high speeds, but not change directions or pivot as effectively.
Related: All leg parts in AC6
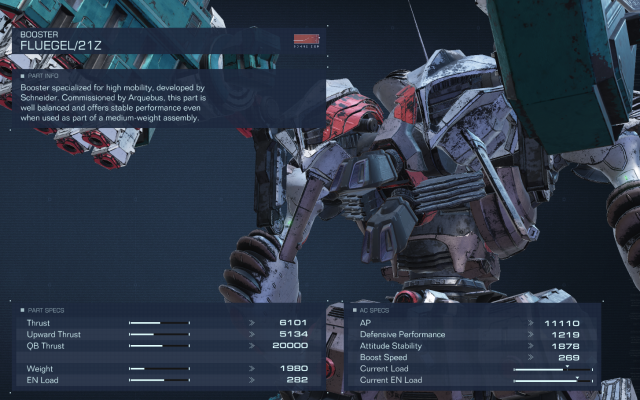
Booster—FLUEGEL/21Z
For boosters, we want something that doesn’t have a glaring flaw, or else CEL would exploit it. You can’t rely on any one type of movement in this fight—be it vertical or horizontal. If you are terrible at either, you aren’t likely to beat this boss. A middle-ground booster like this means you have to be precise with all types of evasion, but that all types of evasion are indeed viable so long as you’re on point.
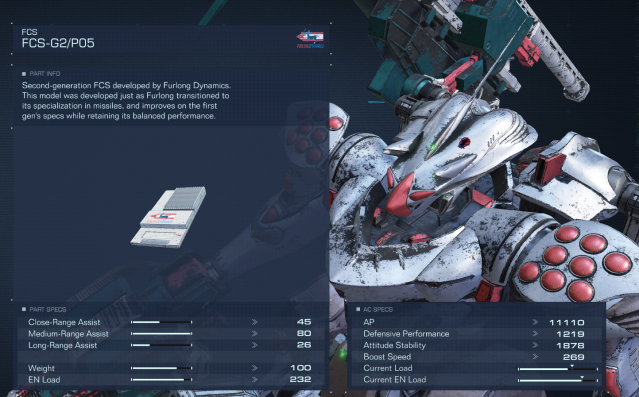
FCS—G2/PO5
As you can see, I dumped literally everything into Medium-Range Assist. In general, I find this to be the best option in Armored Core 6. For CEL specifically, it is no different—we want to be able to apply pressure with our Gatling guns. This is easily done at Close Range regardless of your FCS, basically impossible no matter your FCS at Long Range, and can be anything from impossible to easy at Medium Range depending on FCS.
Alas, this feels like the only real option here.
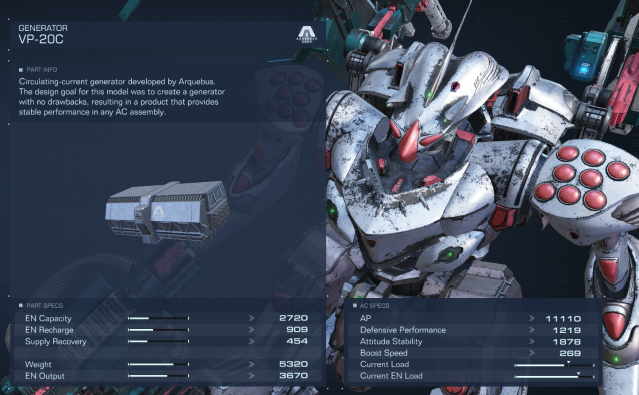
Generator—VP-20C
Every generator decision I make is as follows in Armored Core 6:
- Can it power my Assembly?
- Is it the lightest option that can power my Assembly?
- Does it have the best EN Recharge out of the generators that can power my Assembly?
Answer those three questions, and that’s it. Seriously. If you find yourself choosing between a lighter option and an option with better EN Recharge, go with the Recharge option. You will be boosting a LOT in this fight, and being able to do so at any moment is more important than shedding a tiny bit of extra weight.
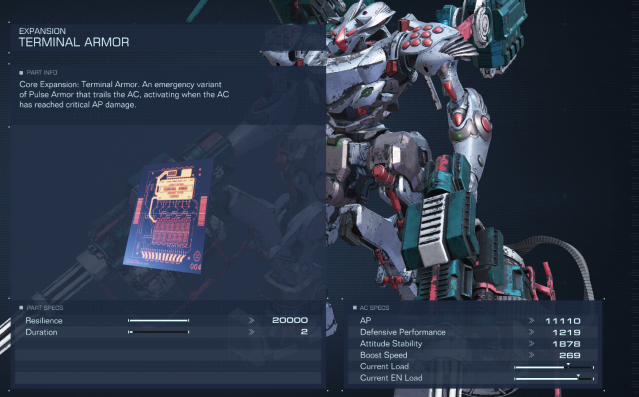
Expansion—Terminal Armor
Here’s the thing. CEL 240 has two lives. If you use any of your Repair Kits during the first life, you’re going to be in serious trouble for the second life, which is significantly harder. That said, CEL 240 hits very very hard, so if you’re below half health you’re in danger of being one-shotted.
Terminal Armor prevents a single death, provides a massive shield for two seconds, and then restores your AC to one AP. This means you have a get-out-of-jail-free card—you can safely hoard your Repair Kits and wait until you would have been killed before using one.
I’ve also found there is just something about having that “extra life” that makes you calmer. When you’re calm, you’ll play better. Having this security in your back pocket may mean you never even end up needing to use it (that said, when I beat CEL 240, it was in the middle of Terminal Armor. I had one AP left).
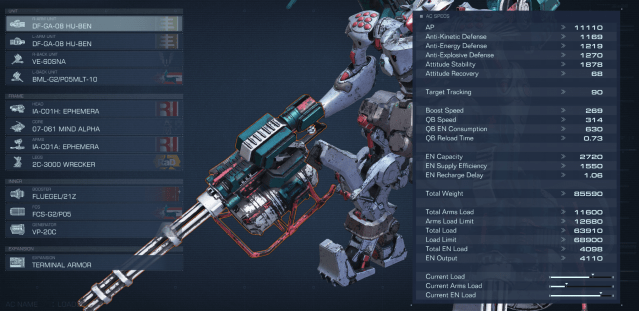
The full build stats
Here are the statistics for my full build that I used to defeat CEL 240. As you can see, the build really is centered around weaponry. Everything else is just about optimizing slots while making sure the weapons are still usable in the Assembly. You can swap parts out if you’d really like to so long as you’re making sure the guns fit.


Published: Aug 31, 2023 10:29 pm