Understanding your audience is one of the most important, and oftentimes complicated, aspects of being a Twitch streamer. But luckily, there’s an abundance of tools that creators can use to figure out the best practices for interacting with viewers.
This week, Twitch introduced a new way that streamers can analyze their viewer engagement with a feature called Chat Activity. The tool is a chart that is available for all creators with VODs enabled on the platform.
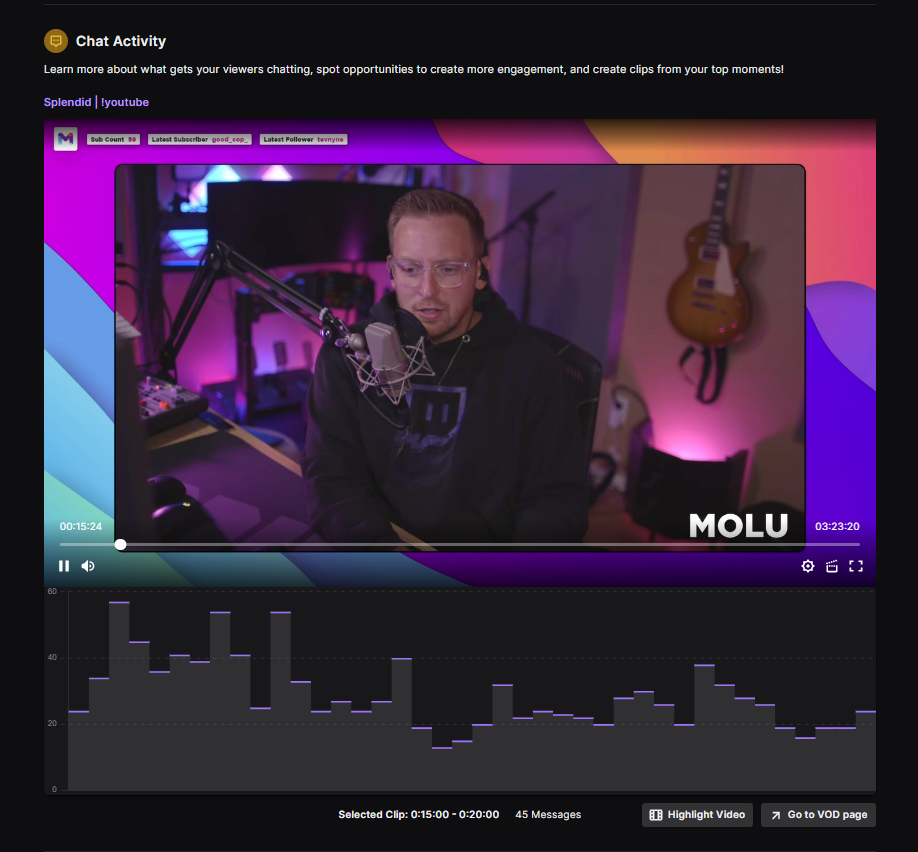
The tool gives creators the ability to see which parts of their streams solicited the most chatting. Above the chart itself, streamers can see a VOD of the stream in question and move through the video to see exactly what was happening when the chat was especially active or quiet.
If you have VODs enabled on your channel, here is how you can find the Chat Activity tool and analyze your streams.
How to use Twitch’s Chat Activity
Chat Activity can be found on your Stream Summary page. If you’re not familiar with how to get there, it only takes a couple of quick clicks.
- Left-click your profile picture in the top right corner of the Twitch home page.
- Choose “Creator Dashboard from the drop-down menu below your profile image.
- On the left side of the screen select the “Insights” drop down.
- “Stream Summary” should be the second available option on the Insights drop-down.
- If you’ve streamed anytime recently, you’ll be able to see key information on your stream.

Your Stream Summary will include stats, notification engagements, emote analytics, and information on how people arrived at your stream. Along with those things, you will now be able to see Chat Activity.
The chat activity chart will have bars across it that represent the number of messages in your chat for every five-minute segment in the stream. Clicking on different bars will direct you to the corresponding timestamp in your stream so you can see what got people talking, or why no one was chatting.










Published: Sep 30, 2022 05:38 pm