Broadcasting on Twitch is fairly simple, but at the same time, there are regularly technical difficulties that can stymie a content creator.
Running a test stream and using Twitch’s “Inspector Tool” is a good way to assess your stream quality and make sure that your broadcast will run properly when you go live for the masses. Doing this can allow a streamer to focus more on their content when they broadcast instead of worrying about whether they’re dropping frames or have some sort of connection issue.
To run a test stream and look at your stream quality, the first thing you need to do is go to Twitch’s Inspector Tool at inspector.twitch.tv.
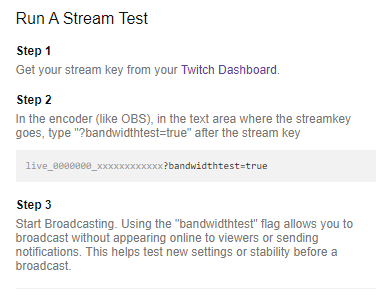
From there, you’ll be asked to log in and you can “run a stream test.” It’s not as easy as just clicking the purple button in the middle of the screen, though. You’ll have to follow a few instructions and edit the text area of your operating broadcast system (like OBS or Streamlabs).

First, you’ll want to get your stream key from your Twitch dashboard. After that, you’ll need to go into your broadcasting software to edit your stream key and add “?bandwidthtest=true.”
By adding that last part, your software won’t push your channel live for viewers. Instead, you’ll only be running a test. And by referencing the inspector tool, you’ll be able to check for any potential technical issues with connectivity.
Twitch has a few requirements for video and audio settings for streams, including a 4,500 to 6,000 kbps bitrate and 60 or 50 fps framerate, but its website also has a number of tools and guides for understanding and analyzing stream tests to make sure your first live broadcast goes off without any hiccups.
To learn more about how to read Twitch’s Inspector Tool, you can check out the platform’s guide to broadcast health.


Published: Sep 21, 2020 04:42 pm