
Part of the Otherworld Brookhaven Hospital in Silent Hill 2 remake, the Chained Box is the core puzzle you need to solve if you want to discharge yourself. After completing Brookhaven Hospital only to get tricked by Laura, James finds himself on the wrong side of a nightmare. The Bubble Head Nurses now have knives, the Lying Figures explode on impact, and Mannequins hide around corners like ninjas.
So, you must solve the Chained Box puzzle in Silent Hill 2 remake if you want to make it out of the Otherworld alive. Here’s everything you need to know about the Chained Box.
This guide has Standard puzzle difficulty solutions and combinations.
Silent Hill 2 remake Chained Box walkthrough
The Chained Box puzzle has three parts to it. There are two combinations to uncover and a key to find. You must visit every floor to solve this puzzle, giving you the -1 Elevator Button to reunite with Maria and jump over the final hurdle to conclude the Brookhaven Hospital. For now, you’ll want to focus on locating the Lapis Eye Key to remove the first chain from the Chained Box.
Lapis Eye Key location
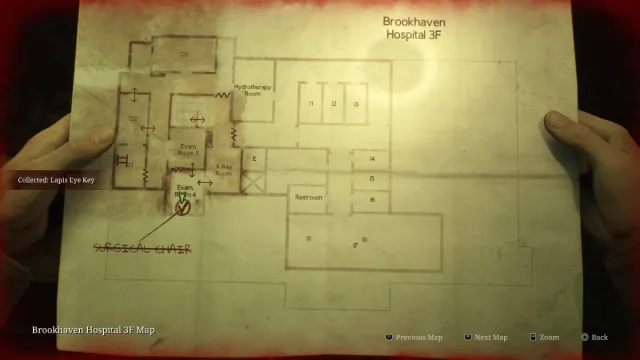
Although this is a new area for James and us, you can still use the map to guide you. Landing inside the room above the Dayroom in the Otherworld, James should make his way to the second floor via the elevator. As you can’t reach the third floor inside the elevator, you instead need to use the western staircase to reach this section of the Otherworld. This will lead you straight to Exam Room 4. There is an Instrument of Force you should use immediately on the dummy. A hole in its head is revealed after destroying its arm, indicating you need to put something inside (for what we assume is a fake lobotomy).
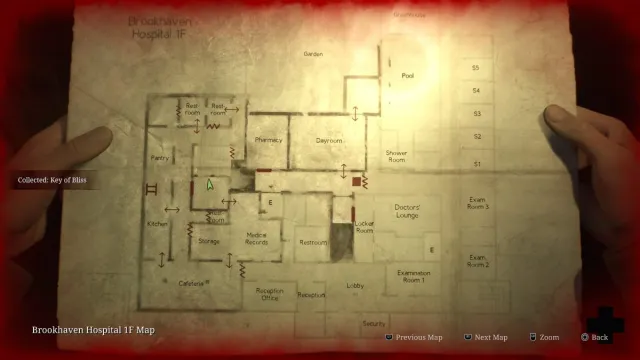
Staying on the third floor, find the ladder directly west of the dummy’s location, which will take you down to the first floor. This area is a pain to navigate as multiple enemies stack within narrow corridors. We recommend you use the Handgun to thin out the enemies as the Nurses, Mannequins, and Lying Figures spawn in this version of Brookhaven Hospital. To perform your lobotomy, locate the Key of Bliss within a hole inside the large room above Storage and Restroom. You can access this area by heading on through Medical Records.
Once you have the Key of Bliss, return to Exam Room 4 and use it to get the Lapis Eye Key.
Calendar Page combination

The second part of this puzzle takes place on the west side of 2F. You no longer need to visit another floor for the remainder of this puzzle. Instead, follow the chain to the left of the Chained Box, which will take you to the room called M2. This cell has its own puzzle where the rules are detailed in the Calendar Page note on the floor. Each line to this note corresponds to a number needed for the Chained Box’s four-digit code.
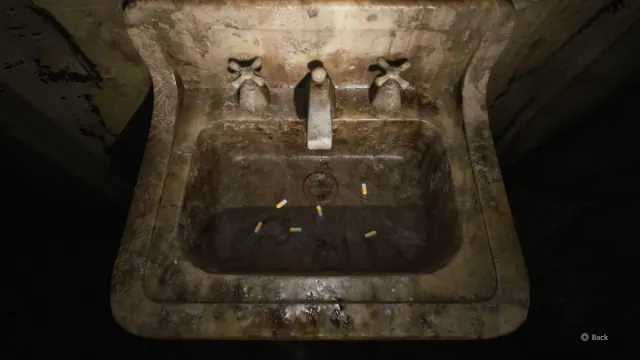
The first line strictly tells you the first number of the four-digit code. The next lines mention the pills in the sink. Look into M2’s sink, count the pills, and make a note of the second digit for the code.

The third line refers to the time of the horn. This links directly to the fourth and final line, which refers to the number of times the light flickers off outside the room. There are two holes in M2. The hole near the ceiling is angled at a light that frequently flickers in a set pattern. Count the number of flickers, as this is the next digit you need.
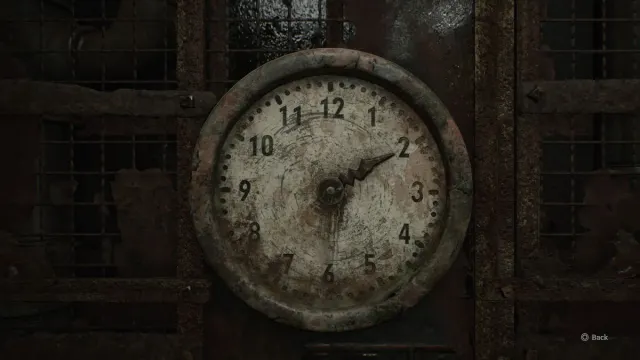
This number is also used on the horn. You can confirm this if you go into M1 and interact with the dial. Fix the hand and move it across to the number of light flickers. This will be two if you’re playing on Normal puzzle difficulty.
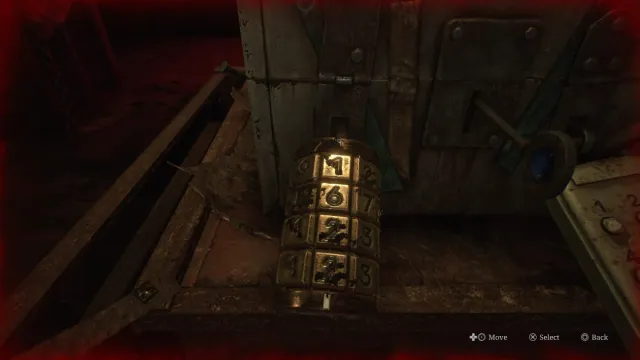
This will confirm that the Chained Box Calendar Page code is 1 6 2 2.
Treatment Stretcher combination
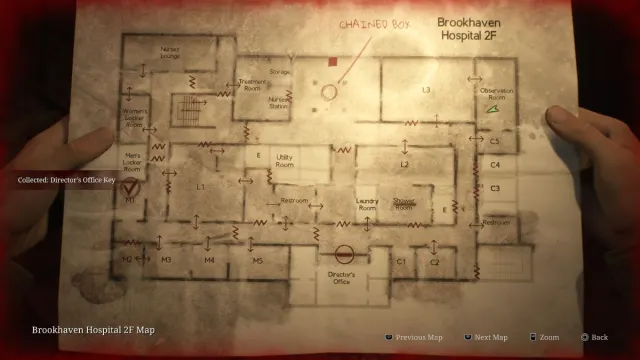
With only one chain left to break, you can head to the east side of 2F and enter L2. Move the wheelie unit from this room and in front of L3‘s wall. Jump up to access this locked area and move into the Observation Room, handling any Nurses attempting to kill you. Pick up the Director’s Office Key in front of the television in the Observation Room and head south to unlock the office. Ascend the ladder to find the Treatment Stretcher.
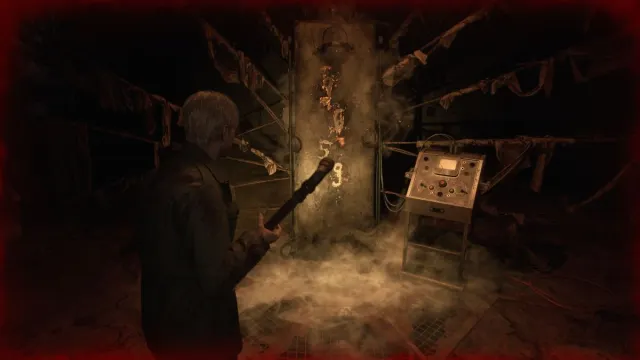
Thankfully, the final part of the puzzle is far simpler than the previous one, as you only need to activate the Generator above the Restroom on 3F to switch on the Treatment Stretcher. The code will burn into the Stretcher when you hit the power button. All you need to do now is return to the Chained Box to input the second code, 9 6 5 9, to reveal the box’s contents.


Published: Oct 7, 2024 05:57 am