A lurk command is a simple addition to your stream that you can add on any streaming software of your choice. The command allows non-active audience members, often called lurkers, a way to show they are still supporting the stream despite their inactivity.
You can set up your lurk command in just a few simple steps. First, open up your streaming platform and go to your bot. Make sure your bot is properly enabled and modded. If it is not already set up, go to your chat and input /mod followed by your bot. This will depend on your OBS of choice; for example if you are using Streamlabs you should type /mod Streamlabs or /mod Nightbot.
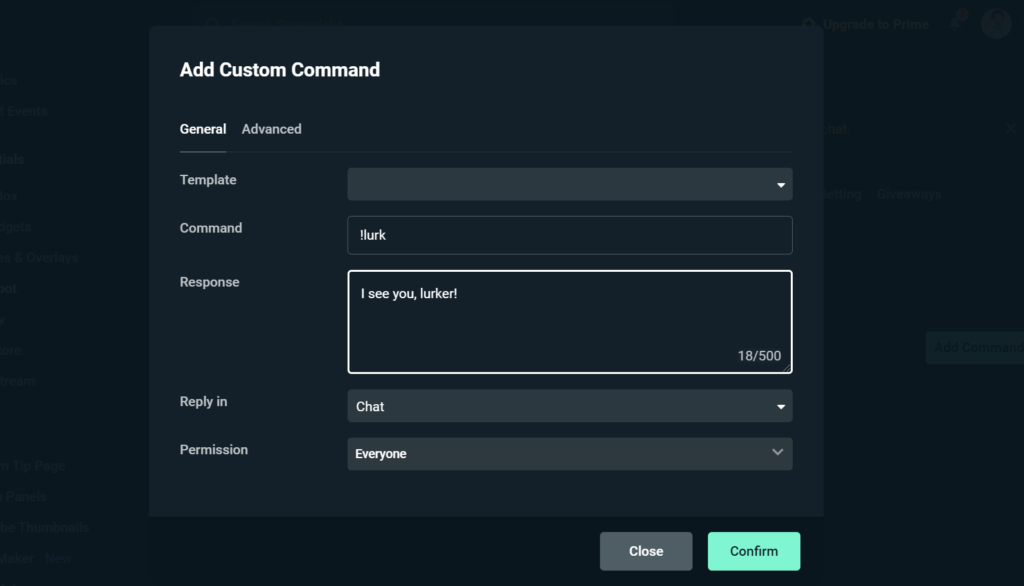
Go back to your bot in the OBS and select the Commands tab. From here, select the Add Commands option. Once again, using Streamlabs for an example, you would select Commands, then Custom and finally Add Command.

In the Command section, you can add your !lurk command and customize what you would like the text response to the command to be. You can change the details around the command further by setting who can use it and how often the response is triggered.
Finally, all you have to do is hit confirm and the settings will be saved and ready to use in chat. When the changes are applied, anytime a chatter types “!lurk”, your custom message will appear saying something along the lines of “I see you lurking, [Chatter’s name].” Of course, your message is entirely up to you and can be an extension for your channel’s brand or community.
While not every chatter may be able to actively engage with the stream at all times, a large majority still want to show their support. The lurk command not only provides audiences a way to communicate their support but gives the streamer another opportunity to add personality to the broadcast by adding a custom command that also promotes audience recognition.


Published: Sep 27, 2021 02:37 pm