
There’s no greater misfortune for a competitive gamer than missing out on recording an incredible highlight. But Steam has just recently added built-in gameplay recording software that works with any game on the platform, so you shouldn’t miss a thing.
The Steam Game Recording beta lets you record, clip, and send highlights all within Steam, without the need of any additional recording or clipping software. You’ll also have the choice to automatically or manually record your game footage.
This feature isn’t automatically turned on for everyone, so if you want to get started recording gameplay and clips on Steam, follow these steps.
How to turn on clip recording on Steam
Activate the Steam Game Recording beta
Steam Game Recording is currently a beta features, so you will have to manually turn on the Steam Game Recording beta before you start clipping.
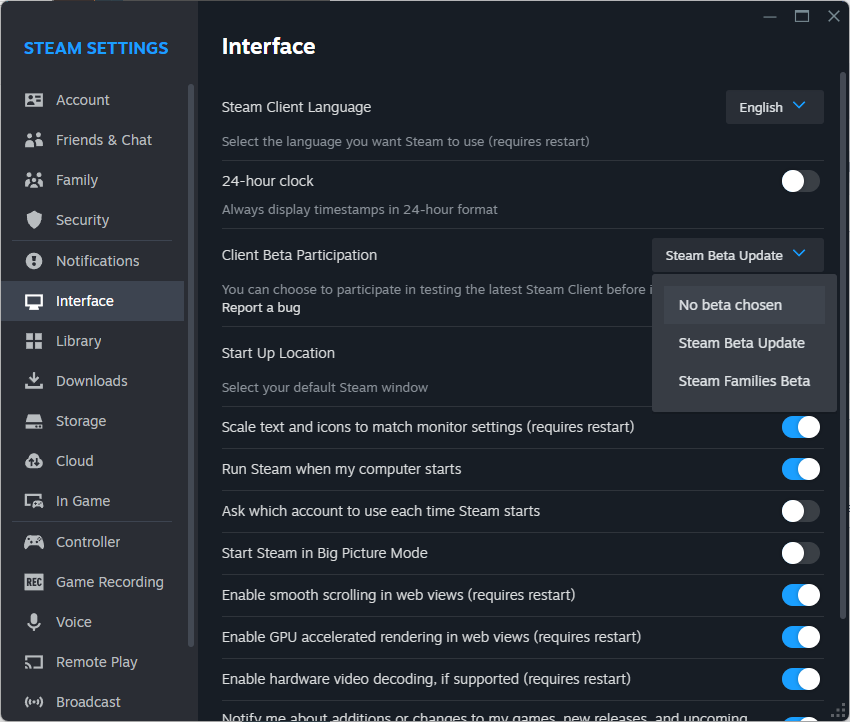
To do this, open Steam and select Settings from the main Steam menu. Go to Interface, and set Beta Participation to Steam Beta Update. After this restarts Steam, go back to Settings, then go to the Game Recording section.
Choose between background (always on) recording or on demand recording
In your Steam settings, you will need to select between background and on demand recording under the Game Recording menu.
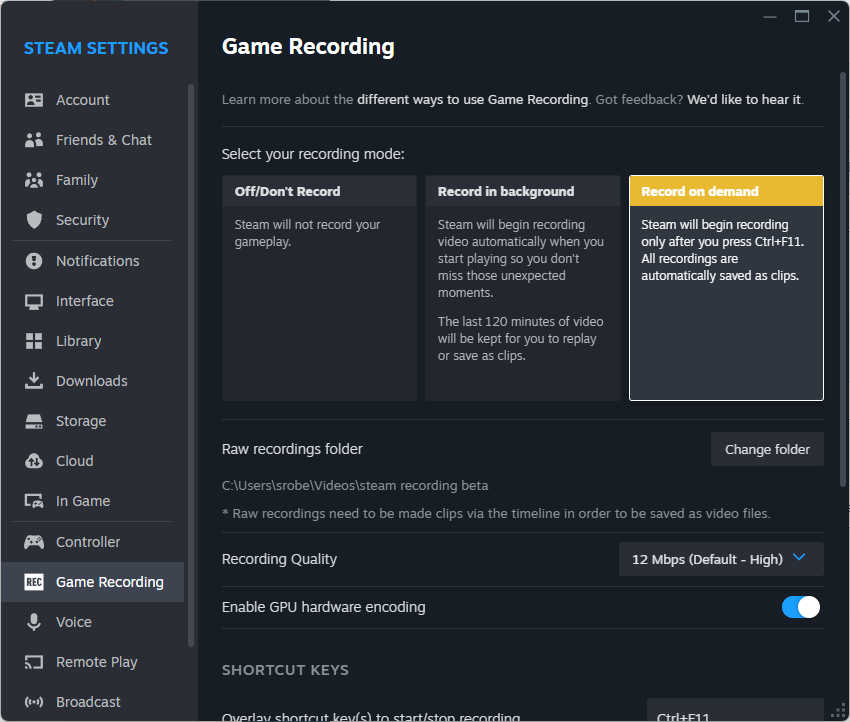
Background recording will begin automatically when you start playing, and will save the most recently recorded footage to your designated folder. By default, background recording will save the most recent 120 minutes at High quality. Within Game Recording settings, you can change the recording length and the quality, and you’ll be able to see how much disk space the recording will take up.
On demand recording is the manual version. With on demand recording, you will have to hit a key shortcut to start and stop recording. By default, the start/stop recording shortcut is Ctrl+F11, but this can be changed to any input.
The settings menu also lets you choose whether or not to include your microphone in the recording audio, and you can also include/exclude other programs in addition to the game, such as Discord or Spotify. You can also designate a shortcut to place a manual marker, Ctrl+F12 by default, that will place a marker on your recording timeline.
Use the clip editor in the Steam menu
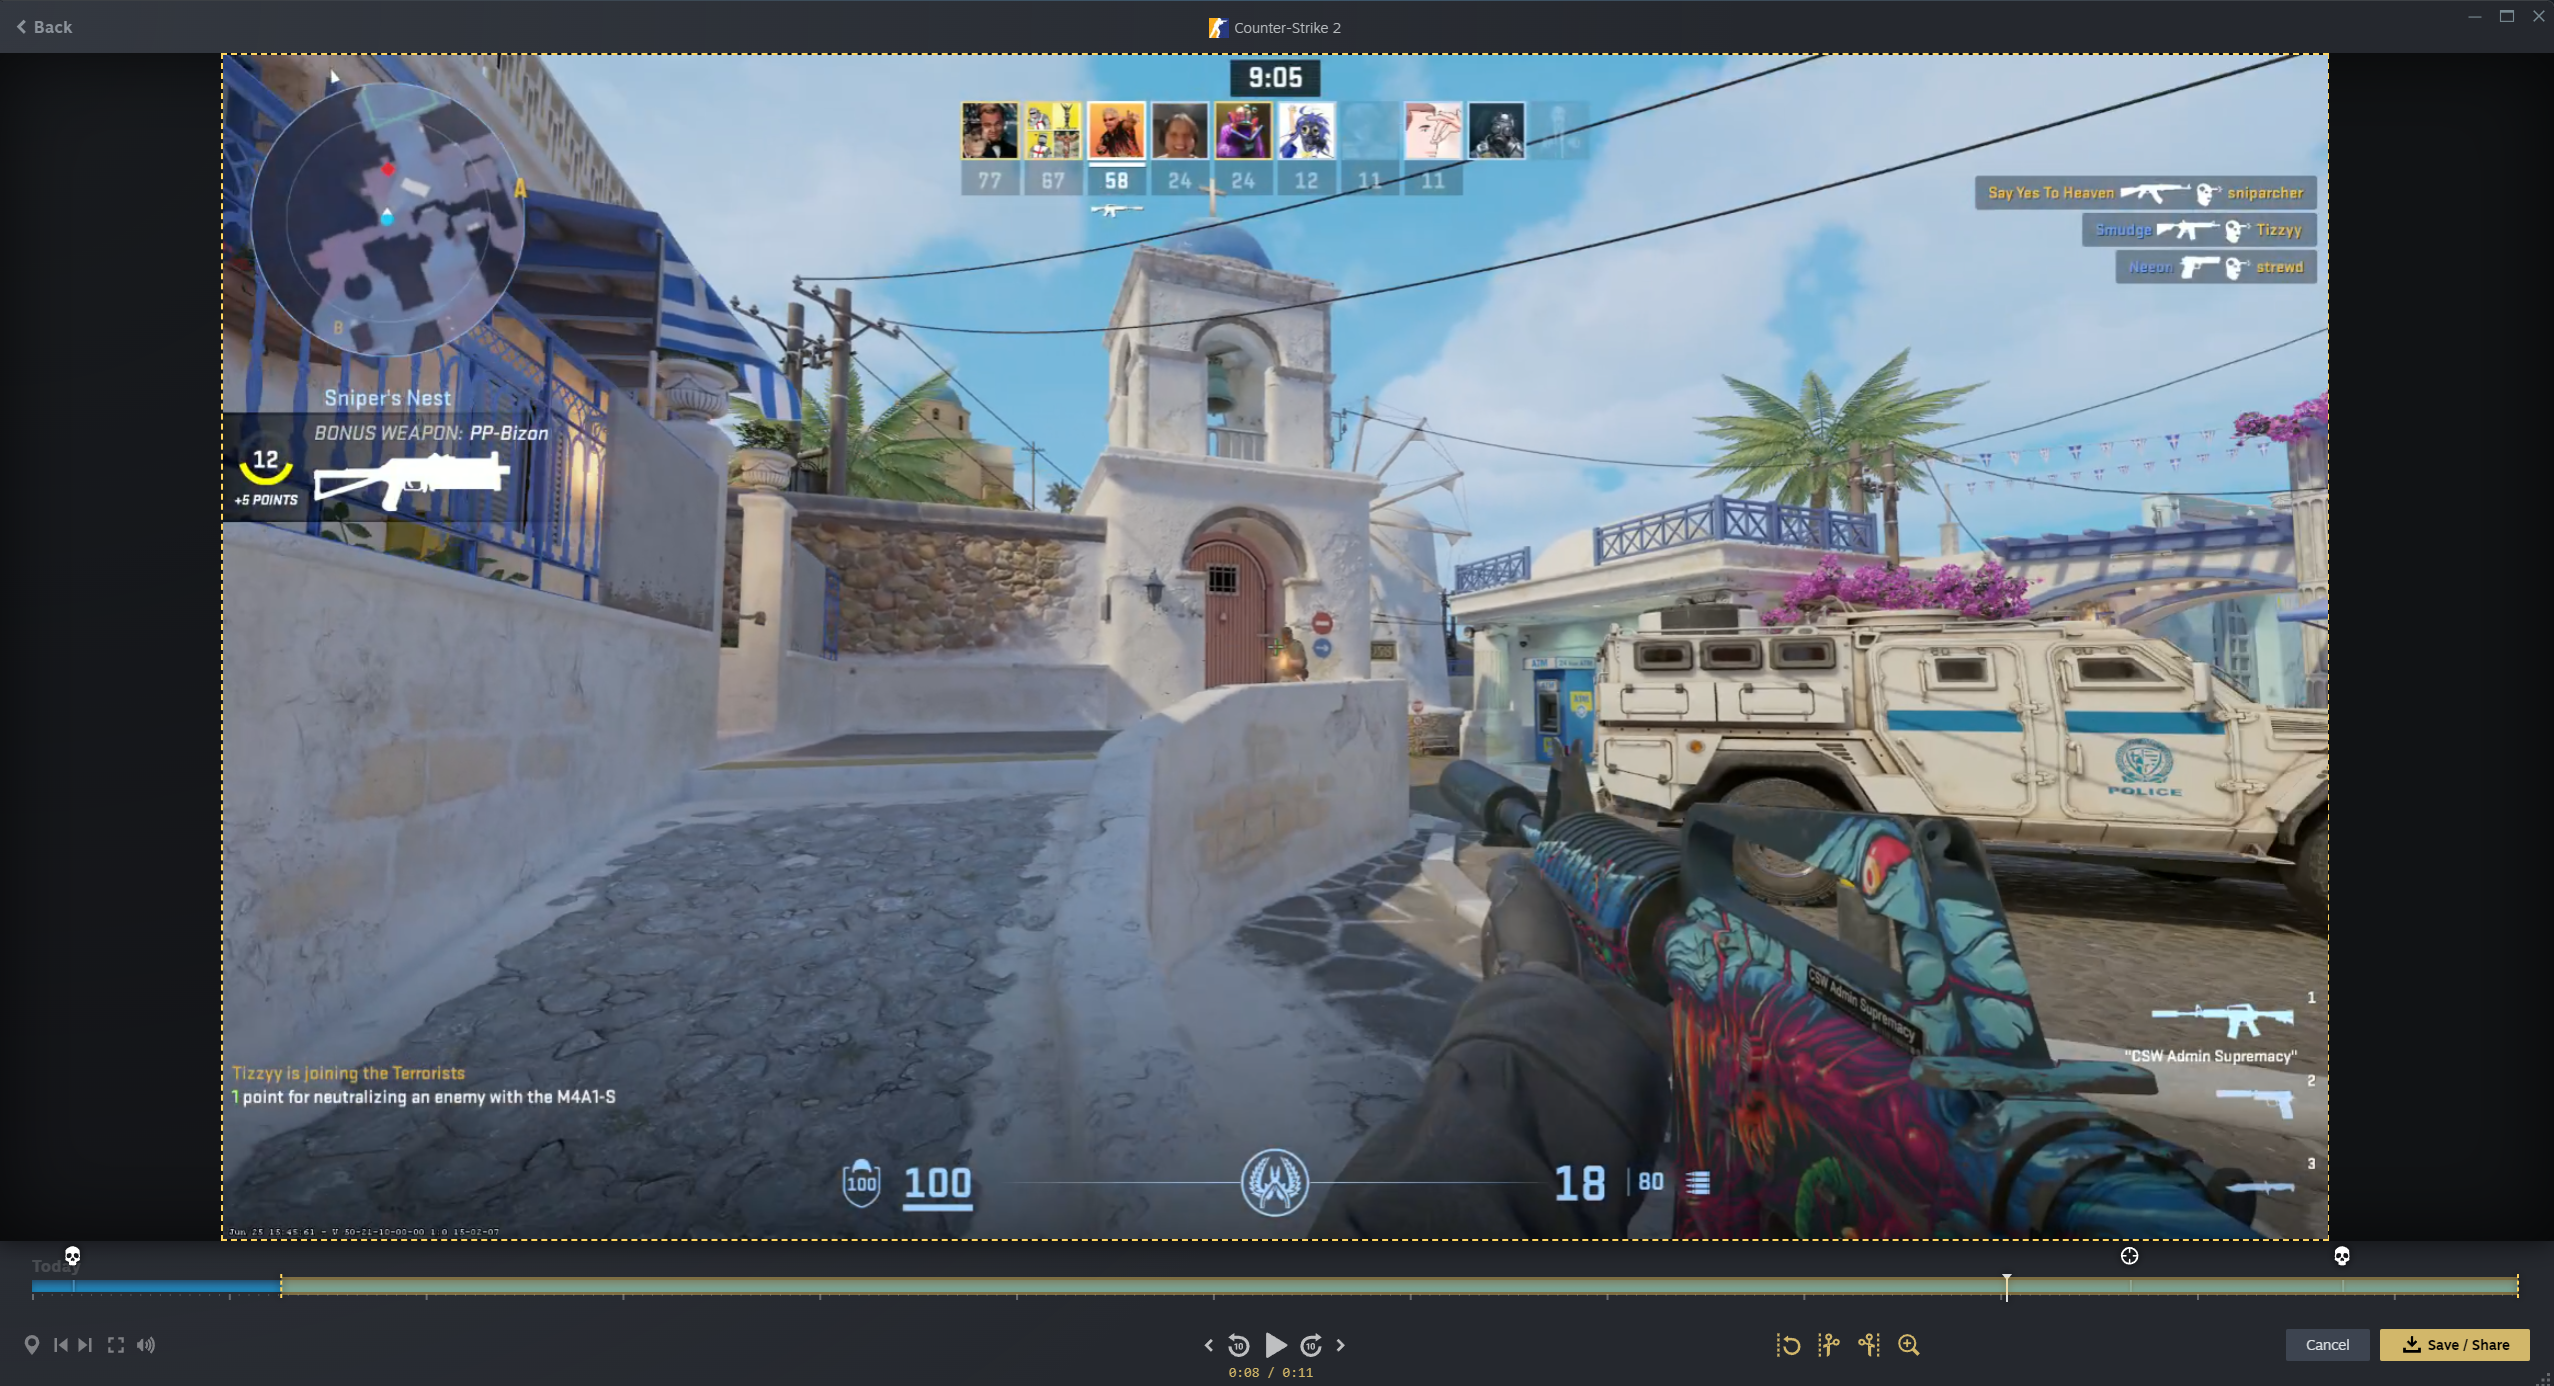
After you exit the game or end the recording, you can use the new built-in clip editor to trim your recordings down into a smaller gameplay recording or individual clips. You can even bring up the editor in-game via the Steam overlay. Your recording’s timeline will feature game-added markers that highlight notable events like kills, deaths, or clutches, as well as manual markers you make.
Use the tools to trim off the footage you don’t want saved. Once your clips are made and saved, you can either export them as a video file, or you can send your friends a link to watch them through Steam. You can also send clips through direct Steam messages.


Published: Jun 26, 2024 04:36 pm