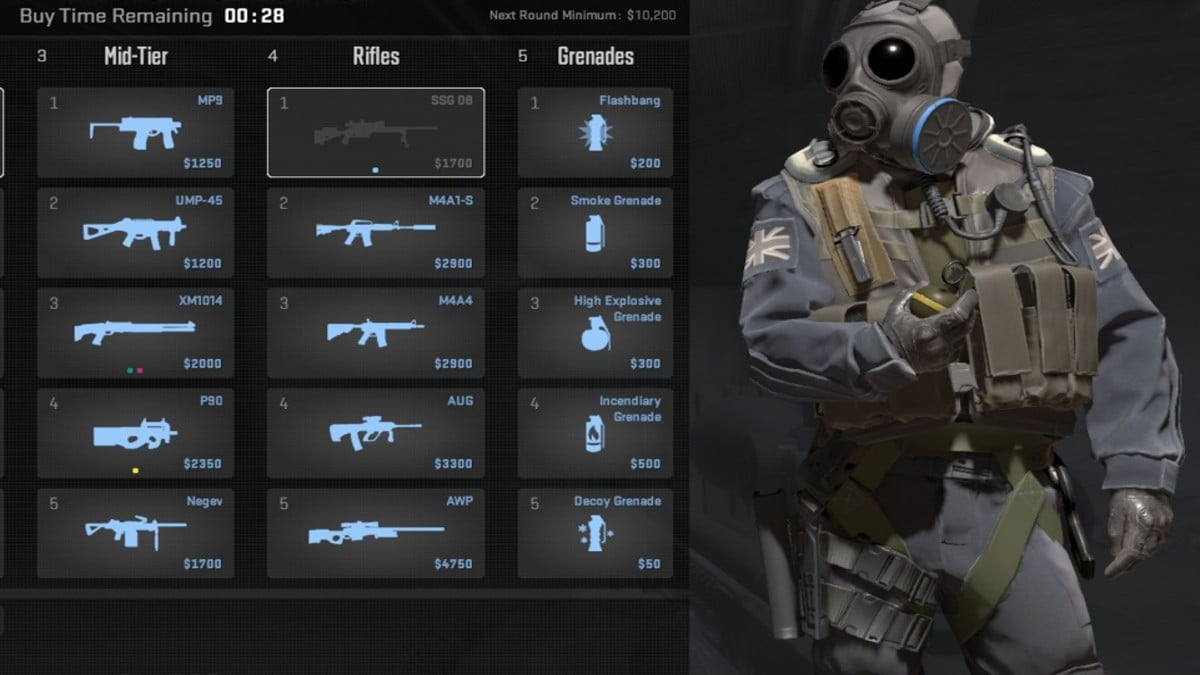
Buying weapons in Counter-Strike 2 takes time—but with your teammates yelling at you to force buy at the last second or you returning from being AFK, you need a quick buy option to gear up as soon as possible.
Like every game in the franchise, CS2 also allows you to create buy binds to save you the trouble of manually equipping your armor, primary weapon, and nades. You can make a config file that loads your binds and settings with the game’s launch or use the console to create buy binds one at a time.
With that said, here’s how to create buy binds in CS2.
Table of contents
How to make a CS2 buy bind the quick way

The absolute best way to set up buy binds in CS2 starts with totalcsgo.com. The site allows you to set up any bind you like with any weapon.
It’s best to create buy binds using keys you don’t use for any other purpose in the game. I recommend using the Numpad, but if you’re using a tenkeyless keyboard like me, stick to using the number keys on top of the keyboard. For example, I have my 6 key bound for a full buy (rifle, head armor, and nades), 7 key bound to AWP purchase (with light armor, smoke, and flashes), and 8 key bound to force buy (FAMAS, light armor, and flashes).
If you’d prefer to bind a standard letter or number key, you can replace each value in quotation marks after the bind command. Here’s an example:
- bind “kp_home” “buy defuser”
- bind “p” “buy defuser”
Here’s what it might look like on totalcsgo.com:
- bind “p” “buyak47; buy m4a1; buy vesthelm; buy flashbang; buy smokegrenade; buy hegrenade; buy molotov; buy incgrenade; buy defuser”
When you’ve finished choosing your binds on the displayed keyboard, simply copy the Current Bind from the right side of your screen. Additionally, you can also use the Save to Config option to generate a config file for you to download. It’ll almost take some experimenting with your binds, but don’t be disheartened if you don’t get it right the first few times.
Here’s an example of what the script may look like.
- // buy binds generated by totalcsgo.com
- bind “kp_home” “buy ak47; buy m4a1;”
- bind “kp_uparrow” “buy awp;”
- bind “kp_pgup” “buy negev;”
- bind “kp_leftarrow” “buy flashbang;”
- bind “kp_5” “buy smokegrenade;”
- bind “kp_rightarrow” “buy molotov; buy incgrenade;”
- bind “kp_end” “buy vesthelm;”bind “kp_downarrow” “buy defuser;”
- bind “kp_pgdn” “buy p250;”
- bind “kp_del” “buy vest;”
- bind “kp_slash” “buy ump45;”
- bind “kp_multiply” “buy p90;”
When you’ve downloaded your script, change its name from “config.cfg” to “autoexec.cfg.” You can add as many binds or simply tweak the existing ones by opening this file in Notepad every time. Next, navigate and paste your script to the game’s config folder which is typically located at “C:\Program Files (x86)\Steam\steamapps\common\Counter-Strike Global Offensive\game\csgo\cfg.”
Now, go into your Steam library, and right-click on CS2. Click properties and search for the Set Launch Options button under the General tab. After you’ve done this, a smaller window should pop up. Finally, type “+exec autoexec.cfg” into the box and click “OK.”
The next time you load up CS2, your new binds will be good to go.
How to make a CS2 buy bind the traditional way
If you’re unable to create an autoexec—or if you’re lazy and simply don’t feel like it—you can type your script manually into CS2. You can do this by entering each line of the script one by one into the console. It’s tedious and time-consuming, but it gets the job done.
The default key for the console is tilde (`), but you can rebind it in the settings. To bind each key manually, open up the console and either type or copy and paste each line of your script. Remember to hit enter after each line.
The best place to do this is in a private server or offline. This will give you the option to test your binds and ensure they work accordingly.
Once you’ve set your binds, your next step is to practice and memorize. This will inevitably take time to get used to, but the more you practice, the better. Eventually, the buy menu will be a breeze, giving you time to focus on strategy and get your head in the game.


Published: Feb 6, 2025 09:55 am