
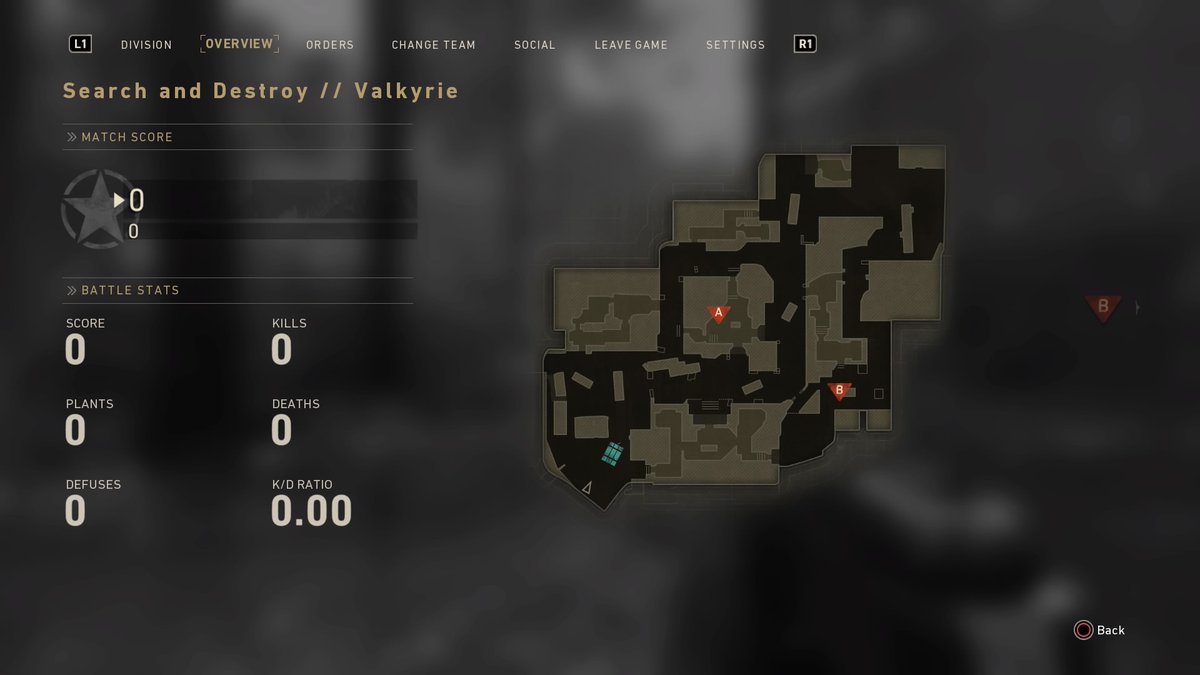
The Call of Duty World League recently added Valkyrie to the competitive ruleset for WWII.
As one of the newest maps introduced to WWII in the game’s first DLC pack, the CWL let players test the map a bit before announcing which game modes would be played on Valkyrie. The CWL then revealed on Feb. 14 that Hardpoint and Search and Destroy would be the two game modes for Valkyrie in competitive play.
Related: Valkyrie Hardpoint, Search and Destroy have officially been added to the CWL ruleset
Players will definitely need to quickly learn the Hardpoint rotations on this new map. But getting used to the rush routes and power positions in Valkyrie Search and Destroy could be even more pivotal for competitive players.
This guide will help you learn the basics to playing Valkyrie Search and Destroy, both on the offensive and defensive sides of the map.
Offense
Valkyrie is a pretty small map, which means that it doesn’t take very long for the offensive team to get to the bomb sites—especially if they’re using Airborne.
There are several small buildings or narrow pathways that create many close-quarters engagements, which makes Valkyrie the perfect map for submachine guns. Most teams will likely uses multiple SMGs, and some could even elect to run full four-man SMG compositions.
With this in mind, you’ll definitely want to create a bunch of PPSh-41 classes for Valkyrie. The most popular will likely be the PPSh with the Airborne Division, Hunker Basic Training, and a frag or sticky grenade. If you want to be quieter, but more prone to grenade damage, switch Hunker for Inconspicuous. If you’re willing to run a bit slower, you can switch Airborne for Armored and Inconspicuous or Energetic. A good mix of tactical grenades, like stuns and smokes, will also help you keep your opponents on their toes.
But if you want to run an assault rifle on Valkyrie, your best choices will be the BAR and STG-44. Although the FG 42 is the strongest AR for long-range gunfights, the BAR and STG are better for close-quarters engagements—and there will be a lot of those on Valkyrie.
The Infantry Division and Hunker Basic Training will be a good starting point for an AR class, but this could vary in several ways. If you want to get to spots quicker, use Airborne on your AR. Or you can use Mountain to make sure you’re as stealthy as possible. You could even try Expeditionary—it’ll allow you to throw grenades from further distances and protect your SMGs from any counter-rushes by the defense.
Once you have all of your classes set up, however, it’s time to actually figure out where you should be going on the map.
A bomb site
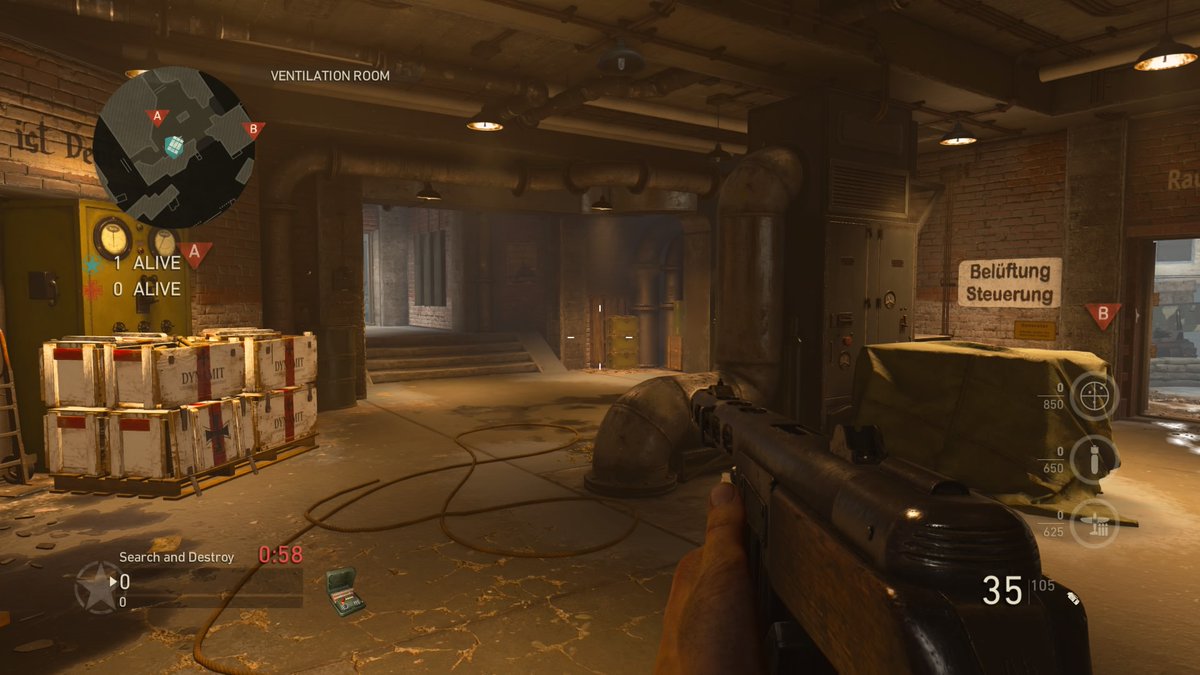
Valkyrie’s A bomb site is located in the Ventilation Room, which is also the first Hardpoint on this map.
If you have an Airborne SMG class, you can head left out of spawn across the middle street and go right into the Ventilation Room in roughly 10 seconds. But the defense can do a similar rush in just about the same amount of time—so if you pick this route, you should immediately prepare for a gunfight.
There are multiple entrances in the Ventilation Room, which makes it difficult to defend the bomb once you’ve planted it. We recommend planting on the back left corner of the bomb, and then running up the staircase toward the offensive spawn. As long as you have a teammate watching the flank, you can continuously check the bomb to make sure nobody is defusing it.
If you don’t want to go right into the A bomb site, you can elect to hit the flank by running through Office and Operations Bunker on the left side of the map. This will be risky, but it could set your team up for success if you catch an opponent off guard sitting near their spawn.
B bomb site
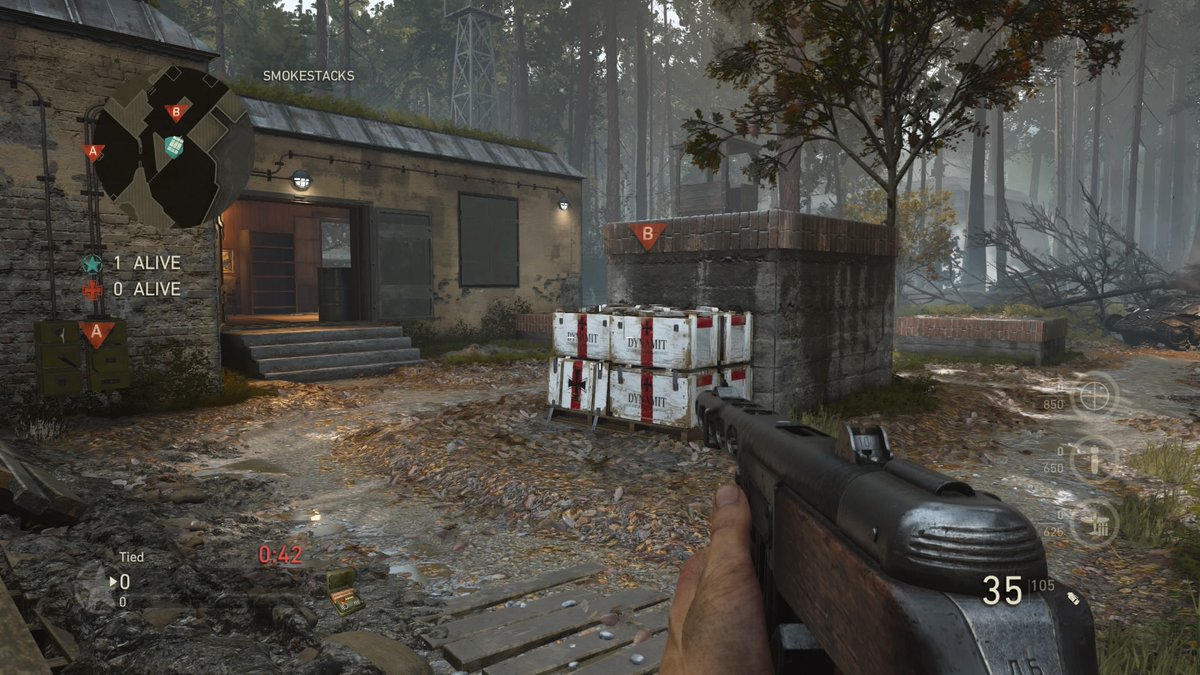
The B bomb site for Valkyrie can be found in the Smokestacks, which is the same spot as the fifth Hardpoint on this map.
From your offensive spawn, if you go right through Storage Bunker with an Airborne SMG class, you can make it to the B bomb site in just under 13 seconds. Throwing stuns at the back of Smokestacks or smoking the exit of Storage Bunker will be important to preventing the defense from getting an early first blood while you’re rushing.
You should try to plant the bomb in the front right corner and then run back toward the Storage Bunker. If you angle it correctly, you can see the bomb from the doorway—and with a teammate watching your flank, you can focus all of your attention in front of you.
In order to flank the B bomb site, you’ll have to go down the middle street or through the left side of the map, which is dangerous and can take an extremely long time. So if you want to attack the B bomb site, we recommend going right at it head on.
Defense

Defense will probably be somewhat chaotic on this map. Due to its size and several small pathways or buildings, Valkyrie seems to favor an aggressive playstyle—which most likely means the offensive team will find success rushing the bomb sites.
Keeping this in mind, you’ll definitely want to try to get control of the bomb sites as quickly as possible. An Airborne and Hunker SMG will likely give you the best chance at doing this while surviving the inevitable barrage of grenades from the offense.
Here are some spots inside of the bomb sites that can help you prevent the offense from planting the explosive.
A headglitch

This big generator in Ventilation Room will inevitably be a popular spot for defensive players inside of A bomb site. Crouching behind the generator and rotating where you’re looking will allow you to see all of the offense’s entrance points into the A bomb site. Just use the generator as a headglitch while you aim down sights, waiting for the enemies to run into your crosshairs.
You’ll definitely want to have Hunker or Armored on, however, as the offense will likely use multiple grenades to try to gain control of the area.
Back B
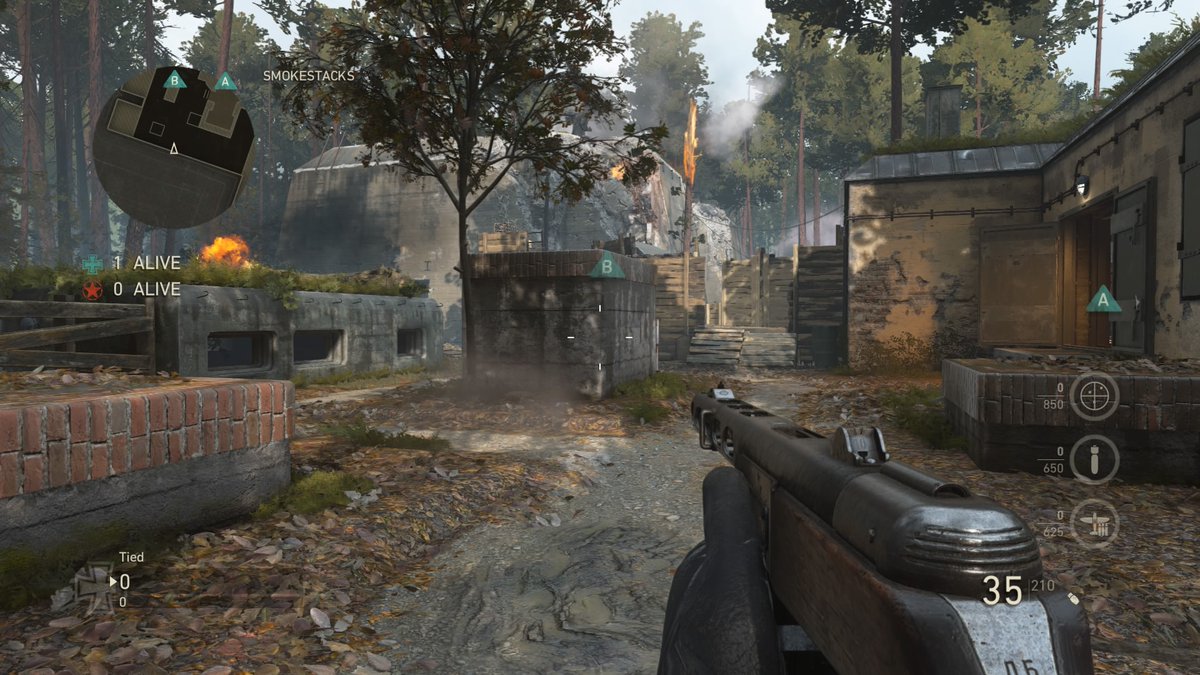
The back of Smokestacks will likely be the best area to defend the B bomb site. From this spot, you can see if the offensive players come out of Storage Bunker or if they run down mid through Construction.
Again, you’ll be susceptible to lethal and tactical grenades in this spot, so you should definitely use either Hunker or Armored.
But in addition to defending the bomb sites, you’ll also want to try to set up control of other parts of the map. Here are just a few basic spots that might help you do this—but note that new positions will be discovered as more games are played on Valkyrie Search and Destroy.
Mid control
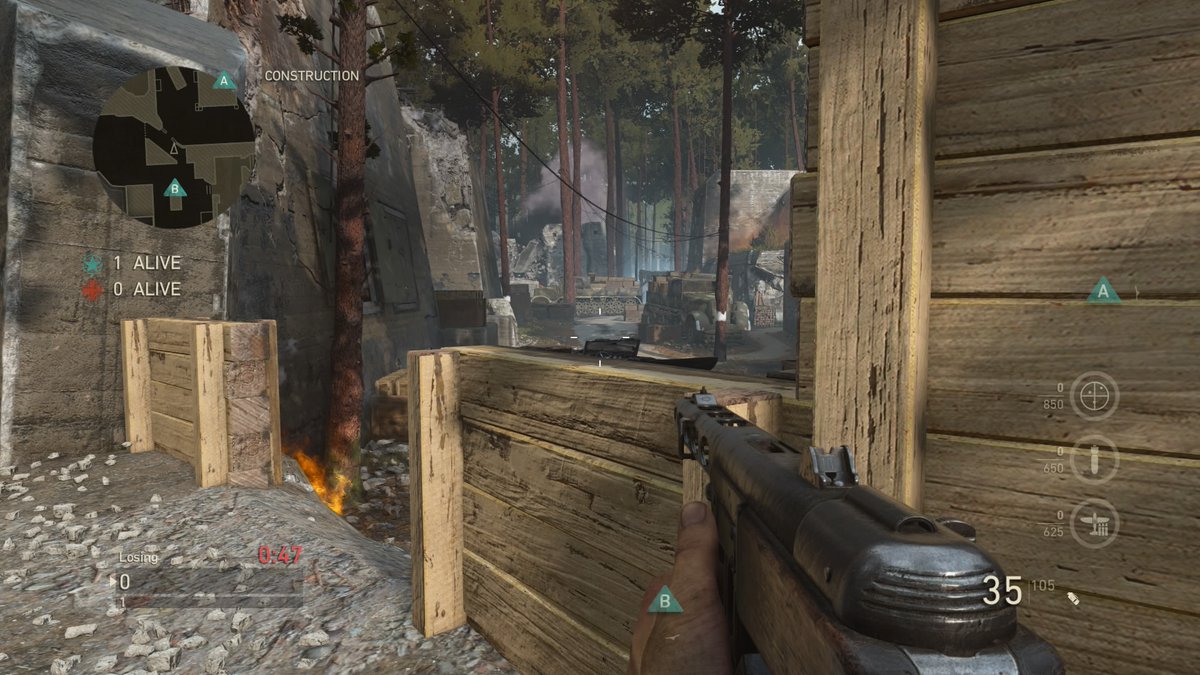
This headglitch in Construction could be a defensive power position to watch the middle of the map—as long as you have a teammate protecting your back. The only problem, however, is you won’t get to this spot before the offense crosses the street to A. So this spot will most likely only work to counteract a somewhat slow rush down Supply Street.
Watch the flank
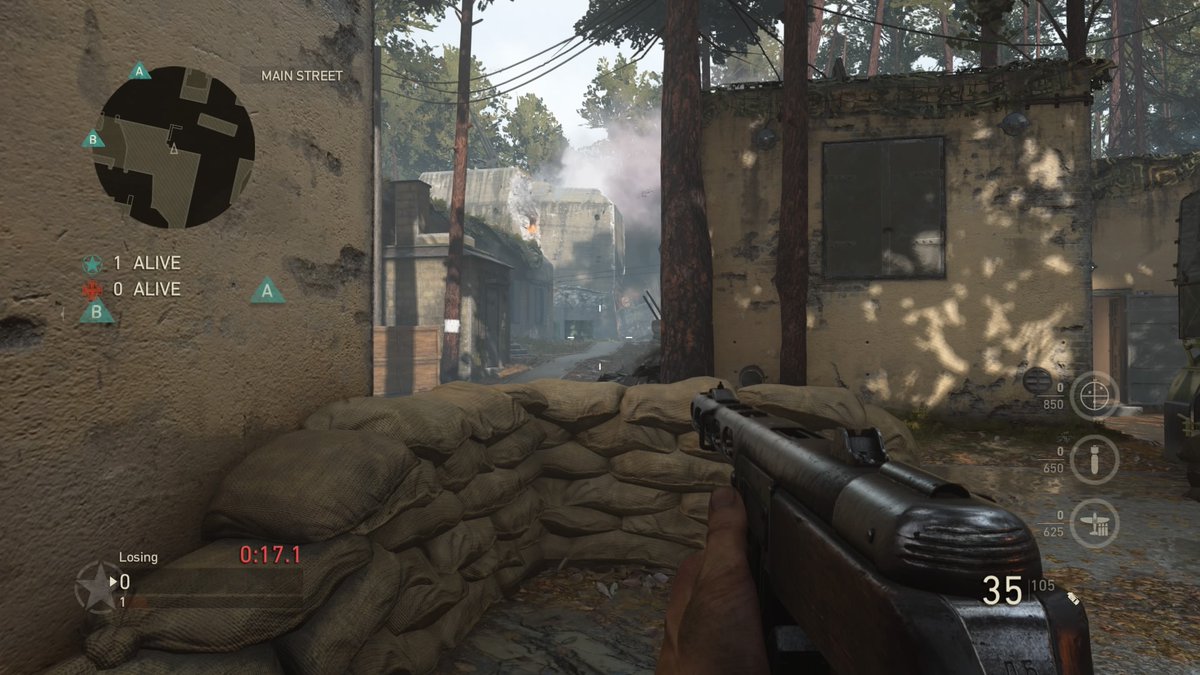
If you find that the offensive team is rushing the A bomb site frequently, you might want to try posting up in this corner on Main Street. This spot gives you a perfect line of sight at the back entrance to the A bomb site.
As long as you have a teammate inside of Ventilation Room, you can use an AR or sniper to watch this back path. This will help protect your team from any long flanks, too.
Valkyrie Search and Destroy will officially make its CWL debut on Tuesday, Feb. 20.

Published: Feb 19, 2018 11:50 am