The Open Hand Temple Murders start in Rivington in Baldur’s Gate 3, which can be accessed at the start of act three. This quest initially involves you tracking down some leads about the murder of the temple’s Father Lorgan.
While the investigator, Valeria, believes the case is closed after deducing that Lorgan was murdered by a refugee he was helping to harbor, many of the temple’s other residents believe otherwise. It’s your job to hunt down the truth and see exactly how Father Lorgan was murdered and by whom.
We will explain the Open Hand Temple Murders quest in its entirety in the guide below.
How to solve the Open Hand Temple murders in Baldur’s Gate 3
The Open Hand Temple is located right near the circus and off the main street near the Rivington waypoint.
I recommend entering the front door via main street, which runs north, but you can access the temple any way you want.
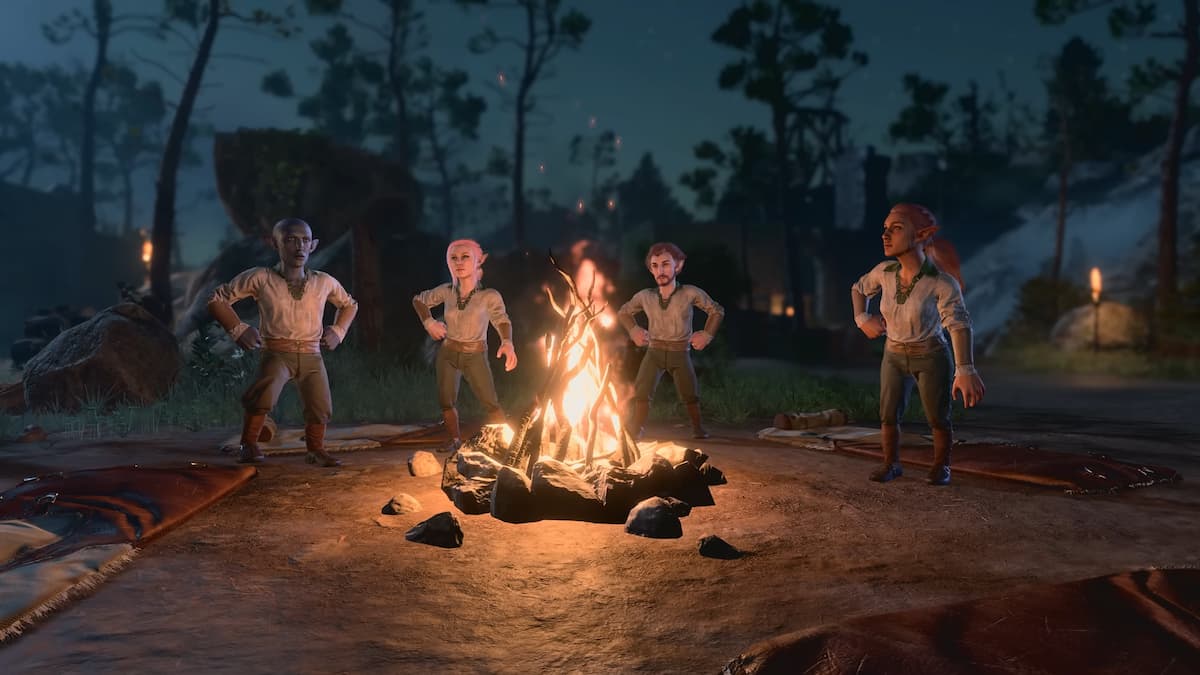
Once inside the open hand temple, follow these steps to begin the quest
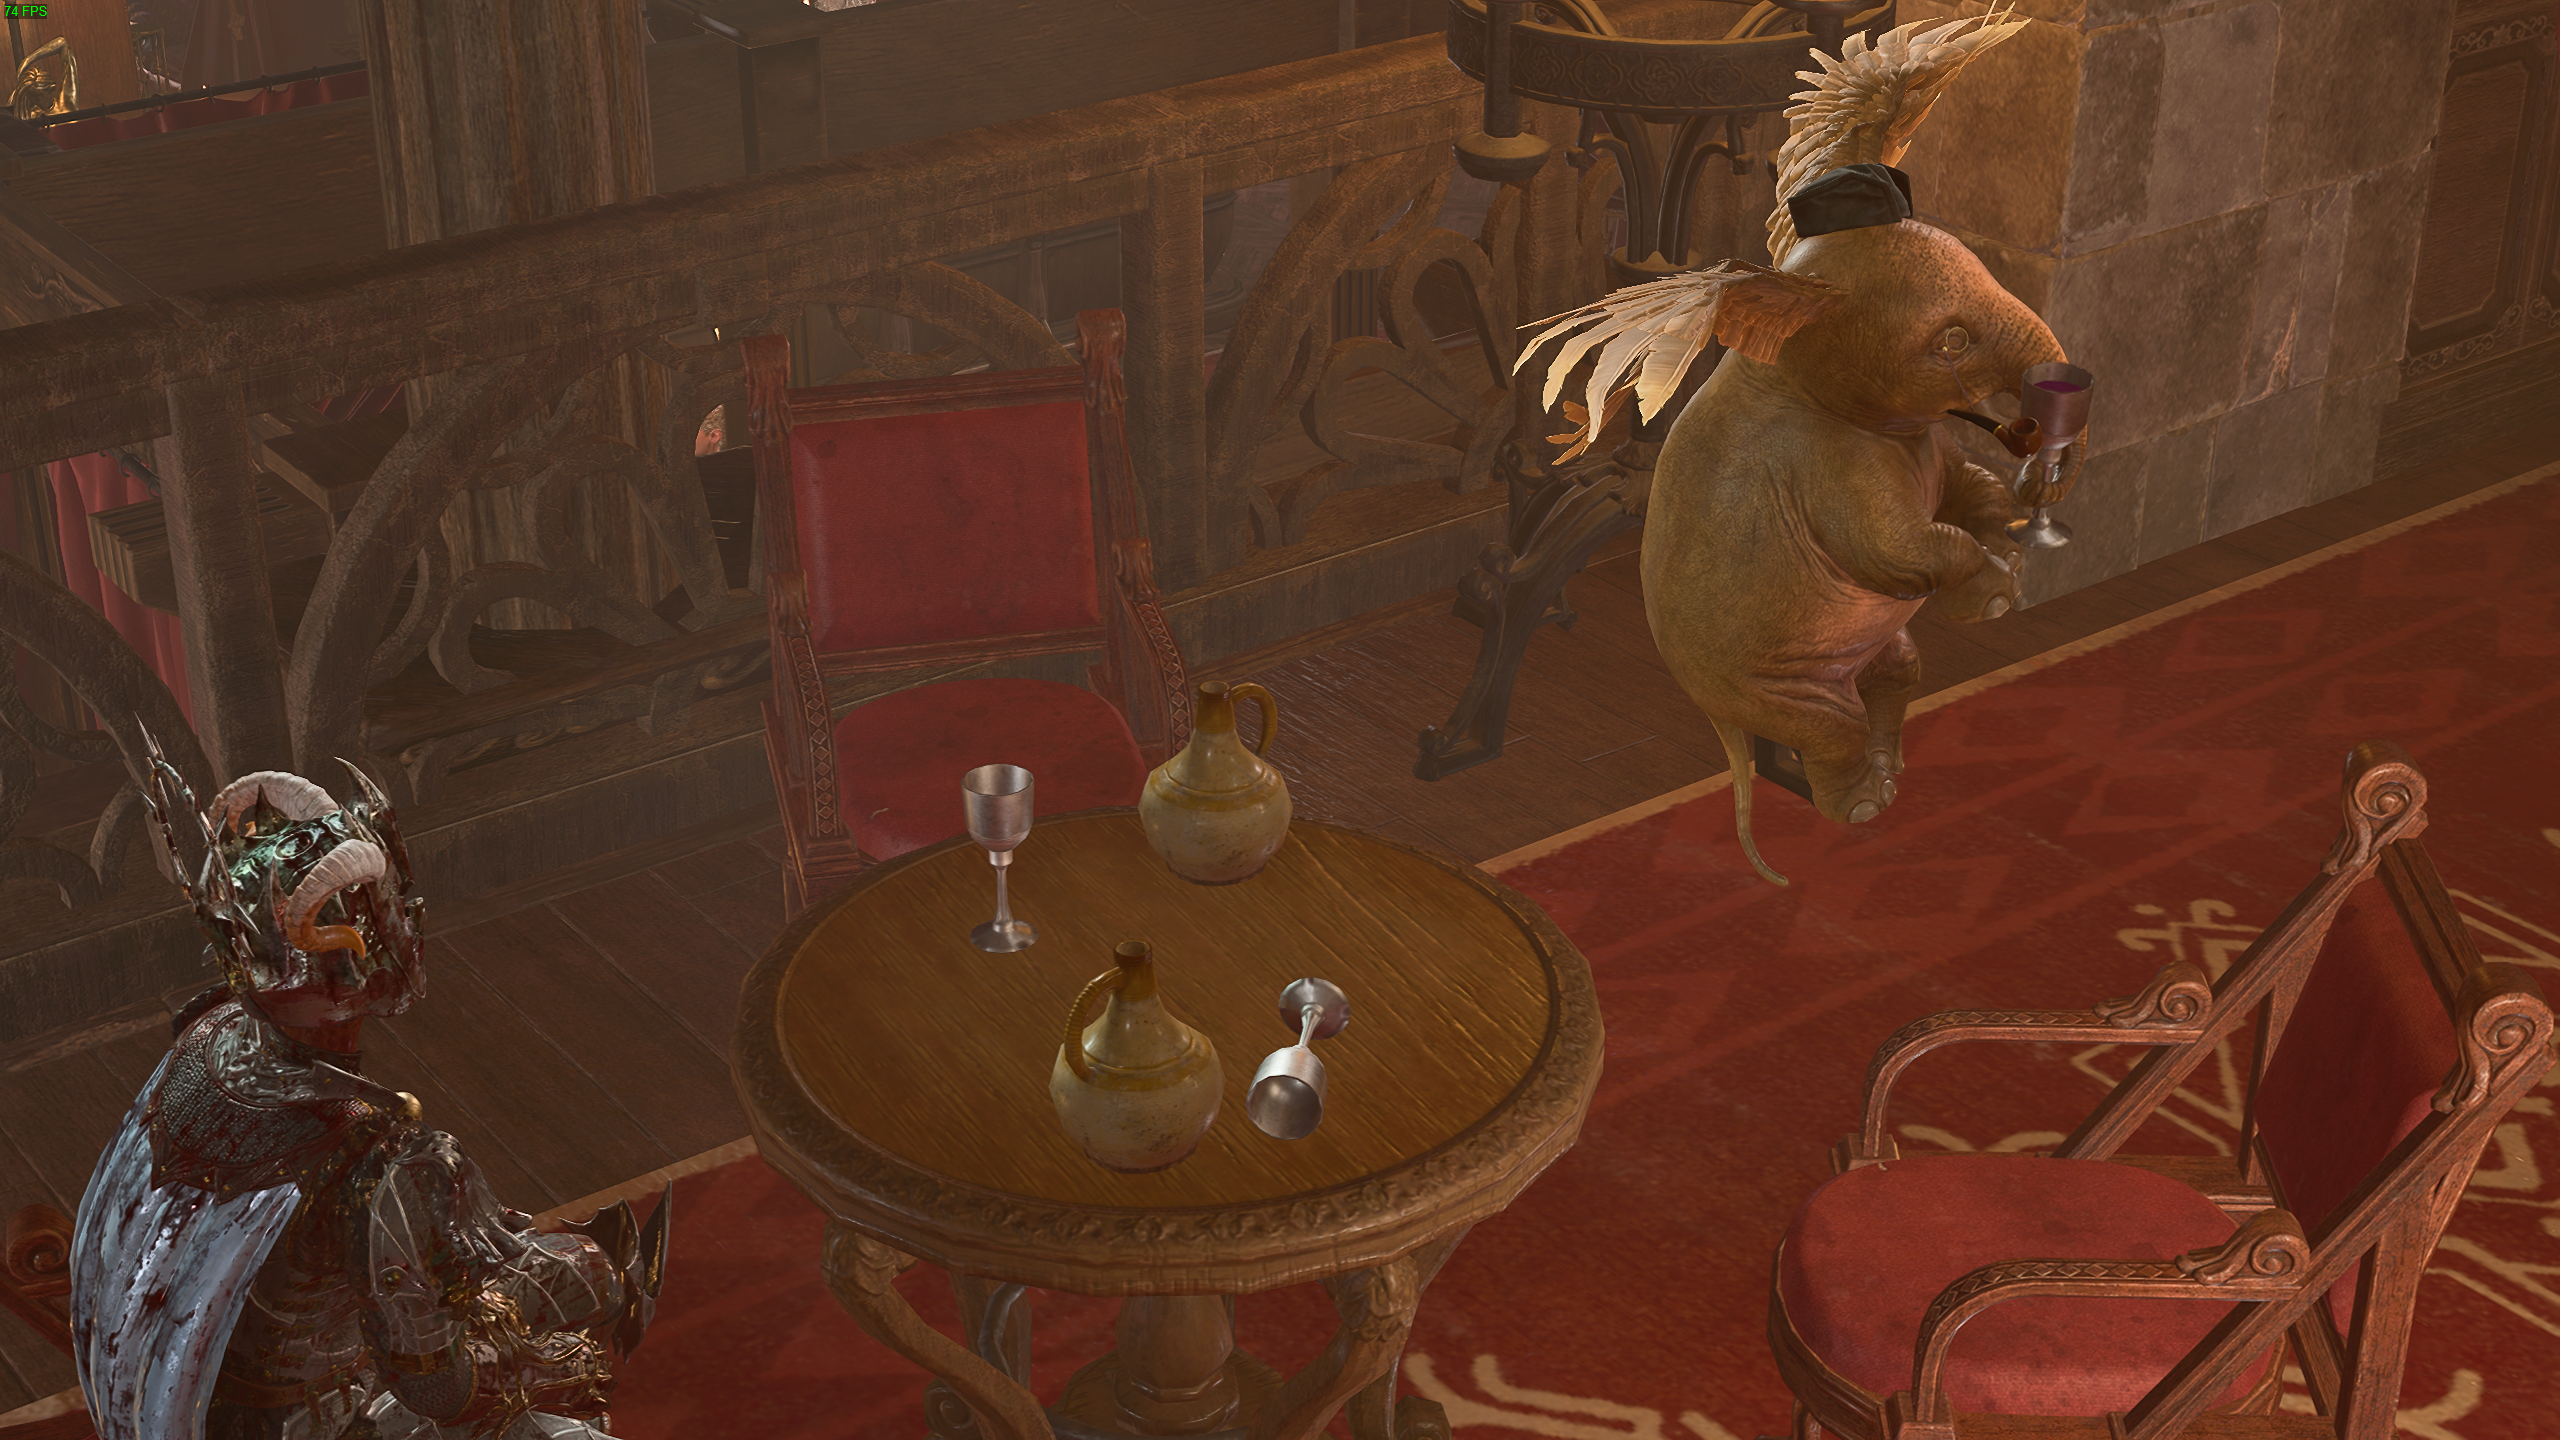
- Find Valeria, a flying elephant, arguing with one of the temple’s sisters about Father Lorgan’s death
- Speak to the sister, named Yannis, to start the Open Hand Temple Murders quest
- Afterwards, speak to other members of the temple to find out more about the murder of Father Lorgan
Some believe that a man named Brigor, who was also killed, murdered the father and then committed suicide. Brigor was a refugee that Lorgan was helping shelter in the basement tunnels of the temple. This is also where both were murdered. To find out more, you must head into the tunnels to see the crime scene.
Accessing the tunnels to find the crime scene
There are a few ways you can access the tunnels.
- The tunnels can be accessed through the kitchen and then going down the Ornate Wooden Hatch
- You can also access them by going down the well found across the street from the front door of the temple.
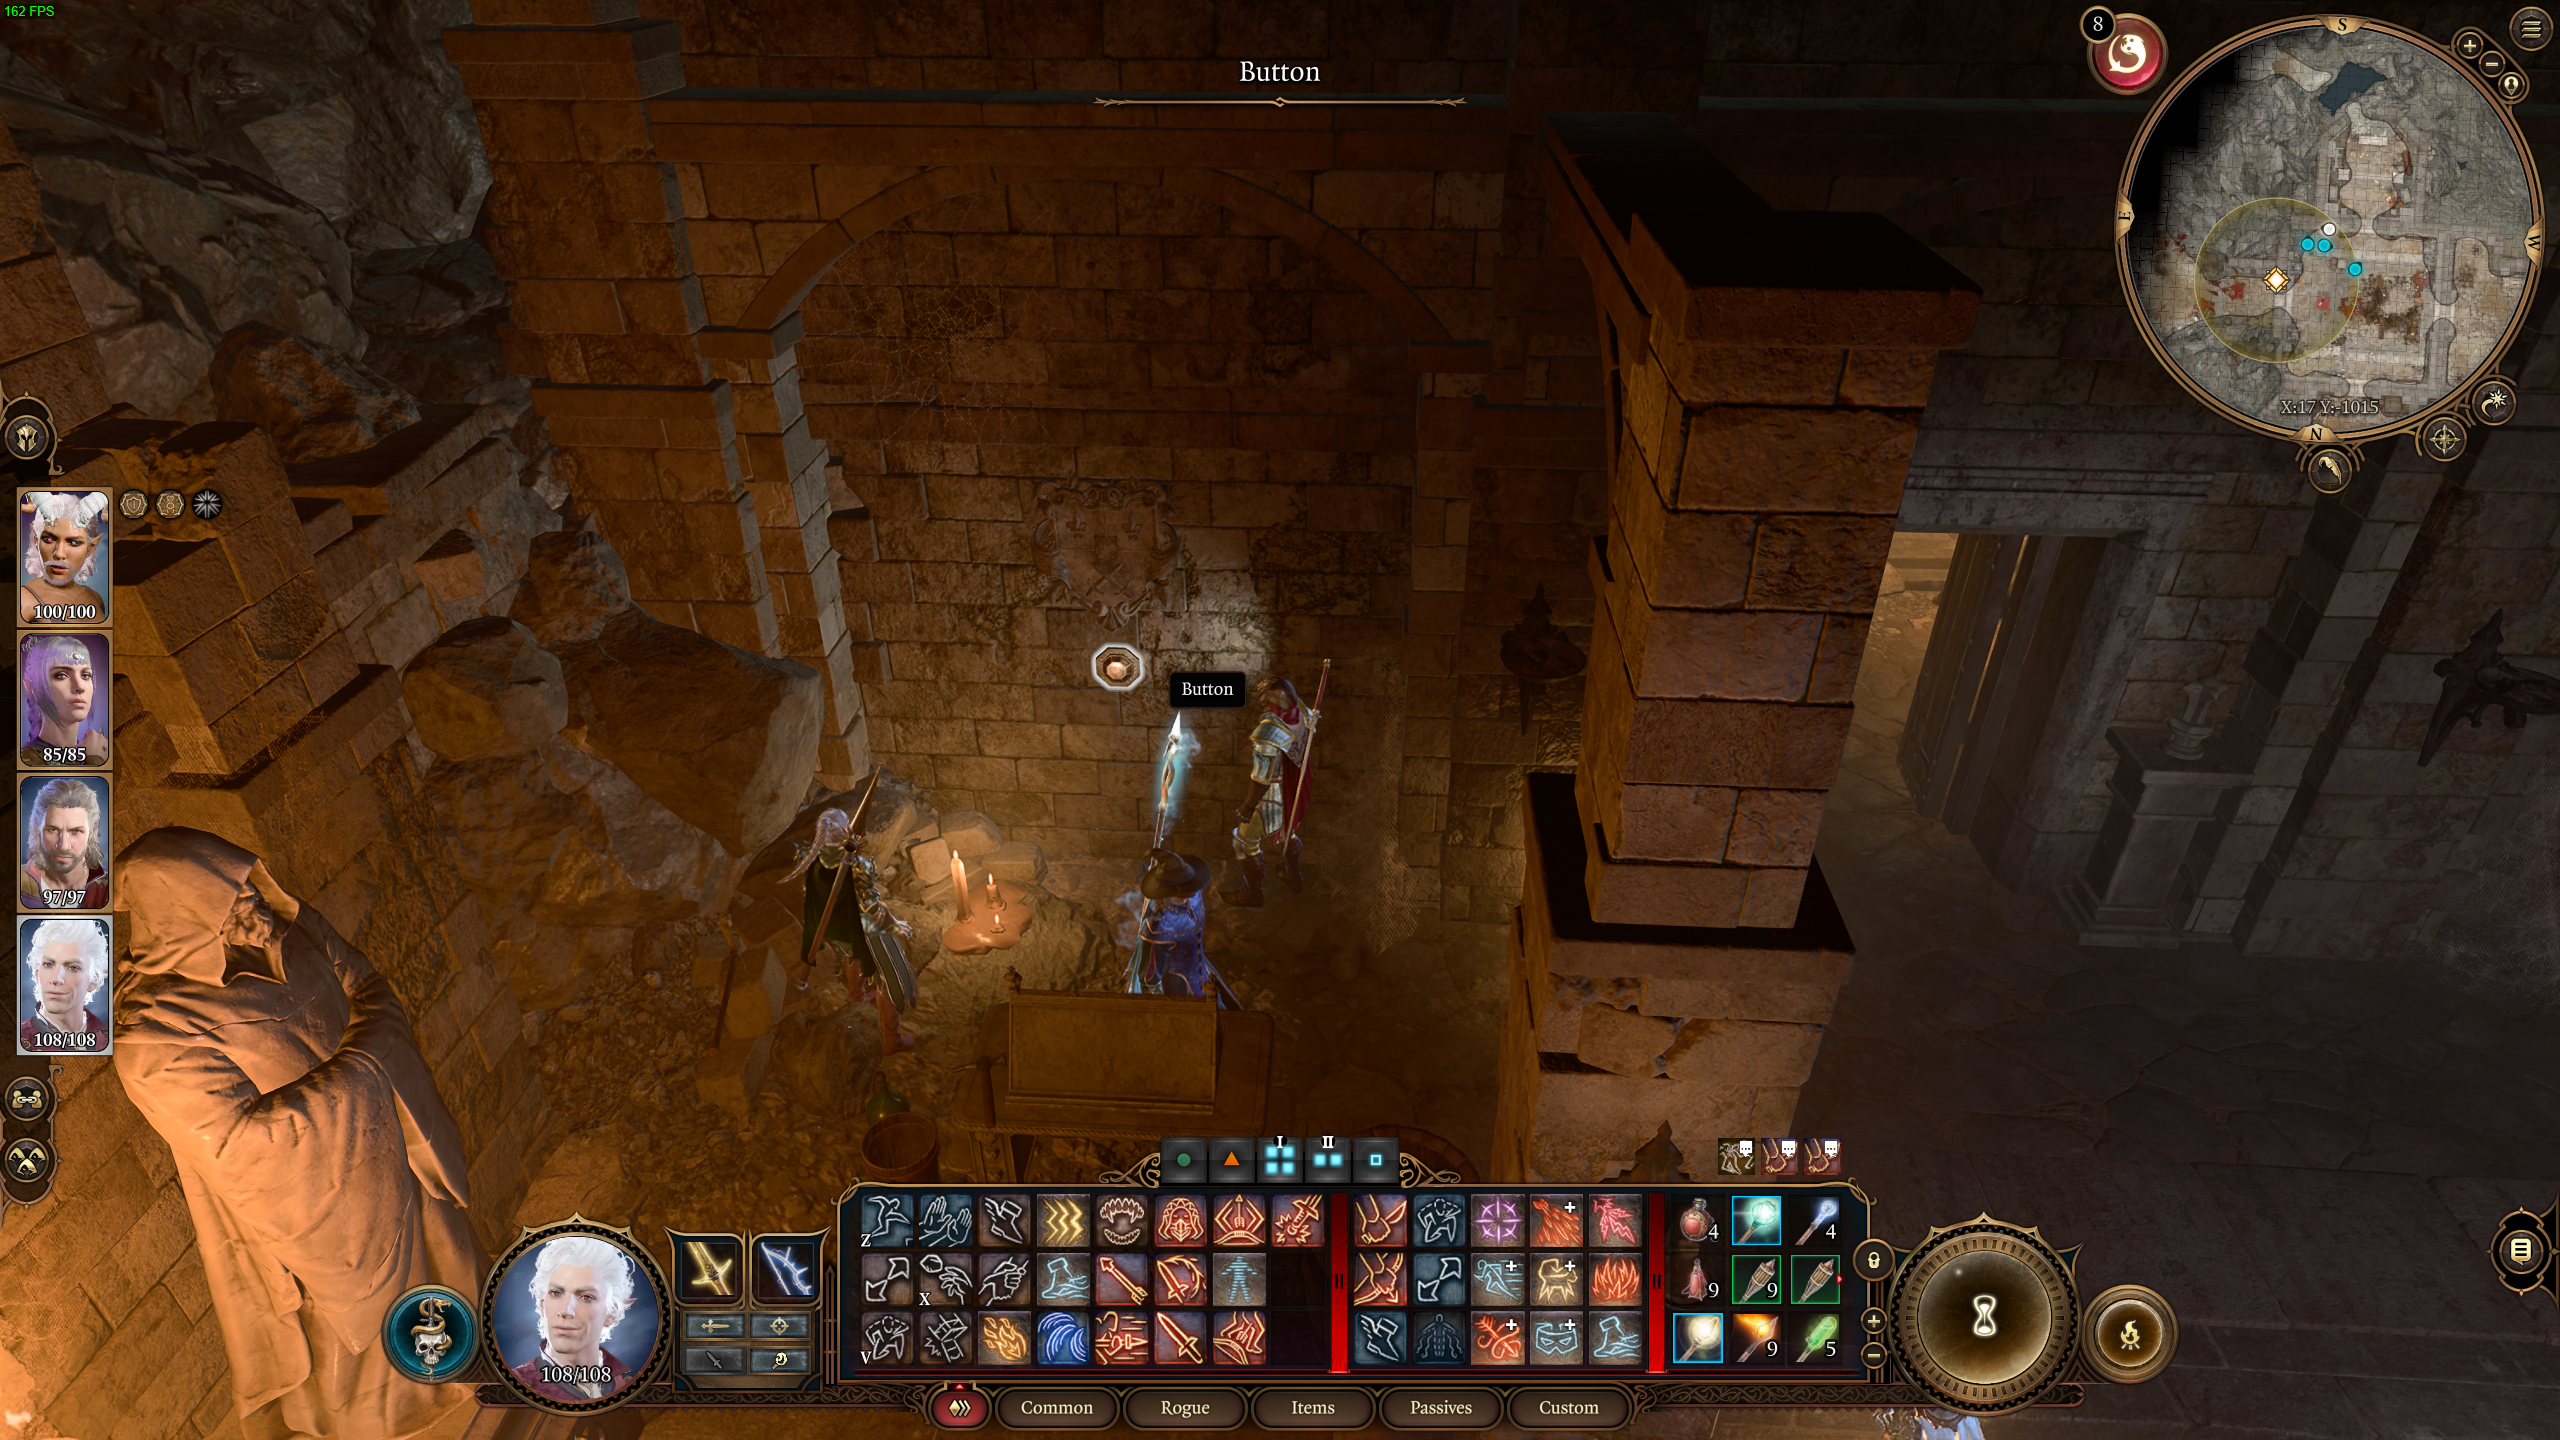
Once you’ve gone through the open hand temple you need to first access a crypt that allows you to complete the Help the Cursed Monk quest in BG3. After that, you will stumble into a room that has an altar and some seats. Behind this altar is a bigger area to explore, but the wall is not able to be walked through. You can get through the wall by pressing the button behind the crest on the walls on either side of the altar, as seen below.

Acquiring Dribbles the Clown and the Flower Key
Go through this new area and you will have to defeat a few doppelganger enemies. You can cast the Speak with Dead spell to learn who sent them.
I also recommend looting all of the bodies around this area, as one of them has a body part of Dribbles the Clown
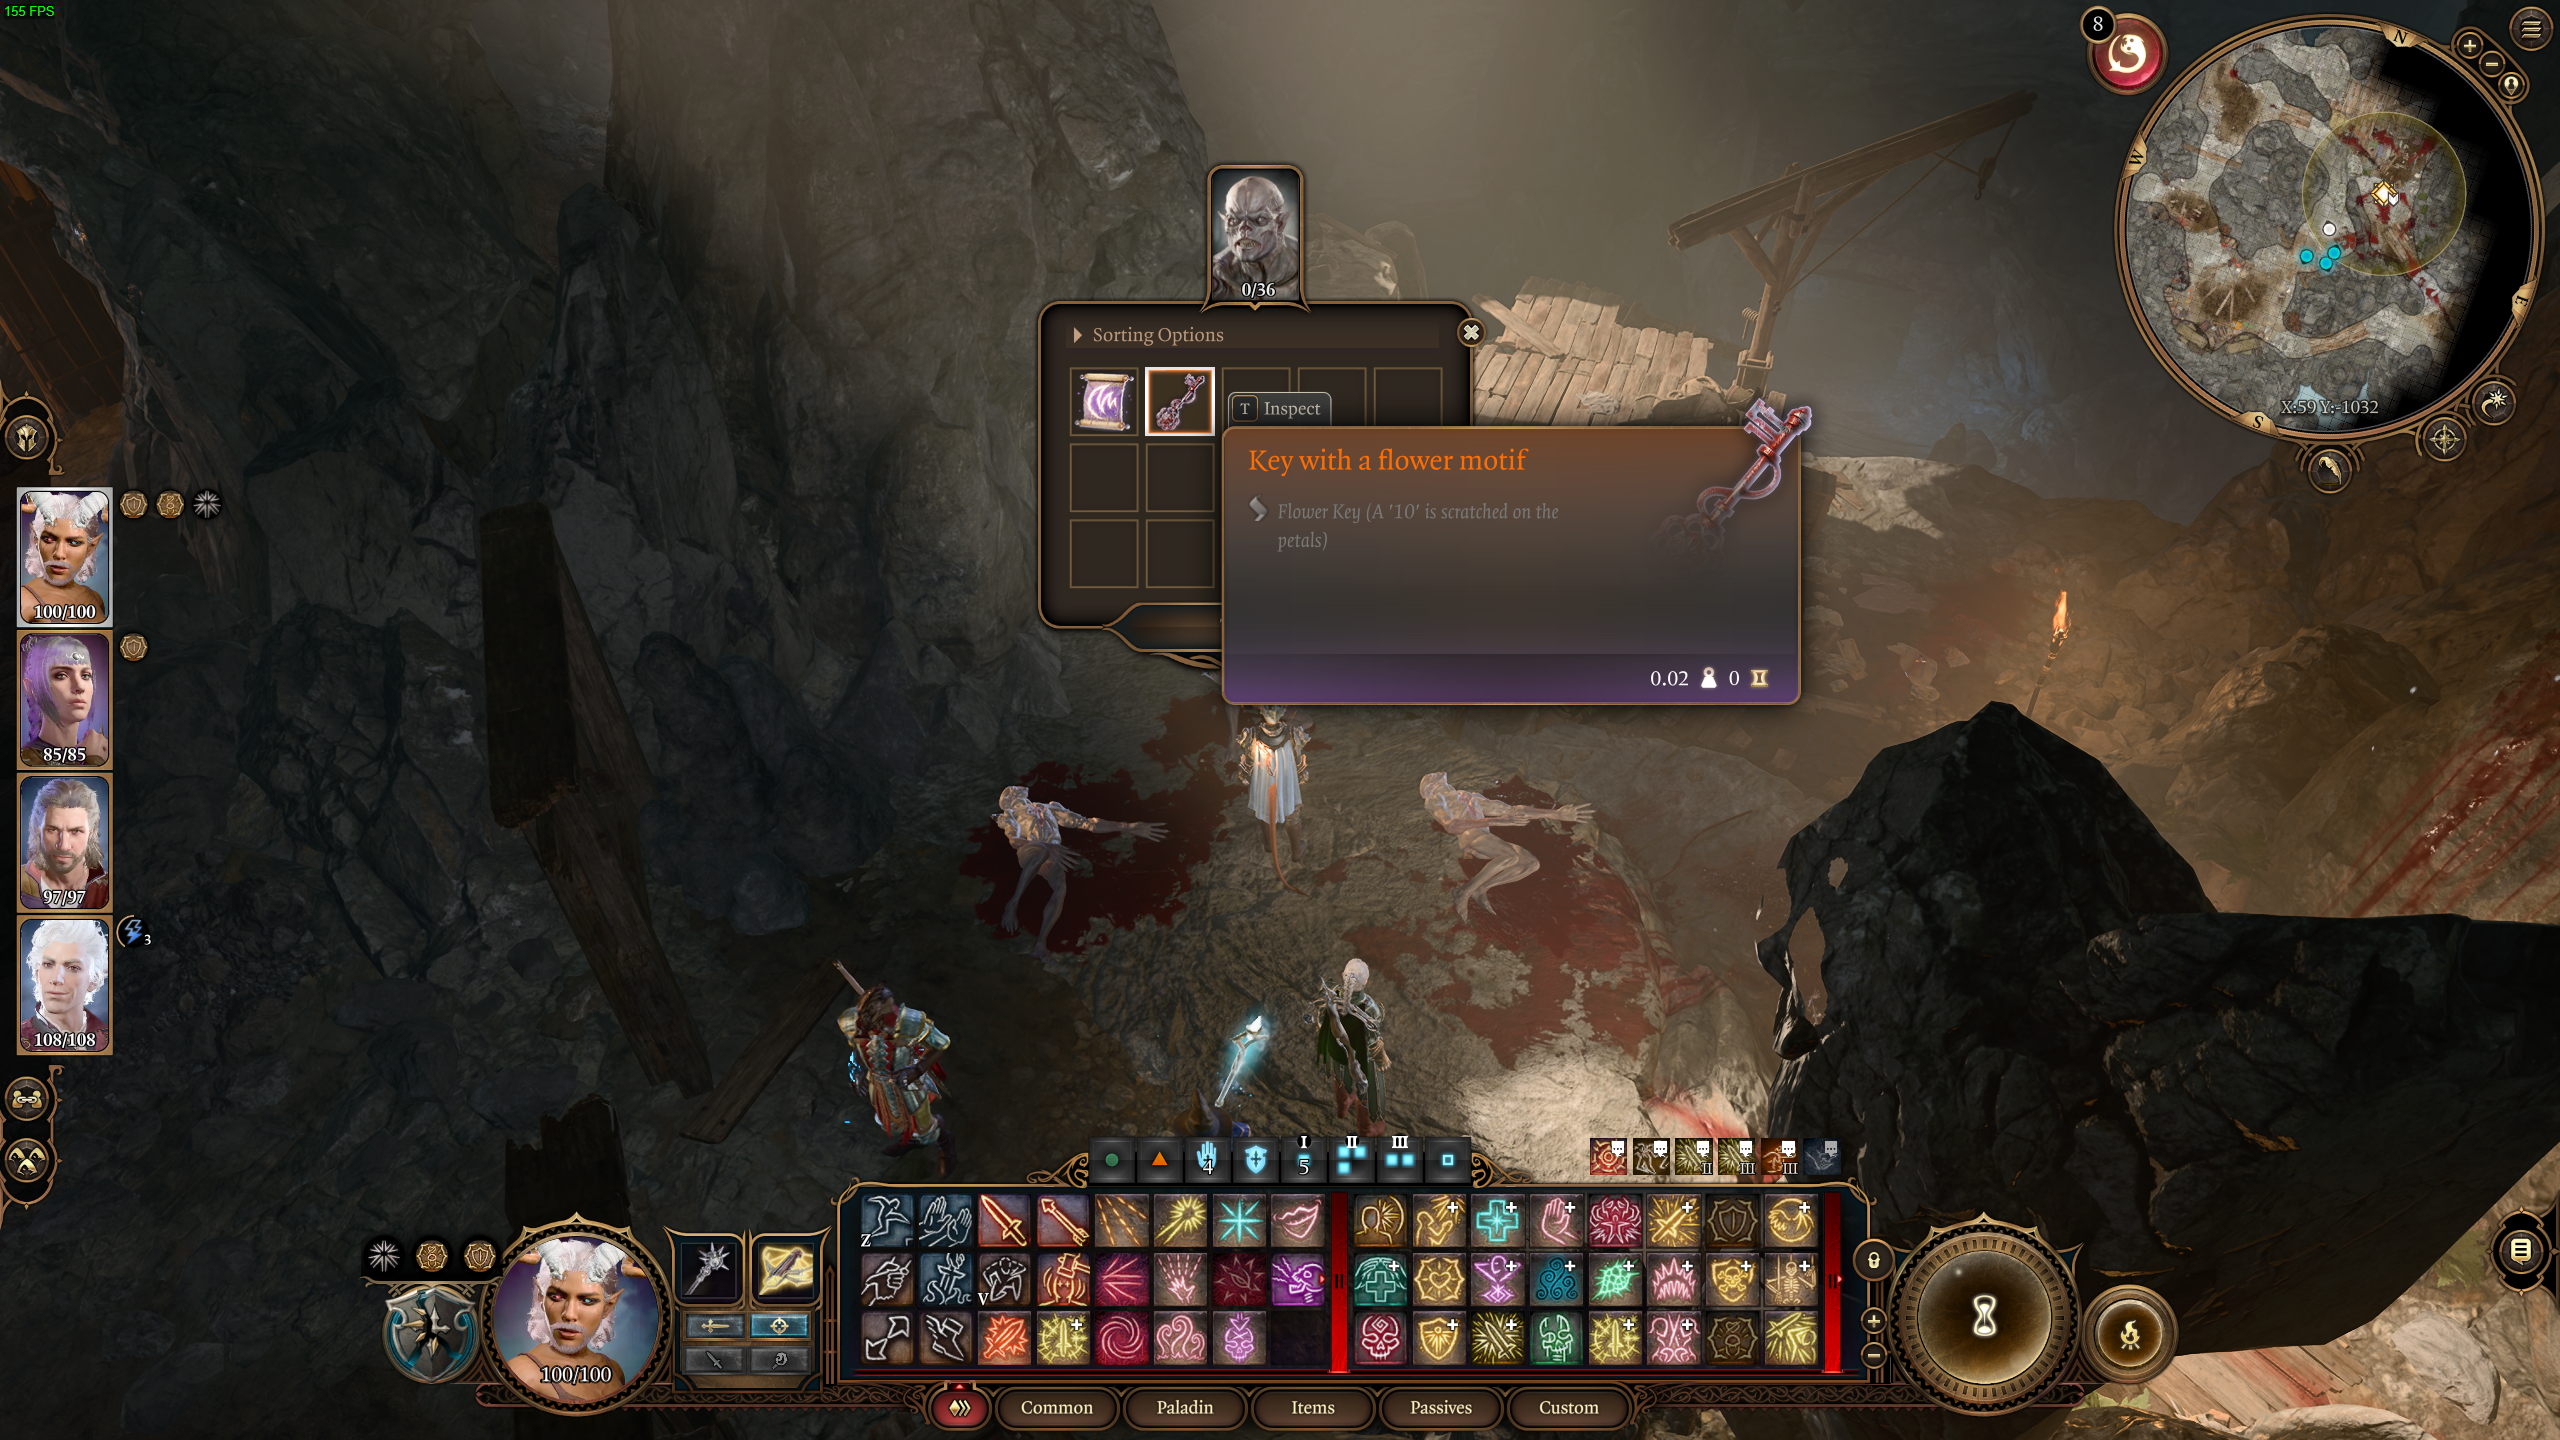
You also want to loot a Flower Key with the number 10 etched into it. There is also the murder weapon, called Stillmaker, found in a hole in the ground near the wooden platform that leads down into the water. You need to pass a perception check to discover the hole, which is located in the area shown below.

Where to use the Flower Key
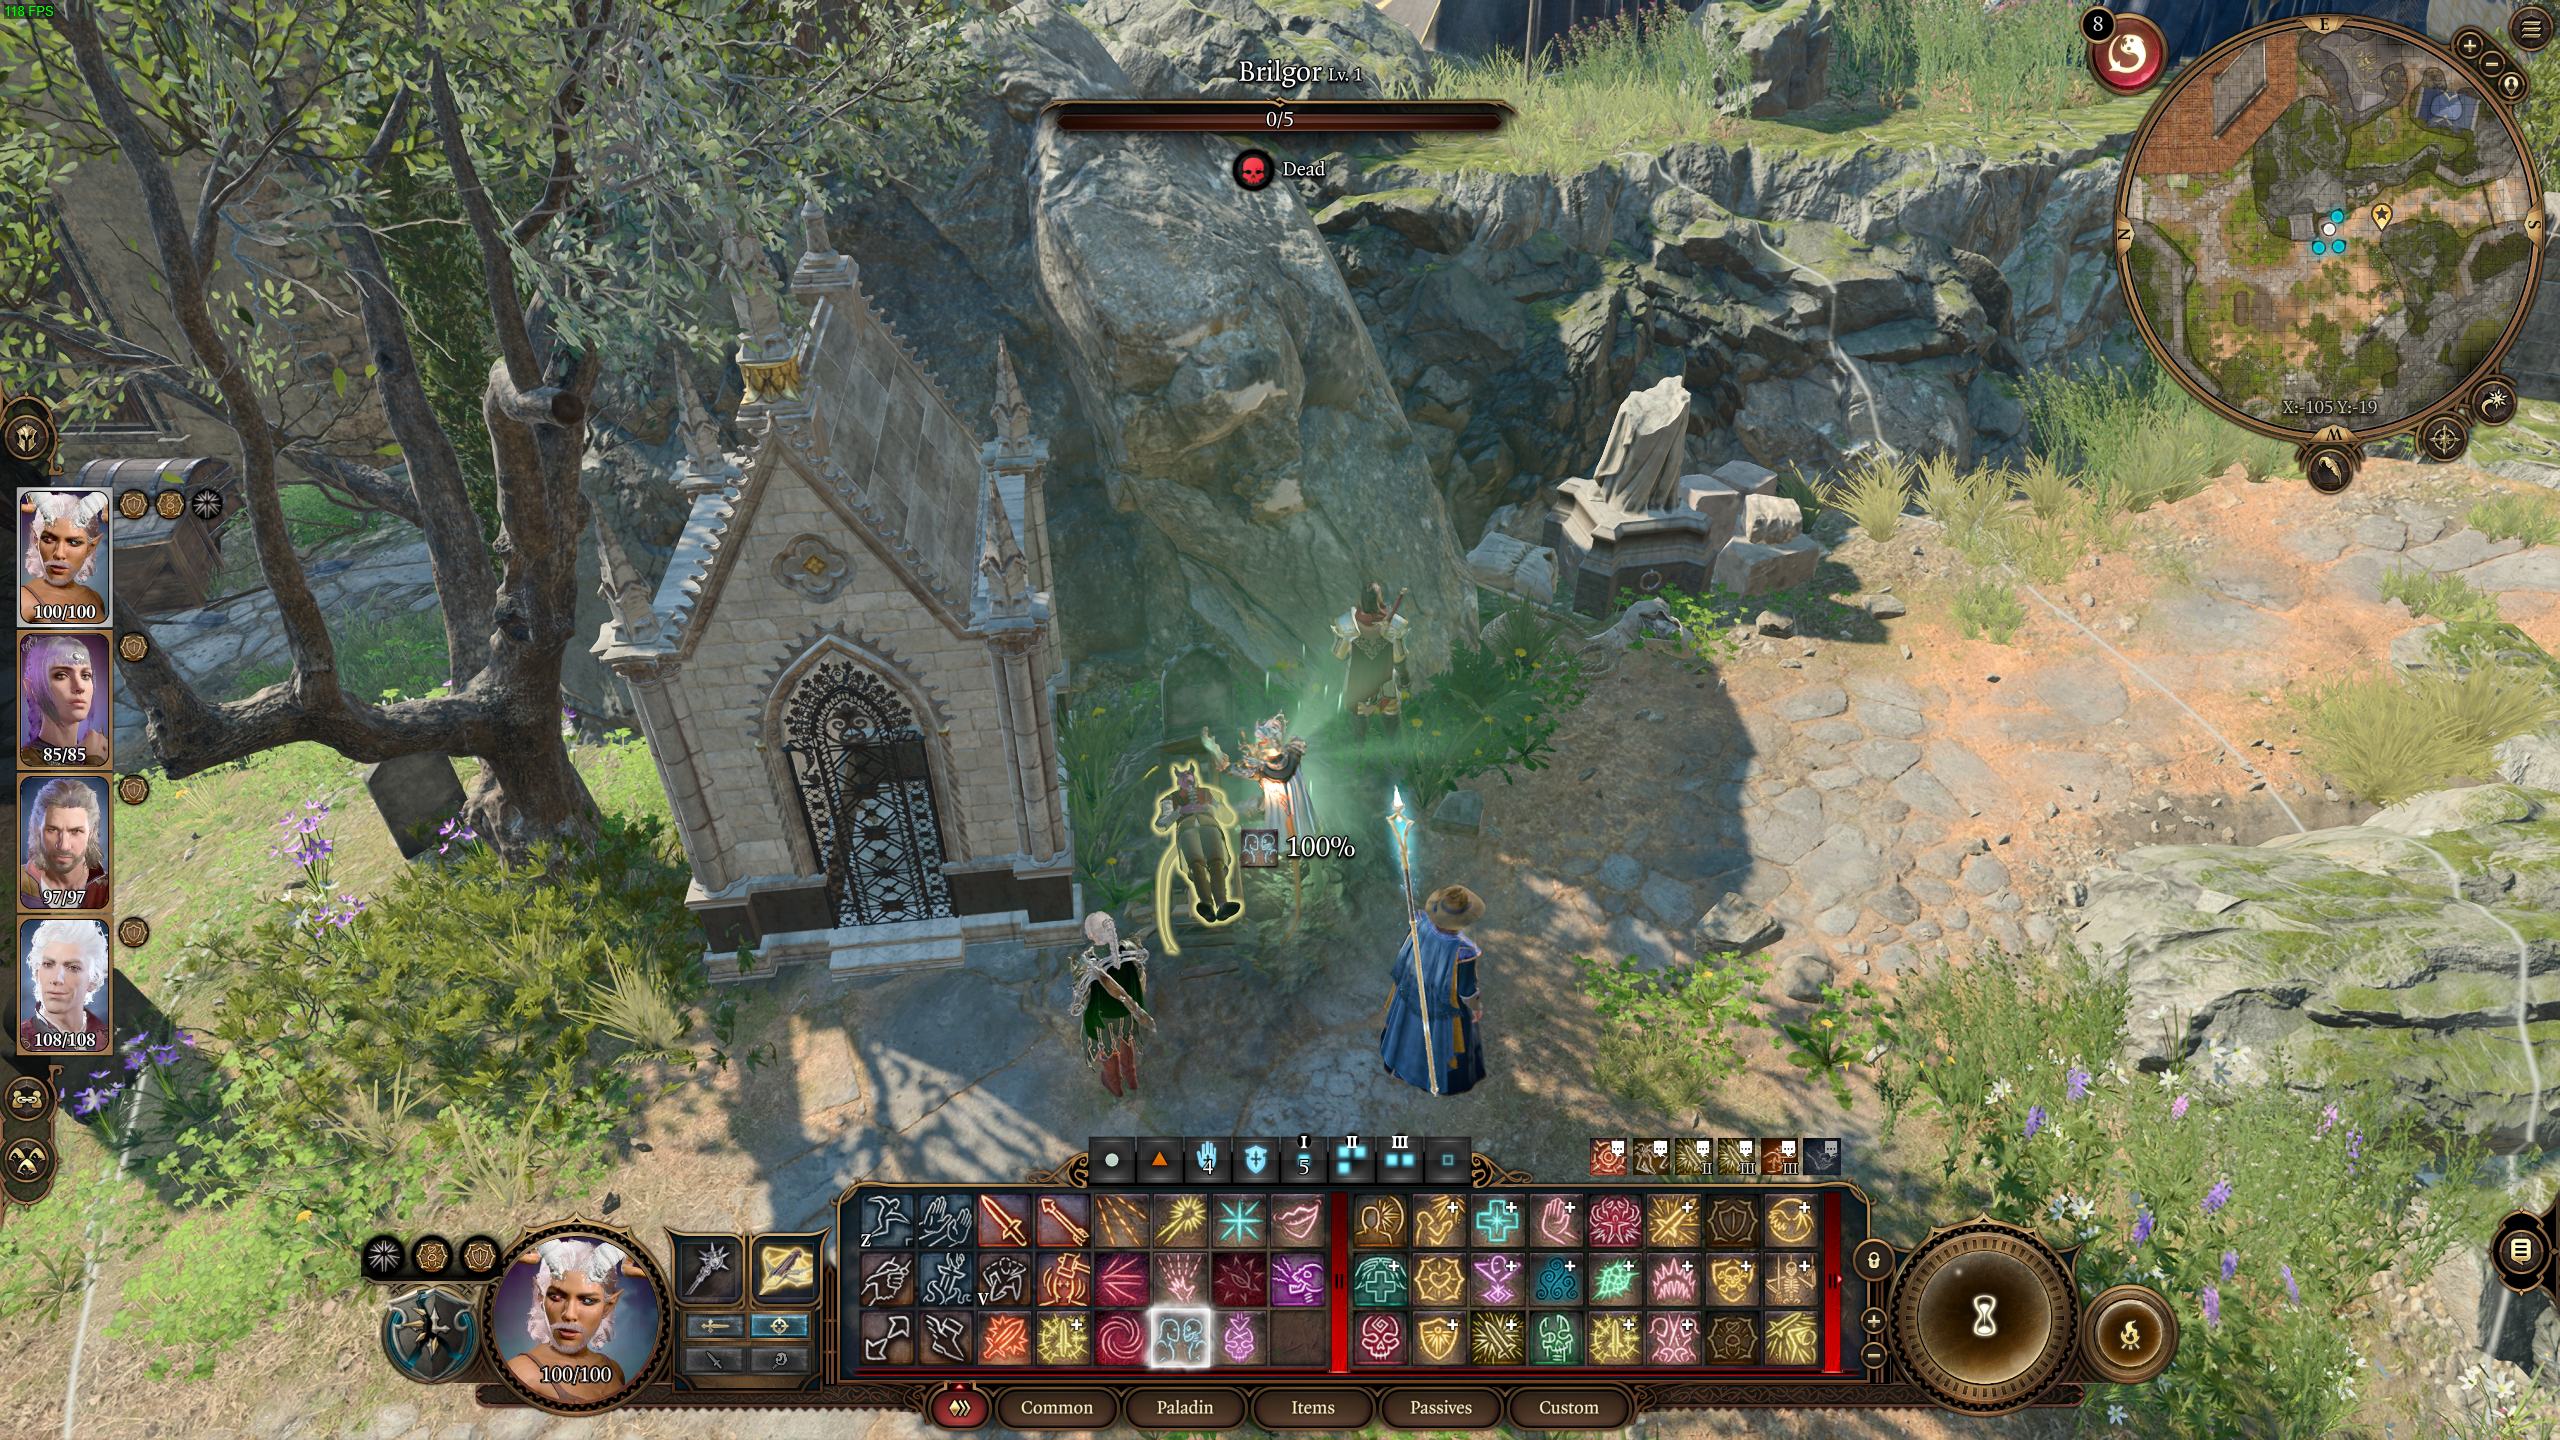
This key unlocks a locked room on the third floor of a building called Fraygo’s Flophouse. Before you leave the open hand temple, though, you can actually cast Speak with Dead on Brigor’s body, which is buried in a coffin in the temple graveyard. This coffin is located at the coordinates: X: -105, Y: -19. You can find it through the gate at the back of the circus.
Destroy the coffin near the small gated building and then Brigor’s body will appear. You can ask him five questions about his death, and it will be revealed he did not kill Father Lorgan.
Heading to Wyrm’s Crossing
Once all of that is done, you can head through the Wyrm’s Crossing gate at the South Span Checkpoint waypoint. Here, you need to pass a check to not get attacked by the Steel Watcher and the Flaming Fist guards. I had to fight them anyway, though, which can actually yield you a piece of Infernal Iron by looting the Watcher’s body.
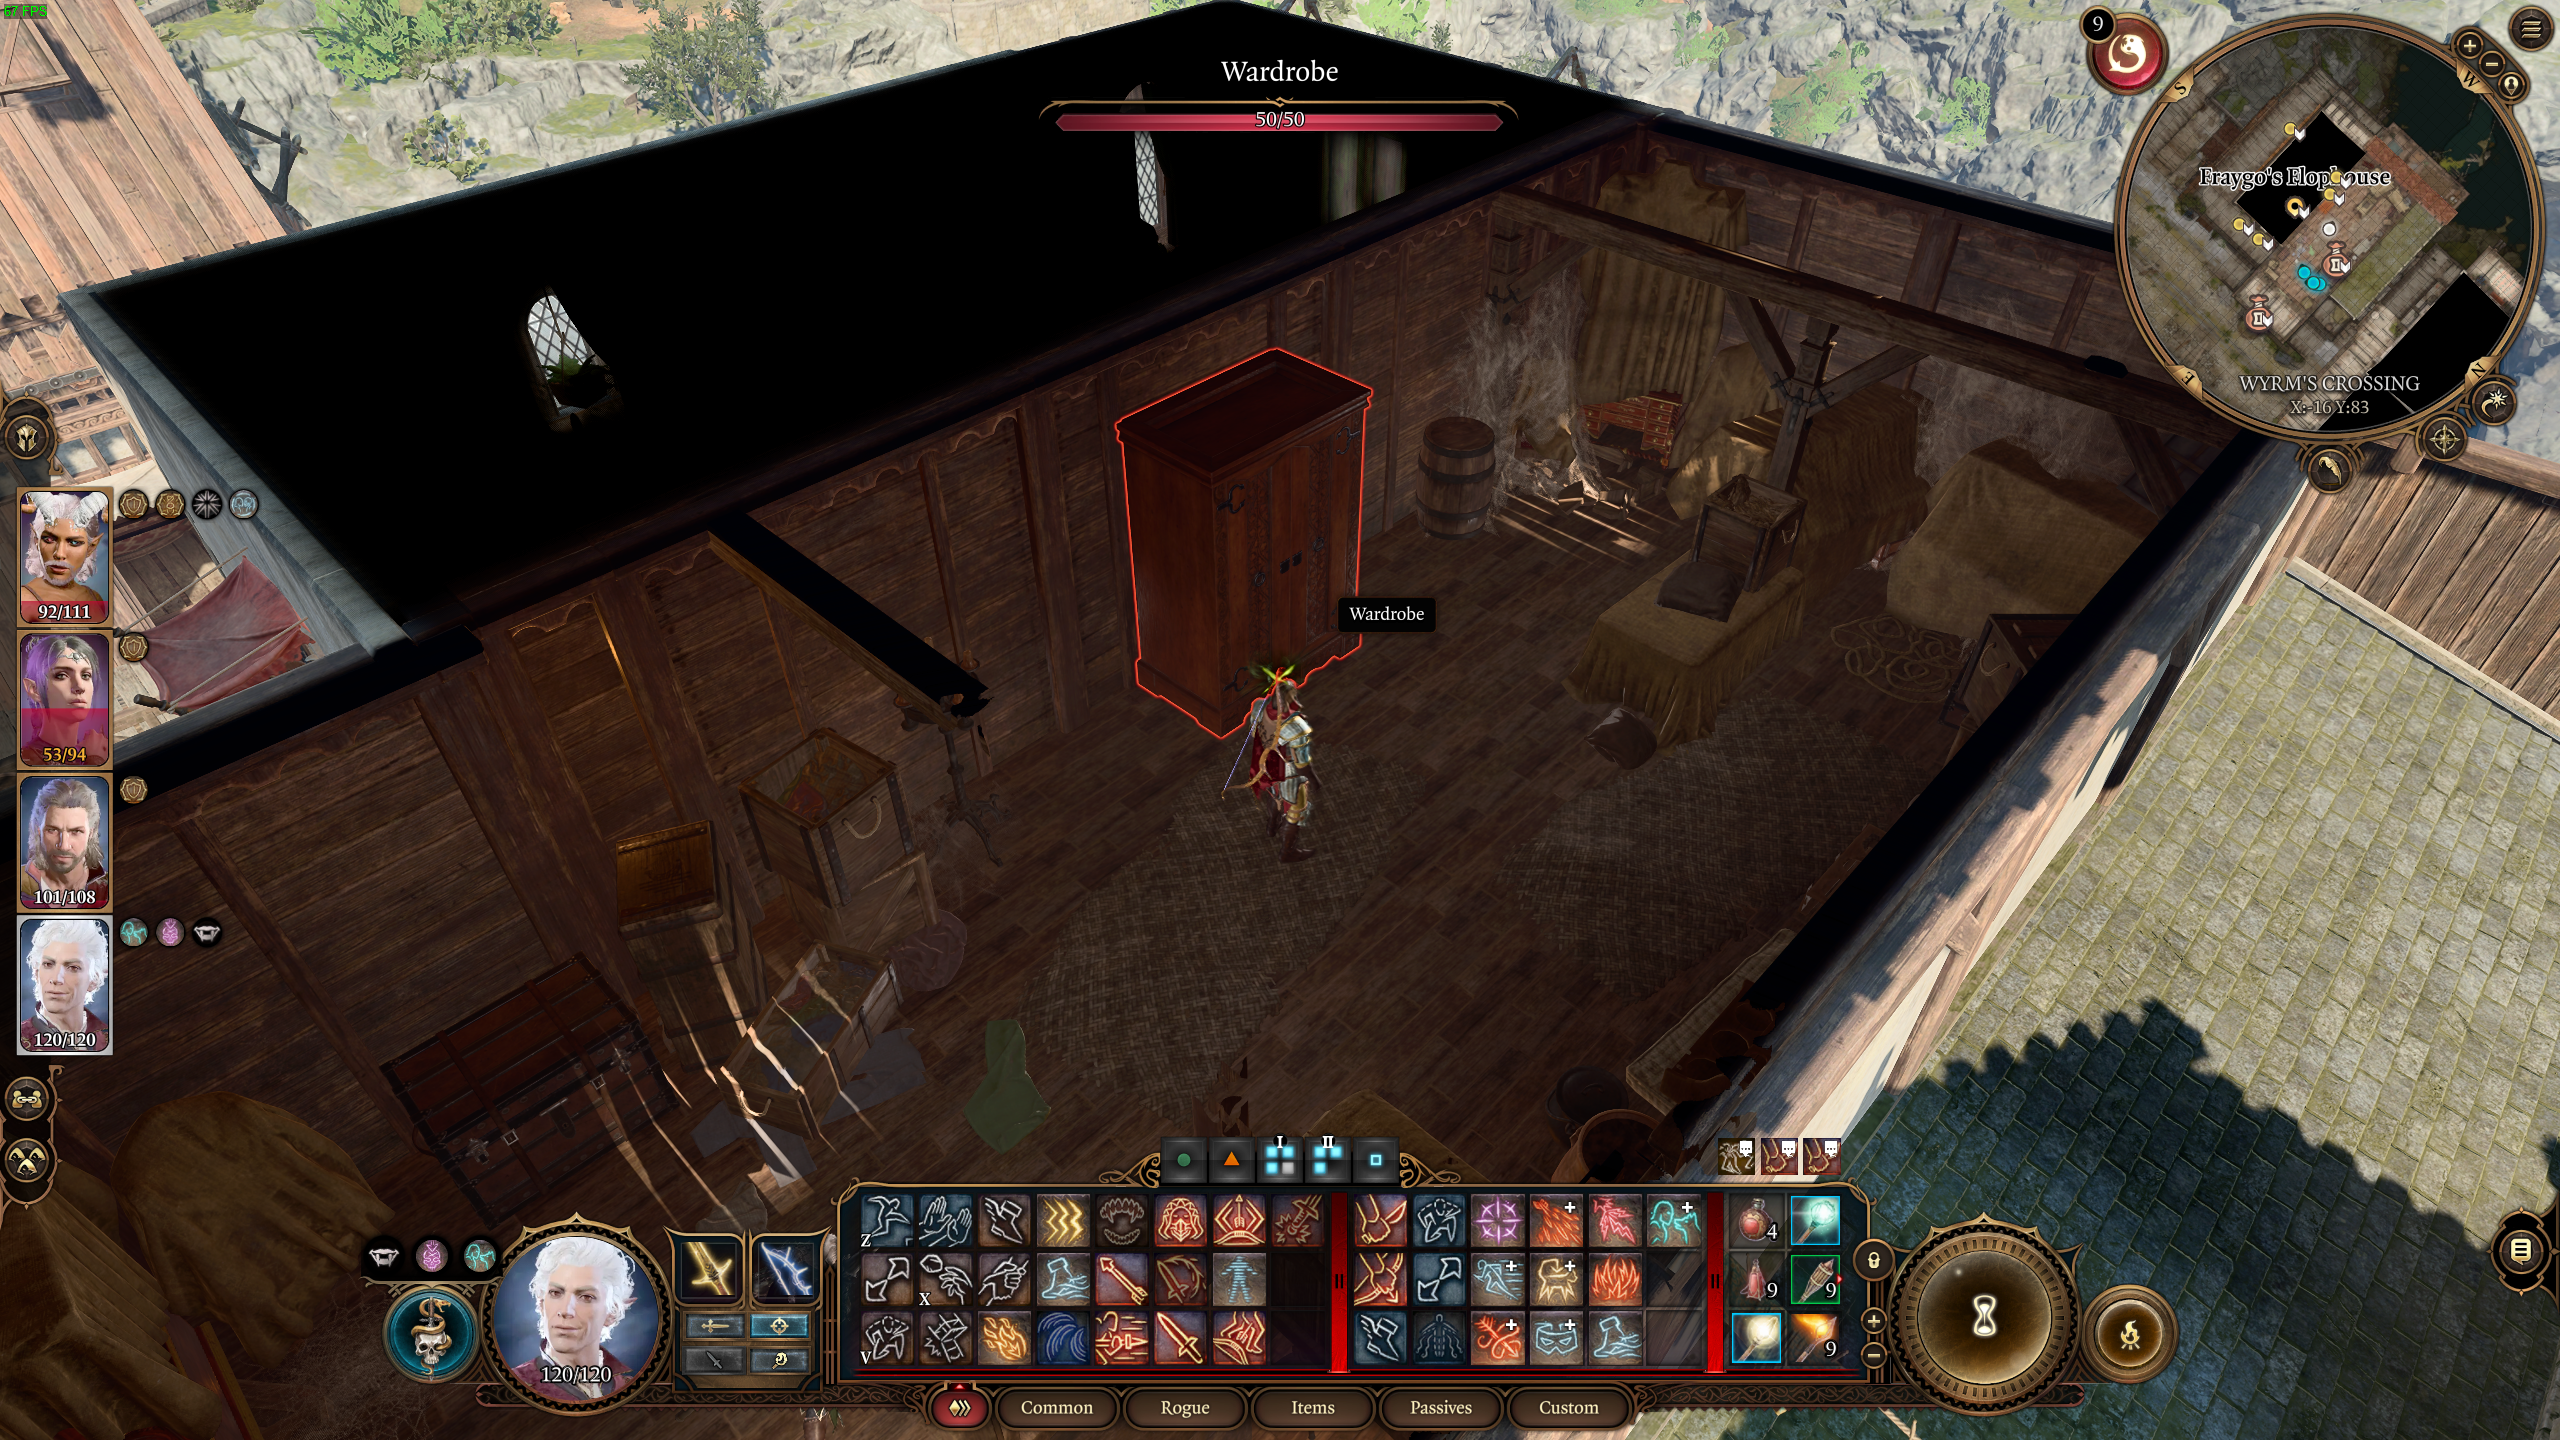
Investigating the crime scene in Flaypo’s Flophouse
In Wyrm’s Crossing, you can find Flaypo’s Flophouse immediately. Go up to the third floor and interact with a wardrobe that reveals a secret room. In this secret room, you will stumble upon a grisly murder scene. You can cast Speak with Dead to talk to the dead body under the bed, but you mainly want to pick up the journal that is on the desk. This will reveal that all of the murders are in connection with a Bhaalist plot. I also recommend going into the adjoining room to loot Ffion’s Key from his dead body.
Return to investigator Valiera, who is enjoying a drink on the second floor at Sharess’ Caress across the street, and share your findings with them. This will complete the Open Hand Temple Murders quest in BG3 and start a new investigation with her assistant, Devella.
Others Asked
Where should players start in Baldur's Gate 3 to find the Guildhall?
Players should start in the town of Rivington and begin Act Three to receive a map that helps them find the Guildhall in Baldur's Gate 3.
What area becomes a major questing location in Act Three of Baldur's Gate 3?
The city of Baldur's Gate becomes a major questing area in Act Three of Baldur's Gate 3.

Where can the player start the 'Avenge the Drowned' quest in Baldur's Gate 3?
The player can start the 'Avenge the Drowned' quest by making their way to the House of the Water Queen in the southwestern part of the Lower City when they get to Baldur’s Gate.


Published: Jan 6, 2024 09:33 am