Moonrise Towers is built up as the climax for Act One of Baldur’s Gate 3 throughout the first several quest lines, and it does not disappoint. From the moment players enter the Cursed Shadow-Lands, there is a tangible change in tone and stakes. Here is our guide on how to rescue the Tieflings in Baldur’s Gate 3.
Starting the Rescue The Tieflings Quest in BG3
Things just got serious, and some players will decide they want to free the Tieflings. Upon reaching the Last-Light Inn, a haven for the Harpers battling The Absolute and Tiefling refugees, you will learn that most of the Tiefling Refugees from Druid’s Cove have been kidnapped by the True Souls and are being held at Moonrise Towers.
This is, of course, dependent on whether you chose to help the Tieflings at Druid’s Cove in the first place. If, instead, you chose to slaughter them, then…shame on you, and no rescue mission. Typically, this rescue quest is given by Alfira, but if you selected the Dark Urge Background, it will be given by Rolan (for reasons that we’re still trying to forget).

How to get to Moonrise Towers in BG3
Our guide for accessing Moonrise Towers in Baldur’s Gate 3 focuses on two primary routes. Keep in mind that you have the freedom to explore Act 1 zones at your own pace. However, progressing further into the Shadow-Cursed Lands will automatically mark the completion of the alternative branch of the quest. Be aware that this region possesses potent magic that can rapidly deplete your characters’ HP. To survive, you must find a way to shield yourself from the Shadow Curse.
Navigating these dark lands requires caution and strategic planning.
The Overland Route Through the Mountain Pass to the Moonrise Towers
The first option to reach Moonrise Towers in Baldur’s Gate 3 involves taking the overland route. Here’s a brief overview:
- Ensure you possess the Spider’s Lute, acquired from Minthara. She provides it if you sided with her/romanced her, or you can loot it from her corpse by saving the Tieflings.
- Access the Mountain Pass by either checking the canyon east of the Goblin Camp or following the stone bridge west of the Githyanki Patrol/Risen Road.
- Reach Rosymorn Monastery Trail, a significant location for completing Lae’zel’s Githyanki Creche quest.
- Follow the winding path northwest to a ravine with decaying plants and dead animals. You may encounter the Wizard Elminster, Gale’s mentor, advancing the Wizard of Waterdeep quest.
- Transition to the Shadow-Cursed Lands, follow the quest objective, interact with NPCs, and meet your guide, a Drider named Kar’niss. Convince him by playing a tune with the Spider’s Lute to reveal your affiliation with Minthara. Kar’niss carries a Moonlantern, countering the curse within its aura. Follow the group to eventually reach Moonrise Towers.
The Underdark and Grymforge Route to the Moonrise Towers
The second option to access Moonrise Towers involves the Underdark/Grymforge route. Here’s how to get to the Moonrise Towers through the Underdark and Grymforge:
- Reach the Underdark through various means, such as solving the Selune/Moon Puzzle in the Goblin Camp/Shattered Sanctum or using the portal in Auntie Ethel’s lair.
- Engage in multiple quests within the Underdark, leading you to its center. Find a ship allowing you to sail to Grymforge, the Duergar slavers’ base.
- Explore Grymforge, undertaking activities like defeating the Grym boss in the Adamantine Forge or collecting Infernal Iron for Karlach. To head directly to the Shadow-Cursed Lands, locate an elevator across the corridor with the waypoint.
- Emerge from ruins, meet the Harpers, and proceed to Last Light Inn to encounter Jaheira. While you can recruit Jaheira later in the game, be mindful of specific requirements.
Where to find the Tieflings in Moonrise Towers
Like seemingly every single element of Baldur’s Gate 3, a successful rescue is not guaranteed. You’ll want to save often during this mission and be prepared to load your game when things go south. The most important thing to know is that you must rescue the Tieflings before actually assaulting Moonrise Towers (this is a good general rule of thumb in Baldur’s Gate 3: If you have a side quest and main quest in the same area, always complete the side quests first). If you assault Moonrise Towers with the Tieflings still in captivity, they cannot be rescued.
To reach the cell where the Tieflings are being held captive, you can actually skip the introductory cutscene to Moonrise Towers altogether. This is our recommendation, as you’ll want to avoid progressing other events in the location as much as possible to ensure the rescue. To do so, simply follow the route highlighted below.
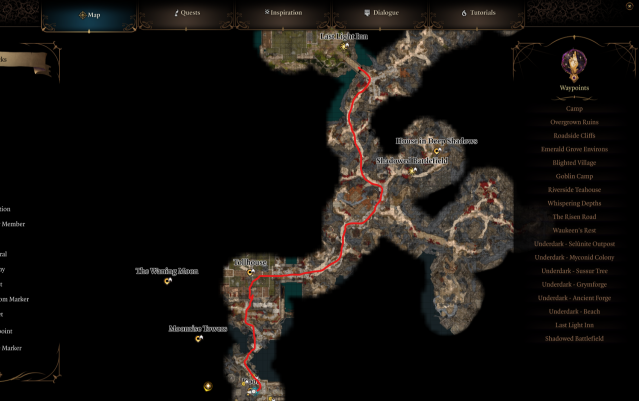
You’ll have to jump over one broken bridge to actually reach the tower, but even a Sorcerer can do it. Upon landing at the base of the tower, you will be questioned for the purpose of your presence, however, a skill check isn’t even needed. Simply lie and carry on.
The only actual entrance on this western area leads directly to the prison, so you’ll only need to change areas one time. Once inside, you’ll see a staircase on your left, a door in front of you, and a passage to your right. Follow the passage on the right a short distance, and it will open up to the prison, where you’ll find both the Tiefling prisoners as well as a group of Deep Gnomes—who you may or may not recognize from the Underdark, depending on your route.
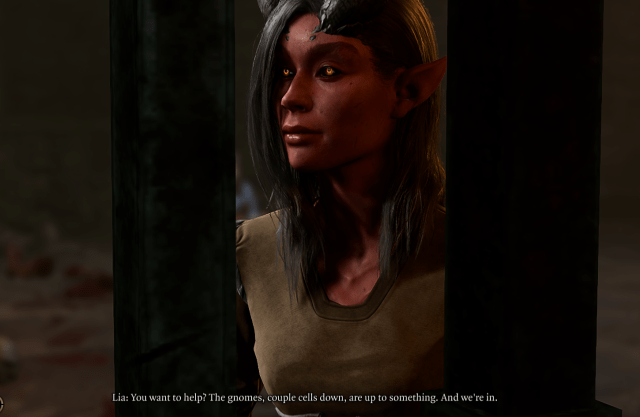
Trying to talk to the Tieflings outright will prompt a guard to intervene, but a relatively easy Deception or Persuasion check will allow you to continue. Speak to Lia, and she will tell you that the Deep Gnomes are planning something, and you should find out what. From here, you have a couple options. This guide will cover the easiest/most assured way you can go about the jailbreak.
How to save the Tieflings in Moonrise Towers
Here’s your basic checklist. At this point, if you don’t have any of the following, simply pop over to your camp real quick and select the following companions, items, and spells:
- Astarion, or any custom character with excellent Stealth.
- Gale, or any other character who can cast Fog Cloud (this step isn’t 100 percent necessary, you can skip if it’s too much of a hassle for you.
- Any way to cast Misty Step—scroll, spell, or item. You only need to cast it once.
- At least one hammer of any kind, preferably two (Wulbren, the Deep Gnome leader, has a hammer that can be found on the next floor up in a restricted section. If, for some reason, you can’t find a hammer elsewhere, you do have this option).
Now that you’ve got those things, here’s how the rescue should go down.
Option 1: Free the Tieflings with a hammer (seriously)
First, talk to Wulbren Bongle, the Deep Gnome leader. His cell is two to the left of the Tieflings. If he knows you from the Underdark, great. If not, it’s an easy Persuasion check to convince him that you’re here to help.
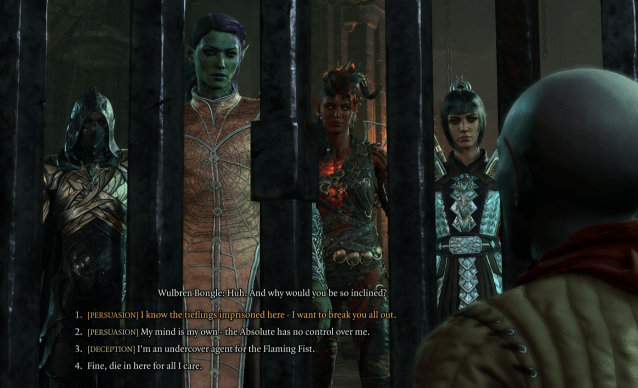
Once Wulbren trusts you, he will tell you that he needs whatever gear you can find to assist his clan in breaking down the back wall of their cell. After that, they’ll break down the back of the Tieflings’ cell. It’s a solid plan, but it could be better. Enter Astarion and the first hammer.
Select Astarion (or your preferred rogue) and toggle Group Mode off. Enter stealth, and make sure you’re out of all guards’ vision cones. There is a spot directly in front of Wulbren’s cell, towards the left corner, that works perfectly. Once you’re sure you’re hidden, throw the first hammer into Wulbren’s cell. He will pick it up and say he’s ready to go on your signal.
At this point, you have the option of casting Fog Cloud on the door of Wulbren’s cell. If you do, great—you’re pretty much done. Give the signal and wait.
If you don’t have Fog Cloud, despair not. Keeping Group Mode off, use Misty Step with whatever character has your second hammer to enter the Tieflings’ cell (this can also be Astarion, since, at this point, he’s done his primary job of throwing the hammer). Again, take care that you are not seen by any guards!

Once one character is safely inside the Tiefling cell, you can attack the back wall (as always, make sure you aren’t seen) and immediately switch characters to give the signal to Wulbren to do the same. This will cause both walls to fall simultaneously, and you won’t have to wait for Wulbren to come and destroy the Tiefling cell wall, potentially getting Tieflings killed during the wait. Conversely, Fog Cloud can buy time for Wulbren to reach the Tiefling wall before the escape is discovered.
Option 2: Rescue the Tieflings the stealthy way
To stealthily free the Tieflings, start by silently eliminating the Scrying Eyes, patrolling guards, and the warden, who can be ambushed in her office, one by one. Ensure that the two guards near the entrance stairs remain unaware. Provide Wulbren with a weapon and, if the cell door is still closed, ascend the ladder in the warden’s office. Navigate through the opening and traverse the wooden rafters by walking or jumping until you can descend into Wulbren’s cell (expect some damage upon landing). Proceed through the opening at the back to reunite with the liberated prisoners.
Option 3: Free the Teiflings by creating the ultimate distraction
Believe it or not, the easiest way to save the Tieflings is to select one of two characters left in your party, move to the opposite side of the prison, and attack a guard. This will lock all guards into combat with that character while your other two are still free to act at will. Give the signal, attack walls, and enjoy a clean escape while the guards are distracted.
This method is essentially a guaranteed rescue—just be sure you have 100 gold handy for Withers, as that character serving as a distraction isn’t likely to make it out alive.
From here, the rescue is smooth sailing. Make sure you save at this point, as there will be one easy fight upon exiting the tunnel behind the prison cells. This fight shouldn’t cause any problems—you’re saving only in case of a random critical hit on Lia. After this fight, the Tieflings will have escaped, and you can meet them back at Last-Light Inn.
Congratulations, you have successfully rescued the Tieflings in Baldur’s Gate 3!
Others Asked
What is one of the main objectives in Baldur's Gate 3?
One of the main objectives in Baldur's Gate 3 is to find a cure for the tadpole infecting your character and fellow party members.
What does Act One of Baldur's Gate 3 introduce to players?
Act One of Baldur's Gate 3 introduces players to the world, core game mechanics, and prepares them for the open world beyond the starting zone.
What is one of the main objectives in Baldur's Gate 3?
One of the main objectives in Baldur's Gate 3 is to remove your tadpole in order to prevent your Illithid transformation.















Published: Nov 21, 2023 11:10 am