The Red Mile in Starfield is one of the most Bethesda-esque things you can find in the game. Are you in the mood to try and run through low gravity while being chased by hungry space dinosaurs and dodging poisonous plants? Then the Red Mile is for you.
Red Mile location: Where to find the Red Mile in Starfield

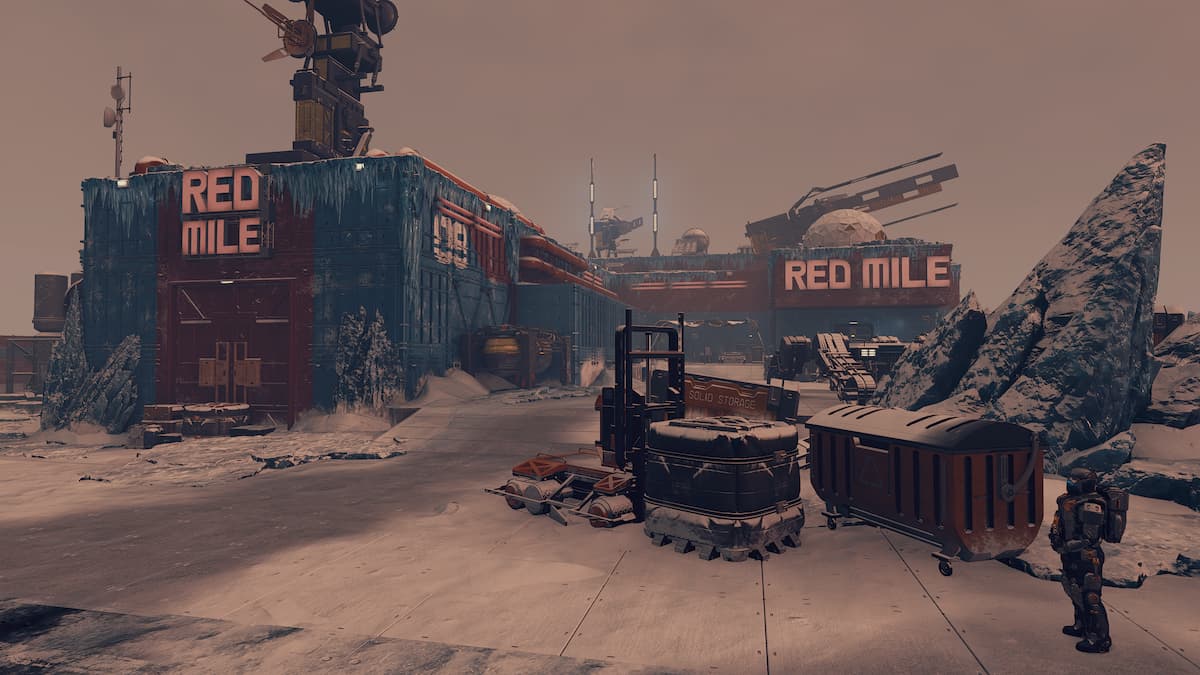
The Red Mile is located at a rundown casino on Porrima III. This is found in the aptly named Porrima system. You can find it on your star map almost directly to the right of Alpha Centauri, your starting system. Land on the planet and at the location marked as the Red Mile, you will find a somewhat grim-looking building and some guards, so just ignore them then head inside.
How to easily finish the Red Mile
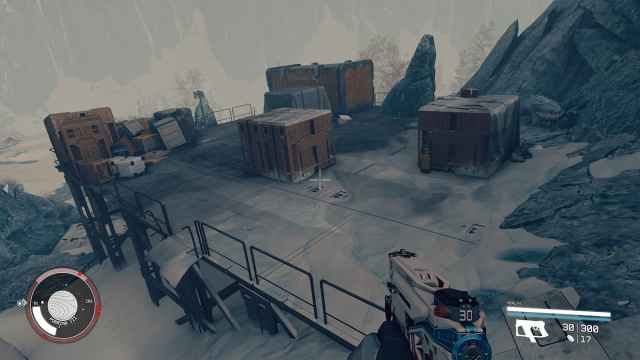
The real trick to finishing the Red Mile early is to not try and do it too quickly in a play-through. It’s a few jumps from where you start for a reason. You will need to run up a hill covered in rocks, discarded containers, and abandoned platforms in order to reach a beacon, activate it, and then make it back to the start. While doing this, you will be harried by creatures called Maulers that look like massive reptiles. There are also lots of poison plants to dodge that will interrupt your routes.
Preparation is key for this event, and how you have invested your skills will really matter. The gravity on Porimma III is pretty rough. Investing in both Fitness for additional oxygen and Wellness for additional health is a great idea. I would also suggest investing skill points into Boost Pack Training to really take advantage of your boost pack. It’s also a good idea to use a balanced boost pack if you have one. You’ll need just enough lift to be able to grab a couple of container tops or high platforms, and then you’ll need your fuel to come back quickly.
You will also want lots of healing items, so bring plenty of Med Packs. The last thing you need to think about is weapons, and there is a lot to consider here. Don’t fall into the trap of equipping weapons that all use the same ammo type. Bring the best weapons that you have access to. I would strongly suggest the Ashta Tamer that you can find during the Empty Nest quest on Akila as part of Coe’s story. This does a lot of area-of-effect explosive damage and will wound multiple enemies.
I also love the Elegance pistol for when something gets too close, as it will rapidly fire all bullets and has a quick reload speed. Finally, the Kodama and a Drum Beat make a brutal combination for controlling the midrange and ripping Maulers apart.

Also, consider your armor. A good airborne rating is great but not a priority, as you can simply avoid the plants that are trying to poison you. I’d suggest a strong ballistic rating instead, and that will help you survive against the Maulers. They hit pretty hard, especially in a group, and you’ll need to be careful about letting them gang up on you.
Survival tactics on the Red Mile
The most important thing is to move forward. If you are getting hassle from Maulers, then you can damage them on the move. Jump on top of containers and rocks to buy some space, but the Maulers will spit explosives at you. Yes, they will spit explosives at you. Gross. The layout of the mile can actually work in your favor, as the Maulers cannot seem to move through each other’s hitboxes, allowing you to bottleneck them pretty easily.
Make sure you use the jump and glide technique to get the most from your oxygen. To do this, run for a few steps, jump, and then pump your boost pack carefully to stay just a little bit above the ground. This will allow your oxygen to come back a bit, and when you are on the ground again, your fuel should return.
Now, here is the bit that might throw you a little. Sometimes, you just gotta stop running. There is no point in blindly running up the hill and not knowing what is near you. Stopping running, partly to get some oxygen back but also to figure out what enemies are close. There is a chance the Mauler that is hounding you only exists in your head.
Find yourself a nice little spot to take a break, funnel enemies to you, and then see what comes your way. Keep a close eye out for plants, as they will just chip away at your health and make it easier for the Maulers to mess you up.
Once you reach the button and press it, you need to get back, and that is much easier as it is all downhill. You will need to really take advantage of the jump and glide technique. There is also an argument to be made that any Maulers you killed on the way up won’t be around to come after you on the way down.
And that’s really it. Remember, if you are really struggling with this, all you can really do is level up and come back with better weapons and more health. There is no magic way to get to the top and back. You just need to be as smart as possible, conserve your oxygen, and pay attention to your surroundings.
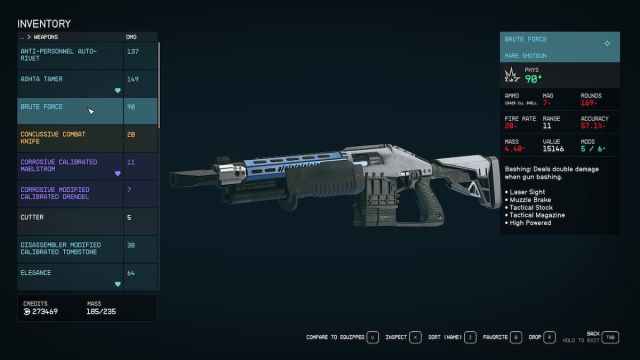
Your prize for this feat of bravery and endurance will be the Brute Force shotgun. This rare shotgun is one of a kind and comes with a Laser Sight, Muzzle Break, Tactical Stock, Tactical Magazine, and High Powered mods all installed. It hits like a truck, has a 7-shell mag, and should sit down most things without too much issue.


Published: Sep 3, 2023 12:14 pm