You’ve outwitted Savathûn three times so far, but the Witch Queen is far from done. She’s got the final Imbaru Engine test ready for you, with a major payoff at the end of it—if you can figure it out, that is.
The Test of Truth and Lies is by far the hardest of the bunch, and it may take some time to crack it. It can be solved solo (with tremendous amounts of hair-pulling), but the solution was a community effort that involved players, papers, and plenty of notes.
Before you can unlock this test, you need to find the A Parting Gift Minor Arcana card, located in the Altars of Summoning. From there, head to the last floor of the Imbaru Engine and interact with the brazier there. You’ll also need to grab three flames in the seasonal activities. You should be set after those preliminary steps, and while that’s a lot of preparation, it’s nothing compared to the effort required to figure this puzzle out.
Here’s how to solve the final Imbaru Engine puzzle. We’ll give you the answer below if you’re just there for the goodies, but we’ll also explain the process in case you’re curious about how it works (or you’ve just given up on attempting it by yourself).
Final Imbaru Engine puzzle: The Test of Truth and Lies solution
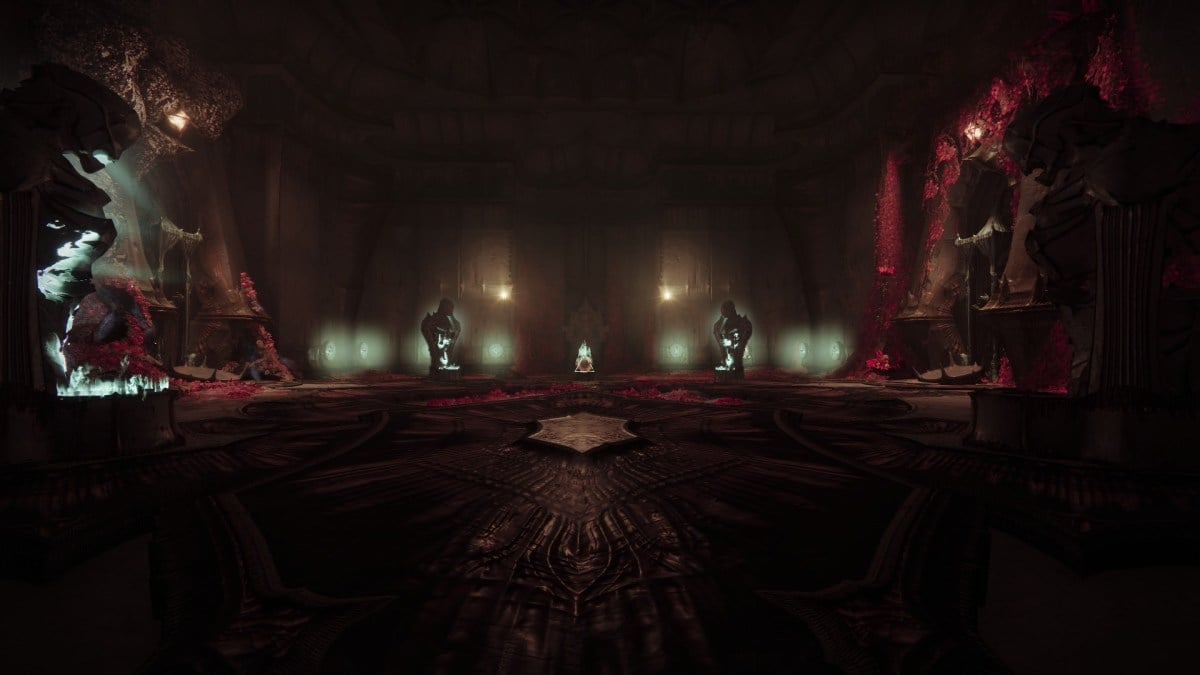
The chamber with the Test of Truth and Lies may make you scratch your head. Grab the Truths and Lies buffs from each side of the room, which will let you interact with both the Hive statues and the Hive runes on the wall. Lighting up each statue creates a triangle or a circle around some of the Hive runes on the wall.
The goal is to light up the correct statues and runes. The area is a square with one statue in each corner, which we’ll use as a point of reference. We’ve split the room into four quadrants with four runes on each. Starting from the top left and going clockwise through the room:
- Top left: Activate the fourth rune from the left.
- Top right: Activate the third and fourth runes from the left.
- Bottom right: Activate the second and fourth runes from the left.
- Bottom left: Activate the third and fourth runes from the left.


Once that’s done, submit your tributes to Savathûn to get her heirloom. A door will open on the far end of the room, and you’ll see the [redacted] that’s setting up a major plot point. You’ll also get a shader and emblem, because fashion is the true endgame. And if you don’t want to know how the sausage is made, you can head back to Orbit, take in the ensuing cutscene, and try out your new fashion.
If you want to know why you had to activate those symbols, though, we’ll break it down for you below.
The Test of Truth and Lies in Destiny 2, explained
The final Imbaru Engine puzzle is quite a bit of work to pull off on your own. Though it’s definitely doable (though maybe not before pulling one’s hairs out), the keen-eyed Reddit community figured it out relatively quickly.
The final Imbaru Engine test echoes Savathûn’s game of “two truths and one lie” in Altars of Reflection, but with far more work and an absurd amount of backtracking. Each Hive statue tags some of the symbols in the last room with either a triangle or a circle, representing truths or lies.
If you can’t make heads or tails of the symbols on the statues in the final room, though, it’s because you only have part of the solution. The Hive statues are scattered on each floor of the Imbaru Engine, so you’ll have to backtrack quite a bit. Interacting with each statue will light up symbols in that room, not in the final room (Thanks, Ebontis, for clarifying that last detail).
After that discovery, it was all a matter of compiling the symbols and weeding out the incorrect ones, as done by players on Reddit and the late Twitter. This yielded the sequence we used to open the final door.
After completing the puzzle, you’ll find a very spoiler-filled artifact, plus the Twisted Space emblem and the Forbidden Wish shader. Enjoy your cutscene and get ready for one of Destiny 2‘s most-awaited revelations—one that’s been years in the making.


Published: Nov 8, 2023 11:47 am