A big part of Zelda: Tears of the Kingdom is the number of fashion options Link can find all across his journey in Hyrule. While a lot of these clothes can be found in shops, there is also a number that can be found around the map in Hyrule. Some of these items were supposedly left behind by a famous thief that went by the name of Misko.
However, this thief wasn’t famous for big heists but for his daring sense of fashion, leaving items of clothes hidden around Hyrule for Tears of the Kingdom players to find.
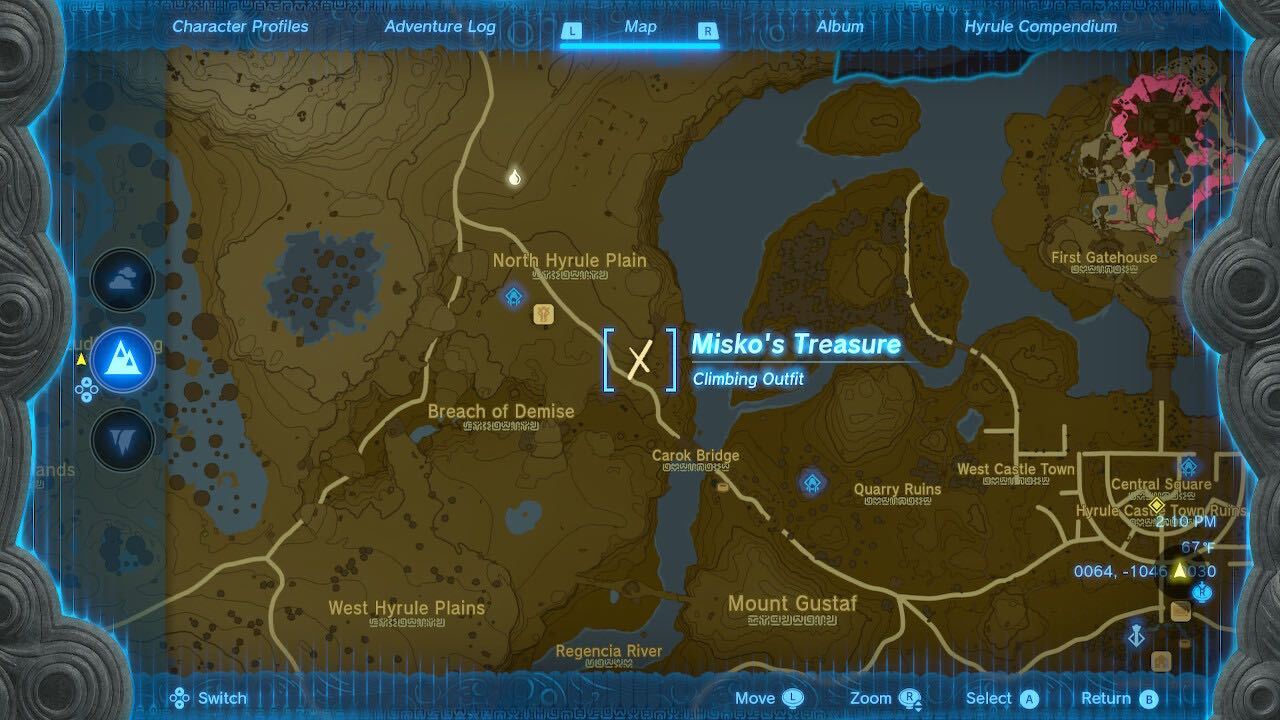
What is Misko’s Treasure?
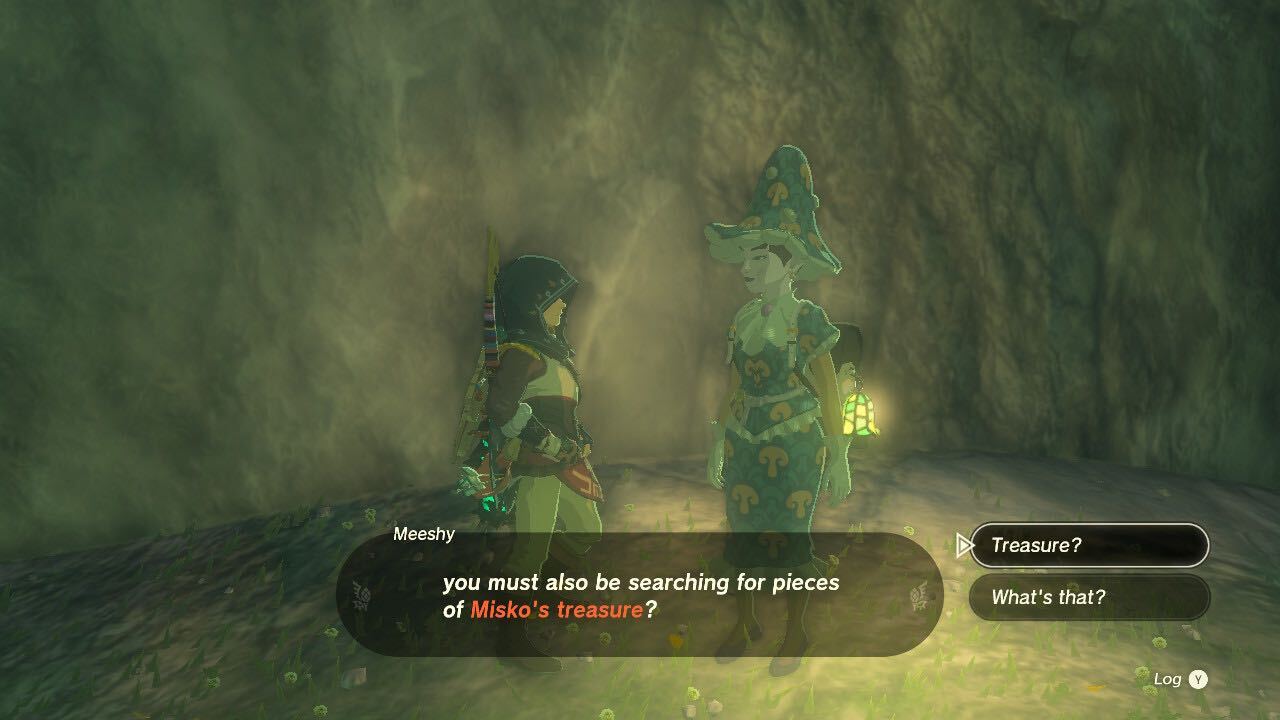

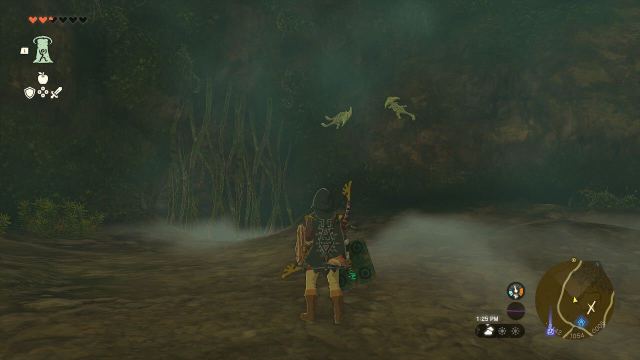
In your journeys across Hyrule Field in TOTK, you may come across someone in a more outlandish outfit. If you speak to them, they will tell you about Misko, an old thief who didn’t become famous for his robberies but for his sense of fashion. They’ll tell you about his treasure, three hidden pieces of clothing around Hyrule Field that give unique buffs.
These members of a fashion organization will also give you tips and encourage you to try and persuade the Great Fairies to come out of their hideouts to bless your new gear.
This isn’t necessary to find the clothing items, though, and I found it best to get all three pieces first. If you use the TOTK map above, you likely won’t need to get the quest from the fashionable travelers first.
Shock-Resistant Outfit location
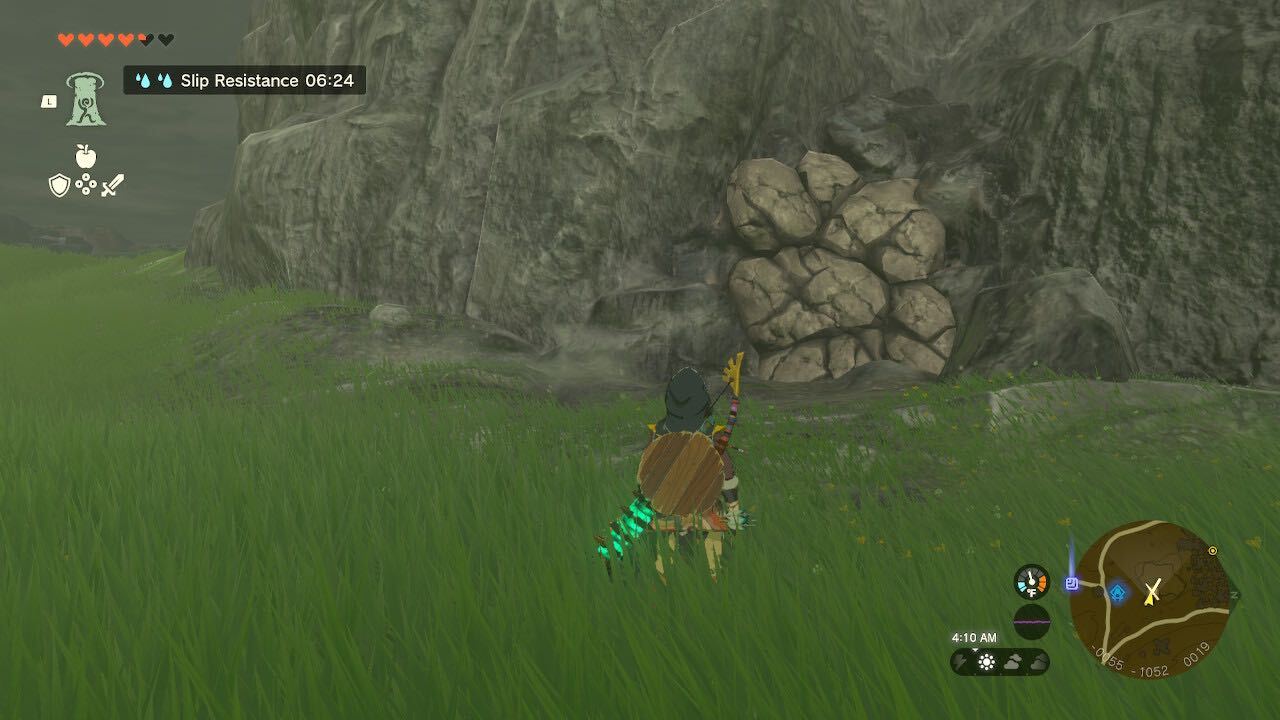
If you have the Teniten Shrine fast travel point unlocked, you can travel to it and walk to the side. There you’ll find a bunch of rocks covering a cave entrance. Blow them up with a Bomb Flower attached to an arrow to get in.
Once inside, follow the path down two steep areas and into the wider cave opening, defeating the few bats and picking up another Bomb Flower.
If you want extra resources, including the potential for some gems, shoot another Bomb Flower arrow to destroy another cave-in on the left. Be warned there are a couple of electric bats, so be ready to defeat them before you claim the ore and Bomb Flower.
Once the side room is cleared, run to the far side where you can see vines growing like in the image above. You’ll either need to use a sharp weapon like an axe or fire to get through, but you can also find a couple of sticky lizards here. There’s another wall of roots you’ll need to destroy before a large drop onto some skeletons, which come to life. You can ground slam on the way down to knock their heads and disorient them.
Once you defeat them, you’ll walk into another large open area, with a chest behind some roots on the right and a stone cliff you can use the Ascend ability on.
Make sure you grab the chest before you move on and then be careful of the open hallway, as a monster at the top is spitting boulders down it.

If you wait, you’ll notice the monster takes a break between spitting rocks. All you need to do is follow its pattern and then run up when the creature is reloading. You can also stick to the edges of the cave and climb on the walls, as the rocks tend to stay on the ground towards the middle of the path. You can’t use Recall unless it’s on the last rock, as the others will cause them to explode.
The worm is much easier to defeat on the other side, where you can either use the rocks and Recall to take out its weak spot or shoot it with arrows. This isn’t necessary to get the clothing but it will make collecting the ore and other resources easier.
Once you’re finished, break the caved-in wall with a Bomb Flower arrow.
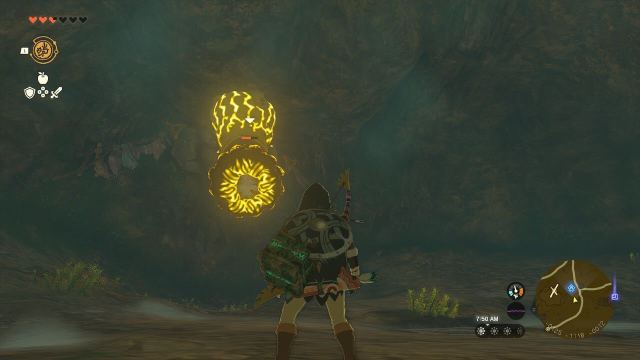
Once you’ve broken down the wall, you’ll see a large electrified worm at the end of a large room. This one can be taken down the same way as the previous worm. All you need to do is wait for it to stop spitting projectiles before you shoot the large weak spot in its mouth. At that point, it will fall to the ground and you can hit it with melee strikes.
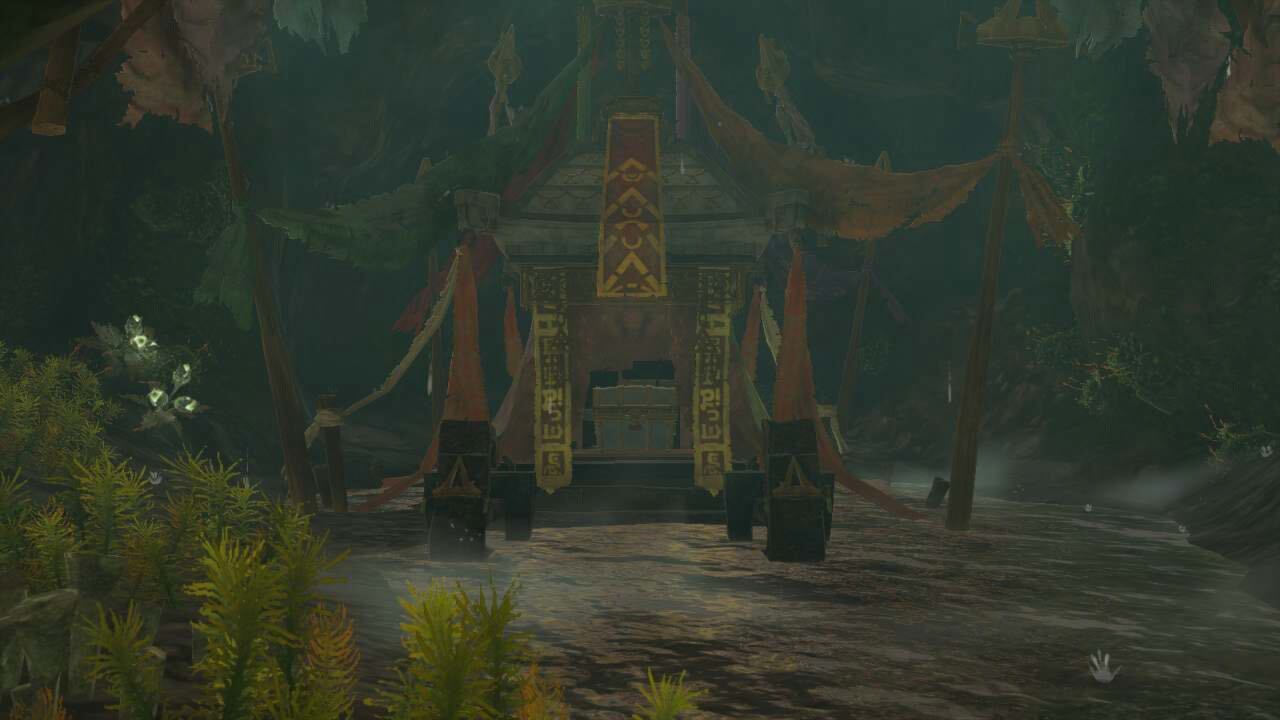
Once you’ve destroyed it, look on the upper wall behind it to see another area where you’ll need to use a Bomb Flower arrow to break through a crumbling stone wall. Once inside, you’ll find a large ornamental red altar with a chest at its base. You’ll find the Rubber Armor inside, which will provide Shock Resistance.
If you use Ascend near the altar, it will bring you out around the shrine.
Climbing Outfit location

If you want to get to this location quickly, you can fast travel to the Sinakawak Shrine near the New Serenne Stable and then follow the road southeast. If it’s your first time there, you’ll likely see a man standing outside and peering carefully into the opening. He tells you about the Bubbulfrogs, which are inside the cave and drop something that’s worth money at a certain stable.
Once you go inside, you’ll see two of the worms from the previous area and they’ll spit rocks at you if they notice you. You can take the time to fight both of them if you want, but you can also run behind the furthest one and use Ascend to get to the cliff above them and then continue running to avoid them completely. There will be one of the werewolf-like Horriblins on the ceiling, but shooting it with a simple fused arrow in the head should defeat it.
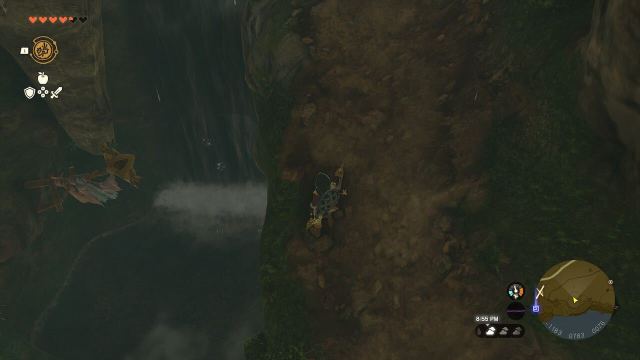
When you get to the second level, you’ll need to walk across a stone bridge and then there will be another ramp leading up on your right. Climb it about halfway and then glide into the waterfall seen in the image above.
Behind that waterfall, you’ll find another red altar with the Climbing Gear inside. This provides you with a speed boost while climbing, but it will still take the same amount of stamina.
Related: How to throw items in Zelda: Tears of the Kingdom
If you go further into the cave, you’ll find the Bubbulfrog the person mentioned outside of the cave earlier. Defeating it will give the player a rare gem and allow them the opportunity to attack the glowing rabbit that drops money before it leaves. This is optional and you’re free to leave the cave as soon as you’ve received the gear.
Powerful Outfit location
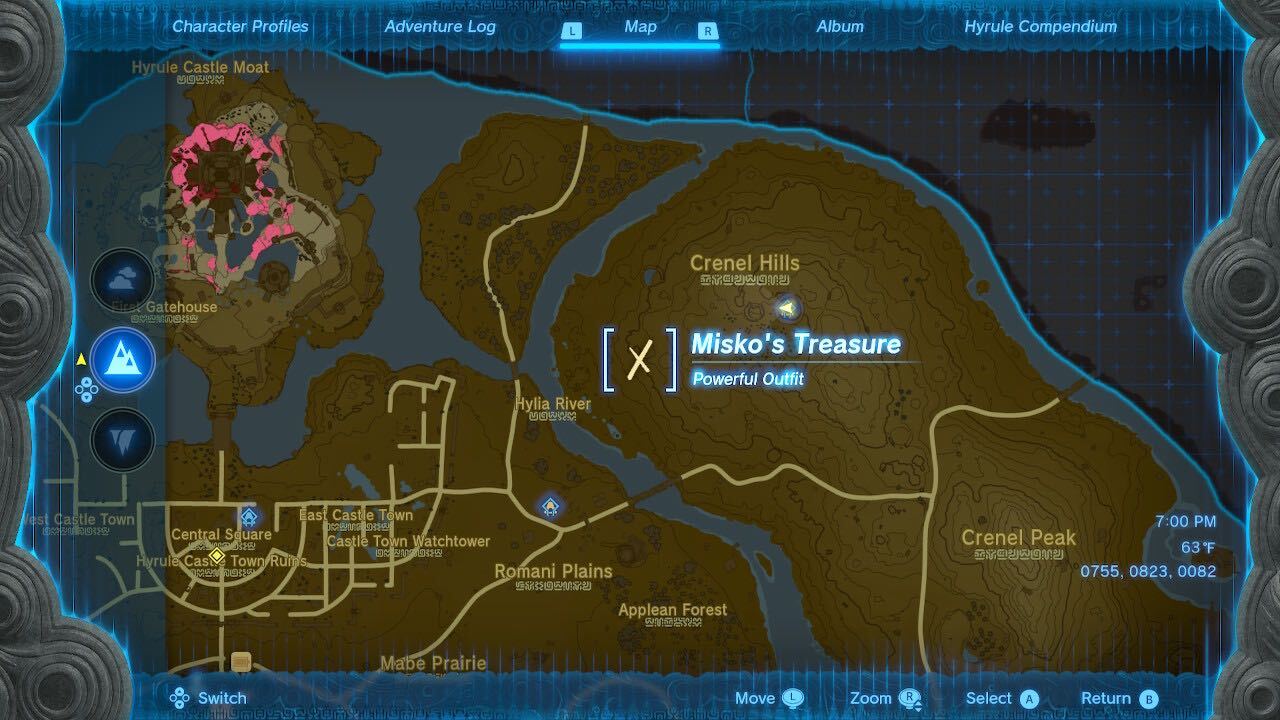
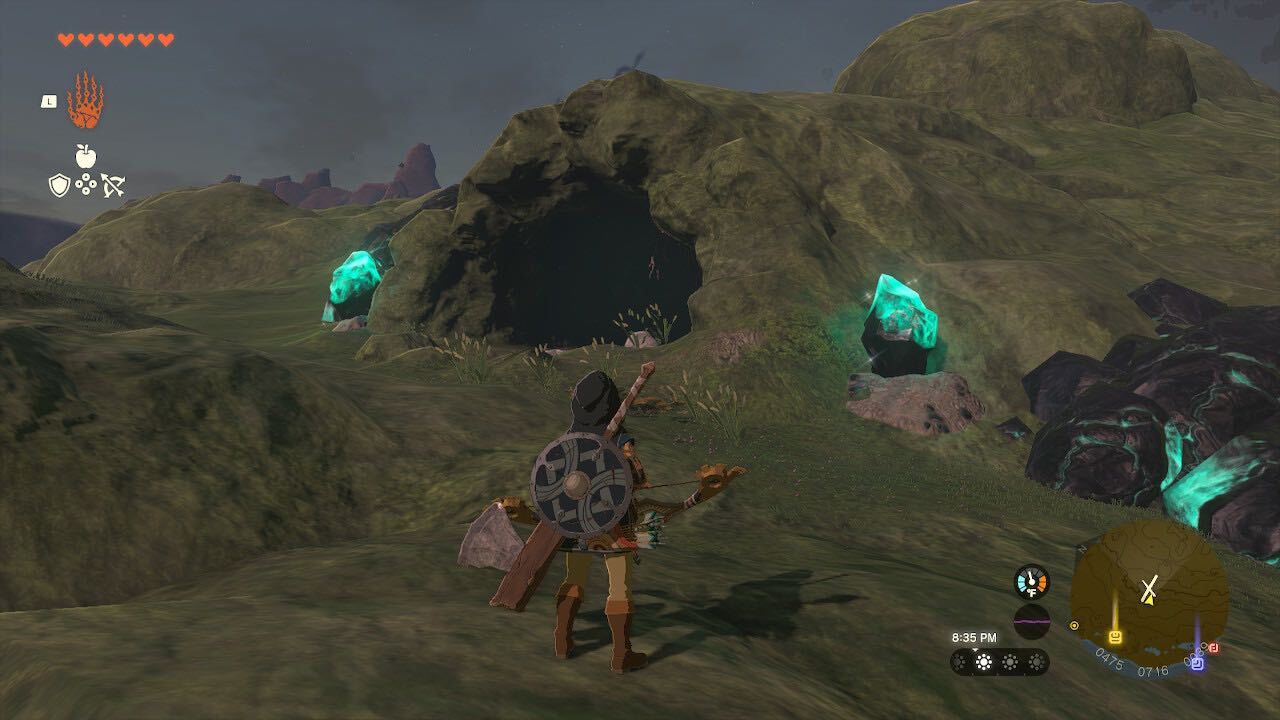
The Powerful Outfit is just east of Hyrule Castle and you can teleport to Kyononis Shrine or Yamiyo Shrine and then head east to the location above. This cave is easy to spot alongside the glowing rocks that are positioned on the outside. Walk into the cave and break the ore found in the opening area for some free resources.
You should be wary of the Stone Talus that will come up out of the ground, with one of the bright blue ore on top of its head. That one is the monster’s weak spot and all the damage should be directed at that one spot. I was surprised to find you don’t actually have to defeat the Stone Talus, just distract it by walking to the opposite side of the cave and then wait for it to slowly follow.
If you are going to fight the Stone Talus, make sure that you’ve got a strong bow and enough arrows to defeat a boss. Since that will largely be your only mode of attack against its weak spot, you should have enough to slowly drain its health. That being said, also make sure to save one for the giant cluster of glowing ore below.
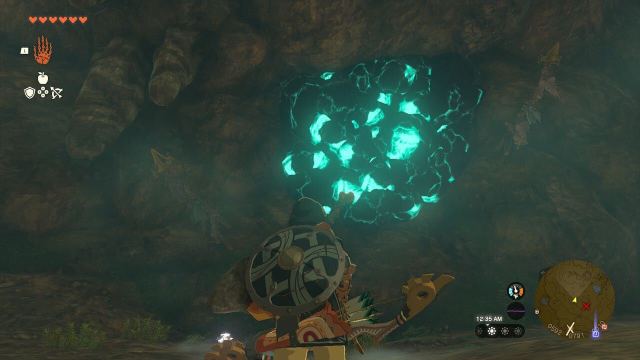
You can also avoid waking up the Stone Talus completely if you carefully stick to the edges of the room since the monster is found in the middle. Just get to the far side of the cave and shoot the grouping of stones shown above with a Bomb Flower arrow. This won’t wake the monster either, so simply just climb into the opening and continue forward.
There will be some ore and plants in the tunnel before you find the final Misko altar, with the Barbarian Armor being found inside. This will raise your attack and make dealing with the Stone Talus a little easier if you decide to fight it on your way out.
You can further enhance your clothing from the four different Great Fairies that are located around Hyrule, but you’ll have to help them first. Even if you don’t, these pieces of armor are sure to help Link as he faces a variety of threats around Hyrule.


Published: May 21, 2023 09:00 pm