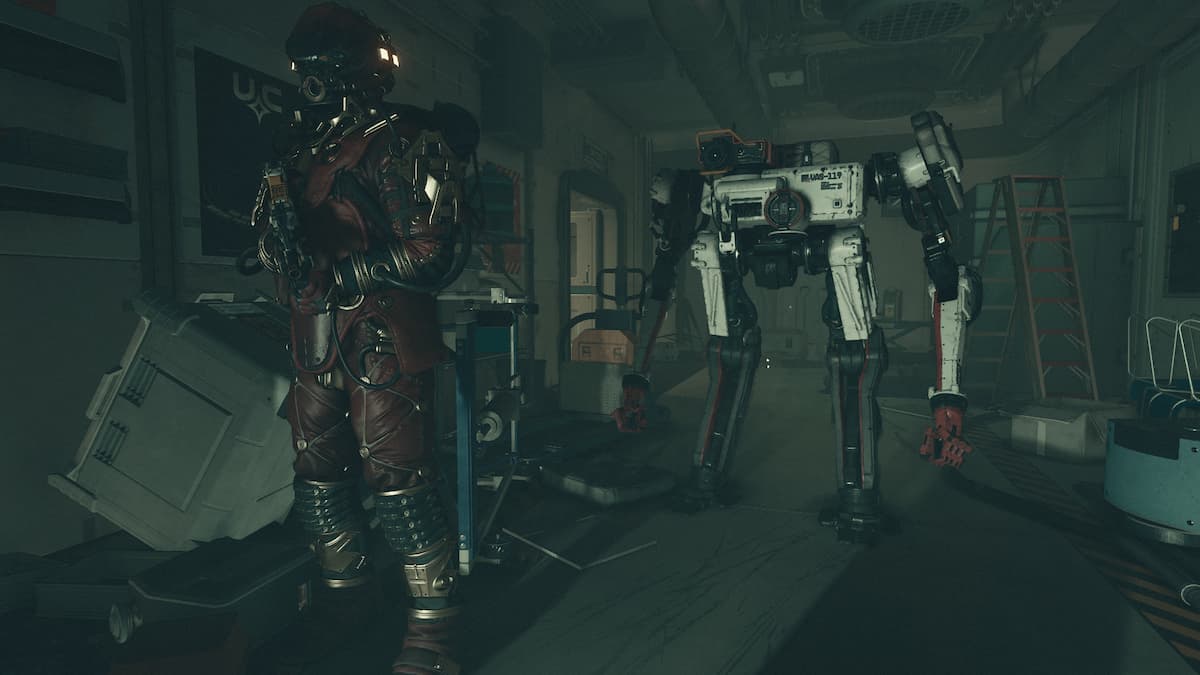
What would a Bethesda game be without a healthy dose of lockpicking? Starfield embraces the classic mechanic but does so in a very new way. When you first try picking a lock, you are likely to find it a little confusing, but don’t worry. We’ll help you pull off that first theft without any problems.
Starfield Lockpicking Guide
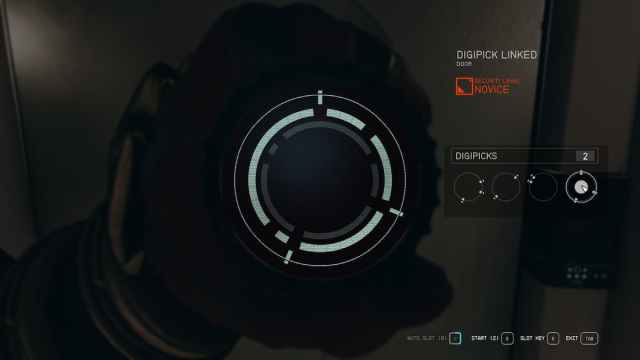
To pick locks in Starfield, you will need to use a Digipick, a digital version of a traditional lockpick. You will need to use the Digipick to rotate the puzzle and line up some notches with some holes, then slot them into place.
These can often be found lying around the various buildings and rooms you will be exploring during missions. They can also be purchased from an assortment of vendors. You can only start lockpicking if you have one in your inventory. If you find a safe or locked door that requires one, there is a high likelihood that a Digilock can be found somewhere nearby.
How to pick locks in Starfield
The basics of locking picking in Starfield are as follows:
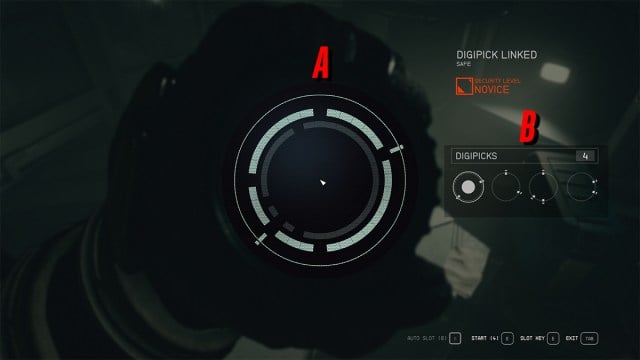
- The large circles in the center of the screen, marked A in the image above, contain gaps.
- The smaller circles represent a series of tumblers, marked B in the image above.
- Use the tumblers to fill the gaps.
- Do not commit to placing the tumblers until all of them are in place.
- Be careful because sometimes tumblers can fit in multiple different gaps.
- You must complete the outer ring, then move inward.
- Switch between the different sets of tumblers to ensure that none of them conflict with each other.
- The more complex the lock, the more circles and notch options you will have, making it harder to discern what goes where.
Locking picking controls
Mouse and keyboard
- Cycle through inner rings – Q or click on them with the mouse.
- Move the tumblers – A and D to move them left or right, or left and right arrow keys, or mouse wheel.
- Slot the tumblers into place – E
Controller
- Cycle through inner rings – left and right on the right thumbstick.
- Move the tumblers – left and right on the left thumbstick.
- Slot the tumblers into place – A
Detailed breakdown
When you have the Digilock, interact with the locked item to use it. Your character will hold the Digilock to their eye, and your screen will change over to show the lock mechanism. I found the next part a little confusing, so don’t worry if the same happens to you.
The main thing you will be able to see is a series of rings in the center of the screen that contain gaps. You will be able to see the security level of the lock and then four smaller rings with different lines on them that act as tumblers. The trick is to link up those other rings and the lines in such a way that they will fill the gaps.
You need to do this one at a time, and you will need to figure out how to turn all the rings in such a way that every gap is filled.
The main thing to keep in mind here is that the smaller rings are not necessarily in order, part of the puzzle is to figure out what needs to go where, and sometimes the smaller rings can line up with quite a few different gaps, so don’t get ahead of yourself and confirm the placement of a ring too soon.
Make sure you line up each ring, then move on to the next one and line that up. Do not commit to any of the placements because you can always go back and change them if you get any conflicting placements. You also need to do the outer ring first, and only then will you be able to do the inner rings.
Sample Lockpick
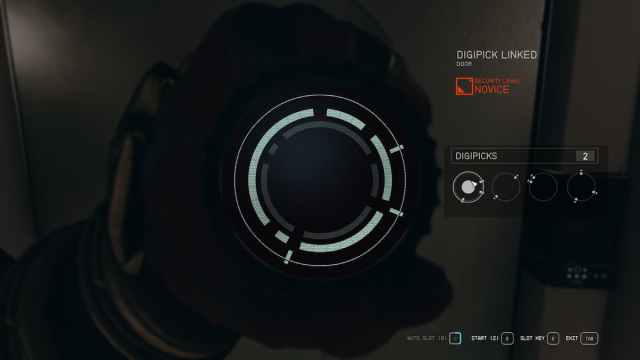
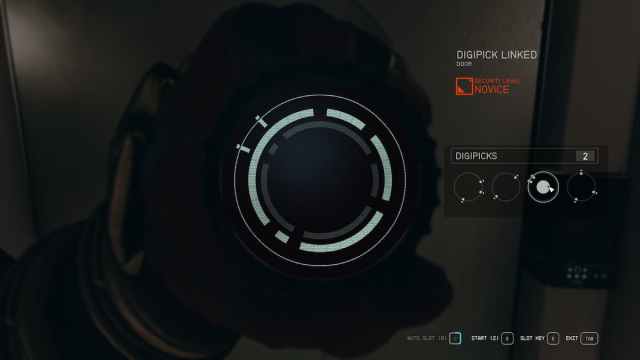
As you can see in the images below, all four smaller circles have the tumblers lined up to fill some of the gaps. We need to lock in the tumblers in the second and fourth images first. This will then give us access to the second ring of the lock, and we can lock in the next sets of tumblers to complete the lockpicking. Once all of them are complete, you will gain access to the safe, chest, or room that has been locked.
Lockpicking Stage 1
Lockpicking Stage 2

Lockpicking Stage 3
Lockpicking Stage 4
How to open Advanced, Expert, and Master locks
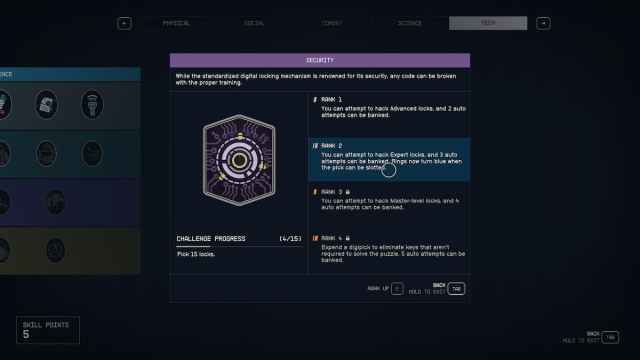
Novice locks are not the only ones you will run into, but they are the easiest, and you can open them by default as long as you have a Digipick. To open Advanced, Expert, and Masterlocks, you will need to rank up the Security skill. Doing so will allow you to open the more difficult locks, although you will need to open a set number of locks between each skill rank to be able to purchase the next one. Ranking this up to the second level will also mean that rings will turn blue when they can be slotted, making it much easier to keep track of which rings have been lined up already.
How Auto Slot works
You build up a small amount of auto slots with each successful hack. When you have a full bar of auto slot, you can use it on any ring to automatically align it. You can bank more of these as your overall Security skill is ranked up. Much like auto persuade, I would suggest leaving them in the bank until you really cannot afford to fail a hack, as they can be incredibly useful in the right circumstances.
How to get more Digipicks
Digipicks can be purchased from vendors for a small amount of credits. Most vendors will have at least a small invoice of Digipicks for sale, but they can nearly always be picked up at Jemison Mercantile on Jemison, the UC Exchange on Mars, and from most Apex Electronic stores all throughout the game.
You can also loot plenty of them from assorted outposts, abandoned factories, and labs all throughout the game. When looting these buildings, I would advise you to do it with your scanner out. Having the scanner out will highlight small objects, making it much easier to see the Digipicks that might be lying around.


Published: Sep 8, 2023 05:27 am