New content has arrived in Starfield, but The Vulture Trackers Alliance mission has caused some controversy due to the unlock method. Here’s a guide to how to unlock and complete it all.
The Vulture mission was added to Starfield in the June 9 update, where the biggest addition was the Creations providing cross-platform mods, and is part of the new Trackers Alliance faction. But it’s not as easy as other quests in the game.
We’ve explained how to unlock the quest, how to complete it, and the rewards you earn for your efforts below.
How to unlock The Vulture Trackers Alliance mission in Starfield

Unlike the first Trackers Alliance mission, The Vulture is not included in the base game and must be purchased in the Creations menu to activate—and it comes at a cost.
The Vulture Trackers Alliance mission costs 700 Creation Credits to unlock. Purchasing the Creation will immediately start the download and add the quest to your game.
Unlike some other mods available in Creations, using the Vulture Trackers Alliance mission will not disable achievements.
How to complete The Vulture Trackers Alliance mission in Starfield

The Vulture mission for the Trackers Alliance is only available once you have completed the introductory mission to the new faction. Once completed, interact with the bounty board in the Trackers Alliance HQ to accept the Vulture quest.
Audio plays once the mission is accepted, detailing the task that lies ahead of you. To complete the quest and earn all the rewards, follow these steps:
- Track the mission in your log and set course to Sumati from the pause menu to fast travel to the required location.
- After arriving in Sumati’s orbit, highlight the blue marker on the planet to open the map and select the Military Outpost as the landing location.
- Use your Scanner to highlight a path to the objective after exiting your ship. Sit at the table and speak to the Freestar Operative. After a short conversation, you get ambushed on two sides by enemies.
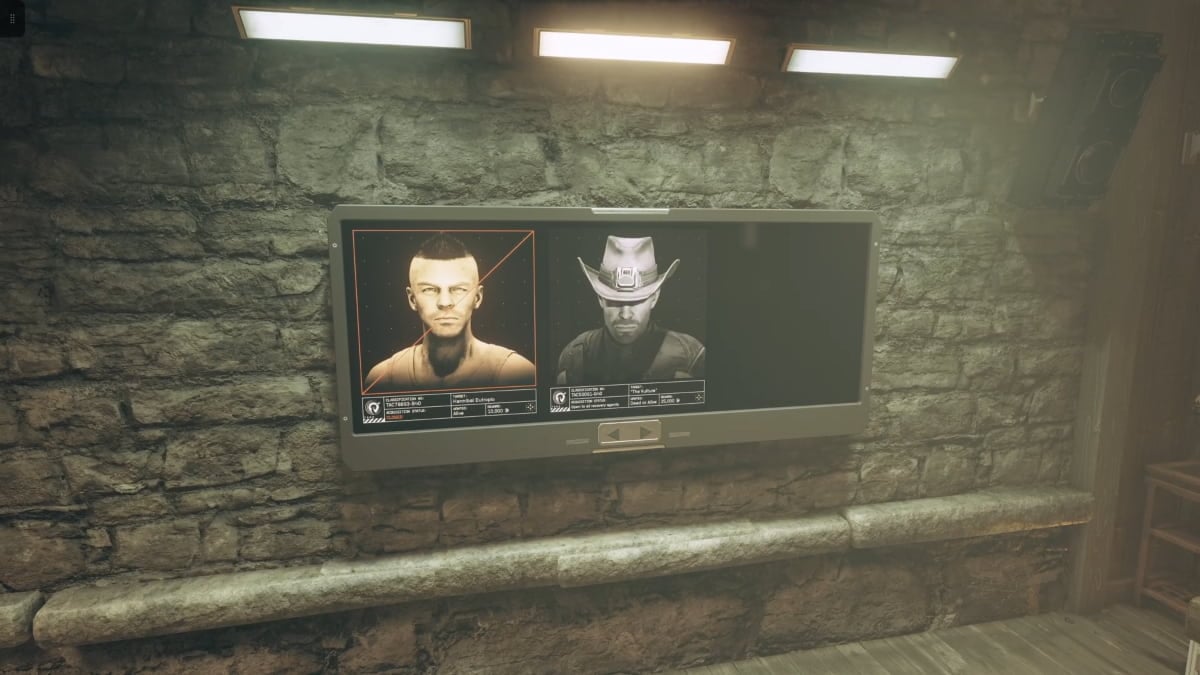
- Eliminate the ambushers and search their bodies for intel. The specific target is the Vulture Mercenary Sargeant, who is looted for the Operation Orders. Reading the orders completes the next objective.
- The next task given is to infiltrate the Mercenary Hideout. Before you leave, loot the enemies you defeated and the area nearby for Health Packs, Ammunition, Digipicks, and more. Use your Scanner to be directed to the next objective. Be careful of additional enemies and aggressive wildlife on your travels.
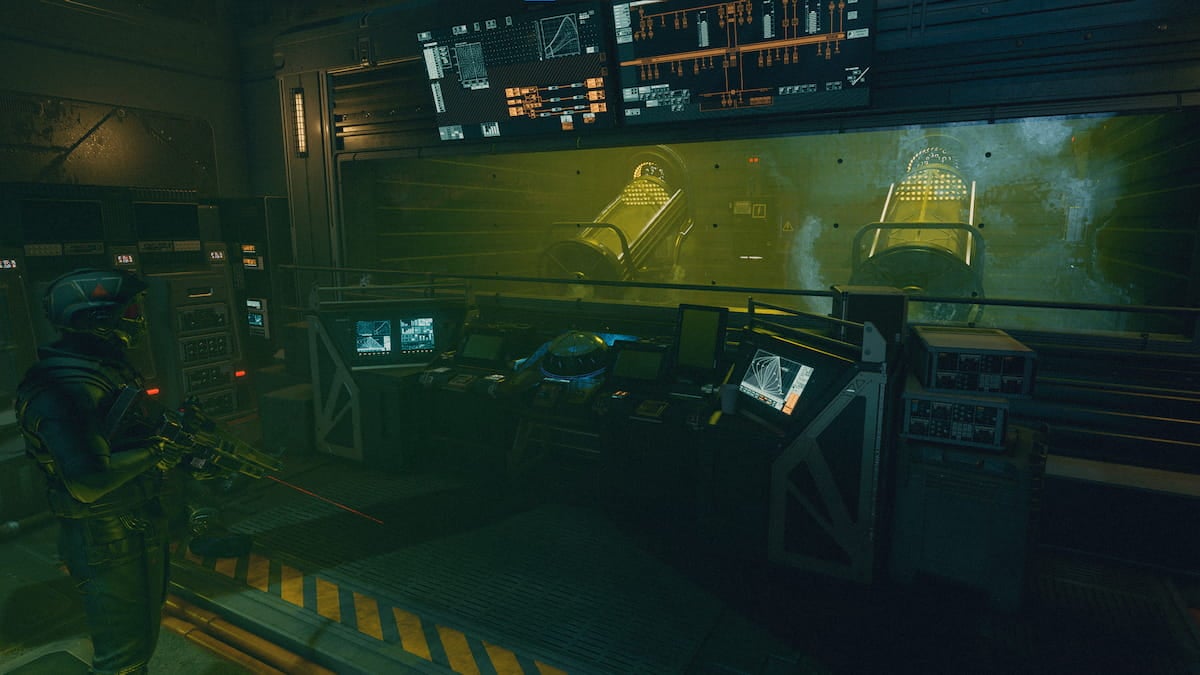
- Heading inside the cave results in more enemies attacking. Eliminate them and follow the waypoint to the marked computer to search for intel. Your next objective is off-planet, so use this time to loot the enemies you defeated and the environment for resources.
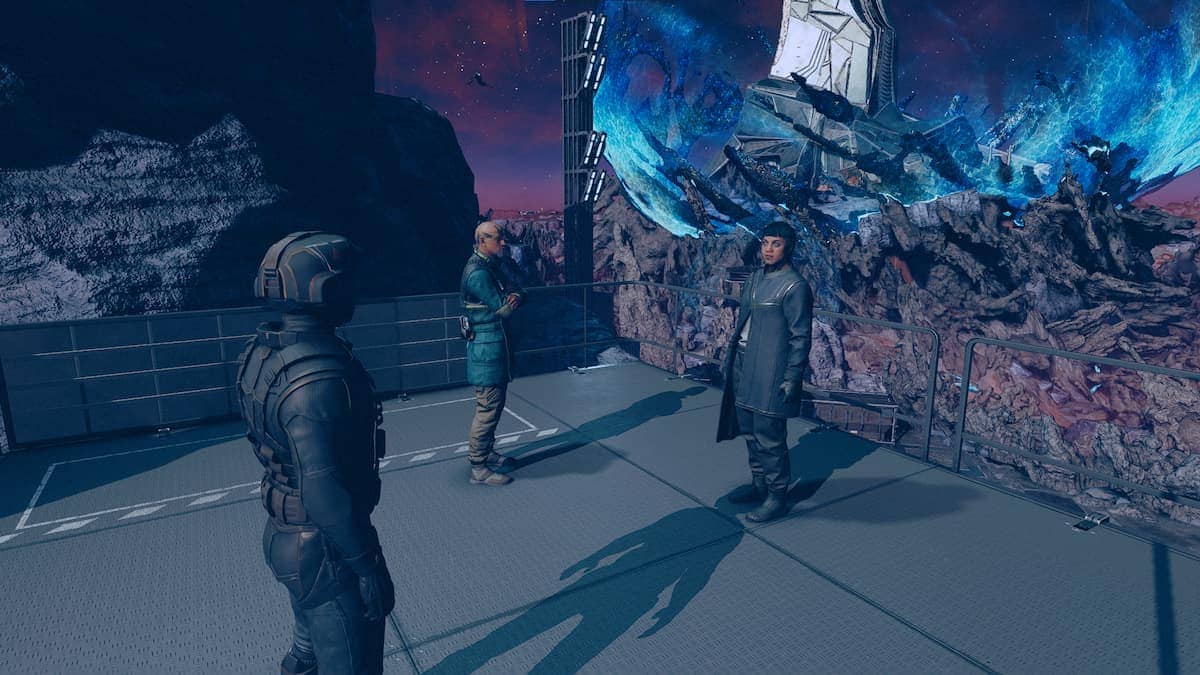
- There are two options to progress. Either return to the Trackers Alliance HQ to inquire about Cephas Hughes or, if you have progressed in the Crimson Fleet questline, talk to Robert Torres at the Key. The easiest option is to return to Akila City and the Trackers Alliance HQ, where you can set a direct course.
- Inside the Trackers Alliance HQ, head downstairs to find Koios waiting for you to receive directions to Porrima II and the Paradiso resort. Fortunately, it’s within fast travel distance so open your pause menu and set course. In orbit, open the planet map and land at Paradiso.
- Follow the waypoint market to the elevator and choose the third floor. Head inside Room 303. Interacting with the Recon Report results in an ambush, so defeat all the enemies and return to the elevator.
- The Vulture is waiting on a clifftop near the Paradiso outside, head out the front of the lobby and to the left and neutralize your target. After his health bar is reduced, talk to him and you have the option to persuade him to surrender. Failing the persuasion means you have to kill him.
Whichever outcome to end up taking, the rewards for the mission are the same: the Refined Arboron Novastrake Sniper, Vulture Dustwear, and Vulture Veteran Duelwear.


Published: Jun 11, 2024 05:44 am