One of the main reasons a PC overheats is internal fans not operating at required speeds. This is often due to the automatic fan controller not functioning correctly.
Luckily, you can adjust your fan speeds manually using a few different methods. Manually adjusting your fan speed is also an essential step in overclocking a CPU. This guide covers how to manually adjust your CPU fan as well as any other case fans.
Figure out what type of CPU fan you have

Before making any adjustments, you’ll need to check what type of fans you have. This part is actually easier than you think. We’ve provided you with a list of ways to find out what your CPU fan type is below.
- Find your CPU model at the manufacturer’s website. This is normally listed under the technical details section.
- Find the manufacturer name and model number on the cooler itself. Most CPU coolers tend to have this information printed somewhere on the model.
- Find your CPU fan type in the computer BIOS. Most PC BIOS menus will contain component information.
- Check the manual that came with the CPU processor. Sometimes you’ll find the make and model there.
- Check online. Generally, online retailers like Amazon or Newegg will have this information available. Just type in the kind of CPU processor you have
- If all else fails, ask an online forum or Reddit for help. You can also call or have an online chat with the manufacturer company as well.
CPU fans will always be adjustable, but other fans in your PC may not be so flexible. The easiest way to identify a fan is to check the connector.
Determining the type of CPU fan by checking its connector
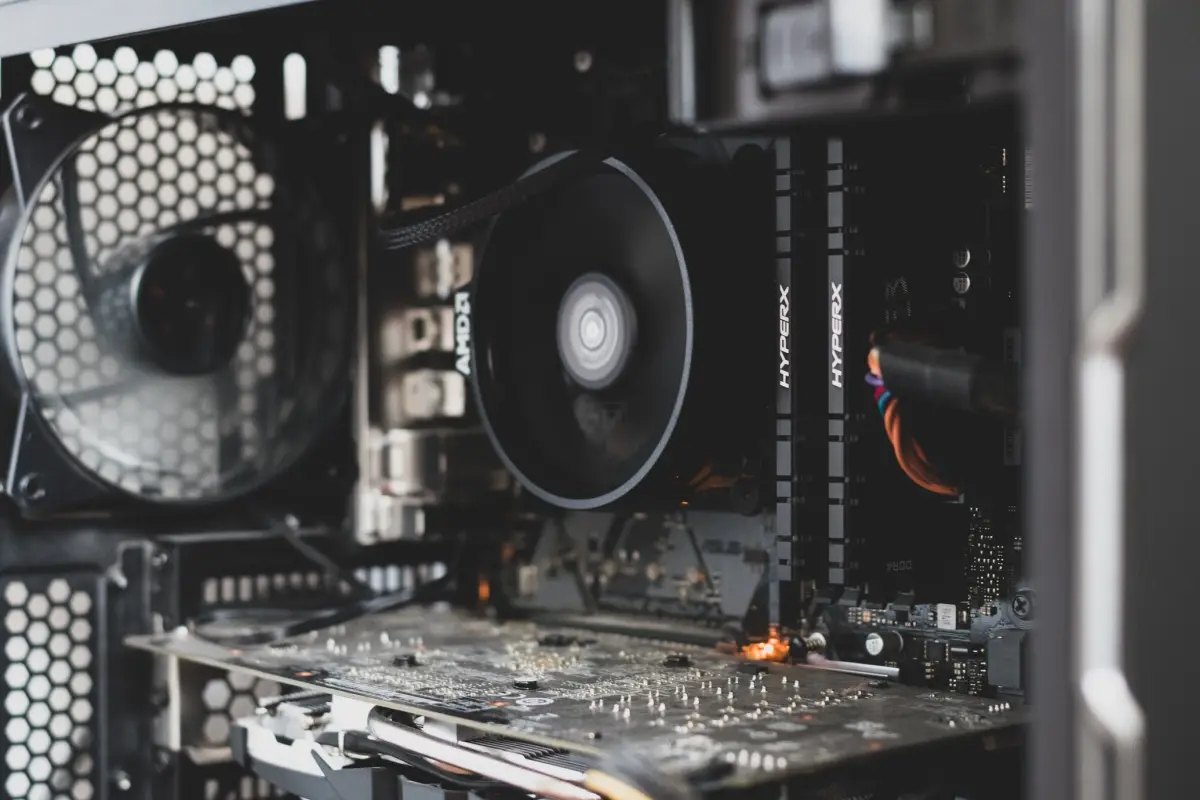
If you built your own PC, then this process should be relatively straightforward, as it’s just opening your PC’s case and checking the connector. Even if you didn’t build your own PC, it’s still pretty simple. Here are the steps to do so:
- Make sure your PC is completely off and unplugged
- Use any necessary tools to open your computer case. This might involve using a screwdriver to take out screws
- Look for the CPU fan mounted on top of the CPU heatsink itself
- Check the end of your CPU fan’s cable for the connector
- Count the pins on the connector. Three pins mean it’s a non-PWM fan, while four pins mean it’s PWM.
There are three types of fans: Molex, DC, and PWM. We’ve written up a visual guide down below to give you a better idea of what certain connectors look like.
Molex fans
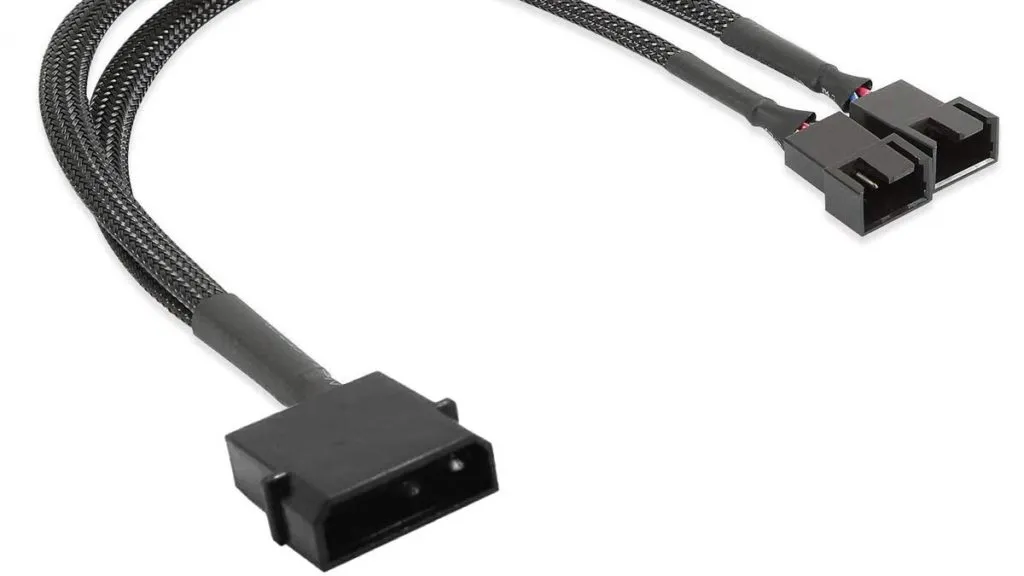
Molex fans are characterized by their flat four-pin connectors and their direct connection to the power supply. Unfortunately, because these fans bypass the motherboard, Molex fans are impossible to adjust manually.
PWM and DC fans
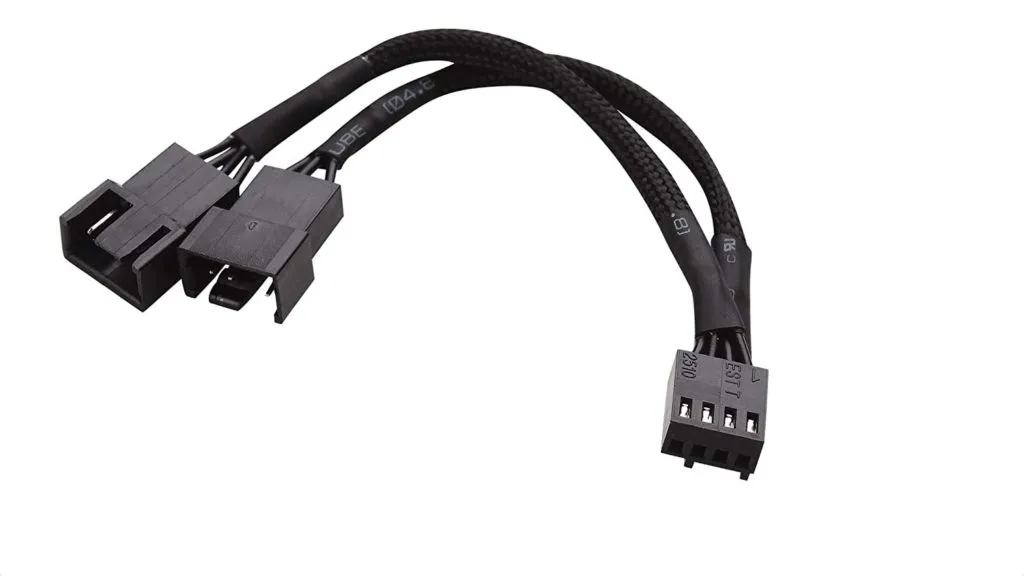
On the other hand, you can manually adjust the two remaining fan types, which are DC and PWM. To spot a PWM fan, look for a connector that is small, four-pinned, rectangular in shape, and plugs directly into the motherboard.
DC fans are almost identical to PWM fans with one exception. DC fans have a three-pin connector instead of a four-pin. The extra pin in PWM fans makes them more power-efficient, giving the fan better performance. That being said, you can adjust PWM to run in DC mode, but it’s not recommended and is a downgrade in most cases.
How to adjust fan speeds using your UEFI
The best way to adjust your PC’s fan speeds is through the Unified Extensible Firmware Interface (UEFI). Of course, every UEFI is different, but the steps listed below are similar on every motherboard.
- Reboot your computer and enter the UEFI.
- To enter the UEFI after restarting, look for directions on your boot screen that detail what key to press to access the UEFI. Most commonly, the F2 or Del key will do the trick.
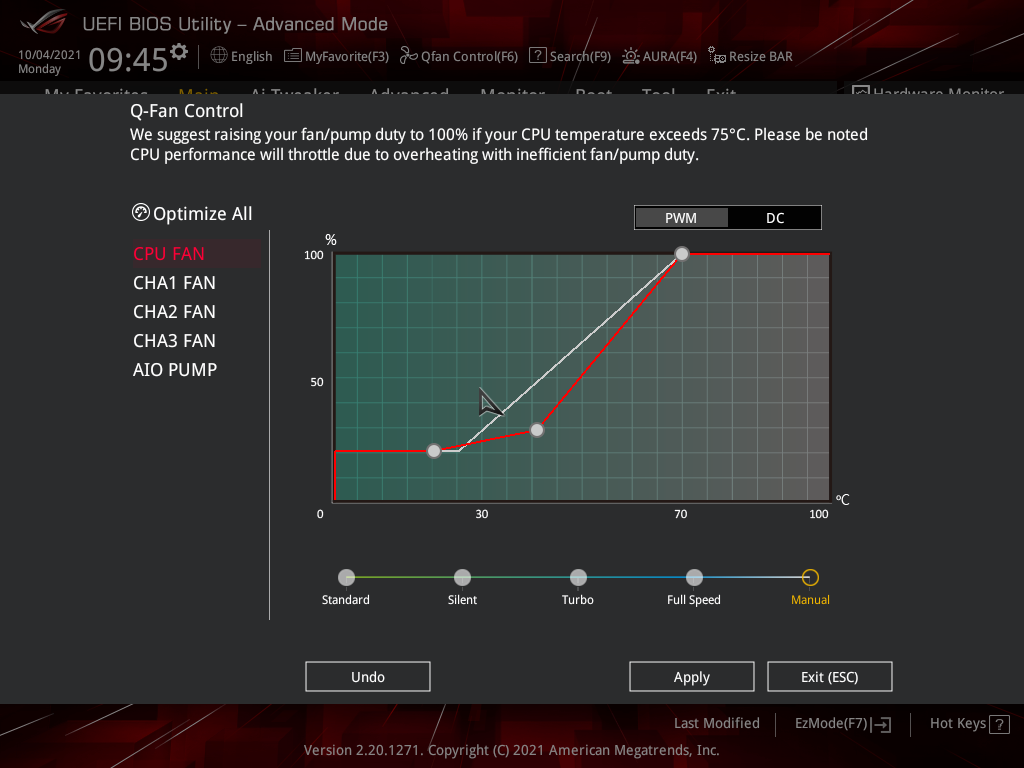
- In the UEFI, locate the setting in the main menu called Smart Fan Mode, Manual Mode, Qfan Control, or something similar.
- You’ll know you are in the right place when you see a list of fans and a curve graph.
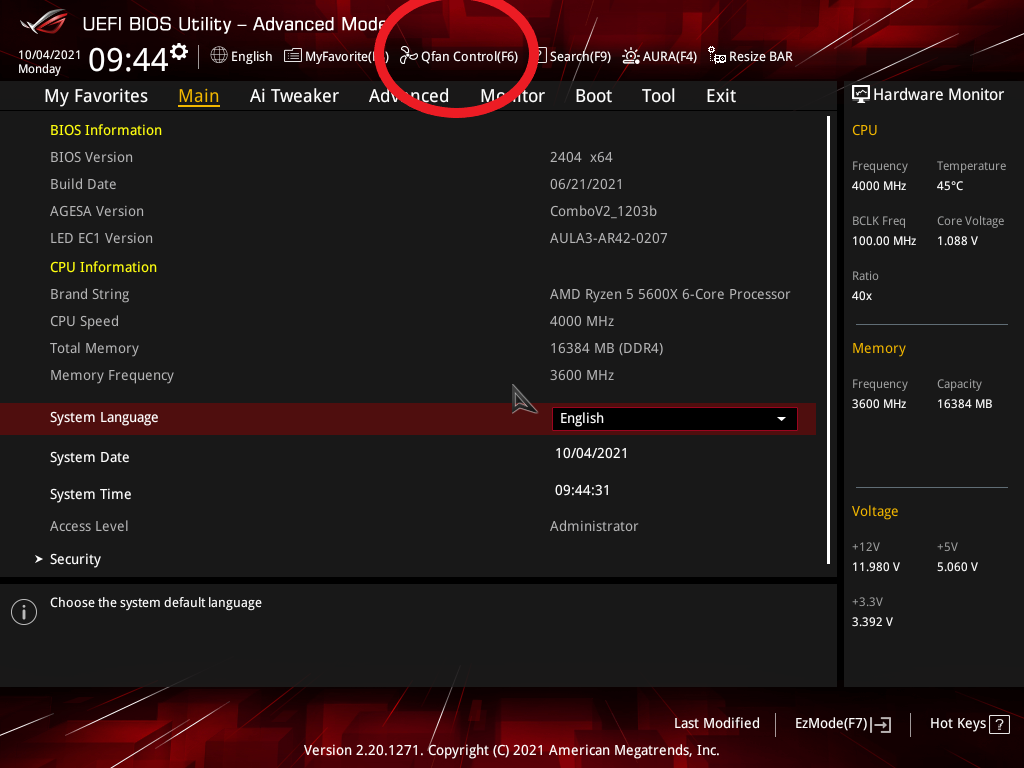
- Once you’ve located the fan curve graph, choose the fan you want to control and change the Fan Mode to Manual.
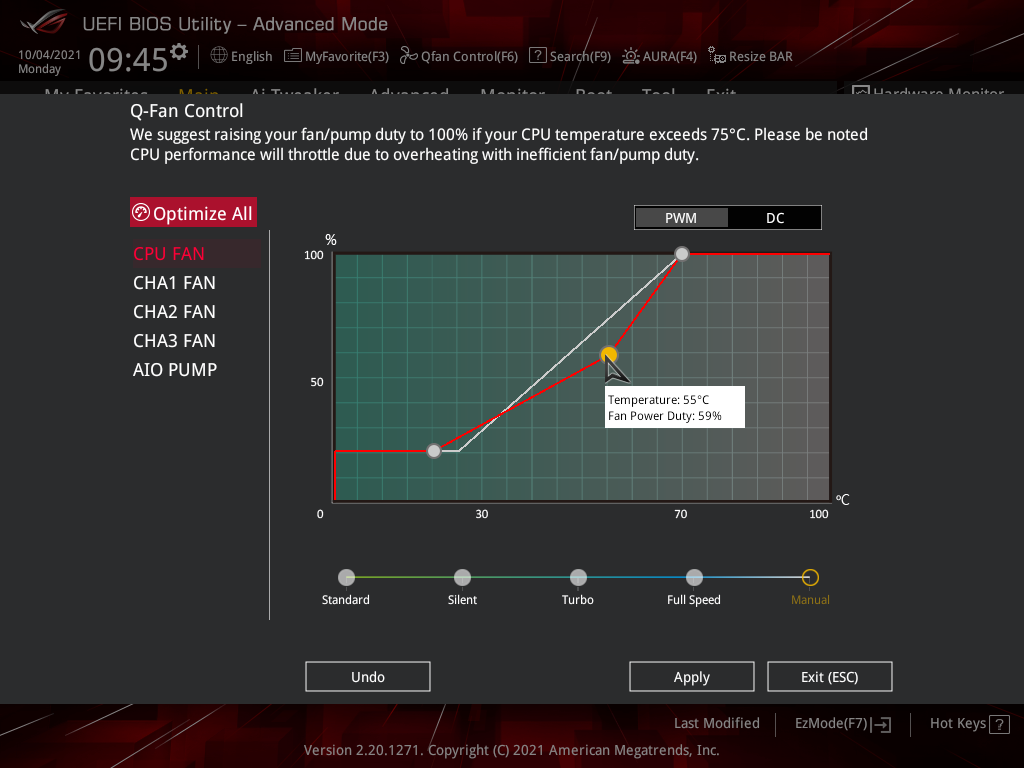
The fan curve can look confusing at first, but it’s simple once you get the hang of it. On the left side of the graph is a number denoting the fan speed, and below the graph is the temperature in celsius. When the temperature inside the case reaches the designated temperature, it will cause the fan speed to increase.
- Now, edit the dots on the fan curve to get your desired fan curve.
- Save your settings, and reboot your computer.
How to adjust fan speeds using software
If you use an older PC without a UEFI or want a more straightforward solution, you can use third-party programs to achieve the same effect. The program used in this tutorial is SpeedTemp. However, programs like SpeedTemp may be unable to access your CPU fan depending on your motherboard manufacturer, so using the UEFI is superior in many cases.
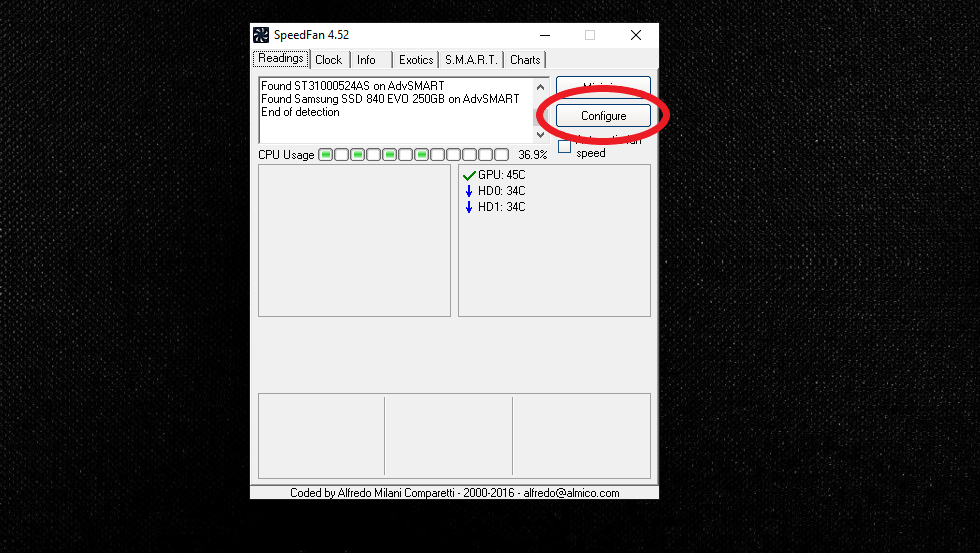
- Open SpeedTemp, and click the Configure box on the top right.
- In the configuration menu, head over to Fan Control.
- Check the box next to Advanced Fan Control.
- Click on the Add box located on the right.
- Name the Fan Controller the group of fans you want to adjust.
- Select Controlled Speed.
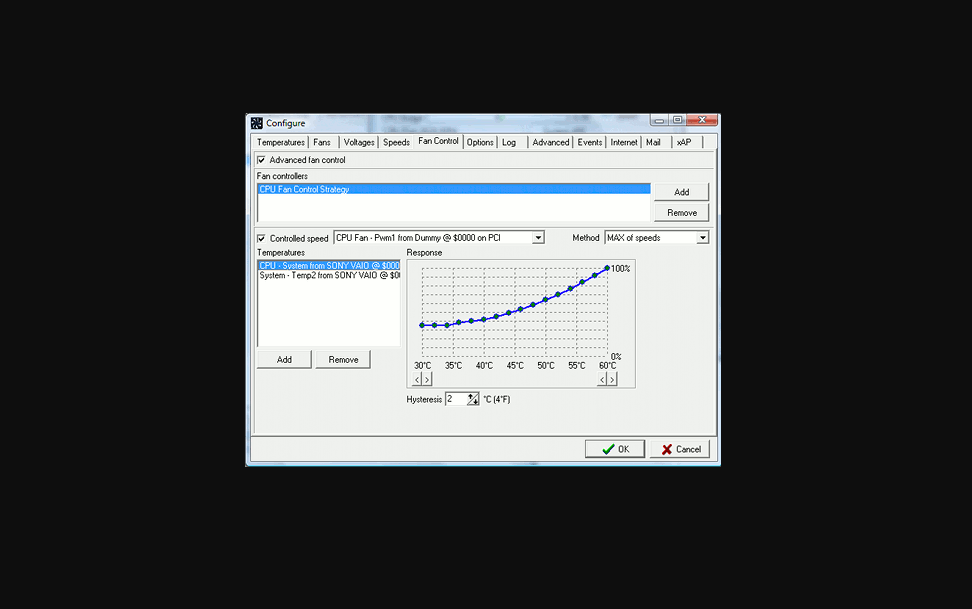
- In the drop-down, select the fan you want to adjust.
- Pick Sum of Speeds.
- Click Add under Temperatures, then add the Temperature Probe for the hardware.
- Adjust the graph to your liking.
- Click Ok, then go back to the main page.
- Disable Automatic Fan Speed.
Benchmarking
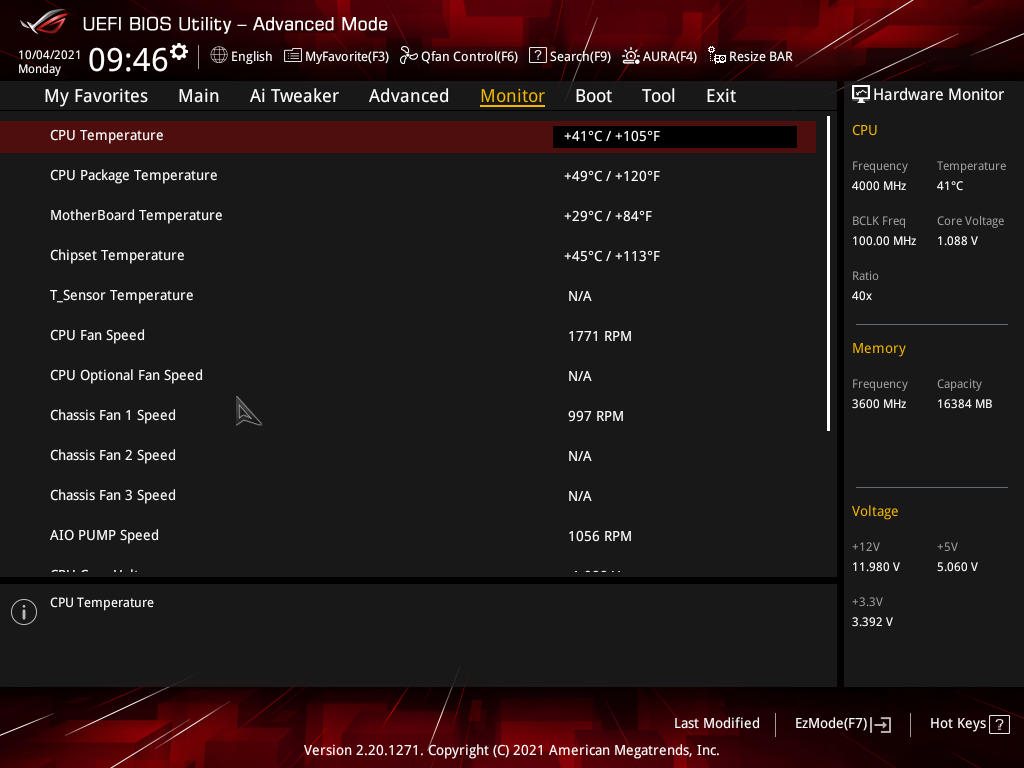
Once you’ve set your fans to your desired speeds, you should check them to ensure everything is working as intended. The simplest method to check is to use the UEFI. To do this, open your UEFI and head to the Monitor section. From here you can inspect the fan speeds and temperature.
For more advanced testing, like monitoring a CPU under load, you can employ a temperature monitoring tool. A helpful tool for monitoring your PC’s temperature and fan speeds is Open Hardware Monitor.
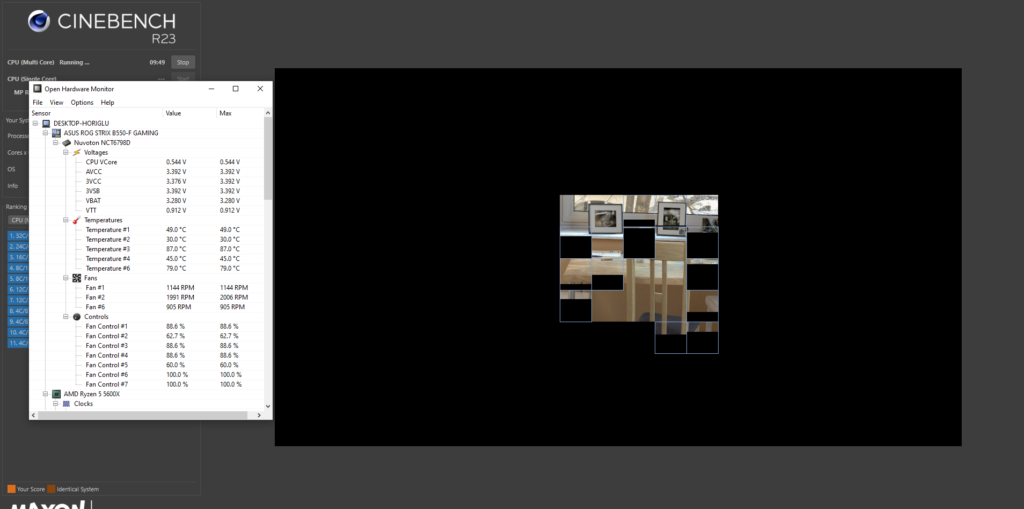
And, if you want to see how your PC reacts under stress, you can run a multi-core test in a benchmarking tool, like Cinebench, while monitoring the temperatures and speeds with Open Hardware Monitor.
What is a good fan speed (and why CPU fan speed matters)
The optimal speed for your CPU fan will depend on its size. Your fan may be anywhere from 80mm to 140mm, which will dictate the ideal speed. Pay attention that the fan size is given in millimeters, while the speed is given in rotations per minute. The given speed can vary +/- 100 RPM:
- 80mm: 1,500 RPM
- 92mm: 1,200 RPM
- 120mm: 900 RPM
- 140mm: 700 RPM
As you may notice, larger fans will need to rotate slower to achieve the same cooling effect. The precise speed at which the fan is moving affects two things: noise and CPU temperature. If you follow these optimal speed settings, you’ll hit the sweet spot where your fan will cool down the CPU as well as possible while not being overly loud.


Published: Mar 2, 2024 12:50 am