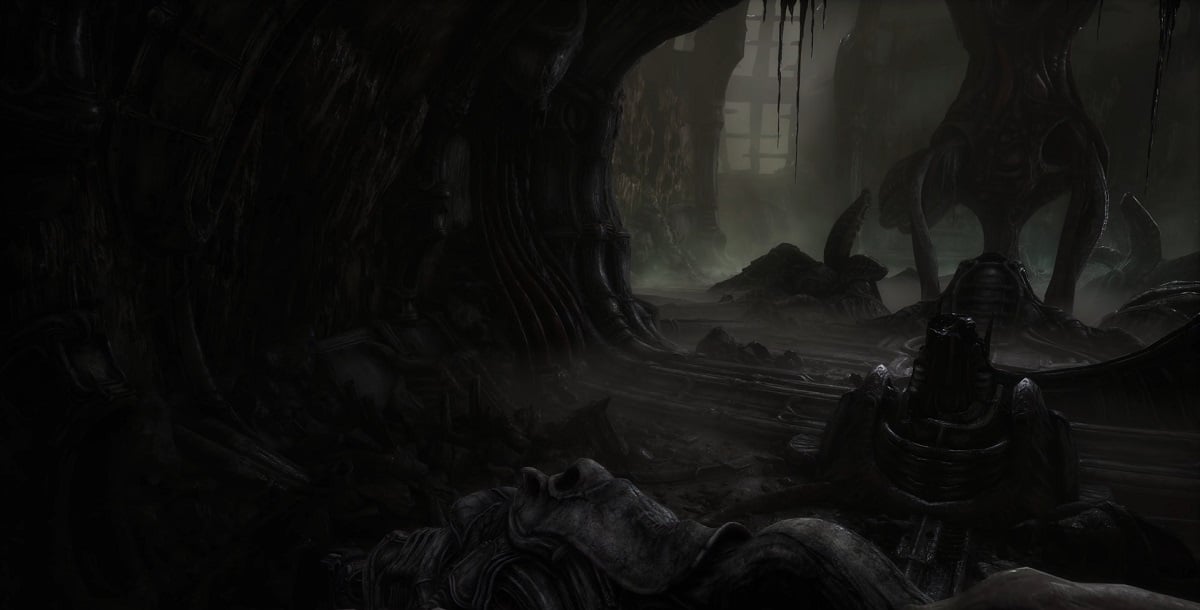
Ebb Software does not pull its punches, as we can clearly see that the difficulty and unsettling nature of Scorn starts through the beginning of the game itself. Who knew that opening a door would take more than a little push?
While you will have to wrack your brain through the first half of the puzzle consisting of moving weird eggs through a mind-bending puzzle alone, you will have a jarring but innocent alien friend for the second half who may not have the most innocent of fates, depending on where your moral compass stands.
And oh, you’re going to need all the help you’ll get. Follow our Scorn prologue and Act 1-1 puzzle guide below for just that.
Scorn prologue puzzle walkthrough
After watching the very first cutscene of the game, your character will rise to their feet and you will be standing right in front of a door that you cannot do anything about right now. Proceed to turn in the opposite direction and head deeper into the tunnel you’re in, eventually making your way to a large alien structure after reaching the opening.
Keep going through the tunnel, soon after which you will encounter a path to your right, another opening that has a door to your left, and a structure in the middle with a walkable path spiraling around it.
Make your way down the path to your right and at the end of this path, interact with the door you will find. Make your way through the door as it closes behind you. In the next room, you will have a skeleton thrown at you, which you should be ignoring. From where the skeleton is, head to the left and stick your hand inside the pillar you come across.
In the middle of the room, there will be another pillar that has you stick both your arms inside it. After you’ve done that, interact with each side of the door ahead of you to open it. Proceed to quickly run through the rapidly-closing door that you just opened. Head through the door and down the tunnel to arrive at the bottom of the structure that had the walkable path spiraling around it, which signals the end of Scorn’s prologue and the puzzle within it.
Scorn Act 1-1 puzzle walkthrough
The room you are left in after the prologue has multiple exits for you to walk into as well as a railway track that moves around the spiral structure and makes its way into each room. But from the place you entered, make your way down the first path to your right to enter a room with a seat resembling a shell along with a claw and hoist above.
Leave these alone for now and make your way into the tiny alive towards the left of the room which acts as an elevator. Insert your fingers into the strange-looking pillar there to make your way upwards.
Once you’ve reached it, make your way through the tunnel until you come across the end. Walk out of the tunnel to come across two separate pillars you can interact with. The pillar in the center possesses a claw which you will see once you interact with it. At the time, there will be nothing in place for the claw to crush.
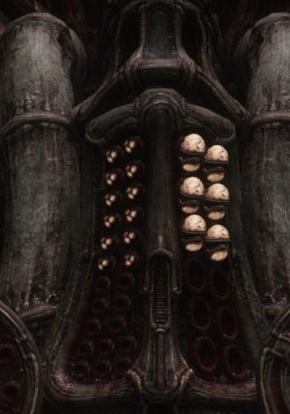
Keep this pillar aside for the time being and make your way to the pillar towards the right of the first one. Here you should find these objects resembling eggs, which the pillar on the right will let you move along the beams here in different directions. You will notice that some eggs are attached to others while some spaces along the beams cannot be used.
The aim of this puzzle is to get a specific egg into the space that you saw the claw trying to grab when you interact with the middle pillar.
To complete this rather annoying puzzle, you will need to clear space along the top and middle beams, slowly but surely getting the correct egg over to the left while the rest of the eggs remain on the right. There is also one single egg that looks similar to the correct egg—both possessing these ‘eyes’—which you will need to put into the illuminated slot as soon as you can to break the egg and free up more space.
There are two parts to solving this puzzle, and the first part has you move the claw to grab and release an egg twice; let’s call these movement patterns.
If the claw is in its starting position proceed with these two movements patterns in order:
First movement pattern:
- Down
- Left
- Grab
- Right x3
- Release
Second movement pattern:
- Left x2
- Down
- Grab the first glowing pod
- Up
- Left x4
- Up
- Release
After completing these, exit the console and interact with the middle console and watch the animation play. Once that ends, make your way to the console on the right to operate the claw once more, which is when it should be reset to its original position. The second egg that needs to be moved is connected to another pod vertically, which makes it more challenging than the first, requiring a lot more movements.
Since the claw is in its starting position again, follow the 16 different movement patterns below to correctly maneuver the second egg:
First movement pattern:
- Right x4
- Down x2
- Grab
- Right
- Release
Second movement pattern:
- Left x2
- Up
- Grab
- Down
- Right
- Release
Third movement pattern:
- Left x6
- Up x2
- Grab
- Down
- Left x2
- Release
Fourth movement pattern:
- Right x4
- Up
- Grab
- Left x2
- Release
Fifth movement pattern:
- Down x2
- Grab
- Up
- Right x2
- Down
- Release
Sixth movement pattern:
- Up
- Right
- Grab
- Up
- Left
- Release
Seventh movement pattern:
- Down x2
- Grab
- Up
- Right x3
- Down
- Release
Eight movement pattern:
- Up x2
- Left x2
- Grab
- Down
- Left x2
- Release
Ninth movement pattern:
- Right x3
- Down
- Grab
- Up x2
- Left x2
- Down
- Release
10th movement pattern:
- Up
- Left
- Grab
- Right x3
- Down
- Right
- Release
11th movement pattern:
- Down
- Grab
- Left
- Down
- Release
12th movement pattern:
- Up x2
- Grab
- Down
- Release
13th movement pattern:
- Up
- Left x3
- Grab
- Up
- Right x3
- Down
- Right
- Release
14th movement pattern:
- Left x7
- Down
- Grab
- Right x2
- Up x2
- Right x3
- Down
- Release
15th movement pattern:
- Left x4
- Right
- Up
- Right x3
- Release
16th movement pattern:
- Left x2
- Down
- Grab
- Up
- Left x2
- Down
- Left x2
- Up
- Release
Once you have successfully completed these, you should have the correct right in the right place, so go and interact with the middle console once more to have the claw pick it up. The claw will proceed to place the egg on a lift for it to descend.
Make your way to the lift that took you up here earlier and head downstairs once again, using it. Once you’ve reached the main room, you will hear a weathered creature whining around here somewhere. Walk through the area and look upwards to witness it dangling from above.
You will find a throne under the creature, with another pillar behind it. Interact with the pillar to control a claw and use it to grab the grotesque creature and lower it onto the throne. Push the creature along the tracks until you come across a small structure that has a protrusion coming out of it. With the creature underneath it, interact with the nearby pillar to witness a pitiful scene. After that, continue along the track.
Now, you have two choices you can use to proceed with the game:
Murdering a new friend
If you want to quickly progress with the game and have no real attachment to your weird companion here, you can make your way to the top of the spiral tower and set the tracks using the device there so you enter the first room off to the right. Here, you will place your eerie friend in the chair and mercilessly murder him, retrieving his arm while also unlocking achievement number two.
Once you have its arm with you, make your way to the exit door and turn left to head into the area where you will find a machine that fits the arm you have with you with the tool needed to open the door. You can then head to the exit door and interact with both consoles to open it. Head out the door and into the lift to swiftly complete part one of act one.
Teamwork makes the dream work
The more empathetic method of progressing with the game would entail you to head up to the top of the spiral tower and set the rail track to guide you into the northeast room of the area. This will have your odd companion survive the whole chair situation.
After this, you will have to slowly guide him to the exit controls. Before this, make sure to walk him to the same device where we earlier talked about fitting his butchered arm and have him fit his intact arm this time.
Once you’ve done this, head on over to the controls of the grand exit door and prop him up to interact with the left console while you interact with the right one to open the doors. Head on through and leave your bizarre bestie behind to take the lift and complete part one of act one.


Published: Oct 18, 2022 08:22 am