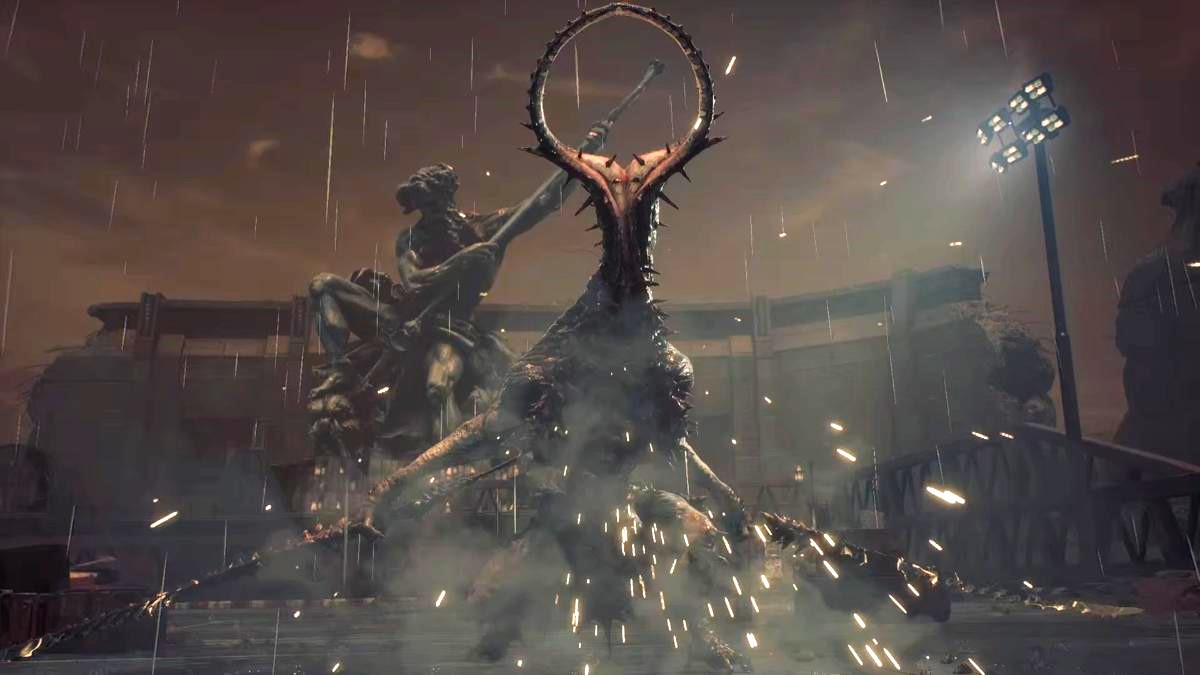
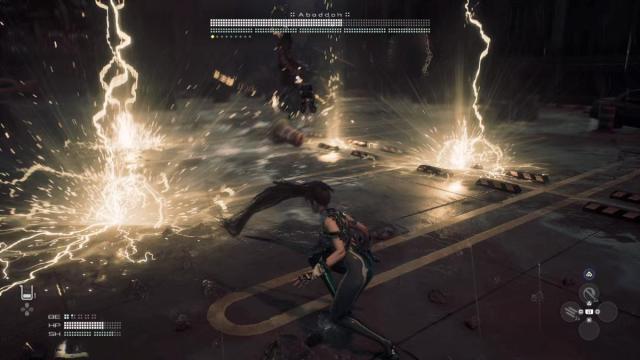
Abaddon is the first boss fight you have in Stellar Blade. You meet this boss at the top of the Parking Tower during Scavenger Adam, when you’re still on your way to the Hall of Records. Abbadon is a large horned beast that wields two fearsome blades.
When you emerge onto the roof of the Parking Tower, Abaddon introduces itself by flinging a car at you. After a quick, bullet-time-tastic cutscene, it’s time for the fight to begin. There’s no particular trick or technique to defeating Abaddon, but it is by far the hardest fight you’ll have had up to now in Stellar Blade. And you need to make use of various combat techniques you’ve unlocked, but maybe not practiced as much as you should have.
How to defeat Abaddon in Stellar Blade
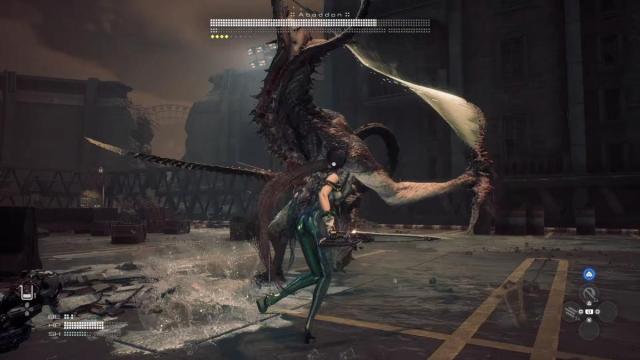
This boss fight is Stellar Blade’s way of letting you know that you really need to learn how to block and parry effectively in this game. I’d pretty much gotten through most of the combat up to now by more-or-less button-bashing my way through. But that doesn’t cut it against Abaddon, and I got my shiny, skin-tight ass handed to me a few times before I started learning to parry and dodge properly.
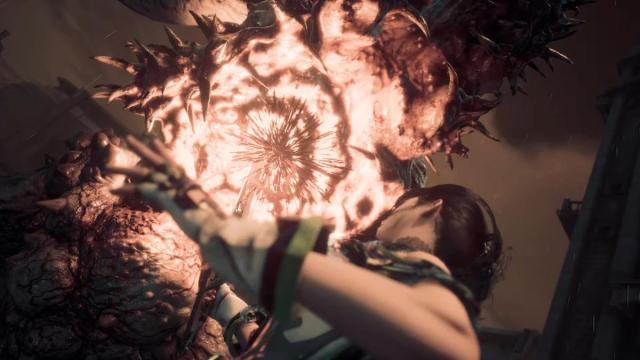
All of Abaddon’s attacks are big, slow, and powerful, which makes it seem like they’d all be unblockable. But resist the urge to dodge unless you see the tell-tale yellow or blue circle warning you of an unblockable attack. Parrying is effective against all Abaddon’s other attacks, and you don’t need to get a Perfect Parry every time (whereas you often get hit if you only manage an imperfect dodge).
One lesson that Abaddon certainly taught me is that parrying is most effective when you press L1 to parry a strike, then let go of L1 before pressing it again to parry a second strike. This is because many of its attacks come in pairs. As a general rule, if it hits you with one blade, it’ll hit you with the other blade soon after. But if it uses both blades at once, you don’t need to worry about a second parry.
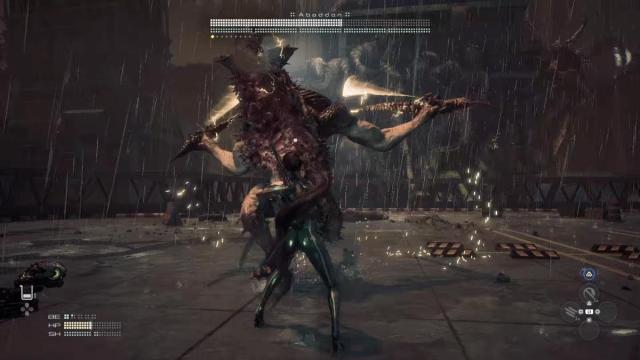
Generally, it’s best to let Abaddon take the initiative. Approach it slowly, parry when it attacks, then counter with a combo and Beta attack if you have one charged. Being bold and going toe-to-toe with it is a good strategy, as it tends to use the same predictable, parry-able attacks when you’re up close. If it starts charging an unblockable attack when you’re up close, you can interrupt it with a Beta attack skill (if you have one charged, that is.
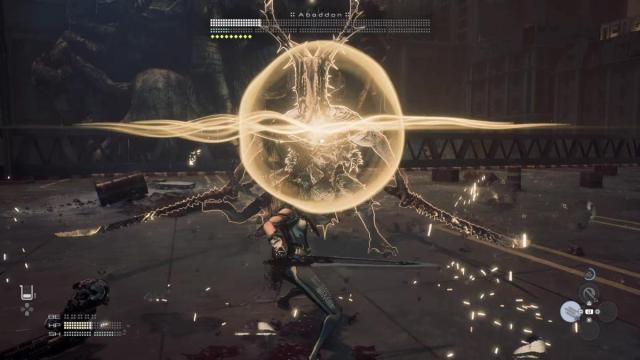
So, if Abaddon jumps or rolls away from you, I’d advise closing that distance as soon as possible, before it launches an unblockable attack. The timing required to dodge these is very fine—you really have to dodge at the last second before impact. The only time you want to get away from Abaddon (and fast) is when it does its lightning-summoning attack.
It might feel like this fight is going to be a long slog, but once you get Abaddon down to 60% health, your next hit triggers a mini-cutscene, during which it gets taken down to 30% health in one hit. It doesn’t change its attack patterns after that, so keep parrying and countering as before, and you’ll soon trigger a very simple, gory quick-time event (QTE) to finish the fight.
What are the rewards for defeating Abaddon in Stellar Blade?
Abaddon drops a whole bunch of loot after you slice it from top to tail. I got some gold, some Nano Elements, Advanced Nano Elements, and Extreme Nano Elements, some Polymer Material, and Extreme Polymer Material. The Polymer Material is useful for crafting new shiny, skin-tight suits, and the Nano Elements are used to upgrade your Exospine.
As well as currency and materials, I got Beta Charge Gear, Protection Gear, and a Weapon Core. The Beta Charge Gear and Protection Gear are equipable items. I went for the Protection Gear because, honestly, I’m still not that good at parrying and dodging. The Weapon Core can be spent on Attack Power Enhancement at a Supply Camp’s Repair Console.


Published: Apr 25, 2024 07:11 am