When traversing the stars in Starfield, your ship is your home, and as such you will be able to customize it to suit your individual needs. As you progress, you’ll slowly (or pretty quickly if you’ve got the cash) be able to upgrade each part, with each providing benefits and drawbacks.
There are a lot of ship parts to choose from in Starfield, meaning near-endless options for you to choose from. Strap in, because we’ve got a lot to cover.
Full ship parts list in Starfield
All Reactors in Starfield
Reactors are perhaps the single most important part of shipbuilding in Starfield. A reactor is the power source for the entire rest of your ship. Reactors come in three different classes: Class A, Class B, and Class C—with Class A generally being the weakest and Class C being the strongest.
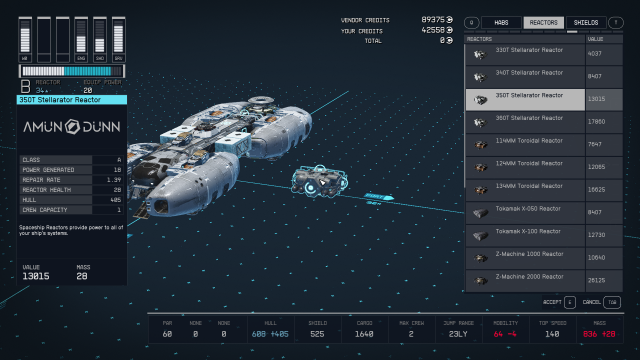
Class A Reactors
- 114MM Toroidal Reactor
- 124MM Toroidal Reactor
- 134MM Toroidal Reactor
- 144MM Toroidal Reactor
- 154MM Toroidal Reactor
- 164MM Toroidal Reactor
- 330T Stellerator Reactor
- 340T Stellerator Reactor
- 350T Stellerator Reactor
- 360T Stellerator Reactor
- 370T Stellerator Reactor
- 380T Stellerator Reactor
- Spheromak DC201 Reactor
- Spheromak DC202 Reactor
- Tokamak X-050 Reactor
- Tokamak X-100 Reactor
- Tokamak X-120S Reactor
- Tokamak X-150 Reactor
- Tokamak X-200 Reactor
- Tokamak X-250 Reactor
- Tokamak X-300 Reactor
Class B Reactors
- 101DS Mag Inertial Reactor
- 102DS Mag Inertial Reactor
- 103DS Mag Inertial Reactor
- 104DS Mag Inertial Reactor
- DC301 Fast Ignition Reactor
- DC302 Fast Ignition Reactor
- DC303 Fast Ignition Reactor
- Ion Beam H-1010 Reactor
- Ion Beam H-1020 Reactor
- Ion Beam H-1030 Reactor
- Z-Machine 1000 Reactor
- Z-Machine 2000 Reactor
- Z-Machine 2020 Reactor
- Z-Machine 3000 Reactor
- Z-Machine 4000 Reactor
Class C Reactors
- Fusor DC401 Reactor
- Fusor DC402 Reactor
- Fusor DC403 Reactor
- Pinch 5Z Reactor
- Pinch 6Z Reactor
- Pinch 7Z Reactor
- Pinch 8A Reactor
- Pinch 8Z Reactor
- SF10 Sheared Flow Reactor
- SF20 Sheared Flow Reactor
- SF30 Sheared Flow Reactor
- SF40 Sheared Flow Reactor
- Theta Pinch A9 Reactor
- Theta Pinch B9 Reactor
- Theta Pinch C9 Reactor
- Theta Pinch D9 Reactor
All Ship Engines in Starfield
Your ship’s engine determines its maximum movement speed, as well as how heavy your ship can be—stronger engines can propel more mass. Engines fall into three categories: Class A, Class B, and Class C. Class C engines are the most powerful in Starfield.
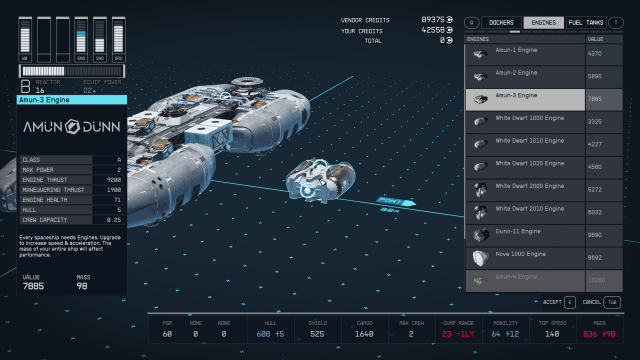
Class A engines
- Amun-1 Engine
- Amun-2 Engine
- Amun-3 Engine
- Amun-4 Engine
- Amun-5 Engine
- Amun-6 Engine
- Amun-7 Engine
- Ares DT10 Engine
- Ares DT20 Engine
- Ares DT30 Engine
- Ares DT40 Engine
- Ares DT50 Engine
- Ares DT60 Engine
- SA-4110 Engine
- SA-4220 Engine
- SA-4330 Engine
- White Dwarf 1000 Engine
- White Dwarf 1010 Engine
- White Dwarf 1020 Engine
- White Dwarf 2000 Engine
- White Dwarf 2020 Engine
- White Dwarf 2030 Engine
- White Dwarf 3000 Engine
- White Dwarf 3010 Engine
- White Dwarf 3015 Engine
- White Dwarf 3020 Engine
- White Dwarf 3030 Engine
Class B engines
- Dunn-11 Engine
- Dunn-21 Engine
- Dunn-31 Engine
- Dunn-41 Engine
- Dunn-51 Engine
- Dunn-61 Engine
- Dunn-71 Engine
- Hercules DT110 Engine
- Hercules DT120 Engine
- Hercules DT130 Engine
- Hercules DT140 Engine
- Hercules DT150 Engine
- Hercules DT160 Engine
- Nova 1000 Engine
- Nova 1010 Engine
- Nova 1030 Engine
- Nova 1040 Engine
- Nova 1050 Engine
- SAE-5110 Engine
- SAE-5220 Engine
- SAE-5330 Engine
- SAE-5440 Engine
- SAE-5550 Engine
- SAE-5660 Engine
Class C engines
- Amun Dunn X-100 Engine
- Amun Dunn X-200 Engine
- Amun Dunn X-300 Engine
- Poseidon DT210 Engine
- Poseidon DT220 Engine
- Poseidon DT230 Engine
- SAL-6110 Engine
- SAL-6220 Engine
- SAL-6330 Engine
- SAL-6830 Engine
- Supernova 2100 Engine
- Supernova 2200 Engine
All Grav Drives in Starfield
Grav Drives are responsible for how far your ship is able to travel in a single jump. Stronger grav drives will allow you to fast travel across multiple Star Systems at once. Your reactor powers your Grav Drive, which means there are three different classes: Class A, Class B, and Class C.
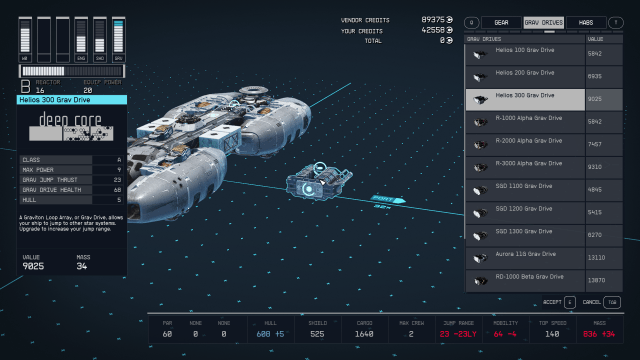
Class A Grav Drives
- Helios 100 Grav Drive
- Helios 200 Grav Drive
- Helios 300 Grav Drive
- Helios 400 Grav Drive
- NG150 Grav Drive
- NG160 Grav Drive
- NG170 Grav Drive
- R-1000 Alpha Grav Drive
- R-2000 Alpha Grav Drive
- R-3000 Alpha Grav Drive
- R-4000 Alpha Grav Drive
- SGD 1100 Grav Drive
- SGD 1200 Grav Drive
- SGD 1300 Grav Drive
- SGD 1400 Grav Drive
- Vanguard Recon Grav Drive
Class B Grav Drives
- Aurora 11G Grav Drive
- Aurora 12G Grav Drive
- Aurora 13G Grav Drive
- NG200 Grav Drive
- NG210 Grav Drive
- NG220 Grav Drive
- RD-1000 Beta Grav Drive
- RD-2000 Beta Grav Drive
- RD-3000 Beta Grav Drive
- SGD 2100 Grav Drive
- SGD 2200 Grav Drive
- SGD 2300 Grav Drive
Class C Grav Drives
- Apollo GV100 Grav Drive
- Apollo GV200 Grav Drive
- Apollo GV300 Grav Drive
- J-50 Gamma Grav Drive
- J-51 Gamma Grav Drive
- J-52 Gamma Grav Drive
- NG300 Grav Drive
- NG320 Grav Drive
- NG340 Grav Drive
- SGD 3100 Grav Drive
- SGD 3200 Grav Drive
- SGD 3300 Grav Drive
All Fuel Tanks in Starfield
Grav drives may enable you to complete farther jumps, but those jumps will still require fuel. Your ship’s fuel tank will determine how much total distance can be traveled across any many of grav jumps before you need to refuel. Fuel tanks do not have classes.
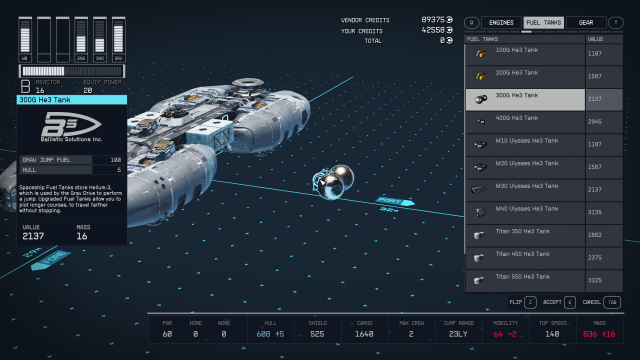
- 100G He3 Tank
- 200G He3 Tank
- 300G He3 Tank
- 400G He3 Tank
- 500T He3 Tank
- 600T He3 Tank
- 700T He3 Tank
- 800T He3 Tank
- 900T He3 Tank
- H10 Atlas He3 Tank
- H20 Atlas He3 Tank
- H30 Atlas He3 Tank
- H40 Atlas He3 Tank
- M10 Ulysses He3 Tank
- M20 Ulysses He3 Tank
- M30 Ulysses He3 Tank
- M40 Ulysses He3 Tank
- M50 Ulysses He3 Tank
- Titan 350 He3 Tank
- Titan 450 He3 Tank
- Titan 550 He3 Tank
All Ship Weapons in Starfield
The purpose of weapons on your ship is very straightforward. What you’re guessing they’re used for is exactly correct! Weapons have different classes: Class A, Class B, and Class C. Your ship will need a Reactor of equal or greater class to power weapons of a given class. Class C is the highest class, and a Class C Reactor can power any ship weapon in Starfield.
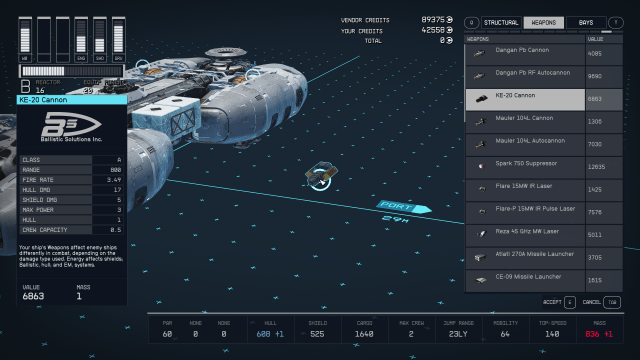
Class A ship weapons
- ATLATL 270A Missile Launcher
- ATLATL 270B Missile Launcher
- CE-09 Missile Launcher
- CE-19 Missile Launcher
- Dangan Pb Cannon
- Dangan Pb RF Autocannon
- Dangan W Cannon
- Dangan W RF Autocannon
- Disruptor 3300 Electron Beam
- Disruptor 3300A Auto Electron Beam
- Disruptor 3310 Proton Beam
- Disrupotor 3310A Auto Proton Beam
- Dragon 221 MW Laser
- Dragon 221P MW Pulse Laser
- Dragon 231 IR Laser
- Dragon 231P IR Pulse Laser
- EMP-200 Suppressor
- EMP-80 Suppressor
- Flare 15MW IR Laser
- Flare-P 15MW IR Pulse Laser
- Infiltrator SC-01 Missile Launcher
- Infiltrator SC-02 Missile Launcher
- KE-20 Cannon
- KE-20A Autocannon
- KE-31 Cannon
- KE-31A Autocannon
- Mauler 104L Autocannon
- Mauler 104L Cannon
- Mauler 105U Autocannon
- Mauler 105U Cannon
- Nullifier 1750 Suppressor
- PB-30 Electron Beam
- PB-50 Proton Beam
- PBO-30 Auto Electron Beam
- PBO-40 Auto Electron Beam
- PBO-50 Auto Proton Beam
- Ravager 20MeV Auto Electron Beam
- Ravager 20MeV Electron Beam
- Reza 30 Thz IR Laser
- Reza 45 GHz IR Laser
- Reza 45 GHz MW Pulse Laser
- Singe 4MW Laser
- Singe-P 4MW Pulse Laser
- Spark 750 Suppressor
- Supaku 110GC Suppressor
- Supaku 250GC Suprressor
- Tsukisasu 13K Missilie Launcher
- Tsukisasu 19K Missilie Launcher
- Vanguard Obliterator Autoprojector
- Vanguard Tempest CE-13 Missile Launcher
- Vaporizer 35MeV Auto Proton Beam
- Vaporizer 35MeV Proton Beam
Class B ship weapons
- ATLATL 270B Missile Launcher
- ATLATL 280B Missile Launcher
- ATLATL 290B Missile Launcher
- CE-29 Missile Launcher
- CE-39 Missile Launcher
- Disruptor 3320 Neutron Beam
- Disruptor 3320 Neutron Turret
- Disruptor 3320A Auto Nuetron Beam
- Disruptor 3330 Helion Beam
- Disruptor 3330A Auto Helion Beam
- Dragon 241 Laser
- Dragon 241P Pulse Laser
- Dragon 241P Pulse Laser Turret
- Dragon 251 UV Laser
- Dragon 251P UV Pulse Laser
- EMP-500 Suppressor
- Eradicator 75MeV Auto Neutron Beam
- Eradicator 75MeV Auto Neutron Turret
- Eradicator 75MeV Neutron Beam
- Exterminator 95MeV Helion Beam
- Firebolt 4000 Suppressor
- Hunter Mag-350 Missile Launcher
- Hunter Mag-450 Missile Launcher
- Jishaku AlNiCo Railgun
- Jishaku AlNiCo RF Rapid Railgun
- Jishaku Fe Railgun
- Jishaku Fe RF Rapid Railgun
- Jishaku Fe RF Rapid Railgun Turret
- KE-42 Cannon
- KE-42 Cannon Turret
- KE-42A Cannon Autocannon
- KE-49 Cannon
- KE-49A Cannon Autocannon
- Mauler 106S Shot-Cannon
- Mauler 106T Autocannon
- Mauler 106T Autocannon Turret
- Mauler 106T Cannon
- Mauler 107I Autocannon
- Mauler 107I Cannon
- Pb-100 Neutron Beam
- Pb-175 Helion Beam
- PBO-100 Auto Neutron Beam
- PBO-100 Auto Neutron Turret
- PBO-175 Auto Helium Beam
- Reza 10 PHz Pulse Laser Turret
- Reza 10 PHz UV Laser
- Reza 10 PHz UV Pulse Laser
- Reza 600 THz Laser
- Reza 600 THz Pulse Laser
- Scorch 60MW Laser
- Scorch-P 60MW Pulse Laser
- Scorch-P 60MW Pulse Laser Turret
- Scorch-S 80MW Pulse Laser Turret
- Supaku 600GC Suppressor
- Torch 250MW UV Laser
- Tsukisasu 25K Missile Launcher
- Tsukisasu 33K Missile Launcher
- Vanguard Hellfire Autocannon
Class C ship weapons
- ATLATL 270C Missile Launcher
- ATLATL 280C Missile Launcher
- Blaze 2GW SX Laser
- Blaze-P 2GW SX Pulse Laser
- Blaze-P 2GW SX Pulse Laser Turret
- CE-49 Missile Launcher
- CE-59 Missile Launcher
- Devastator 1500 Missile Launcher
- Disruptor 3340 Alpha Beam
- Disruptor 3340A Auto Alpha Beam
- Disruptor 3340A Auto Alpha Turret
- Dragon 261 SX Laser
- Dragon 261 SX Laser Turret
- Dragon 261P SX Pulse Laser
- EMP-1000 Supressor
- Fulminator 8000 Suppressor
- Jishaku Nd Railgun
- Jishaku Nd RF Rapid Railgun
- Jishaku Nd RF Rapid Railgun Turret
- Marauder 114ANC Railgun
- Marauder 114ANC Rapid Railgun
- Marauder 115N Railgun
- Marauder 115N Railgun Turret
- Marauder 115N Rapid Railgun
- MKE-4 Gauss Gun
- MKE-4A Auto Gauss Gun
- MKE-9 Gauss Gun
- MKE-9A Auto Gauss Gun
- Obliterator 250MeV Alpha Beam
- Obliterator 250MeV Auto Alpha Beam
- PB-300 Alpha Beam
- PB-300 Auto Alpha Beam
- PB-300 Auto Alpha Turret
- Reza 300 PHz SX Laser
- Reza 300 PHz SX Pulse Laser
- Reza 300 PHz SX Pulse Laser Turret
- Tatsu 500EM Suppressor
- Tatsu 501EM Suppressor
- Tsukisasu 40K Missile Launcher
- Tsukisasu 50K Missile Launcher
- Vanguard Ares Particle Cannon
- Vanguard Starseeker Pulse Laser
All Shield Generators in Starfield
Shield generators protect the Hull of your ship in Starfield. Before any enemy fire can actually damage your ship, it will first have to deplete your shields. Shields are powered by your ship’s reactor, and as such have three classes—Class A, Class B, and Class C.
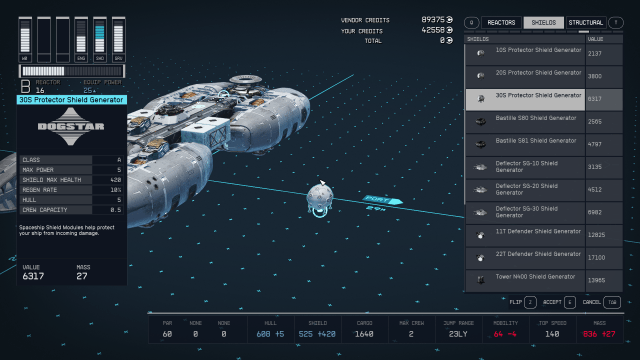
Class A shield generators
- 10S Protector Shield Generator
- 20S Protector Shield Generator
- 30S Protector Shield Generator
- 40S Protector Shield Generator
- 50S Protector Shield Generator
- 60S Protector Shield Generator
- Bastille S80 Shield Generator
- Bastille S81 Shield Generator
- Bastille S82 Shield Generator
- Bastille S83 Shield Generator
- Bastille S84 Shield Generator
- Deflector SG-10 Shield Generator
- Deflector SG-20 Shield Generator
- Deflector SG-30 Shield Generator
- Deflector SG-35 Shield Generator
- Deflector SG-40 Shield Generator
- Deflector SG-50 Shield Generator
- Marduk 1010-A Shield Generator
- Marduk 1020-A Shield Generator
- Marduk 1030-A Shield Generator
- Marduk 1040-A Shield Generator
- Osiris 2020-B Shield Generator
Class B shield generators
- 11T Defender Shield Generator
- 22T Defender Shield Generator
- 28T Defender Shield Generator
- 33T Defender Shield Generator
- 44T Defender Shield Generator
- Osiris 2030-B Shield Generator
- Osiris 2040-B Shield Generator
- Tower N400 Shield Generator
- Tower N410 Shield Generator
- Tower N420 Shield Generator
- Vanguard Bulwark Shield Generator
- Warden SG-100 Shield Generator
- Warden SG-200 Shield Generator
- Warden SG-300 Shield Generator
- Warden SG-400 Shield Generator
Class C shield generators
- 101D Guardian Shield Generator
- 102D Guardian Shield Generator
- 103D Guardian Shield Generator
- 104D Guardian Shield Generator
- Assurance SG-1000 Shield Generator
- Assurance SG-1800 Shield Generator
- Assurance SG-2000 Shield Generator
- Assurance SG-3000 Shield Generator
- Fortress A1 Shield Generator
- Fortress A2 Shield Generator
- Fortress A3 Shield Generator
- Odin 3030-C Shield Generator
- Odin 3040-C Shield Generator
- Odin 3050-C Shield Generator
All Ship Cockpits in Starfield
Your ship’s cockpit has a pretty large effect on the overall quality of your build. Cockpits vary greatly with regard to how many Crew Stations they offer, meaning your choice of the cockpit will affect the amount of crew that can be stationed on your ship. Cockpits also influence your ship’s mass and total health.
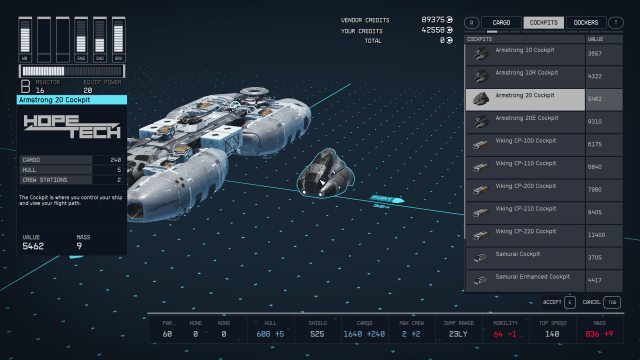
- Armstrong 10 Cockpit
- Armstrong 10R Cockpit
- Armstrong 20 Cockpit
- Armstrong 20E Cockpit
- Armstrong 20R Cockpit
- Cabot C3 Bridge
- Cabot C3X Bridge
- Cabot C4 Bridge
- Commander 500 Bridge
- Daimyo Cockpit
- Daimyo Enhanced Cockpit
- DS10.1 Phobos Cockpit
- DS10.2 Phobos Cockpit
- DS10.3 Phobos Cockpit
- DS30.1 Ares Bridge
- DS30.2 Ares Bridge
- DS40.1 Ares Bridge
- DS40.2 Ares Bridge
- Himeji Bridge
- Himeji Command Bridge
- Kon-Tiki B-300 Bridge
- Kon-Tiki B-310 Bridge
- Kon-Tiki B-400 Bridge
- Kon-Tiki B-500 Bridge
- Kon-Tiki B-600 Bridge
- Magellan C1 Cockpit
- Magellan C1X Cockpit
- Magellan C2 Cockpit
- Magellan C2X Cockpit
- Magellan C2X Cockpit (NASA)
- Overseer 300 Bridge
- Overseer 300E Bridge
- Overseer 400 Bridge
- Samurai Cockpit
- Samurai Enhanced Cockpit
- Shogun Cockpit
- Shogun Enhanced Cockpit
- Viking CP-100 Cockpit
- Viking CP-110 Cockpit
- Viking CP-200 Cockpit
- Viking CP-210 Cockpit
- Viking CP-220 Cockpit
All Cargo Holds in Starfield
Cargo Holds determine how much weight in kilograms your ship can carry. You and your ship “share” an inventory in any Outpost Building menu, vendor menu, or crafting menu—so it is a great idea to invest in extra storage for your ship in Starfield.
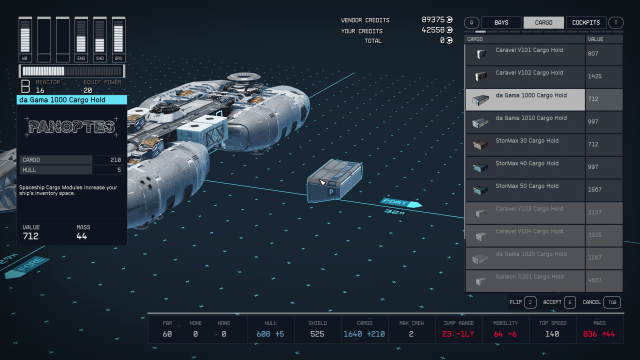
- 100CM Ballast Cargo Hold
- 100CM Ballast Shielded Cargo Hold
- 10ST Hauler Shielded Cargo Hold
- 10T Hauler Cargo Hold
- 200CM Ballast Cargo Hold
- 200CM Ballast Shielded Cargo Hold
- 20T Hauler Cargo Hold
- 300CM Ballast Cargo Hold
- 30T Hauler Cargo Hold
- 400CM Ballast Cargo Hold
- 40T Hauler Cargo Hold
- Caravel V101 Cargo Hold
- Caravel V101 Shielded Cargo Hold
- Caravel V102 Cargo Hold
- Caravel V102 Shielded Cargo Hold
- Caravel V103 Cargo Hold
- Caravel V104 Cargo Hold
- de Gama 1000 Cargo Hold
- de Gama 1000 Shielded Cargo Hold
- de Gama 1010 Cargo Hold
- de Gama 1010 Shielded Cargo Hold
- de Gama 1020 Cargo Hold
- Galleon S201 Cargo Hold
- Galleon S202 Cargo Hold
- Galleon S203 Cargo Hold
- Galleon S204 Cargo Hold
- Polo 2000 Cargo Hold
- Polo 2010 Cargo Hold
- Polo 2020 Cargo Hold
- Polo 2030 Cargo Hold
- Stormax 30 Cargo Hold
- Stormax 40 Cargo Hold
- Stormax 50 Cargo Hold
- Stormax 60 Cargo Hold
All Ship Habs in Starfield
Habitat Modules, or Habs, determine the interior of your ship. Selecting a different hab not only changes the aesthetic appearance of your ship’s cabin, it also changes which Crafting Stations are available on board your ship.
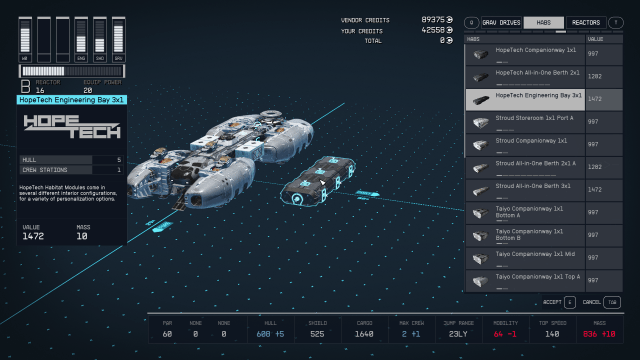
All Deimos Hab Modules
- Deimos All-in One Berth 2×1
- Deimos All-in One Berth 3×1
- Deimos Armory 2×1
- Deimos Battle Stations 2×2
- Deimos Brig 2×2
- Deimos Captain’s Quarters 2×1
- Deimos Cargo Hall 2×2
- Deimos Cargo Hall 2×3
- Deimos Cargo Hall 3×2
- Deimos Cargo Hall 3×3
- Deimos Companionway 1×1
- Deimos Computer Core 2×1
- Deimos Computer Core 2×2
- Deimos Control Station 2×1
- Deimos Engineering Bay 2×2
- Deimos Engineering Bay A 3×1
- Deimos Engineering Bay B 3×1
- Deimos Infirmary 2×1
- Deimos Large Hab 3x3x3
- Deimos Large Hab 3x3x3 Port Btm (A, B, and C)
- Deimos Large Hab 3x3x3 Port Top (A, B, and C)
- Deimos Large Hab 3x3x3 Stbd Btm (A, B, and C)
- Deimos Large Hab 3x3x3 Stbd Top (A, B, and C)
- Deimos Large Hab 6x3x3
- Deimos Large Hab 6x3x3 Port Btm A
- Deimos Large Hab 6x3x3 Port Top A
- Deimos Large Hab 6x3x3 Stbd Btm A
- Deimos Large Hab 6x3x3 Stbd Top A
- Deimos Living Quarters 2×1
- Deimos Living Quarters 2×2
- Deimos Living Quarters 3×1
- Deimos Mess Hall 2×3
- Deimos Mess Hall 3×2
- Deimos Science Lab 2×1
- Deimos Storeroom 1×1
- Deimos Workshop 2×1
All HopeTech Hab Modules
- HopeTech All-in-One Berth 2×1
- HopeTech All-in-One Berth 2×2
- HopeTech Armory 2×1
- HopeTech Battle Stations 2×2
- HopeTech Brig 2×2
- HopeTech Captain’s Quarters 2×1
- HopeTech Cargo Hall 2×2
- HopeTech Cargo Hall 2×3
- HopeTech Cargo Hall 3×2
- HopeTech Cargo Hall 3×3
- HopeTech Companionway 1×1
- HopeTech Companionway Fuselage (A, B, C, and D)
- HopeTech Computer Core 2×1
- HopeTech Computer Core 2×2
- HopeTech Control Station 2×1
- HopeTech Engineering Bay 3×1
- HopeTech Hab Cross Bace
- HopeTech Hab Spine
- HopeTech Infirmary 2×1
- HopeTech Large Hab 3x3x3
- HopeTech Large Hab 6x3x3
- HopeTech Living Quarters 2×1
- HopeTech Mess Hall 2×3
- HopeTech Mess Hall 3×2
- HopeTech Science Lab 2×1
- HopeTech Storeroom 1×1
- HopeTech Storeroom Fuselage (A, B, C, and D)
- HopeTech Workshop 2×1
All Nova Galactic Hab Modules
- Nova Colony Hab Nose Cone
- Nova Galactic All-in-One Berth 2×1 A
- Nova Galactic All-in-One Berth 2×1 B
- Nova Galactic All-in-One Berth 2×2
- Nova Galactic Armory 2×1
- Nova Galactic Battle Stations 2×2
- Nova Galactic Brig 2×2
- Nova Galactic Captain’s Quarters 2×1
- Nova Galactic Cargo Hall 2×2
- Nova Galactic Cargo Hall 2×3
- Nova Galactic Cargo Hall 3×3
- Nova Galactic Companionway 1×1
- Nova Galactic Computer Core 2×1
- Nova Galactic Control Stations 2×1
- Nova Galactic Engineering Bay 3×1
- Nova Galactic Frontier 2×1
- Nova Galactic Infirmary 2×1
- Nova Galactic Living Quarters 2×1
- Nova Galactic Living Quarters 2×2
- Nova Galactic Mess Hall 2×3
- Nova Galactic Mess Hall 3×2
- Nova Galactic Science Lab 2×1
- Nova Galactic Storeroom 1×1
- Nova Galactic Workshop 2×1
- Nova Large Hab
- Nova Large Hab Nose
All Stroud Hab Modules
- Stroud All-in-One Berth 2×1 A
- Stroud All-in-One Berth 2×1 B
- Stroud All-in-One Berth 3×1
- Stroud Armory 2×1
- Stroud Battle Stations 2×2
- Stroud Brig 2×2
- Stroud Captain’s Quarters 2×1
- Stroud Cargo Hall 2×2
- Stroud Cargo Hall 2×3
- Stroud Cargo Hall 3×2
- Stroud Companionway 1×1
- Stroud Computer Core 2×1
- Stroud Computer Core 2×2
- Stroud Control Station 2×1
- Stroud Engineering Bay 3×1
- Stroud Infirmary 2×1
- Stroud Living Quarters 2×1
- Stroud Living Quarters 2×2
- Stroud Mess Hall 2×3
- Stroud Mess Hall 3×2
- Stroud Science Lab 2×1
- Stroud Storeroom 1×1
- Stroud Storeroom Port 1×1 (A, B, and C)
- Stroud Storeroom Stbd 1×1 (A, B, and C)
- Stroud Workshop 2×1
All Taiyo Hab Modules
- Taiyo All-in-One Berth 2×1 Bottom A
- Taiyo All-in-One Berth 2×1 Bottom B
- Taiyo All-in-One Berth 2×1 Mid
- Taiyo All-in-One Berth 2×1 Top A
- Taiyo All-in-One Berth 2×1 Top B
- Taiyo All-in-One Berth 2×2 Bottom A
- Taiyo All-in-One Berth 2×2 Bottom B
- Taiyo All-in-One Berth 2×2 Mid
- Taiyo All-in-One Berth 2×2 Top A
- Taiyo All-in-One Berth 2×2 Top B
- Taiyo Armory 2×1 Bottom A
- Taiyo Armory 2×1 Bottom B
- Taiyo Armory 2×1 Mid
- Taiyo Armory 2×1 Top A
- Taiyo Armory 2×1 Top B
- Taiyo Battle Stations 2×2 Bottom A
- Taiyo Battle Stations 2×2 Bottom B
- Taiyo Battle Stations 2×2 Mid
- Taiyo Battle Stations 2×2 Top A
- Taiyo Battle Stations 2×2 Top B
- Taiyo Brig 2×2 Bottom A
- Taiyo Brig 2×2 Bottom B
- Taiyo Brig 2×2 Mid
- Taiyo Brig 2×2 Top A
- Taiyo Brig 2×2 Top B
- Taiyo Captain’s Quarters 2×1 Bottom A
- Taiyo Captain’s Quarters 2×1 Bottom B
- Taiyo Captain’s Quarters 2×1 Mid
- Taiyo Captain’s Quarters 2×1 Top A
- Taiyo Captain’s Quarters 2×1 Top B
- Taiyo Cargo Hall 2×2 Bottom A
- Taiyo Cargo Hall 2×2 Bottom B
- Taiyo Cargo Hall 2×2 Mid
- Taiyo Cargo Hall 2×2 Top A
- Taiyo Cargo Hall 2×2 Top B
- Taiyo Cargo Hall 3×2 Bottom A
- Taiyo Cargo Hall 3×2 Bottom B
- Taiyo Cargo Hall 3×2 Mid
- Taiyo Cargo Hall 3×2 Top A
- Taiyo Cargo Hall 3×2 Top B
- Taiyo Companionway 1×1 Bottom A
- Taiyo Companionway 1×1 Bottom B
- Taiyo Companionway 1×1 Mid
- Taiyo Companionway 1×1 Top (A, B, C, and D)
- Taiyo Computer Core 2×1 Bottom A
- Taiyo Computer Core 2×1 Bottom B
- Taiyo Computer Core 2×1 Mid
- Taiyo Computer Core 2×1 Top A
- Taiyo Computer Core 2×1 Top B
- Taiyo Computer Core 2×2
- Taiyo Computer Core 2×2 Bottom A
- Taiyo Computer Core 2×2 Bottom B
- Taiyo Computer Core 2×2 Mid
- Taiyo Computer Core 2×2 Top A
- Taiyo Computer Core 2×2 Top B
- Taiyo Control Station 2×1 Bottom A
- Taiyo Control Station 2×1 Bottom B
- Taiyo Control Station 2×1 Mid
- Taiyo Control Station 2×1 Top A
- Taiyo Control Station 2×1 Top B
- Taiyo Engineering Bay 3×1 Bottom A
- Taiyo Engineering Bay 3×1 Bottom B
- Taiyo Engineering Bay 3×1 Mid
- Taiyo Engineering Bay 3×1 Top A
- Taiyo Engineering Bay 3×1 Top B
- Taiyo Hab Cargo Hall 2×3 Top (A, B, and C)
- Taiyo Hab Mess Hall 2×3 (A, B, and C)
- Taiyo Infirmary 2×1 Bottom A
- Taiyo Infirmary 2×1 Bottom B
- Taiyo Infirmary 2×1 Mid
- Taiyo Infirmary 2×1 Top A
- Taiyo Infirmary 2×1 Top B
- Taiyo Large Hab 6x3x3
- Taiyo Living Quarters 2×1 Bottom A
- Taiyo Living Quarters 2×1 Bottom B
- Taiyo Living Quarters 2×1 Mid
- Taiyo Living Quarters 2×1 Top A
- Taiyo Living Quarters 2×1 Top B
- Taiyo Mess Hall 3×2 Bottom A
- Taiyo Mess Hall 3×2 Bottom B
- Taiyo Mess Hall 3×2 Mid
- Taiyo Mess Hall 3×2 Top A
- Taiyo Mess Hall 3×2 Top B
- Taiyo Science Lab 2×1 Bottom A
- Taiyo Science Lab 2×1 Bottom B
- Taiyo Science Lab 2×1 Mid
- Taiyo Science Lab 2×1 Top A
- Taiyo Science Lab 2×1 Top B
- Taiyo Storeroom 1×1 Bottom A
- Taiyo Storeroom 1×1 Bottom B
- Taiyo Storeroom 1×1 Mid
- Taiyo Storeroom 1×1 Top (A, B, C, and D)
- Taiyo Workshop 2×1 Bottom A
- Taiyo Workshop 2×1 Bottom B
- Taiyo Workshop 2×1 Mid
- Taiyo Workshop 2×1 Top A
- Taiyo Workshop 2×1 Top B
All Ship Dockers in Starfield
Dockers are simply outer devices that allow you to board other ships. The only reason you may want a new one is to allow a different docker placement for unique ship designs.
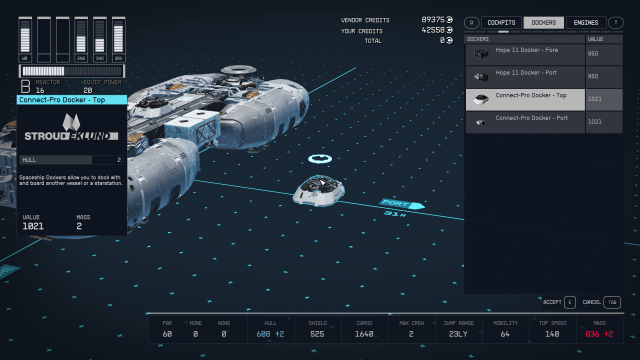
- 100DP Slim Docker Top
- 11DP Docker Top
- Connect-Pro Docker Port
- Connect-Pro Docker Top
- Extender Port 200 Docker Top
- Hope 11 Docker Fore
- Hope 11 Docker Port
- NG-2 Docker Top
All Landing Gears in Starfield
The landing gear is necessary on all ships to enable them to make contact with the ground safely. The position and type required depends entirely on the specifics of a given ship.
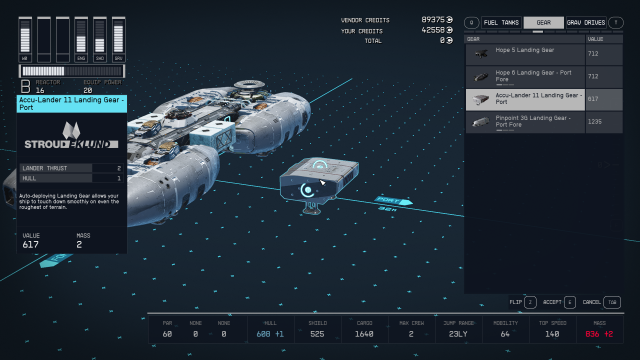
- 220CB Landing Gear Port
- 320 Landing Gear CB Port
- Accu-Lander 11 Landing Gear Port
- Hope 5 Landing Gear
- Hope 55 Landing Gear
- Hope 6 Landing Gear Port (aft, mid, and fore)
- NG-10 Landing Gear Port (and and fore)
- NG-15 Landing Gear Port
- NG-15 Landing Gear Port Fore
- NG-15 Landing Gear Stbd
- NG-15 Landing Gear Stbd Fore
- NG-20 Landing Gear
- NG-20 Landing Gear Wide
- NG-20 Landing Gear Fore
- Pinpoint 3G Landing Gear Port (aft, mid, and fore)
- Pinpoint 4G Landing Gear (Port and Stbd)
All Ship Bays in Starfield
Bays are very straightforward—they are required on every ship and allow for access from the ship to the ground via a ramp.
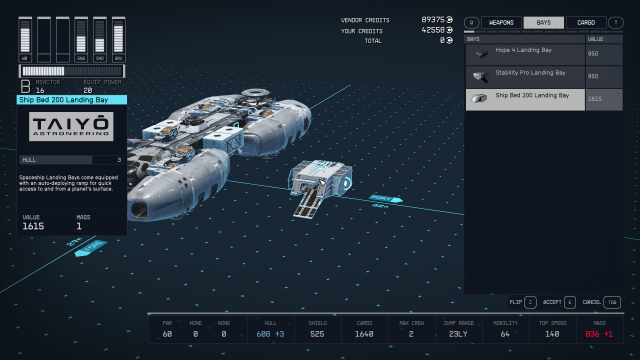
- 120LD Landing Bay
- Hope 4 Landing Bay
- NG-6 Landing Bay
- Ship Bed 200 Landing Bay
- Stability Pro Landing Bay





Published: Sep 17, 2023 09:04 pm