Live Fire seems to be a map in Halo Infinite players either love or hate. Ranked players will play Strongholds, Slayer, and Oddball on Live Fire, so it’s a map you’ll see quite often. Even if it’s not your favorite, it’s still necessary to learn the ins and outs of Live Fire if you want to be an effective teammate and climb the ranks.
Weapon spawns
- House Elbow (Garage) – VK78 Commando
- House Window – Plasma Carbine/MA40 AR (ranked)
- Overlook (Sandbags) – Frag Grenades and Mangler
- Green Bend – Spike Grenades
- Hallway – Skewer/S7 Sniper (ranked)
- Tunnel – Heatwave
- Turbine – Needler
- Platform – Plasma Grenades
- Towe r- Frag Grenades and Plasma Carbine/MA40 AR (ranked)
- Canal – Disruptor/Plasma Pistol (ranked)
- Nest – BR75/VK78 Commando (ranked)
Equipment spawns
- Green Building – Repulsor
- Turbine – Active Camo and Overshield
- Brutes (Training Dummies) – Drop Wall
House
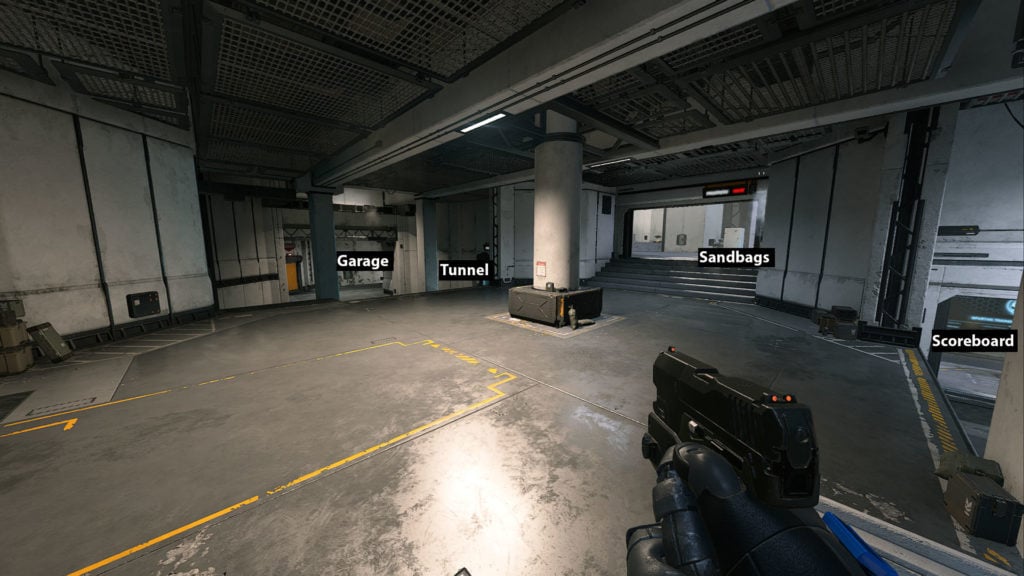
House is one of the spawn points in Live Fire and the location of the A Flag in Strongholds. This area connects to Green House, Tunnel, and Sandbags, meaning there are multiple ways to attack this area.
This is also a popular spot to hold the ball in Oddball as players will protect the ball carrier near House Window towards Turbine. A coordinated team can easily cover every main entrance, but a coordinated attack can break a solid defense. While most enemies will push into House from Garage or Sandbags, a sneaky player can flank from Turbine or Tunnel.
Players can also cover Hallway from House and bounce grenades to cover the Sniper and Skewer spawn point. Sandbags provide an excellent view of the Turbine area, although it’s exposed from Green House and Hallway. Players can also use the Scoreboard to jump up to Sandbags, so double-check for any nearby enemies.
Green Building
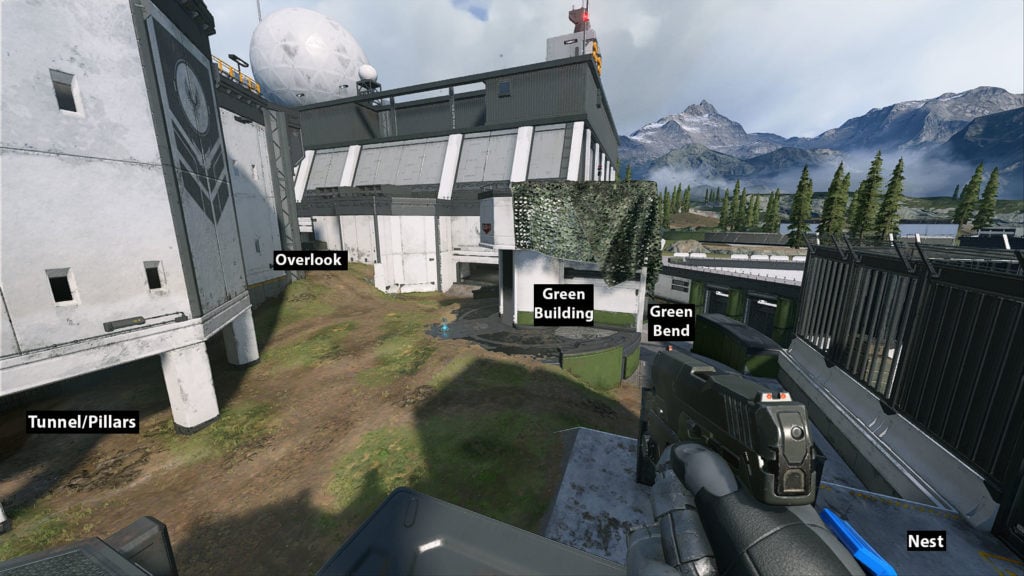
Green Building is on the edge of the map and is home to the B Flag on Strongholds. This area is less important in other game modes like Slayer, but it can be a decent place to hold the Oddball.
Behind Green Building is Green Bend, which is where the Spike Grenades Spawn. The grenades are directly in front of a ledge, and players with the Repulsor can easily knock enemies off the map. This is also an excellent place to reset the Oddball if enemies overrun your position to give your team a chance to regroup.
Taking B Flag can be challenging, especially if multiple enemies are guarding the location. You can capture the zone from the exposed portion of Green Building or the small tunnel leading to Green Building Bend. Grenades are an excellent way to clear the tunnel as enemies often sit here to contest the flag.
Between Green House and Tower is Nest, which serves as a connector. A bridge above Canal connects both areas and provides an elevated view. Nest is also the spawn point of either the BR75 or Commando, which are always decent guns to add to your arsenal.
Tower
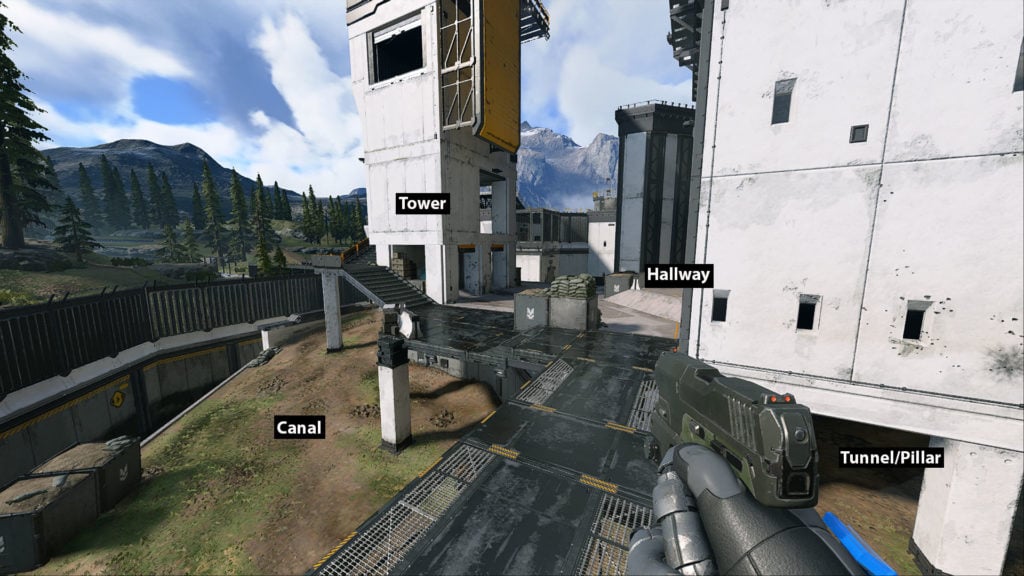
Tower is the other spawn point and home to the C Flag in Strongholds. This elevated position offers an excellent view of Hallway, Turbine, and Nest. But it also leaves you exposed from all directions, so pick your battles wisely.
Beneath Tower is Canal, which wraps around towards Green Building and a Tunnel Entrance. This lower part of the map has a direct sightline towards Yard and Green Building and can potentially be used to cover this area. But it’s also exposed, and escaping enemy fire can be difficult. There is a box on the edge of the map that can be used to jump up to Canal, but just make sure an enemy with a Repulsor is waiting for you.
Hallway

Hallway serves as the middle lane of the map and is where the Sniper Rifle or Skewer spawns. This narrow path can be dangerous as it’s exposed on both sides. But a small opening leads to Tunnel if you need to make a quick escape.
Tunnel

Tunnel runs directly beneath Hallway and connects House, the Green Building area, and Turbine. This is also where the Heatwave and Oddball spawn. Tunnel is a claustrophobic area that can be a death trap if enemies spam grenades. But it also serves as an excellent way to safely reach multiple areas of the map, so don’t be afraid to go underground.
Turbine
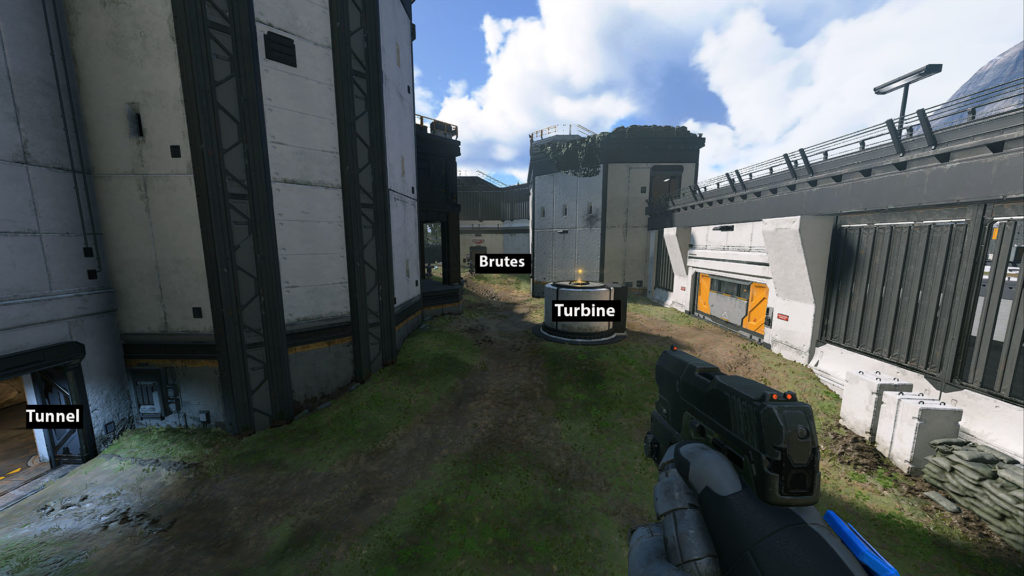
Turbine is a large area connecting House, Tunnel, and Brutes. Active Camo and Overshield spawn in the middle of this location, meaning it’s an important spot to control. Players spawning at House can use Sandbags or the Scoreboard to cover Turbine, while players spawning at Tower can use the Brutes and Platform for protection. Clearing enemies before pushing towards the equipment is crucial as escaping the wide-open spaces in Turbine is almost impossible.


Published: Jan 26, 2022 04:12 am