All Hallow’s Eve is a new quest added to Fallout 4 in the April 2024 update, and even though it’s a short and sweet mission, it’s a memorable one thanks to the Halloween party backdrop.
We’re going to be walking you through the All Hallows Eve Fallout 4 quest so you know what to expect and what kind of spooky rewards you can get from it.
Fallout 4 All Hallow’s Eve quest walkthrough
Listen to the Mysterious Signal
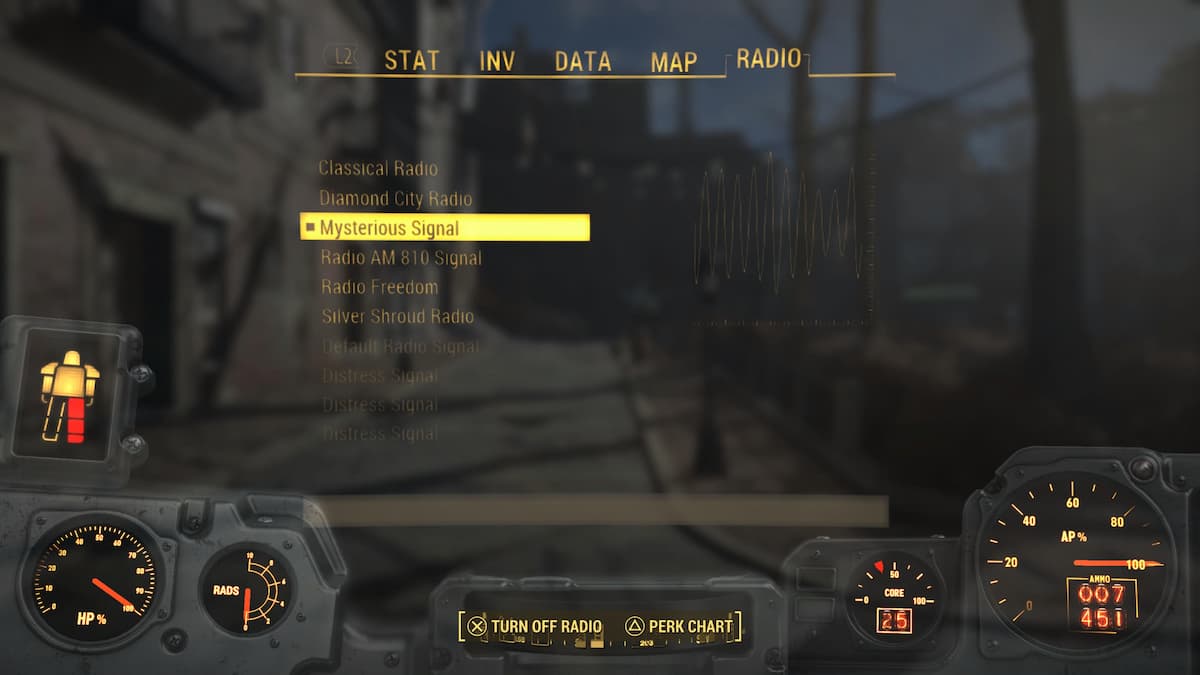
After updating Fallout 4, you’ll get a few new quests pop up when you jump into the game. One of these quests is All Hallow’s Eve, and to begin the quest, you’ll need to listen to a Mysterious Signal on your Pip-Boy.
Bring up your Pip-Boy and navigate to the Radio tab. Scroll down to the Mysterious Signal channel and listen for a few moments. The quest will update and tell you to head to the location of the signal.
Go to the marker on the map
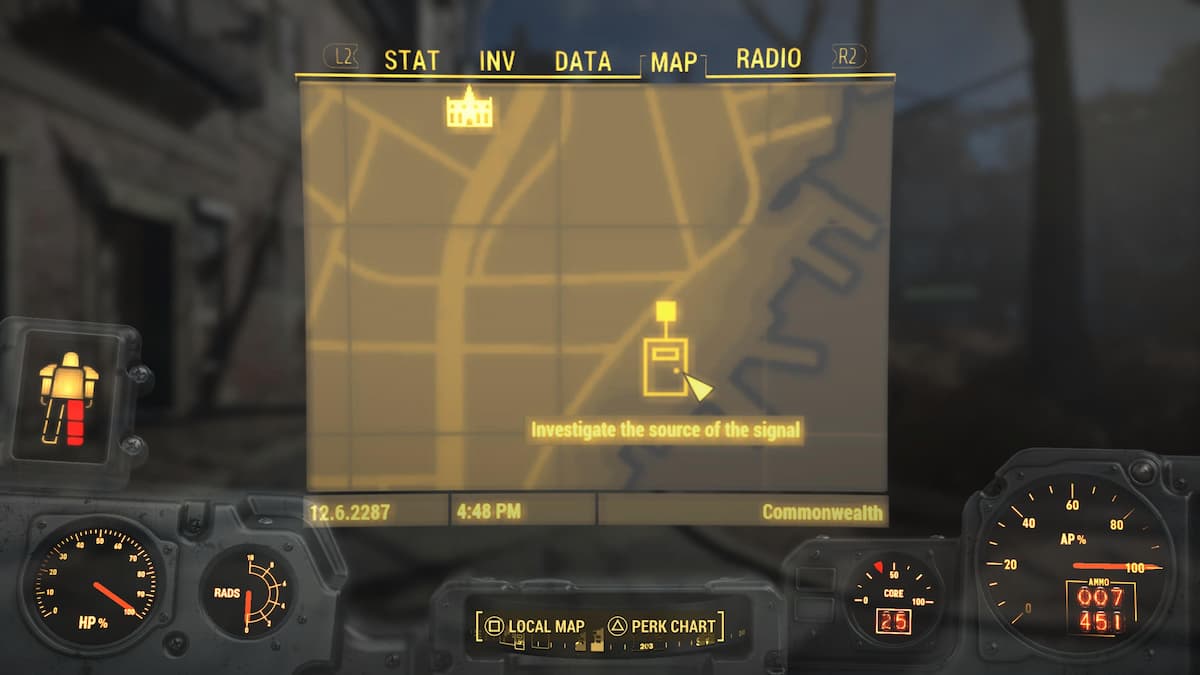
Set the quest as active, and a marker will appear on the map that tells you where the signal is being broadcast from. It’s to the southeast, close by to the Shamrock Taphouse. If you haven’t unlocked that area yet, the closest major settlement is Goodneighbor. Fast travel there first and then follow the marker via the HUD.
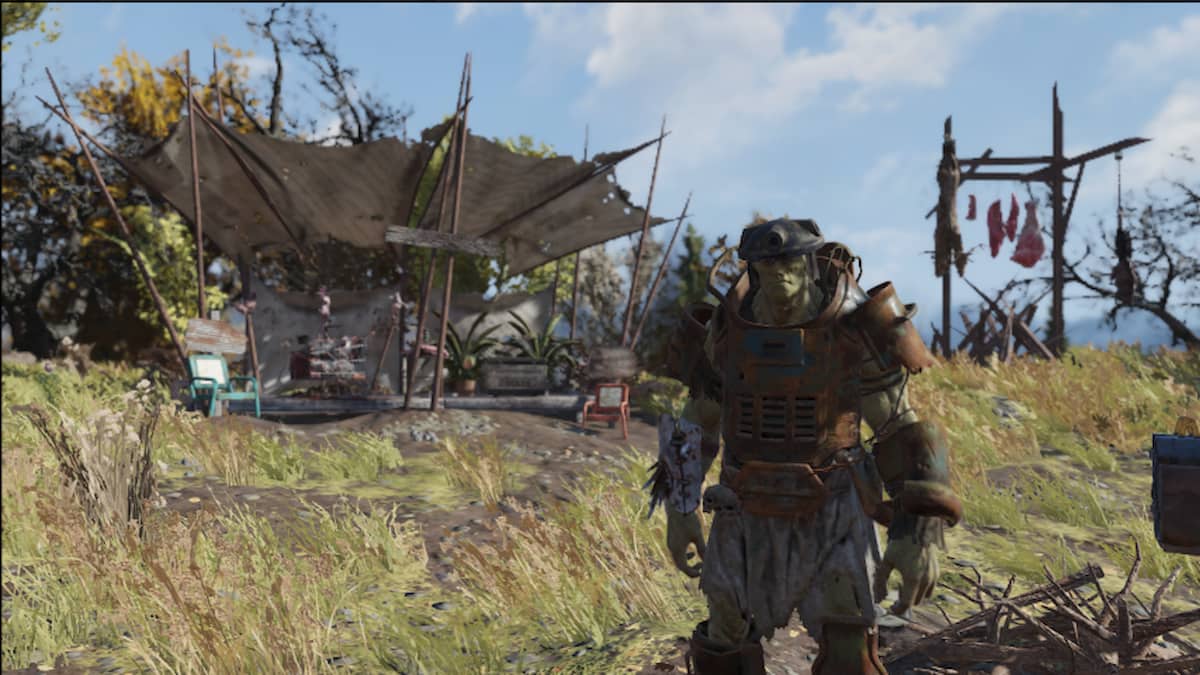
Watch out for Raiders and Super Mutants on the way, though, as the areas you’ll have to pass through include a few enemy encampments.
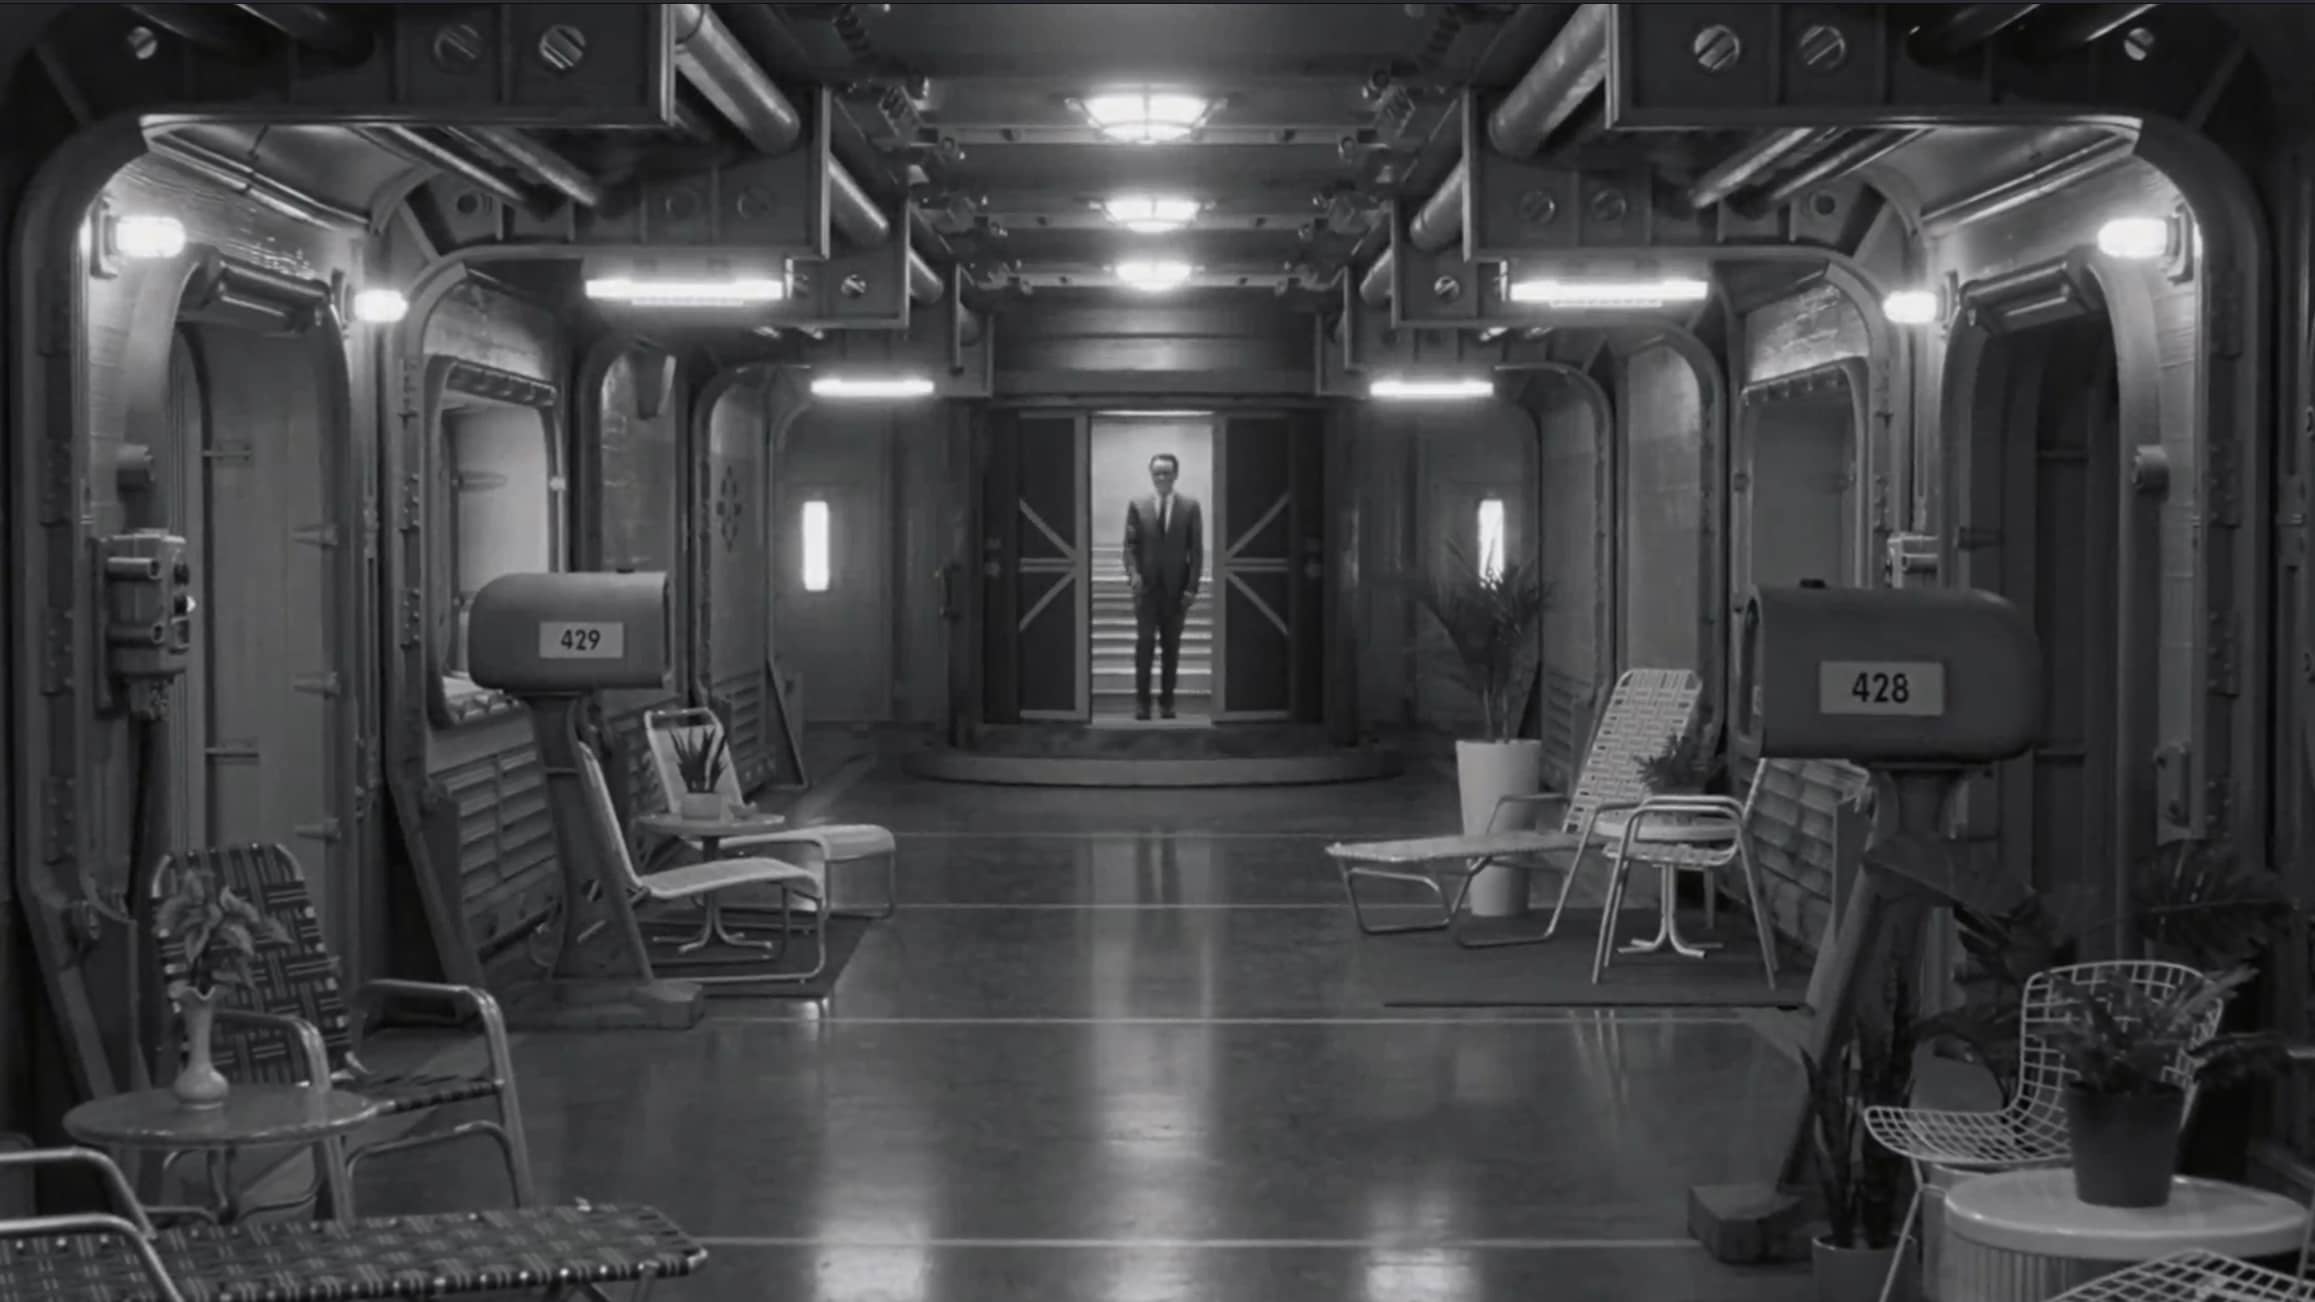
Enter the Harbormaster Hotel
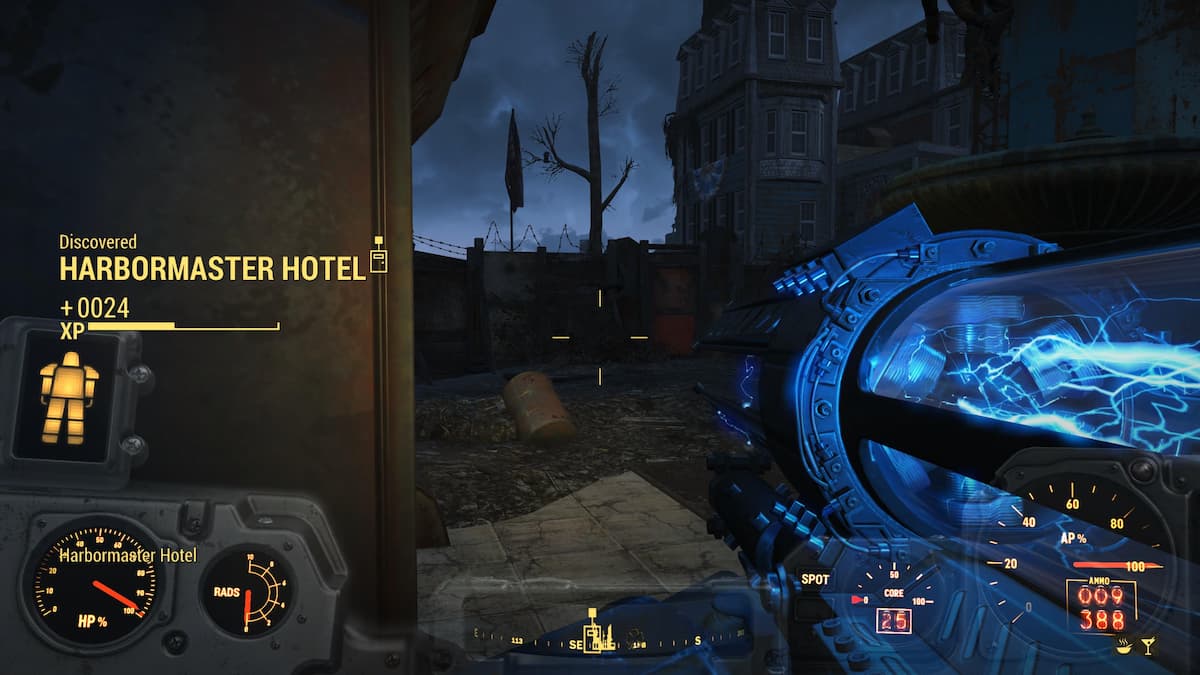
You’ll eventually get to the Harbormaster Hotel by following the marker, so head inside and then take a left and go through the double doors. The doors will be marked so long as the All Hallows Eve quest is still active on your Pip-Boy. When you approach, the door will be marked as “New England Technocrat Society.”
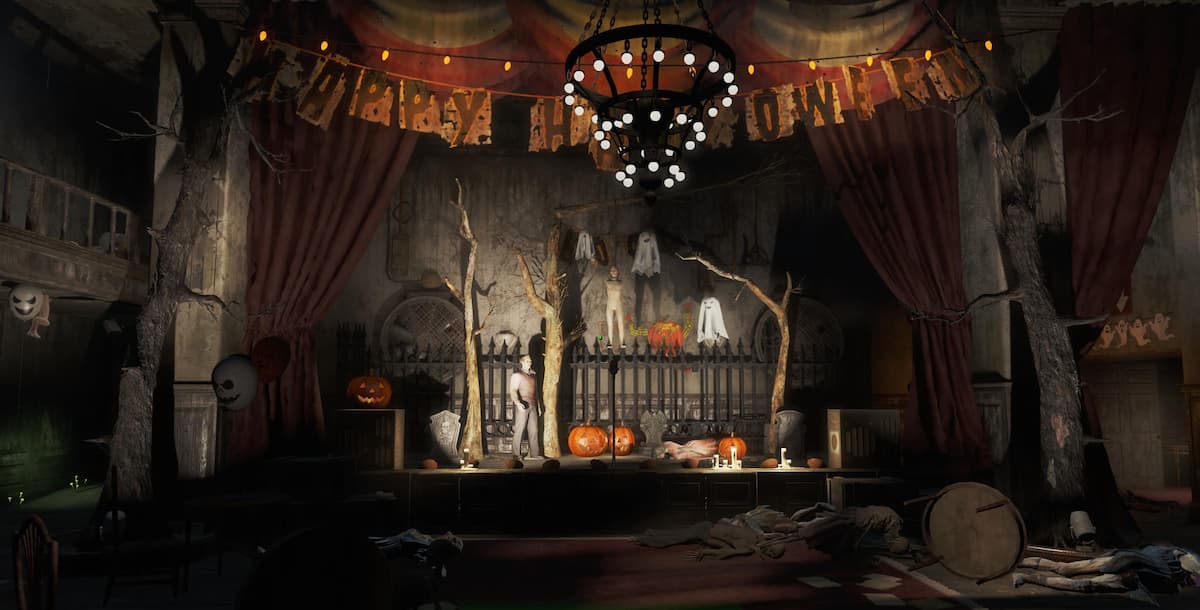
Investigate the Halloween party setup
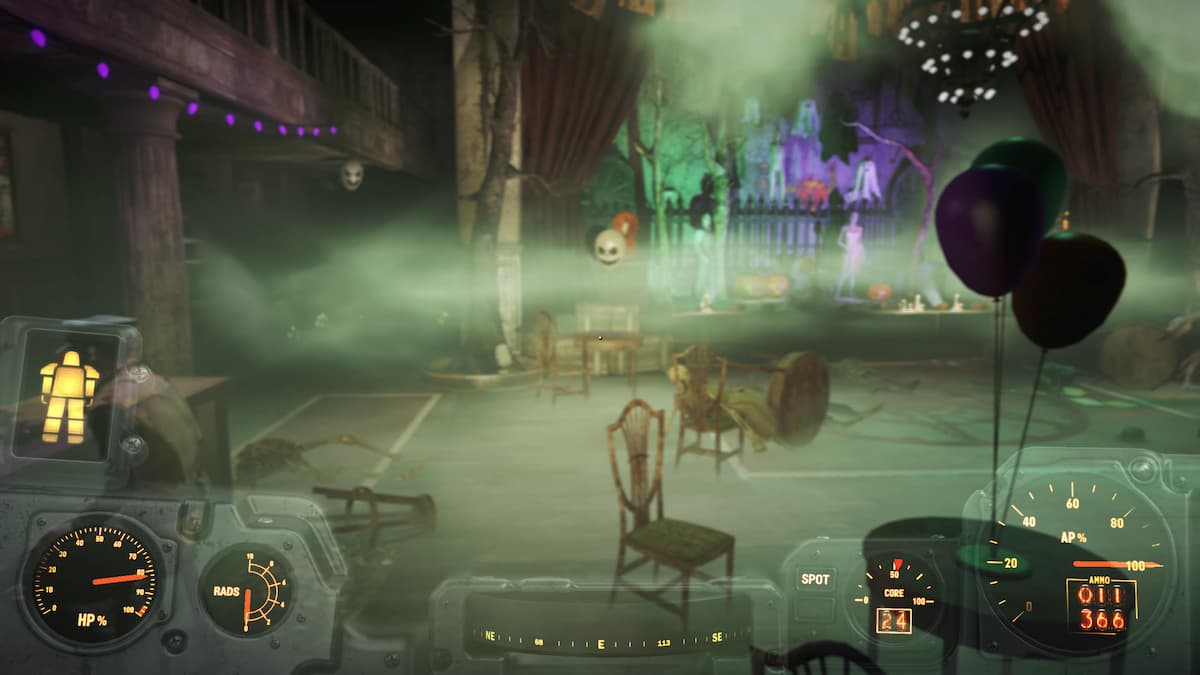
When you go through the doors, you’ll find the remains of a pre-war Halloween party that had been planned for that faithful October day when the bombs fell in the Fallout universe. It’s safe to say that the party guests didn’t get a chance to celebrate the spooky season. You can go through a door on the left and unlock it to do some looting, but you’ll need to go through another set of doors to access the main hall where the party was being held.
When you enter the hall, a mysterious green gas will fill the room and slowly drain your health. It will also make your vision blurry, but you’ll have to keep your wits about you as things are about to get more than a little scary.
Defeat the ghouls
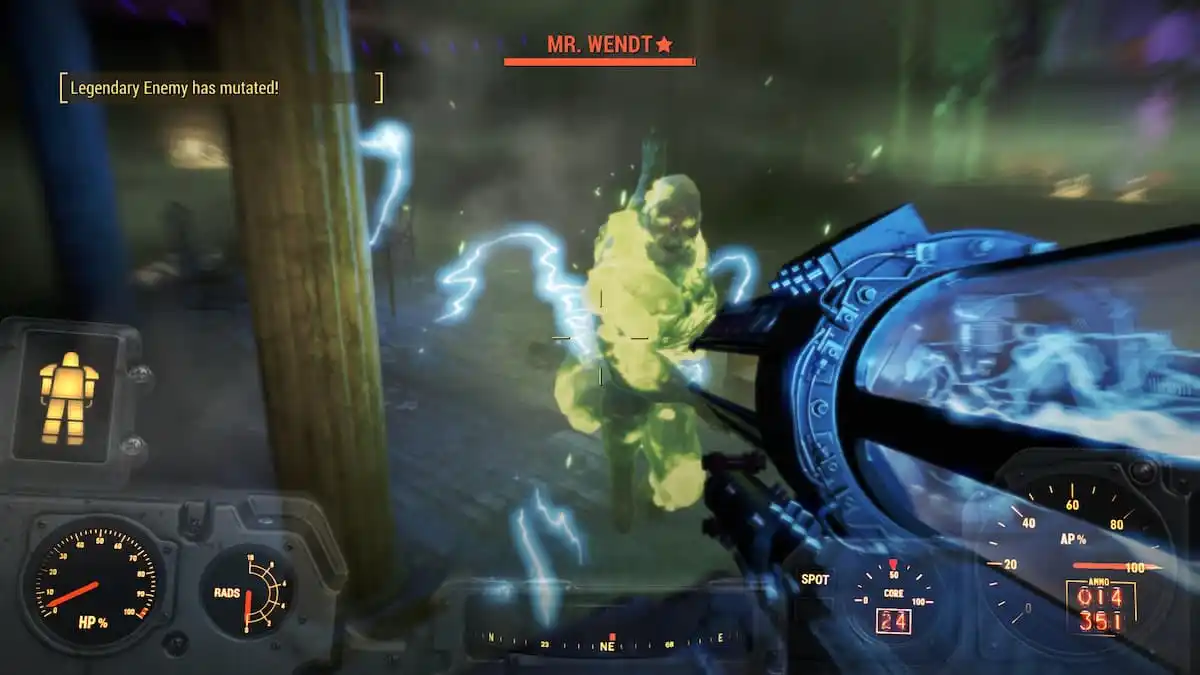
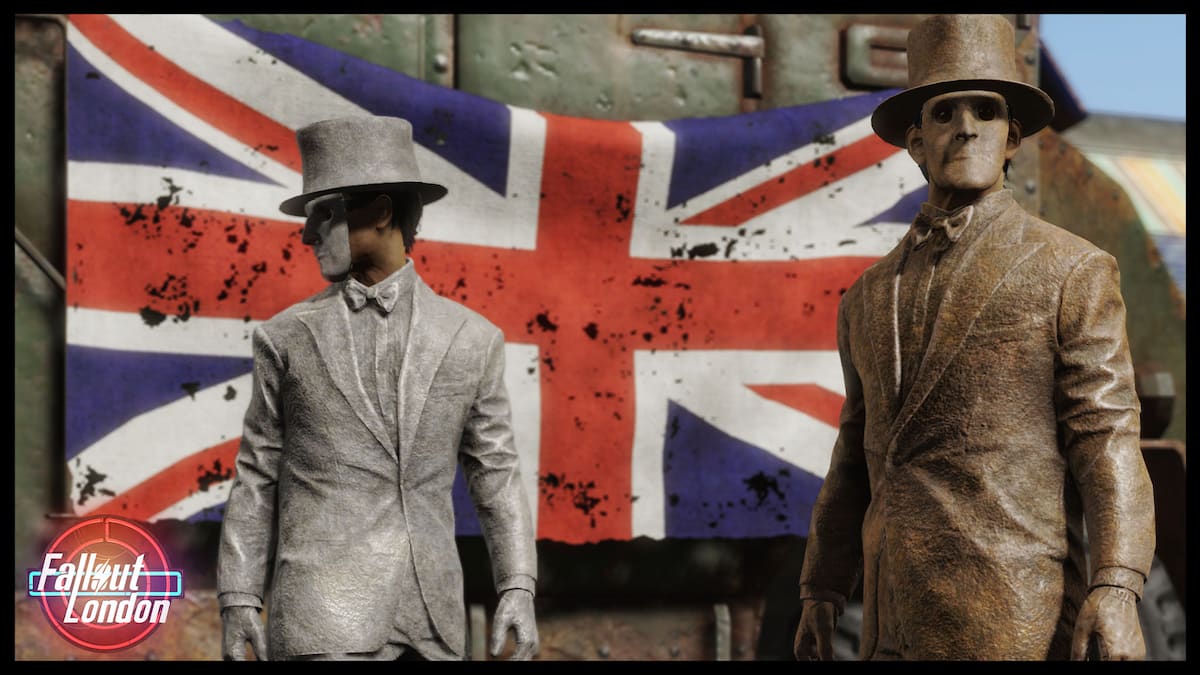
A pack of feral ghouls will appear, each of which has unique names and additions to their attire to suggest they were the pre-war partygoers. There are a lot of them, so make sure you are well-stocked and ready for a fight beforehand.
Most of the ghouls are tough, but there is a putrid glowing ghoul towards the end of the fight that is particularly tricky. I had Power Armor and the new Tesla Cannon weapon, and it still took a bit of time for me to kill it. It’s handy to have a good supply of Rad-X and RadAway to hand due to how much radiation the ghouls spread you during the fight.
Escape the hall
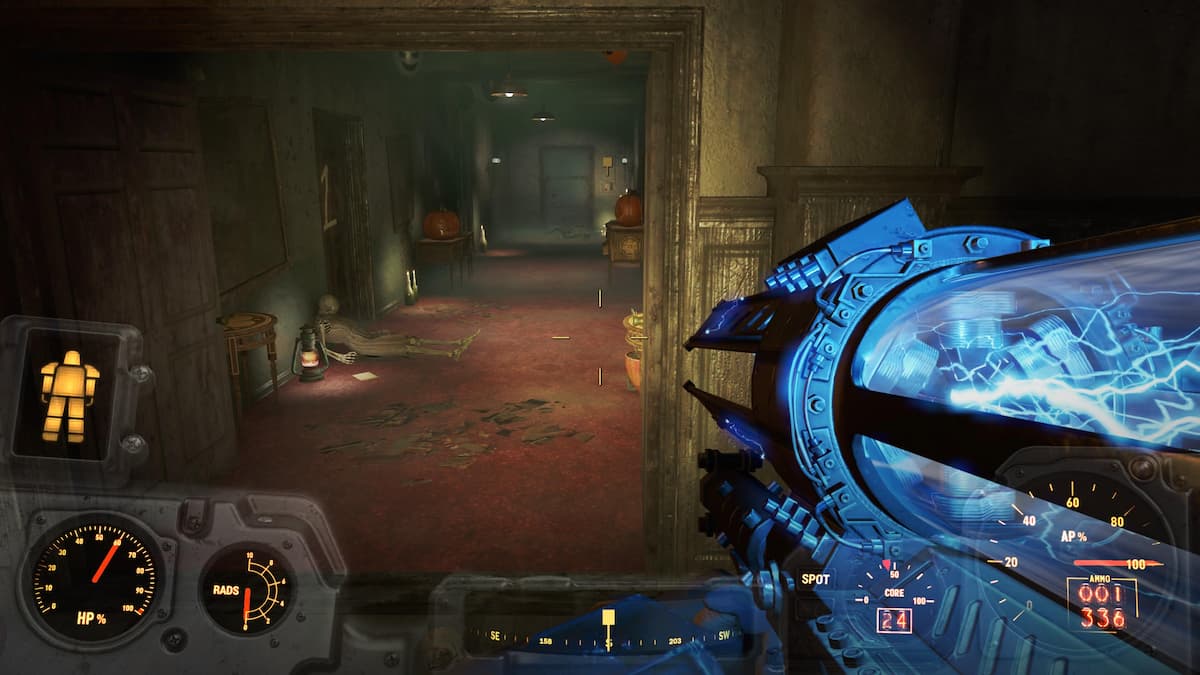
When the ghouls are dead (and you have looted their bodies and taken their Halloween masks because why wouldn’t you), run to the back of the room and take a right to go down a corridor where the gas can’t get you. Don’t worry about looting the gassed room right now, as the gas will disappear later, and you will be able to loot it without the worry of being poisoned to death.
Interact with the keypad
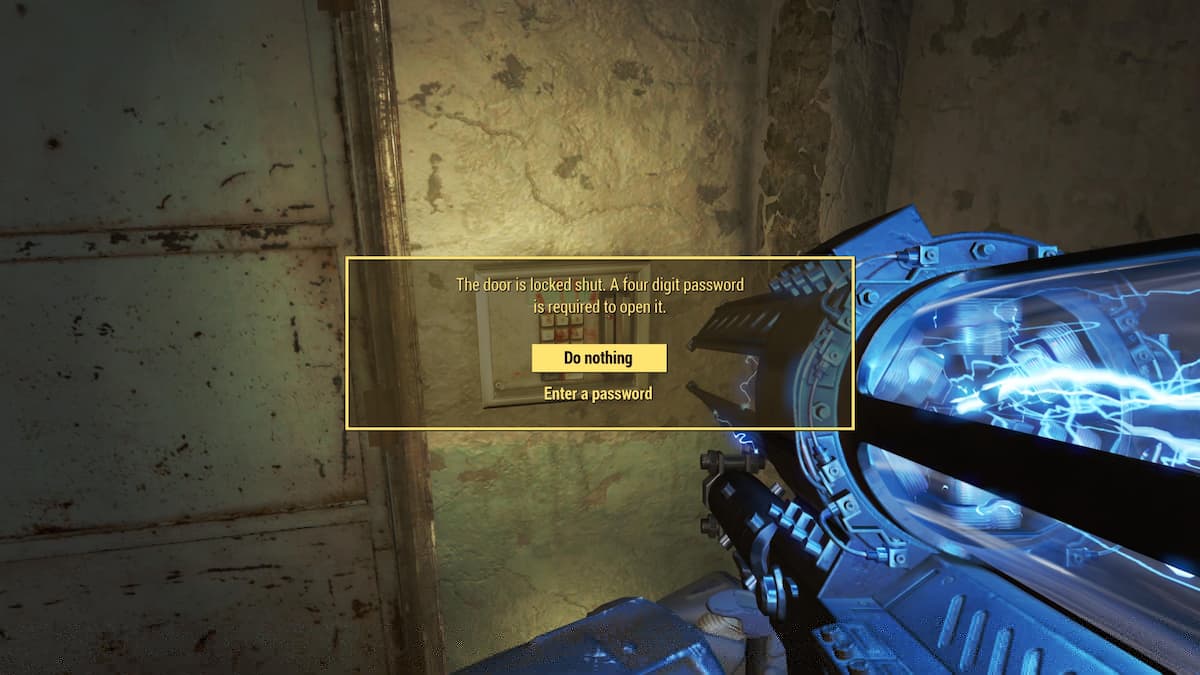
You’ll notice four doors each marked with a number when you enter the corridor, but the first thing you need to do is go straight to the exit door at the end. It has a keypad next that can be interacted with. Even though you don’t know it yet, interact with the keypad and then select “do nothing” as this will update the quest.
Find password clues

You’ll be prompted to look for clues to find the passcode for the door, and a note next to a skeleton not far from your location will be marked. Pick up the note marked “Lana’s Note” and read it to find the clues.
The clues revolve around the doors with numbers written on them and what is behind each one. There are different, specific items behind the doors, and the passcode relates to the number of each item behind each door. Be careful when you open doors three and four though, as door three has a laser turret in the top right corner of the ceiling, and door four has a gun trap set up. Be prepared to disarm the trap and shoot the turret when you open the door to avoid losing health.
Figure out the passcode
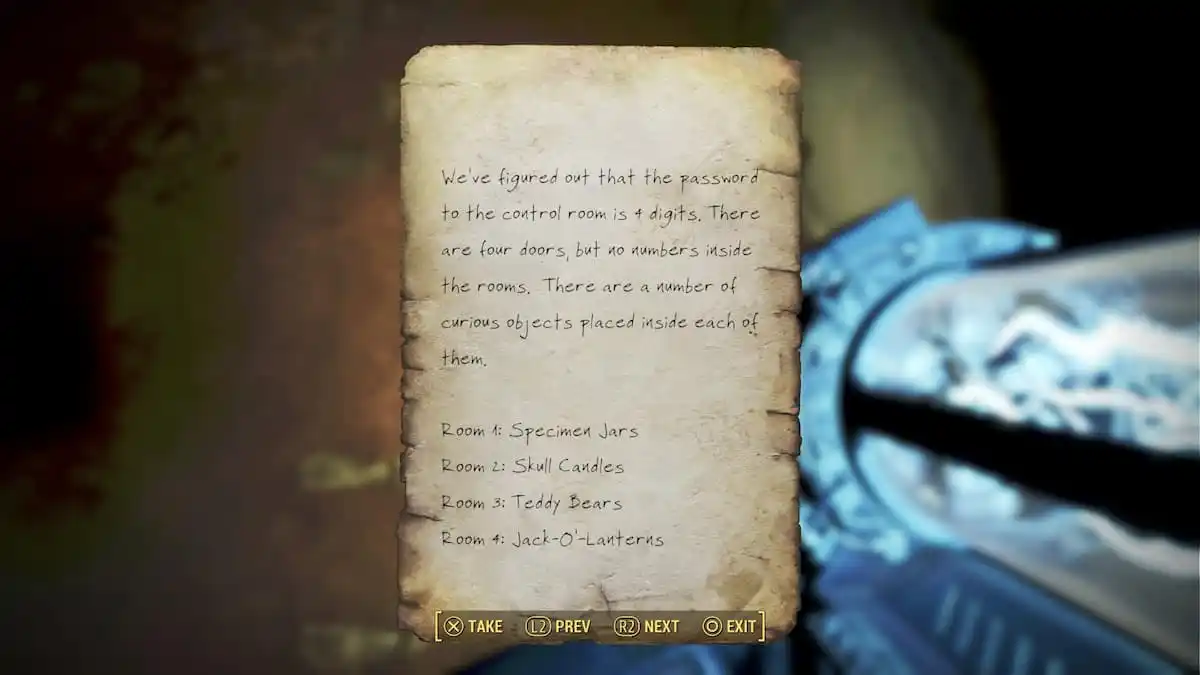
For the passcode, you’ll need to count the number of specimen jars behind door one, the skull candles behind door two, the teddy bears behind door three, and the Jack O’ Lanterns behind door four. There are four specimen jars, three skull candles, four teddy bears, and six Jack O’Lanterns, so go back to the keypad and enter four, three, four, six. This will open up the door, where you will find a few cool goodies waiting for you.
Interact with the AI terminal
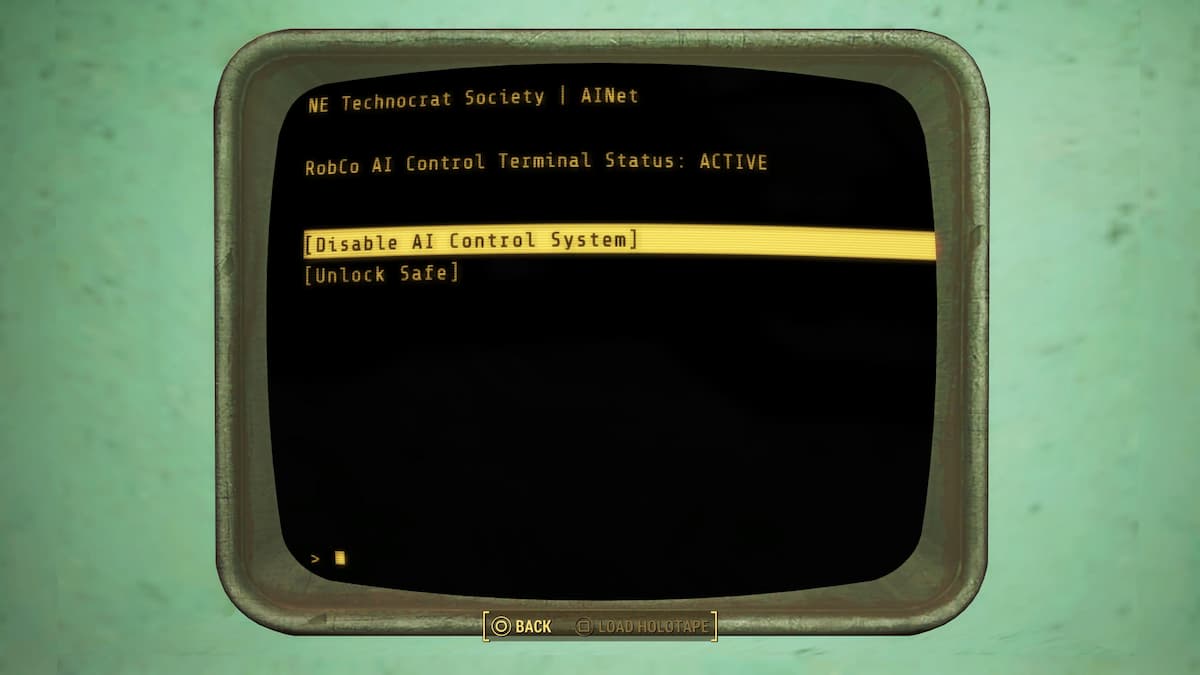
A terminal is marked straight ahead as soon as you open the door, so go and interact with it. You can read through the terminal entries to find that an AI is the one that brought you here while trying to have some fun with humans, which is more than a little creepy. Navigate to the option to shut down the AI system, which will turn off the gas and complete the quest. You can also use the terminal to unlock a safe found to the right.
Grab your rewards
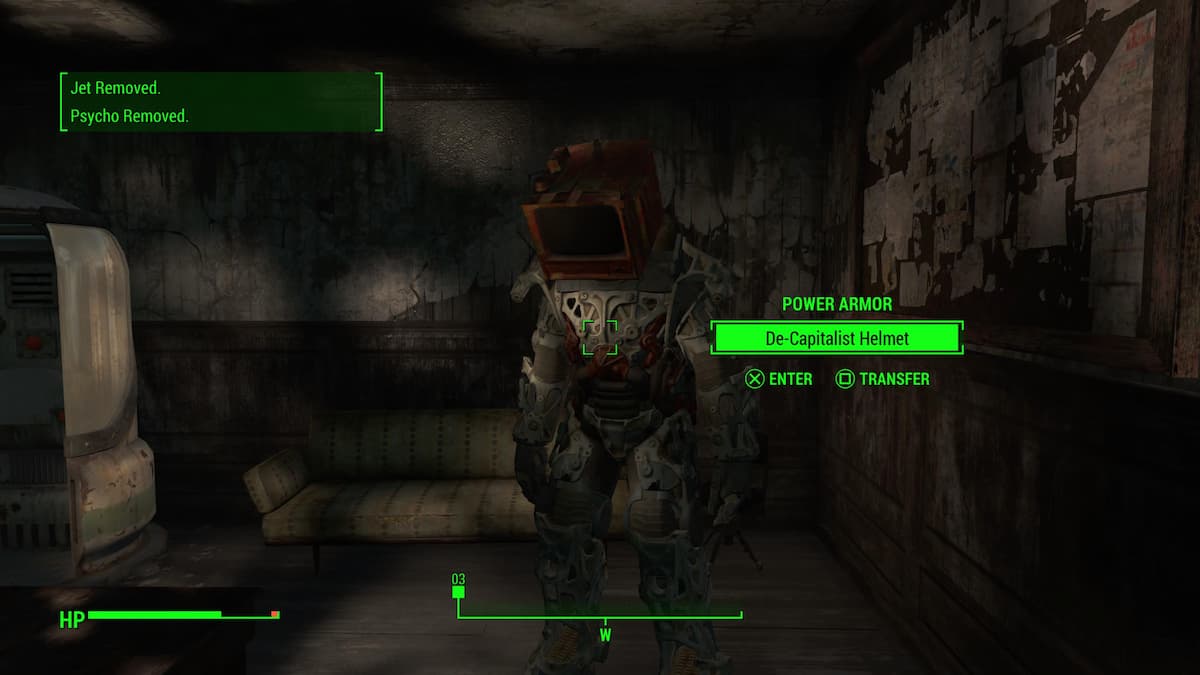
There is a set of Power Armor behind the door with a Halloween-themed helmet that you can take if you so choose. If you only want the helmet, there are a few of them on the console near the terminal. You can also grab a bunch of ammo and aid from the safe once you have unlocked it at the terminal.
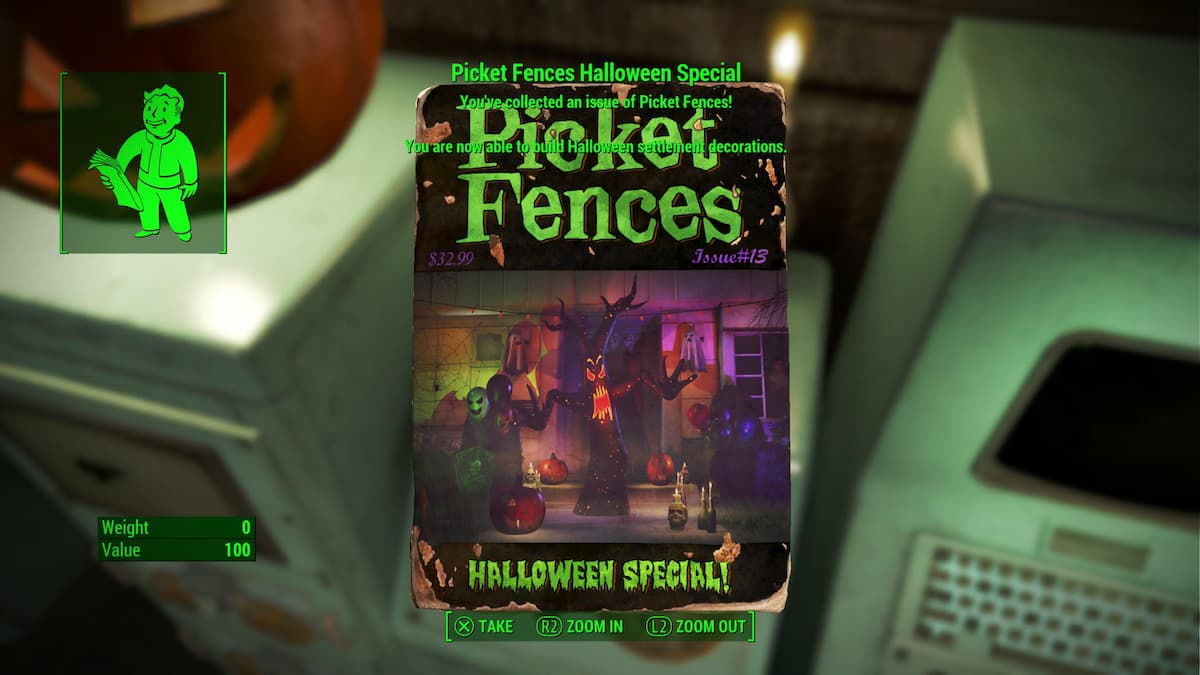
The final reward you can pick up is a Picket Fences Halloween Special magazine, which will unlock some fun, Halloween-themed decorations that can be used in your settlements.
Don’t forget to loot the previously gassed-up room on your way out, as you’ll find some food items and a lot of alcohol that can be useful.
That’s everything you need to know about completing the All Hallows Eve quest in Fallout 4. There isn’t much to this quest, but if you like the idea of using Halloween items to make it spooky season all year round in your settlements—as well as some Halloween masks—then it’s a must.


Published: Apr 26, 2024 07:49 pm