
Destiny 2’s Dual Destiny mission is a mechanic-heavy, entertaining quest with one of the game’s best rewards locked behind it: Exotic class items, which are exclusive to the Prismatic subclass.
Like most other activities, mechanics are at the core of the Dual Destiny secret Exotic quest. But this mission is so focused on mechanics that it may feel like a two-person dungeon instead of a regular activity. And that’s before taking into account the laundry list of things you need to do to start this mission.
Though it starts off with a six-minute timer, Dual Destiny extends your countdown to Orbit by giving you 10 minutes each time you reach a major encounter. This ends up pushing the mission’s time to around 30 to 40 minutes after you’ve gotten used to it, and our runs have been clocking at around 34 minutes.
Though it’s still quite a commitment when it comes to time and effort, braving the mechanics of the Dual Destiny mission can be worth it for the Exotic class item. This potentially game-changing item type mixes effects from multiple Exotics—some even borrowed from other classes—to make Prismatic builds even more powerful.
Here’s our breakdown of the major mechanics in Destiny 2‘s Dual Destiny activity so you can also chase your Exotic class item and clear this activity.
Destiny 2 Dual Destiny guide: Mechanics breakdown

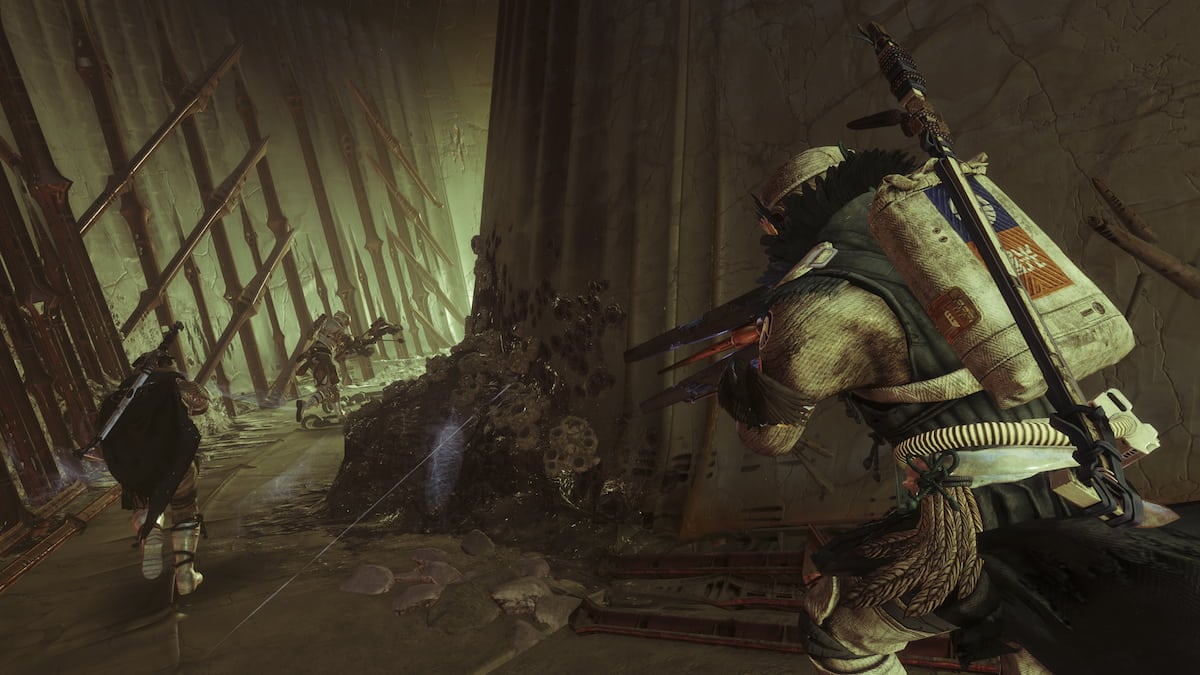
As a whole, the mechanics around this mini-dungeon revolve around Light and Dark. One Guardian will be attuned to the Light and the other to the Darkness, giving each of them a unique role during the mission.
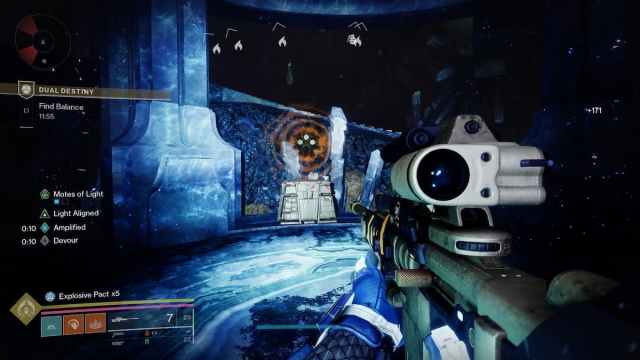
The first basic mechanic (which we won’t talk in-depth about) is the pedestals of Light and Dark energy. Both players will often be required to stand on the matching plate simultaneously to trigger the next steps in the mission. This is particularly noticeable during the Infiltration section, which has a platforming puzzle of sorts leading to the next part of the adventure. Here are our core mechanics for Dual Destiny.
Dual Destiny’s first mechanic: The Glyphs
Your first foray into Dual Destiny’s mechanics will bring you to a myriad of glyphs. They’re the same symbols used in Vow of the Disciple, so if you’ve beaten up Rhulk, odds are you’ll have a good grasp of them.
Throughout this section, Light and Dark will alternate reading glyphs to each other. Generally, you can only see all symbols once you’ve had the maximum number of corresponding motes, so take down those orange bars as soon as they come up. The order matters here.
In the first room, Light calls the two symbols first in the order they appear on the pedestals on the lower floor. Dark will then shoot the matching symbols in the correct order. The second room switches up a bit: Dark calls and Light shoots, with three symbols up for grabs this time. They’ll also appear on a pedestal close to the Light holder. The third room circles back to Light calling and Dark shooting, with four symbols in total.
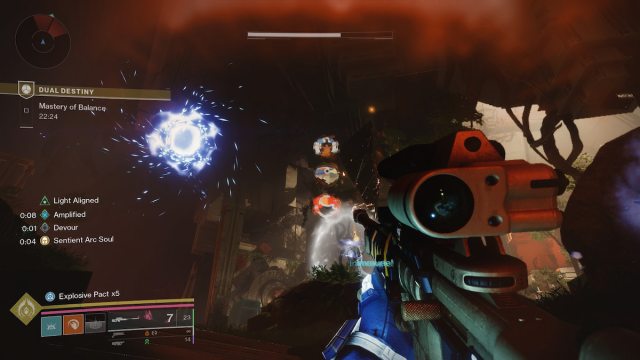
The Dark guardian must damage enemies with a dark shield. Any foe with a white shield only takes damage from the Light guardian. If you die, you lose your motes, so survivability is vital if you’re struggling to keep it within the time limit. Getting the hang of callouts also helps.
This is the first major mechanics-related challenge in Dual Destiny, but it won’t be the last. After this section, you’ll go through a platforming bit with the pools of Light and Dark required for buffs. This leads you to the second major mechanic in Dual Destiny: reading clocks.
How to get past the clock room in Dual Destiny
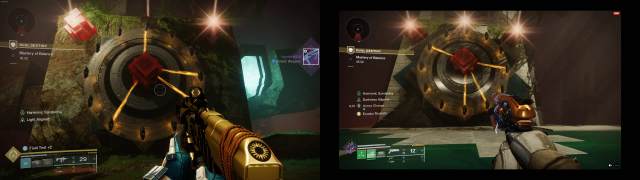
The clock room will introduce you to a new mechanic that also shows up at the end of Dual Destiny. Both players see a clock in this room but with different hours for each guardian. The goal is to shoot the three matching times on the clock.
You need the Harmonic Sundering buff to shoot them, which you can obtain (in this encounter) by taking down the Tormentor that spawns in the middle of the area. Whoever gets the final blow on the Tormentor gains the buff, and they have to shoot the three matching pointers. Using one of our runs as an example:
- Light: Two, four, five, six, eight, nine.
- Dark: Two, three, four, five, seven, 10.

Once the guardians have shot the right nodes three times, they can advance to the rest of the mission. Since this part has Tormentors, anything with precision damage works well, but we’ve been leaning toward machine guns with good results. Bring some survivability, too, due to the sheer volume of enemies.
The Tormentor section leads to a change in scenery, but the mechanics are still pretty much the same. You’re back to standing on matching platforms of Light and Dark pools to pave the way to the next area, though you’ll face two Tormentors at once along the way. You’re in the home stretch after you get to an open area with a rally banner. Here are the mechanics you need to know for the final boss.
Final boss mechanics in Dual Destiny: Glyphs and clock reading
In true Bungie fashion, the final boss (well, bosses) will combine a bit of everything presented so far. This is pretty much a mechanic-based encounter with a few damage phases in between.
Dealing enough damage to the first boss will summon the Servile Wizards, which can only die to the matching guardian. Killing both starts a symbol mechanic where, as usual, one player calls the symbols from the top down, and the other shoots them in order. The roles will reverse after.
Advancing through the encounter will trigger a message that says, “The barrier generator’s frequency is shifting.” This leads to another clock-reading mechanic, but slightly different this time around.
Instead of shooting three matching nodes on a static clock, the boss room clock puzzle requires both guardians to shoot the one matching node between the two. The catch is the clocks rotate every five seconds or so—being fast is essential. Using another example from our runs:
- Light: 12, three, four, seven.
- Dark: Three, five, six, 10.
The matching number between the two clocks is three (equivalent to three o’clock), so both guardians should shoot that quickly before the nodes change. Like in the other clock room puzzle, getting the sequence right three times advances the encounter, at which point you can hit the bosses as hard as you can.
Finishing the mission: Kill (or not)
Savathûn has a secret mechanic for you. Once the two of you can spot your class items in a display case, she will kill you both and ask you to fight each other, with a prompt ahead of you that tells you to prepare for battle. While you can shoot your teammate and even attempt to crush their Ghost, you can always look around behind you and offer peace to your teammate by interacting with the Love glyph. Either way, you can grab your Exotic class item after making your choice, which should end Dual Destiny.


Published: Jun 12, 2024 02:15 am