Welcome to the Resistance is the third main story quest in Avatar: Frontiers of Pandora, and it serves as a harbinger for many of the game’s mechanics and characters.
Tutorial missions like this can go one of several ways—they either hold your hand too much, or they throw you to the wolves. Welcome to the Resistance lands in the middle; the quest holds your hand while wolves devour you. Luckily, this guide is here to make sure you go peacefully. Read on to learn how to complete Welcome to the Resistance.
How to start Welcome to the Resistance in Avatar: Frontiers of Pandora
This quest is the third in the game, which means it starts automatically before side quests even become an option. As such, if you haven’t started the quest on your own, something is very very wrong. The quest should start automatically when you complete Pandora by retrieving Dapophet Pods for So’lek and then fighting off the RDA assault.
There are three stages of Welcome to the Resistance, making it one of the longer quests in Avatar: Frontiers of Pandora. Those are:
- Finding Resistance HQ
- Touring Resistance HQ and learning how to use SID
- Taking down Pneumatic Tower Echo
Each stage comes with its own set of trials and tribulations, so for the remainder of this article, I will break down each stage individually by section.
Part one—How to find Resistance HQ
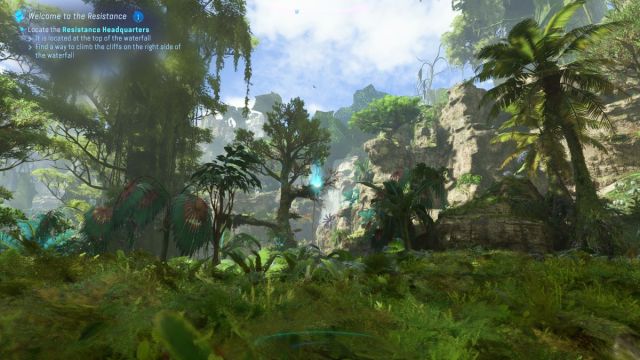
So’lek thanks you for saving his life by saying “See you back at HQ!” While this does present a good opportunity to explore a bit and learn the lay of the land, his instructions are… lacking. All So’lek (and the quest guide) tells you is you need to find a way to climb the waterfall. If you’re on Guided Mode, you will see a quest marker when you use Na’vi Senses, but that doesn’t help you find your way up the waterfall at all.
How to climb the waterfall
As the quest guide tells you, the path up the waterfall is found within the cliffs to the right of the waterfall. If you stand at the base and look right, you will see a Lift Vine plant that acts as a pulley rope to begin your climb up the waterfall. Continue forward a short ways, and you will see another short cliff, only this time there is no vine.
Look at the top of this cliff, and you’ll see a small bulb just like the one that had the last vine. Shooting this bulb causes a Lift Vine to descend from the bulb.
Continue forward after taking the Lift Vine up, and you will come to a gap in the rocks in part of a makeshift cave. An onscreen tip will inform you you can charge your jump by sprinting and holding down the input before releasing it. This is all good and nice, but what the tip doesn’t tell you is you need to jump from a pretty weird angle to clear this gap. If you attempt to jump straight on from the way you came, you will fall. Don’t worry—you won’t take damage, and you can climb back up via two short ledges on the left.
To clear this gap, you need to go over to the far left segment of the gap. It will appear like you don’t have enough room to get an adequate running start on the left side, but you do.
Odds are, you will need to press the jump input again as you connect with the ledge on the other side of the gap to mantle up. Once you have cleared this gap, there are no more gimmicks or trials to find Resistance HQ. Just continue forward and you will see the building in a clearing above the waterfall like So’lek said.
Part two—touring Resistance HQ
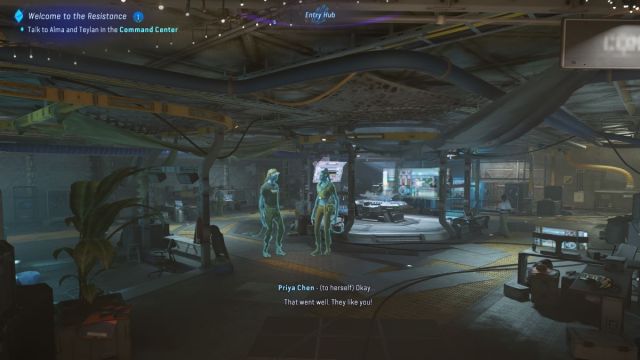
After you arrive at Resistance HQ, follow So’lek inside, where you will meet Pria, Anqa, Alex, Raj, and all of your Sarentu siblings from the prologue. For the most part, this section is just about following Teylan around as he dumps exposition and introduces key players, however, there is one part of the tour that requires some actual brainpower—using SID.
How to use SID
At the end of the tour given by Teylan, you meet Alex, the inventor of SID (a hand scanner turned portable hacking device). To complete this part of the quest, you need to demonstrate to Alex that SID actually works. Use your weapon wheel to equip SID. You should now notice there are green and orange highlights on the floor that form patterns of hidden wiring and such.
Alex wants you to use SID to locate and fix some faulty wiring. Keeping SID equipped, follow the green wire through the floor, where it will eventually connect to an orange box and wire. Aim SID at the orange box, and the prompt to complete the SID hacking mini-game will appear. All you need to do is gently hold down RT until the larger circle closes in enough to line up with the smaller one. When the circle mini-game is completed, the box and wire will both turn green.
Follow the new green wire up the stairs. Halfway up, you will see another orange box intersection. Repeat the same process to continue the connection and turn the wire green, then follow that wire upstairs into the control room. Once there, you will see a control panel on the wall with the same circle prompt for SID. This one is more complicated, but barely.
After matching the circles, you will be brought to the hacking mini-game screen. All you need to do is complete the little maze by moving your cursor to the other end within a generous time frame.
Once you complete this hacking mini-game, the SID tutorial is complete, and you’re ready to move on to the last leg of the tour; meeting up with your fellow Sarentu Clan members in a cave below the HQ facility.
How to find the Sarentu cave beneath the complex
On the second floor where you completed the SID tutorial, there is actually a second entrance/exit to Resistance HQ. If you exit back outside from this second-floor door, the cave where your Sarentu allies are just beneath you on the left. Drop down and activate Na’vi Senses, and you can see them right there.
Sit through some short cutscenes, and then you’re off to the final leg of Welcome to the Resistance—taking out your first RDA Facility.
Part three—How to defeat Pneumatic Tower Alpha
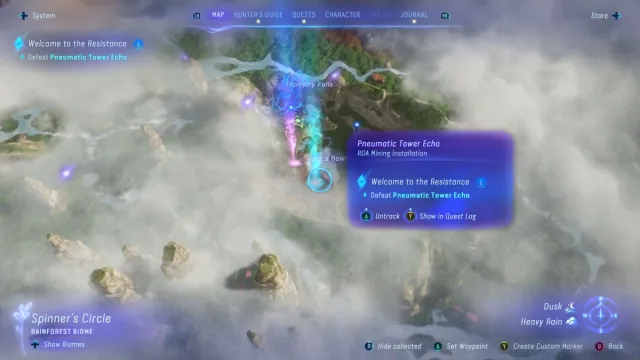
In this part of the quest, you need to destroy an RDA Mining Installation that is polluting the area near Resistance HQ. Taking out RDA sites like this one will be a recurring, common, and necessary part of your adventures throughout Pandora, and this one serves as an introduction to the necessary mechanics.
Pneumatic Tower Alpha is directly south of Resistance Headquarters, so finding it shouldn’t present any problems. Once there, you need to do three things:
- Destroy the generator.
- Hack and destroy the cooling unit.
- Destroy the emergency flare.
You have the option of completing all three objectives using stealth, however, I found that this early on in the game, attempting to use stealth is more trouble than it’s worth. Until you have some specific perks from the Hunter skill tree, stealth is a greatly uphill battle.
How to destroy the generator
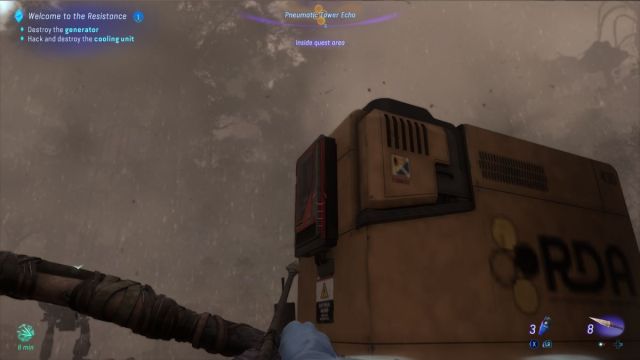
Destroying the generator is the easiest part of wiping out Pneumatic Tower Echo. You most likely will be approaching the facility from the north, which will mean the generator is the first objective you encounter. Use your Na’vi Senses to pinpoint its exact location, but you are looking for a large yellow metal box with an AMP patrolling right next to it.
On the side of the generator is a red panel that will turn your reticle red when you look at it. Shooting or punching this control panel destroys the generator. If you’re trying to use stealth, I advise shooting it from as far away as possible (but again, stealth is more trouble than it’s worth this early on).
How to hack and destroy the cooling unit
The cooling unit is only slightly more involved than the generator. It is located in the center of the facility on the second floor of the outdoor catwalk built onto the drill. Again, you should use your Na’vi Senses to pinpoint the cooling unit. Once you have done that, find the SID hacking prompt on the left side of the cooling unit and complete the simple hacking mini-game. Afterwards, the cooling unit will open a vent to expose a red fan on its right side. Shoot or punch this fan to destroy the cooling unit.
How to destroy the emergency flare
After you have destroyed the generator and the cooling unit, you still have one more task left to finish taking out the facility; you must destroy the emergency flare. This “emergency flare” is just a vent which opens up high on the tower in the middle of Pneumatic Tower Echo, and destroying it is as simple as a well-placed arrow.
Periodically, the red vent will open to spew out fire. You need to shoot an arrow into the vent while it is open. Doing this will destroy the emergency flare and cement the destruction of Pneumatic Tower Echo, which in turn completes Welcome to the Resistance.



Published: Dec 13, 2023 07:33 pm