Finding Home Part Eight is one of the last treasure hunt quests in a long line of Comic Page collecting in Avatar: Frontiers of Pandora, and you need to be well into the latter half of the game to complete this particular quest.
Like all Lost Item quests in this game, you don’t get the help of Quest Markers even if you are playing on Guided Mode, so completing the Finding Home quests can be one of the more difficult exploration tasks in Avatar: Frontiers of Pandora. This guide will walk you through exactly where you need to go to start and complete Finding Home Part Eight.
How to start Finding Home Part Eight in Avatar: Frontiers of Pandora
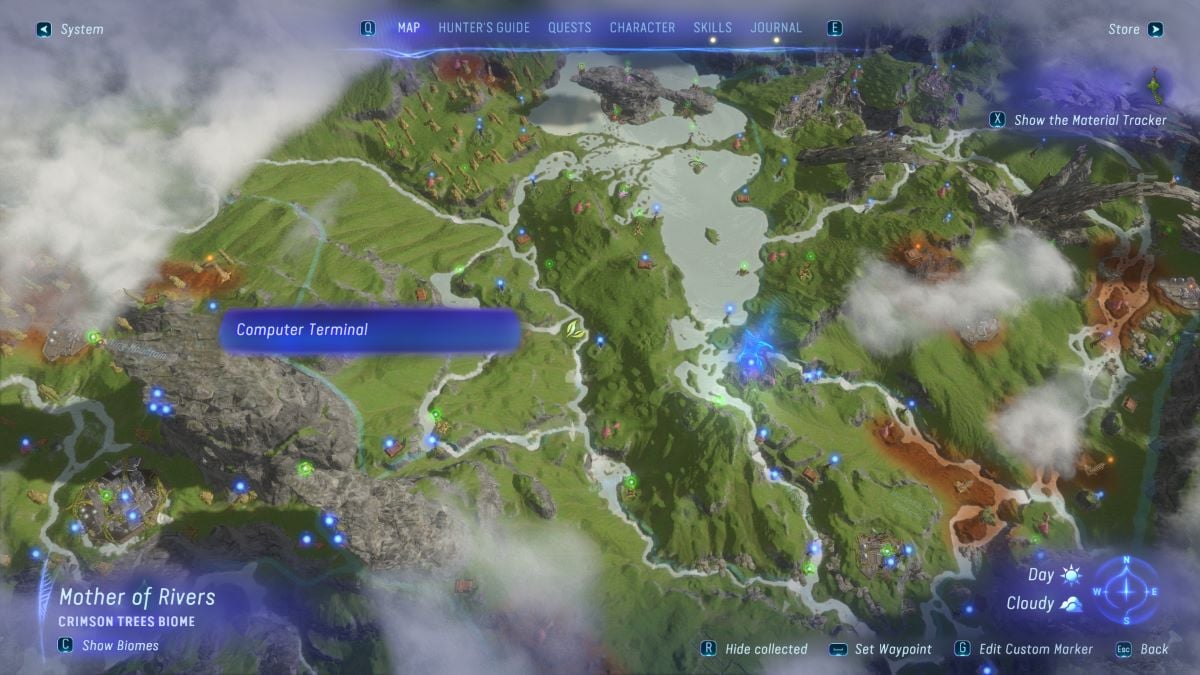
While you will need to have access to the Clouded Forest region to complete Finding Home Part Eight, you only need to reach the Upper Plains to find the Computer Terminal that starts the quest. The Computer Terminal you need to find is in the Mother of Rivers area, which is just southwest of the huge lake in the center of the Upper Plains. Within the Mother of Rivers area, rivers merge and split to create two islands on the western edge of the area. The Computer Terminal is found on the northeast corner of the southern island, and while the area doesn’t have a name on the map, it will be marked with a purple POI icon that will turn into a Computer Terminal icon after you have visited the location.

When you arrive at the Computer Terminal indicator, find the long-since-abandoned metal RDA outpost, where you will need to crouch down to enter through a human-sized door. Inside the cramped outpost, you can’t miss the Computer Terminal, which will begin Finding Home Part Eight when scanned using SID.
How to complete Finding Home Part Eight in Avatar: Frontiers of Pandora
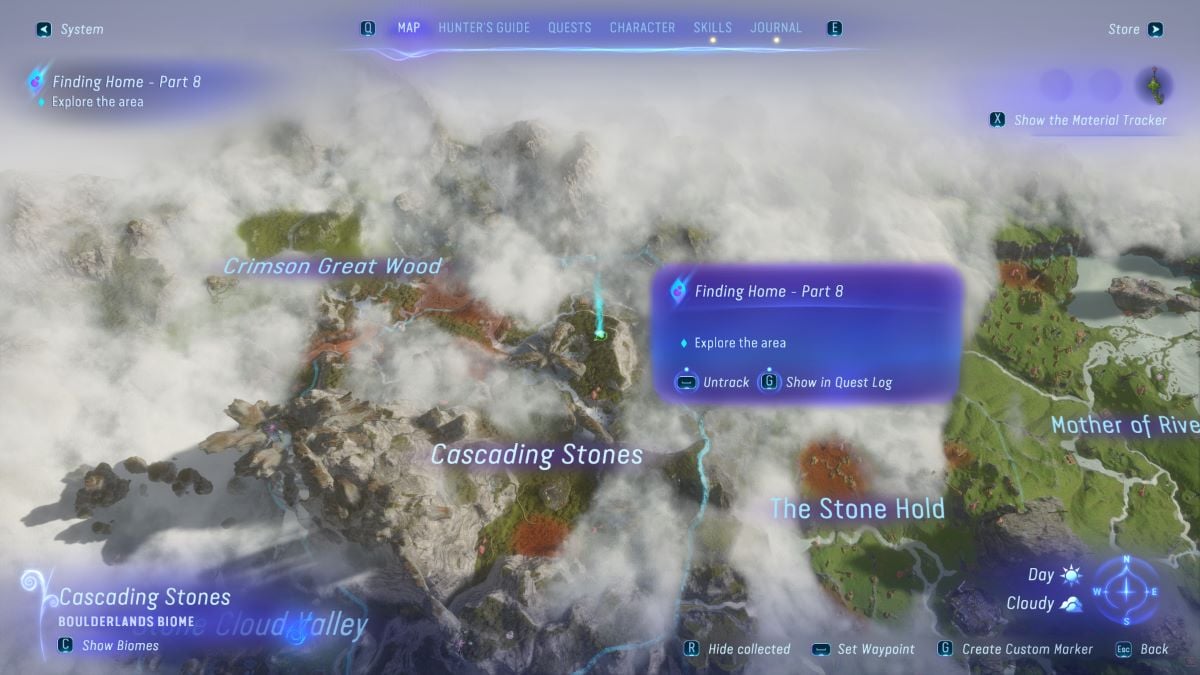
Make sure that you begin tracking Finding Home Part Eight from the Quests menu tab—partly because this is the only place that you can actually see the photograph clue from and partly because you actually will get a quest marker once you’re in close enough proximity to the Comic Page needed to complete the quest.
Your quest journal tells you that the photo looks like it was taken somewhere near the Ensnared Lake in the northern part of Cascading Stones in the Clouded Forest. I mean, duh. I was just about to say that same thing, too. The Cascading Stones is one of the first regions that you will explore in the Clouded Forest, so you should actually already have this area discovered. If not, fast travel to the Resistance Headquarters in Clouded Forest and head northeast, you will soon discover it. Directly east of the Ensnared Lake is a mountain full of trees that extends upward before forming a cliff face on its opposite edge. The location from the photo is right in the center of this small mountain, and as soon as you’re near it, Finding Home Part Eight will update to give you a quest marker that shows the exact location of the Comic Page.

The outpost containing the Comic Page is a humble, single metal shack that is pretty unassuming. Chances are, you won’t see it until you’re actually right up on top of it, so using your Quest Marker or a Custom Marker if you’re in Explorer Mode is very important for pinpointing the solution to Finding Home Part Eight.
Once you find the shack, which is tucked against a large rock and surrounded by pink and violet ferns, the quest will update again. All you must do now is head inside the shack and grab the Comic Page, which will complete Finding Home Part Eight. Make sure you check out all of our other guides in the Finding Home series, two of which are linked above. You need to find all 10 Lost Comic Pages before the side quest line actually leads anywhere, and we now have guides up for all of them.


Published: Dec 15, 2023 04:40 pm