Chapter four of Terminal Escape Room beckons and your character’s long and arduous escape from Leisterez continues through a perilous and puzzle-laden research lab—and our walkthrough can help.
By now, you have likely survived chapter one, chapter two, and chapter three of Roblox‘s Terminal Escape Room creation—the inventive and creative escape room title constantly leaving us confused but content.
Terminal Escape Room is back with chapter four, and a whole new series of mysteries awaits!
How to complete Terminal Escape Room chapter 4
A notice in the starting room clearly states, “Many of the puzzles are randomized,” and “Many of the codes may change.” As I delve deeper into Terminal Escape Room‘s levels, it’s clear to me universal escape codes simply won’t cut it, and there are different codes for each puzzle with every playthrough.
As usual, I am going to do my best to talk you through every puzzle and what you need to do to overcome it. There are many occasions where I can only push you in the right direction and tell you what information you need, and it’s up to you to use this information efficiently.
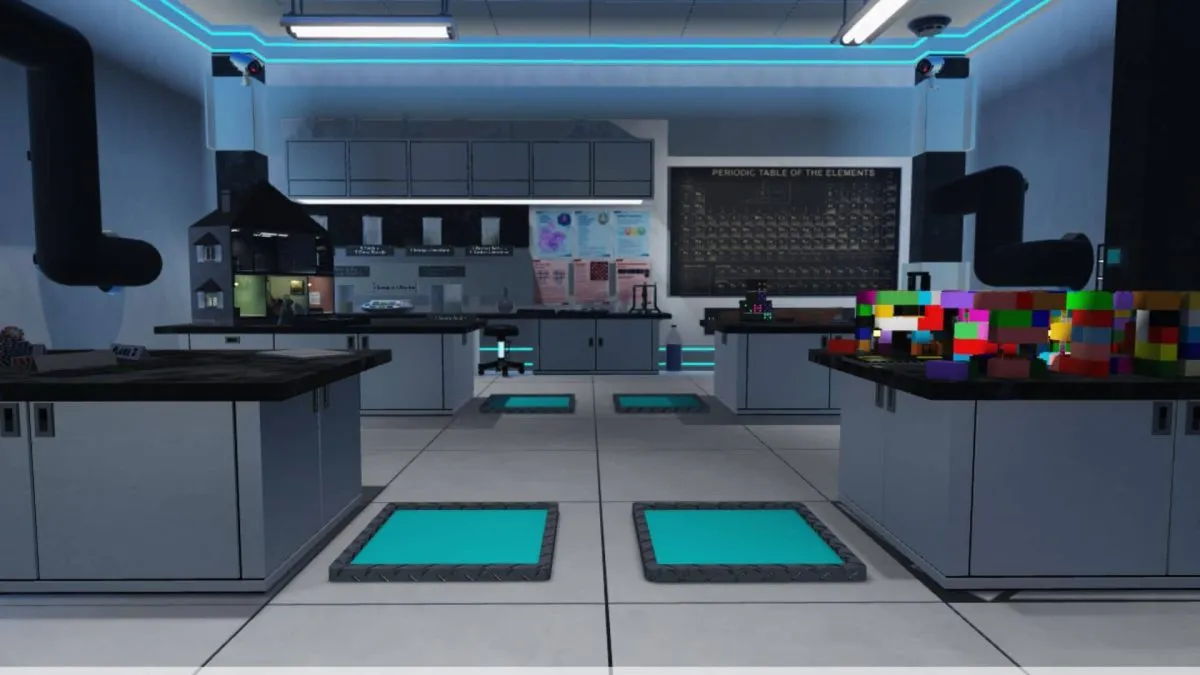
Checkers puzzle solution
- Go to the Checkers board and note down where each black piece is on your board—use the chart above it for the exact numbers and letters if you need.
- Head to the Reagent Shelf in the opposite corner of the room.
- Match the positions of the black Checkers pieces to the chemical bottles on the unit.
- Each piece’s location should be represented by different elements.
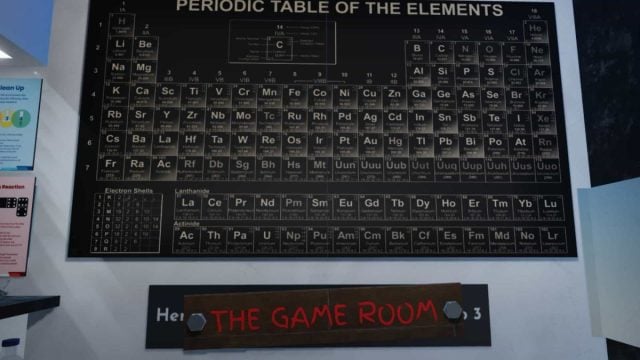
- Go back to the other side of the room and take a look at the Periodic Table.
- Using the four elements you’ve obtained from the four bottles, find them on the Periodic Table.
- In order, add all the chemical symbols together to make a word. For example, Gold gives you AU, and Carbon is C.
- Enter the word into the giant keyboard input on the wall behind you, and the screen should say “RIGHT.”
- Grab the Dominoes and Bottle from the open drawer and move on.
Tic-Tac-Toe puzzle solution
- Check the “Beaker Clean Up” poster on the wall to figure out the order of beakers to find.
- Find the Tic-Tac-Toe boards in the order of the beakers as they appear on the poster.
- Using each board, note down the winning square of the final move in each game.
- For example, if there are fewer Xs than circles, or vice versa, X has to go next, and if there is a free space you can put down an X to make three in a row, this is the winning move/position.
- Do this with all four Tic-Tac-Toe boards.
- The lab room has a keypad perfectly imitating the shape of the Tic-Tac-Toe boards, so input the four winning position squares in order (using the beakers poster as guidance) and the drawer opens.
- Again, claim the Dominoes and Bottle.
Scoop & dashes puzzle solution
- Head over to the counter with scales, beakers containing chemicals, and various instructions about scoops and measurements.
- The key information here is “one scoop = four dashes.“
- I had one measurement featuring a scoop of material and nothing more, and placing it on the scales revealed its value.
- Using basic maths, I can now divide one scoop into four dashes.
- So let’s say you have one scoop of Gasoline weighing 100, I know each scoop of Gasoline is 25, and so forth.
- You can now systematically break down each equation to work out the values of each material and its scoop weight.
- One of the room’s many posters shows a sum, so using all the values you’ve worked out, you can solve the equation to get a code.
- With the code in hand, input the number into the code panel next to the black pipe on the wall.
- Take the newest Dominoes and Bottle from the opened drawer.
- In front of the Periodic Table poster, pick up the bottle on the floor—taking your total to four Bottles.
- Go to the left of the scoops & dashes puzzle, and fill the tall structure using the four Bottles you have in your possession.
- You can now take the final two Dominoes that have risen to the top of the structure.
Dominoes puzzle solution
- Go to the Domino table, put down all the Dominoes, and match them all up so adjacent pieces have the same value at each end.
- This means one half of a Domino with four dots also needs to be next to another Domino with four dots—you can also rotate pieces.
- Complete the game, and you have a single Domino left over.
- Move over to the Fume Hood machine and use the Domino to activate it—also triggering a portal on the floor.
Dollhouse puzzle solution
- Walk over to the shining portal on the ground and press “Shrink.”
- Go inside the Dollhouse in your shrunken-down form.
- Upstairs, there are many panels scattered around the room, and one of them requires four answers, with the questions right next to it.
- Due to the randomized nature of the questions and answers, all I can tell you is the information is on the walls and out in the open.
- There’s nothing difficult, it’s a simple process of elimination to track down and locate the right answers.
- As per the sign, “When questions are answered, read answers vertically. Four numbers will appear, enter left to right.”
- Do this, and you get your numbers.
- Enter the code into the keypad and if it turns green, go back to the portal you entered to go back into the lab.
Simon Says puzzle solution
- Another portal is active in the Research Lab, so make your way into it.
- Go into the Domino structure in front of you to find a game of Simon Says inside on the wall.
- Again, this is randomly generated, and you may need to write down the sequences to progress if you can’t remember them.
- Input the sequences exactly as they appear, and once the final pattern is done, go back to the Research Lab.
Poker puzzle solution
- Venture into the third portal, go to the stack of poker chips, and my best advice is to either write down every single note from all the cards or take screenshots using your phone or computer.
- Compile all the information together into one handy-to-read source, and it’s time to solve each large “Player” puzzle scattered around the table.
- The “Scoring Examples” tell you the value of cards and what they do—and to make things a bit easier, you can always make yourself bigger again in the research lab to see each player’s hand more easily!
- Use the information at hand, and once you have three codes, go to the briefcase in the middle of the area and start entering codes for each Player.
- You’ll know a code is correct if the light next to the code flashes green.
- The briefcase opens if all three inputs are correct, you can push the button inside and head back to the lab.
Buildings Blueprints puzzle solution
- The final portal takes you to a street of blocks (reminiscent of LEGO) where you need to go inside the building at the end of the street.
- A notice addressed to Evelyn (from Michael) is on the platform in the middle of the room telling her to “buy the three cheapest ones” and put them in order of “cheapest first.”
- Check every blueprint in the room and note down the prices.
- Identify the three cheapest Blueprints, and put them in order from cheapest to most expensive.
- Starting from the cheapest Blueprint, press the colored buttons in order, and each button gives the Blueprint a different colored hue—and also reveals a letter.
- Using all three buttons, each Blueprint gives you three letters. So take three letters from all three Blueprints to get nine in total.
- The letters aren’t in any order, so you need to rearrange the nine letters to get a word.
- I recommend using World Unscrambler to save you the trouble.
- With the nine-letter word in hand, type it into the password reader, and if correct, a door opens in the lab.
Pipes puzzle solution
- Inside the new room saying “There is no escape. You cannot win,” pick up all the tools on the floor: Chain Cutters, Sledgehammer & Wrench.
- First, use the Sledgehammer to break apart the various pipes in the room until you have all 12 pieces.
- Take out the Chain Cutters and cut the chain attaching the stool to the scoop & dashes workstation.
- Place the stool on the different benches to “Access ceiling.”
- You need to make a circuit covering the sprinklers at each end of the pipe structure.
- Once this is done, walk over to the periodic table, equip the Wrench, unscrew the bolts, and take the “The Game Room” sign.
- Place the sign on the contraption next to the periodic table on the bench.
- This triggers gas, letting you escape through the Fume Hood machine!


Published: Jul 10, 2024 12:16 pm