
You can actually fly in Star Wars Jedi Survivor, and I’m not talking about boarding your Mantis starship and flying from planet to planet. There are certain points in the game where you can fly with the aid of airborne beasts.
The first such point occurs when you meet a Relter during the “Reach the Forest Array” objective. The flight controls aren’t particularly complicated, but they’re not what I’d call intuitive either. Thankfully, this guide has everything you need to take to the sky.
How to fly with a Relter in Star Wars Jedi: Survivor

As mentioned above, you’ll meet your first tameable flying beast while you’re on your way to the Forest Array. The Relter is actually at the very end of the Bilemaw Den region of the Basalt Forest on Koboh. After you make your way through the Bilemaw Den (picking up all three collectibles on the way, I hope), you’ll traverse various vines and branches until you reach a high clifftop.
Related: How to tame the Nekko mount in Star Wars Jedi: Survivor
On that cliff there’s a Relter. BD-1 will approach the Relter, and you’ll experience a flashback to when Cal Kestis learned that he can’t fight his way out of some situations. This flashback essentially unlocks the “tame beast” ability, and when you return to the present, you’ll be prompted to press R1/RB to tame the Relter. So, do that.
Star Wars Jedi: Survivor flight controls guide
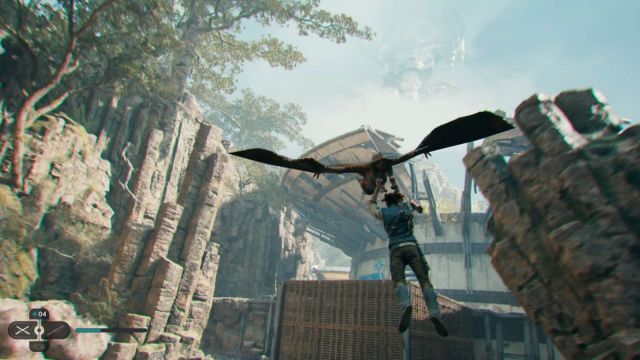
Once you’ve tamed the Relter, it’ll be marked as a “friendly creature” on your map, and it’ll obediently hover just above head height. To mount the Relter (although you don’t exactly mount it if you ask me), simply press X/A when standing under it. This will make Cal jump and grab hold of the Relter’s feet in much the same way as he jumps and grabs hold of ziplines.
The Relter will immediately begin flying straight ahead and, while the game will tell you how to change the inversion controls in the settings, it’ll offer no further pop-ups regarding flight controls. The basics are fairly intuitive, but there are some details that aren’t immediately obvious.
You mostly control the flight of the Relter using the left stick, but the right stick plays a part too. The tricky part is that at first, it seems like the left stick makes you fly up and down, but that’s not actually true. While there is some up-and-down movement, it’s actually more like accelerating and braking. And for that reason, the “Invert Y Axis (Flight Controls)” settings are wrong. It should actually invert the right stick, but it inverts the left one.
I would suggest that, whether you normally invert the Y axis or not, you do so for the flight controls in Star Wars Jedi: Survivor, and think of the left stick as controlling “forward and back” rather than “up and down”. This will come naturally to a lifelong Y-axis inverter like me, but not so much to others.
To actually fly your Relter up and down, you need to point up and down using the right stick, then push forward on the left stick (with the Y axis inverted). In this way, you can ascend without losing speed. Annoyingly for us Y-axis inverters, it’s not possible to invert the Y axis of the right stick in the flight controls. So basically, flying in Star Wars Jedi: Survivor is a little awkward whether you usually invert the Y axis or not.
The only other flight controls are holding R2/RT to dive, and pressing Circle/B to let go of the Relter’s feet. I don’t recommend doing either of those during this first flight though. Just aim up with the right stick and accelerate with the left stick while steering gently to the left. That way, you’ll get back to the Forest Array in one piece.


Published: May 4, 2023 08:11 am