Sea of Thieves provides players with several activities on the open sea, including the numerous puzzles you encounter throughout the game. One puzzle in particular is the riddle on the island of Crook’s Hollow.
Crook’s Hollow location
Before you get started with the puzzle you have to come across the riddle itself. Unlike Tall Tales like Shores of Gold, riddles are random drops you have a chance to come across by completing nearby voyages. Your best chance to find one would be in a bottle on the shores of a nearby island. Once you come across the map, this is the riddle you will get.
After mutiny and plunder, now come to rest,
on Crook’s Hollow to hide my chest
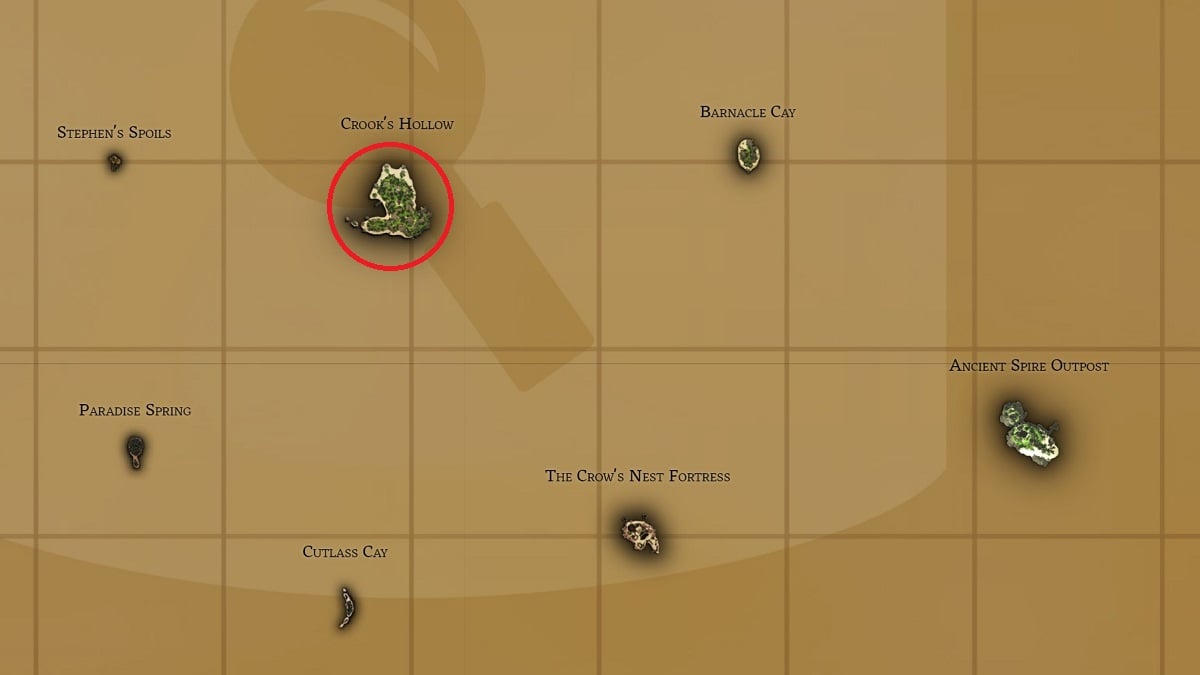
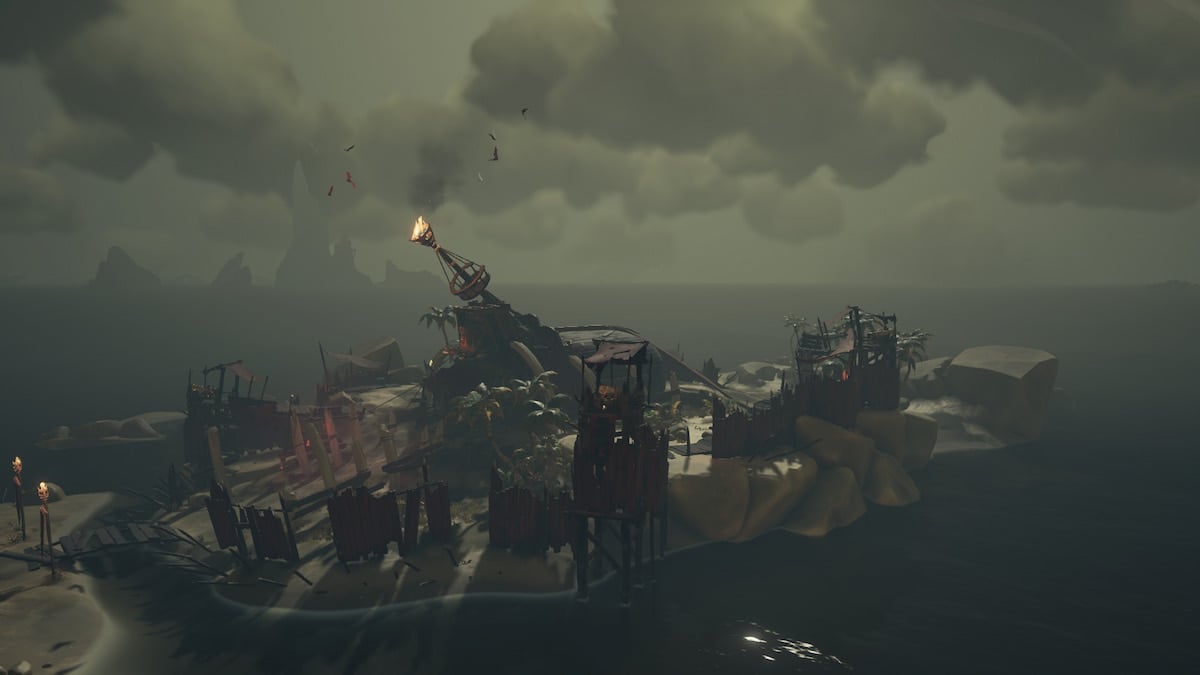
The riddle will point you to Crook’s Hollow, which you can find marked on the map above. The best way to get there would be to start from Ancient’s Spire Outpost and make your way west or Plunder Outpost and make your way northeast. Whatever route you take, you will eventually end up at Crook’s Hollow, in quadrant Q19.
Solving the Crook’s Hollow riddle
The Crook’s Hollow riddle has four parts, and solving all of them will get you to your reward. Each part has its own mini-riddle to solve and once you do, you will be led to the next part of the main riddle. This is how you solve each part of the Crook’s Hollow riddle.
Part one
The first part of the riddle reads as follows:
The Endless Lizard painting, where the light is murky,
dig six paces south-by-southeast, a treasure’s lurking
The solution to this puzzle is finding the painting of the Endless Lizard. “Where the light is murky” indicates a dark place that light cannot reach, so in this case, a cave. With several caves to choose from on this island, finding the right one can be tricky. To easily find the location, land on the western shore and head inside the bay. Drop off here and make your way to the nearby giant cave.
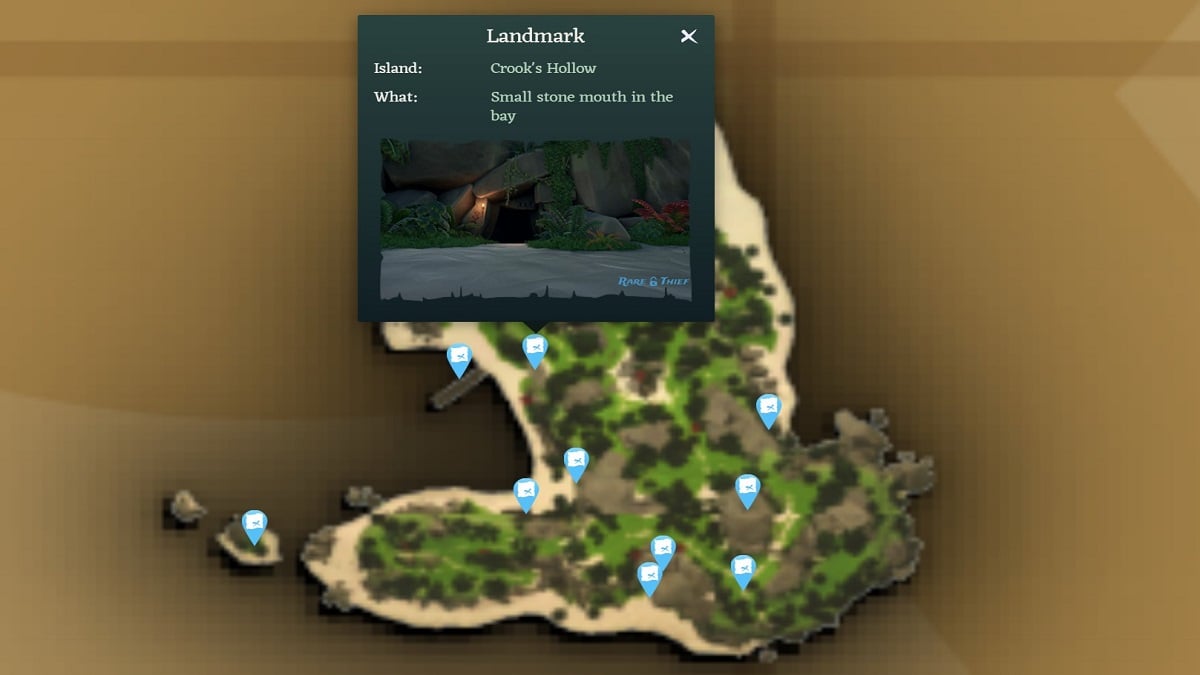
You will know you are in the right cave when you go deeper and find a skeleton on a wall next to an old campfire nearby. From here, look towards the wall opposite the skeleton to find a painting showcasing two lizards. This is your landmark for the first part of the puzzle. Face the painting and open your compass.
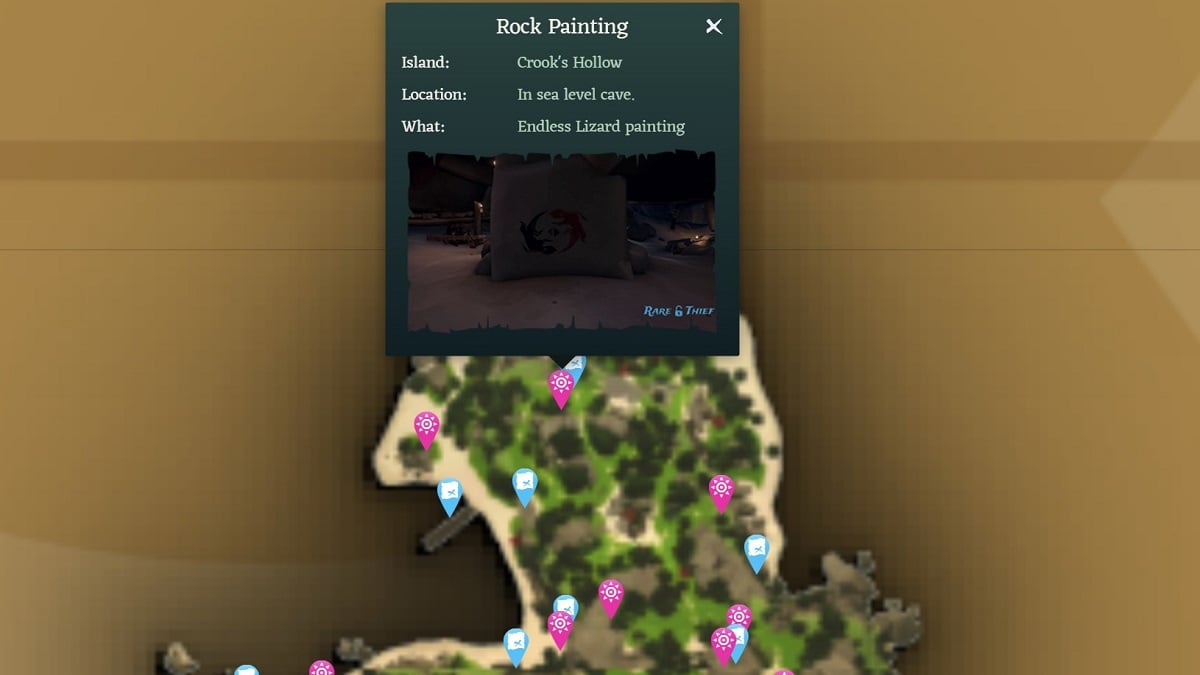
Move around with the compass open until you’re facing the direction exactly in the middle of south and southeast. Then look down at your feet and walk six steps ahead, but try not to run to be more accurate with your steps. When you reach the end of your steps, you should be right on top of the treasure, so dig away until you find it and the next clue.
Part two
Onto the second part of the riddle, as follows:
The cavern campfire, where there is little light
seven paces east-by-southeast, dig gold ye might
This puzzle is easier to solve than the last one because you have already been here before. You need to go to the weathered pier shown below and make your way back into the original cave, except the instructions to find this one is a little different. Keep going towards the same skeleton propped up against a wall with the campfire next to it.
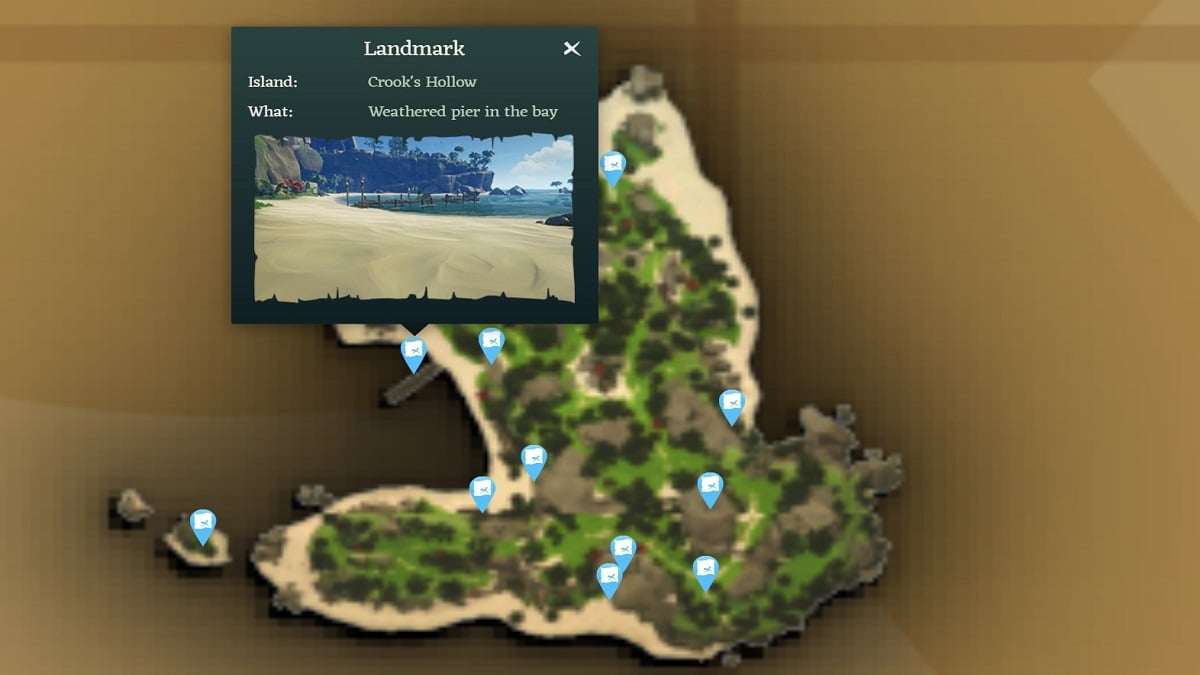
As the puzzle states, “The cavern campfire where there is little light” indicates a campfire that has almost died out or is extinguished. The campfire you are at right now fits that very description, so it’s time to take out your compass and begin pacing once again. Adjust yourself so you are facing the middle of the east and southeast directions and take your steps forward.
Seven steps later, you should reach the spot you’re looking for, along with a clue to the third part of the riddle.
Part three
The third part of the riddle deals with some feisty crustaceans:
At the dueling crabs on the southwest beach, ye are almost there,
nine paces northeast, dig treasure bare
As is with most riddles, they’re not meant to be taken literally. What you are supposed to be looking for are not two crabs fighting, but a painting of the crabs instead. Just like before, stop at the weathered pier from the previous two clues and walk along the coastline leading southwest. Keep going until you reach a sandbank just outside the main island.
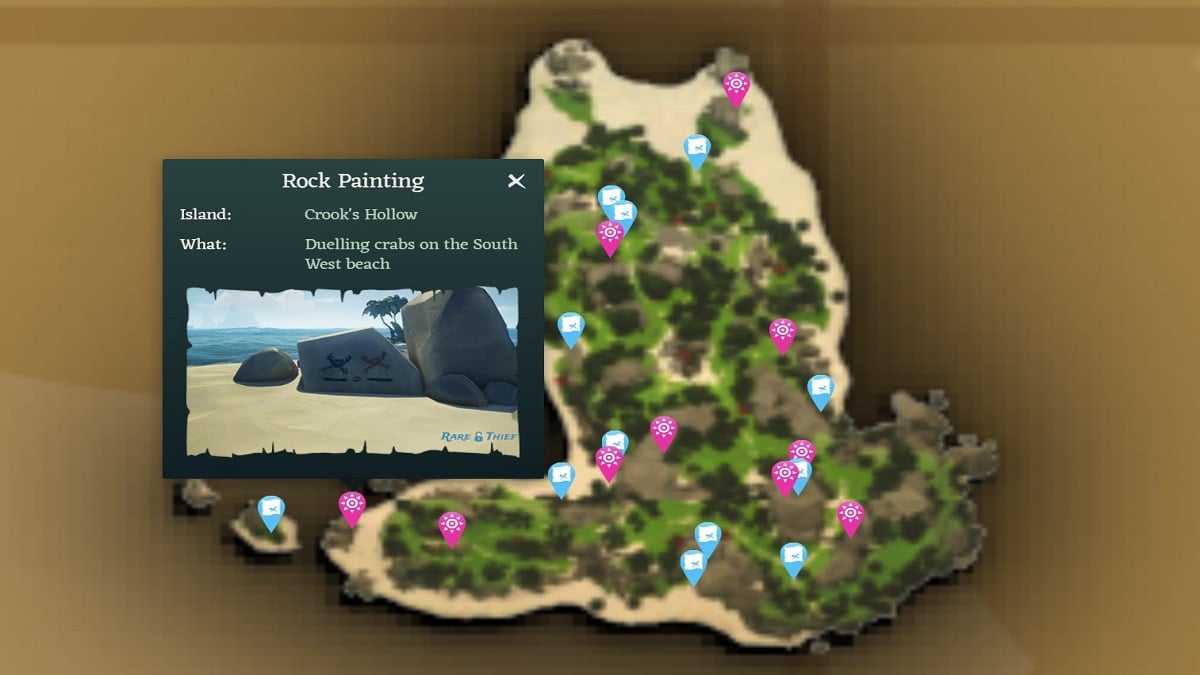
From this spot, go east and look around you until you find a clustered group of rocks. You’ll know you have the correct rocks when you notice the painting of the dueling crabs on one of them. One of the crabs is red while the other crab is black. From this spot, follow the rest of the clues by looking exactly northeast with your compass and walking nine steps ahead.
Once you reach your spot, dig the ground for your treasure and the final clue of the riddle.
Part four
The fourth and final part of the riddle will lead you to what you are looking for:
Seek the beetle at the crossing of ways, where there is no sky,
it lies in wait for sweet music’s cry
The last clue will take you away from the coast and through the cave systems till you get to the center of the island. It doesn’t matter which cave you take; with enough trial and error, you should get to the spot marked below. For convenience’s sake, we recommend taking the western entrance that lies to the southeast of the weathered pier and making your way to the spot shown below.
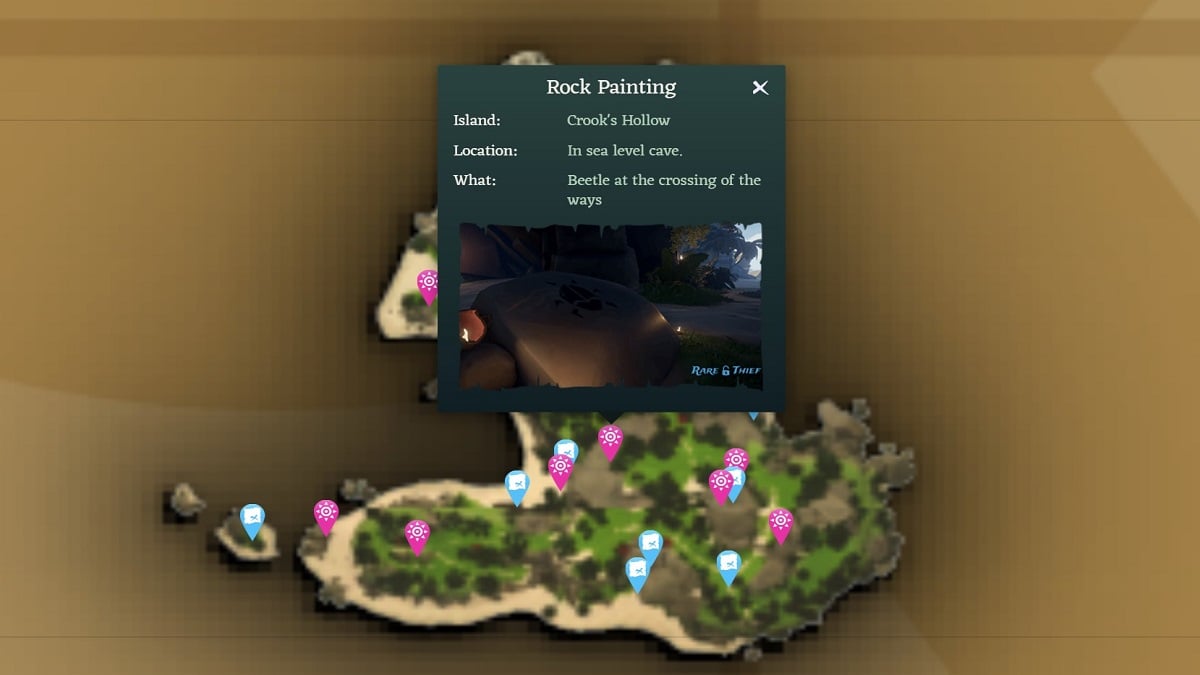
This time, what you’re looking for is the painting of a beetle. Keep traversing to the central part of the tunnels to make your way here. It’s at the lowest level of the island so it shouldn’t take you too long to get to this point. Once here, look at the ground for the painting of a black beetle. The exact spot is indicated by a large rock with candles next to it.
Once you find the beetle, there’s no need to dig. The clue states “it lies in wait for sweet music’s cry,” indicating you must play an instrument here to complete the riddle and solve the puzzle. Do so and collect your reward for a job well done.




Published: Jan 29, 2024 11:30 am