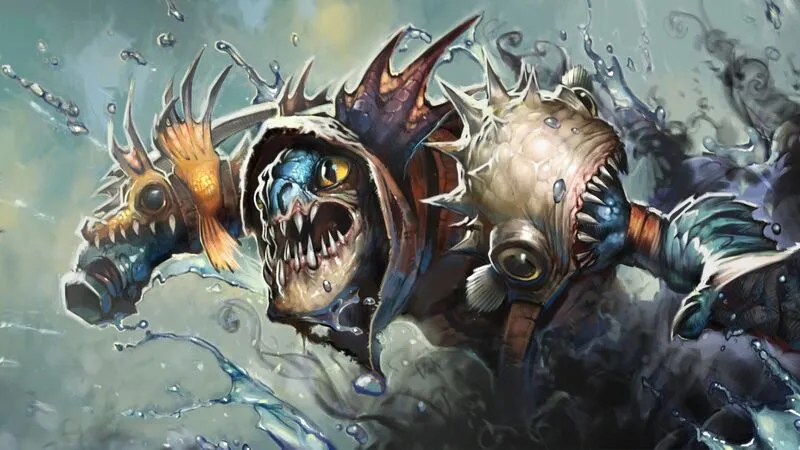
Looks don’t tend to be that defining in MOBA games. Slark may be one of the shortest members of Dota 2’s hero pool, but he can surely punch hard enough to bring down the tankiest characters when itemized correctly.
Slark has been a nightmare to play against for support players, and the hero hasn’t lost that reputation after years of changes. While he’s as vulnerable as any other hero, he’s potentially the most hard-to-catch one in Dota 2. His kit includes a purge, an ability that makes him leap forward, and an ultimate that lets him hide in the shadows to regenerate health.
Getting rid of Slark requires an immense level of team coordination, something that’s hard to come by in lower MMR brackets. Mastering how to build and play Slark can easily be your ticket way out of the trenches since he can easily dismantle teams with his overall power level.
Slark is usually played in the safe lane as the position one/hard carry. It’s also possible to lane him in mid against favorable opponents, but Slark does considerably better with some level of lane assistance. His ability to self-sustain allows his supporting cast to roam freely around the map, and he can always farm the jungle quickly if things go south during the laning stage.
When gold becomes no object, you’ll need to know what items Slark needs to reach his full potential. Though you’ll need to make decisions based on the enemy team’s heroes sometimes, Slark’s core build revolves around the same philosophy—and that’s stacking attributes.
Slark’s skill build
| Level one | Essence Shift |
| Level two | Pounce |
| Level three | Dark Pact |
| Level four | Dark Pact |
| Level five | Dark Pact |
| Level six | Shadow Dance |
| Level seven | Dark Pact |
| Level eight | Essence Shift |
| Level nine | Pounce |
| Level 10 | First Talent Upgrade: +9 Strength |
| Level 11 | Pounce |
| Level 12 | Shadow Dance |
| Level 13 | Pounce |
| Level 14 | Essence Shift |
| Level 15 | Second Talent Upgrade: +15 percent Lifesteal |
| Level 16 | Essence Shift |
| Level 18 | Shadow Dance |
| Level 20 | Third Talent Upgrade: +120 Dark Pact |
| Level 25 | Fourth Talent Update: +65 Essence Shift Duration |
Slark’s first ability, Dark Pact, may look like self-sabotage since it also hurts, but it’s an amazing damage source and helps Slark farm incredibly fast without any farm items. If things are going worse than expected during the laning stage, you can try to survive until you hit level six and start clearing the jungle with Shadow Dance’s passive.
Slark’s first talent upgrade may look like a head-scratcher, but you can’t put a price on three more attributes even though it’s something other than agility. Considering how squishy Slark can be when caught, he’ll need the extra strength.
Slark’s item build
Starting items
Slark’s main goal is to kill as many creeps as possible during the laning stage. His starting items reflect this, but you can always cut the Quelling Blade for more stats if you know that you’ll be playing against a lane that you can secure easy kills.
Quelling Blade + Two sets of Tangoes + Healing Salve + Slippers of Agility


Quelling Blade is the priority weapon of any carry hero that’s looking to last hit creeps. Two sets of Tangoes and the healing salve are more than enough for Slark to survive the lane, but you may need to bring more regeneration items to the lane via the courier when facing aggressive duos.
Slippers of Agility can be replaced by two Iron Branches against lanes that spam spells since you’ll be able to build it into a Magic Stick faster.
Early game
The early game starts right after the horn blows and lasts until around the 20-minute mark, depending on the game’s pace. You’ll be focusing on items that offer the most value for the price during this stage of the game since you’ll need to survive through the first teamfights to farm more expensive items toward the late game.
Phase Boots

Phase Boots offer the most aggressive attribute-line for Slark and suddenly turn him into a threat during the laning stage. You should be able to complete your boots before the 10-minute mark, and you can time their arrival to secure a surprise kill, putting your power spike to use.
Phase Boots’ active ability helps Slark chase down heroes and make it slightly easier to land his second spell, Pounce. These boots also provide armor and give 18 extra damage to Slark.
If you sense that your match may turn into a farm-fest and you may not get to fight that much in the next 15 minutes, you can also opt-in for Power Treads, which are better for farming.
Orb of Corrosion

Orb of Venom has been quite a popular item for heroes that needs to stack up hits on targets during the early stages of a match. The main reason why most tried not to pick it up was because it didn’t build into anything useful.
The Mistwood patch changed this, however, and the Orb of Corrosion uses some of the most effective early game items and combines them into a single slot. You’ll need an Orb of Venom, Blight Stone, Fluffy Hat, and a recipe to bundle them all together.
The end result combines all of these listed items’ effects, meaning the Orb of Corrosion can slow enemies on hit while reducing their armor and dealing damage overtime.
Wraith Band

If you start the game with Slippers of Agility or a Circlet, make sure to complete your Wraith Band. It gives decent attributes, armor, and attack speed, making it a no-brainer to have in your inventory during the early game.
Magic Wand

Even if the enemy team doesn’t have a Skywrath Mage or Zeus, a Magic Wand will always be super-charged whenever you need it the most. It can let you get away to safety with close to zero hp or help you secure that one last kill with a slight mana boost.
Diffusal Blade

More often than not, Diffusal Blade will be the first item you’ll want to have on Slark. It’s cheap and comes with a clutch active ability that slows enemies. It also drains a small portion of Slark’s targets’ mana.
Considering Slark starts hitting like a machine gun toward the end of a game, he’ll empty most heroes’ mana tanks in no time.
Mid game
Sange and Yasha

Slark is all about value items that give him the most for the gold they cost. Sange and Yasha used to be a laughable item, but it has become a stable piece of most heroes’ builds with the changes it received.
In addition to its basic attribute bonuses, Sange and Yasha offer status resistance. Status resistance decreases the duration of most status debuffs and slowing abilities. When this gets combined with how slippery Slark can be, it turns into a must-have item against most lineups.
Black King Bar

Though Sange and Yasha reduce the duration of stuns and slows, it may not be enough to save Slark in a teamfight. If you’re playing against a lineup with too many stuns and slows, making it impossible for you to survive in skirmishes, you may need that urgent Black King Bar to make sure you contribute enough to your team’s success.
Black King Bar doesn’t offer the best attributes for its price, but its active ability that makes heroes immune to magic damage and effects makes it one of the best teamfight items in Dota 2.
Late game
Satanic

Late-game teamfights are mostly about lasting longer than your enemies. Slark will always have his ultimate to fall back and regenerate health, but doing that won’t be possible in the game’s later stages.
You’ll need to regenerate while the fight is happening, and Satanic is the perfect item to do just that. It gives Slark a passive 25-percent lifesteal and comes with an active ability that boosts his lifesteal to 200 percent for five seconds.
Combining your Satanic with your Black King Bar or Shadow Dance will guarantee that you’ll return back to full HP, unless you get blackhole’d by an Enigma during the process.
Eye of Skadi

If you’d like to continue stacking attributes, no better item can do it than the Eye of Skadi.
Skadi makes Slark even tankier and allows his attacks to slow his targets. This passive ability can come in quite handy if you’re having a tough time chasing down opponents.
Skull Basher/Abyssal Blade


You’ll usually need to decide between getting an Eye of Skadi and a Skull Basher, but there’s nothing wrong with getting them both either.
Basher grants a 25-percent chance to stun enemies with auto attacks to Slark, making it a viable option if you’re looking to lock down enemies.
It can also be upgraded to an Abyssal Blade, which brings more tankiness to the table and an active ability for a guaranteed stun.
Situational items
You can opt-in to get any of the following items throughout the later stages of the game since Slark’s needs may change drastically upon who he’s facing.
Monkey King Bar

It’ll be challenging for Slark to go up against a carry hero with evasion. Monkey King Bar grants Slark a 75-percent chance to pierce through evasion, allowing him to deal the most amount of damage possible.
Moon Shard

Moon Shard is the ultimate value pickup during the late game. You probably won’t have slots to carry it in your backpack, but it’s not a problem since it’s best that you consume it.
Consuming a Moon Shard will grant you a passive attack speed buff, giving you a nice power boost in the late game.
Butterfly

When playing against heavy-hitting cores that don’t look like they’re planning to get Monkey King Bars, you can make their life more difficult by purchasing a Butterfly. It offers a decent chunk of agility, attack speed, and evasion.





Published: Jan 15, 2021 01:42 pm