Destiny 2‘s favorite mysterious intergalactic Exotic merchant is back with a new activity for guardians in the game’s 30th Anniversary Pack. Xûr is bringing his own gameshow-esque activity called Dares of Eternity, which is free to all players and brings a new set of rewards.
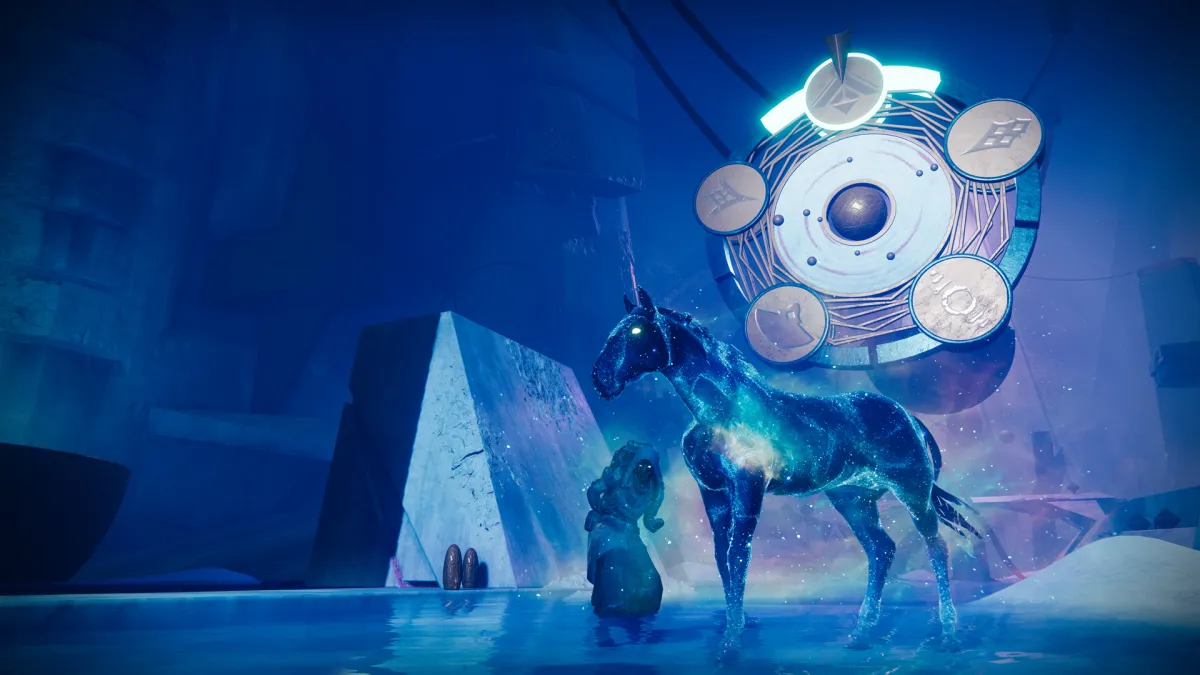
Xûr has a co-host in his own sideshow, a cosmic horse—fittingly named Starhorse—that runs the event. Starhorse seems thrilled by your progress throughout the journey, and the chat narrates Starhorse’s reactions to your endeavors. This cluster of elements makes Dares of Eternity a fun experience that bends the rules of logic and reality, in typical Nine (the mystical beings who run the dungeon) fashion.
Here’s how to complete Dares of Eternity to get your rewards.
How to complete Dares of Eternity
Much like Season of the Lost’s Astral Alignment, Dares of Eternity has a set formula, though it varies depending on your luck and whatever encounters the game throws at you. The activity has enough variety that it may take a few runs until you see them all, and the rotating wheel makes it a more exciting endeavor than watching Drifter spin motes around as you cross your fingers and hope it’s not Hive.
Since Dares of Eternity also brings Champions depending on the faction, make sure to have a few mods or weapons with intrinsic anti-Champion capacities. Divinity, for instance, will instantly stun Overload Champions, and also helps with debuffing priority targets now that Breach and Clear is gone (and will be missed).
Spin the Wheel
You’ll spawn in an opulent area with holographic chests (they’re not real, so don’t try to interact with them). Xûr and Starhorse sit on either side. When you’re ready to start, or when the first member of your squad pulls a Leroy Jenkins, head through the portal and you’ll come out on an area that bears a striking similarity to Europa, which will be full of Taken. This is almost like a warm-up—think of them as the Scorn before starting Astral Alignment. After you clear them out, you’ll have to spin a wheel that will determine what enemies you’ll face.
There are five different enemy types: Cabal, Hive, Fallen, Vex, and Taken. Scorn sit out of the rotation, meaning players don’t have to worry about Abominations or Screebs.

The first part of the mission will be to just take down the enemies, while the second part will give you a specific objective.
- Hive: Use the Power of the Hive Wells to destroy the Crystals
- Take out powerful enemies to spawn Hive Wells. Walking through them gives you the Ruinous Resonance buff, which lets you damage the crystals.
- Fallen: Defuse the Fallen Mines
- A fairly straightforward mission, just defuse the bombs like you would in the Warden of Nothing strike. Just be mindful of Explosive Shanks and Brigs that will try to stop you.
- Cabal: Defeat Bombtenders and use their Dare Cores against their Commanders
- Enemies called “Bombtenders” will show up. Take them out and throw their cores at the minibosses to destroy their shields—then destroy them.
- Taken: Throw Paracausal Energy at the Taken Blight
- Killing specific enemies will drop orbs. Take those orbs and hurl them at the big Taken Blight nearby until it’s destroyed.
- Vex: Remove Gatekeepers’ Shields with Heads of Headbearers
- Enemies called “Headbearers” will spawn. Killing them will drop a Void Cranium, which you can use as a laser beam to melt the Gatekeepers’ shields.
To complete whatever objective you receive, keep track of Champions and make use of the buffs lying around in the arena, which can help with mobility, grenade recovery, or even give you Super energy.
Continue on
After you finish the first part, Xûr will beckon you towards the next section. To get there, though, you’ll have to go through a short, Fall Guys-esque obstacle course. The route isn’t complicated, but it can be frustrating with you being shoved around. Keep in mind that the seemingly straight path ahead of you is actually a moving platform. If you succeed without falling down, you’ll get a buff called Starhorse’s Favor, which increases your defense and regenerates your heavy ammo, so learning to navigate the path will be essential.
After making your way through the course, you’ll spin the wheel again, and another round of challenges will begin.
Round two and the doors
After you spin the wheel the second time, you’ll summon another batch of enemies to fight. This part will be basically the same as the first round, though in a different arena. After you finish the objectives, you’ll also face a miniboss that hinges on the same mechanics for the first round.
Finishing this section will give you a guess between three factions. One of them will be your boss, and players who guess it correctly will receive Starhorse’s Favor. To make a decision, stand in the circles in front of each door.
Final Boss
The boss fight will also bring a series of mechanics depending on each enemy type. Here are the ones we’ve encountered so far:
Zydron, Gate Lord (Vex)
The fight against Zydron is fairly simple. The first step requires you to avoid his Walls of Detainment, which will detain you on touch; you can break out of the bubbles by shooting them, though. After that, you’ll break his shields with drops from other enemies and damage him. Make use of the Super powerups in the arena.
Crota, Son of Oryx (Hive)
This boss fight follows the Sword Logic—find a sword, then use logic. After you kill the marked enemies, they will drop Hive swords like the ones in Pit of Heresy. Use those to damage the boss. After a while, Crota will summon Aspects of him, which are essentially copies of the boss. Repeat the process to damage them with the Hive swords (they’re impervious to damage otherwise), but keep an eye out for Edgekeepers. If you take those out, you get a bonus to damage against Crota, which will help raise your damage output.

Published: Dec 7, 2021 07:53 pm