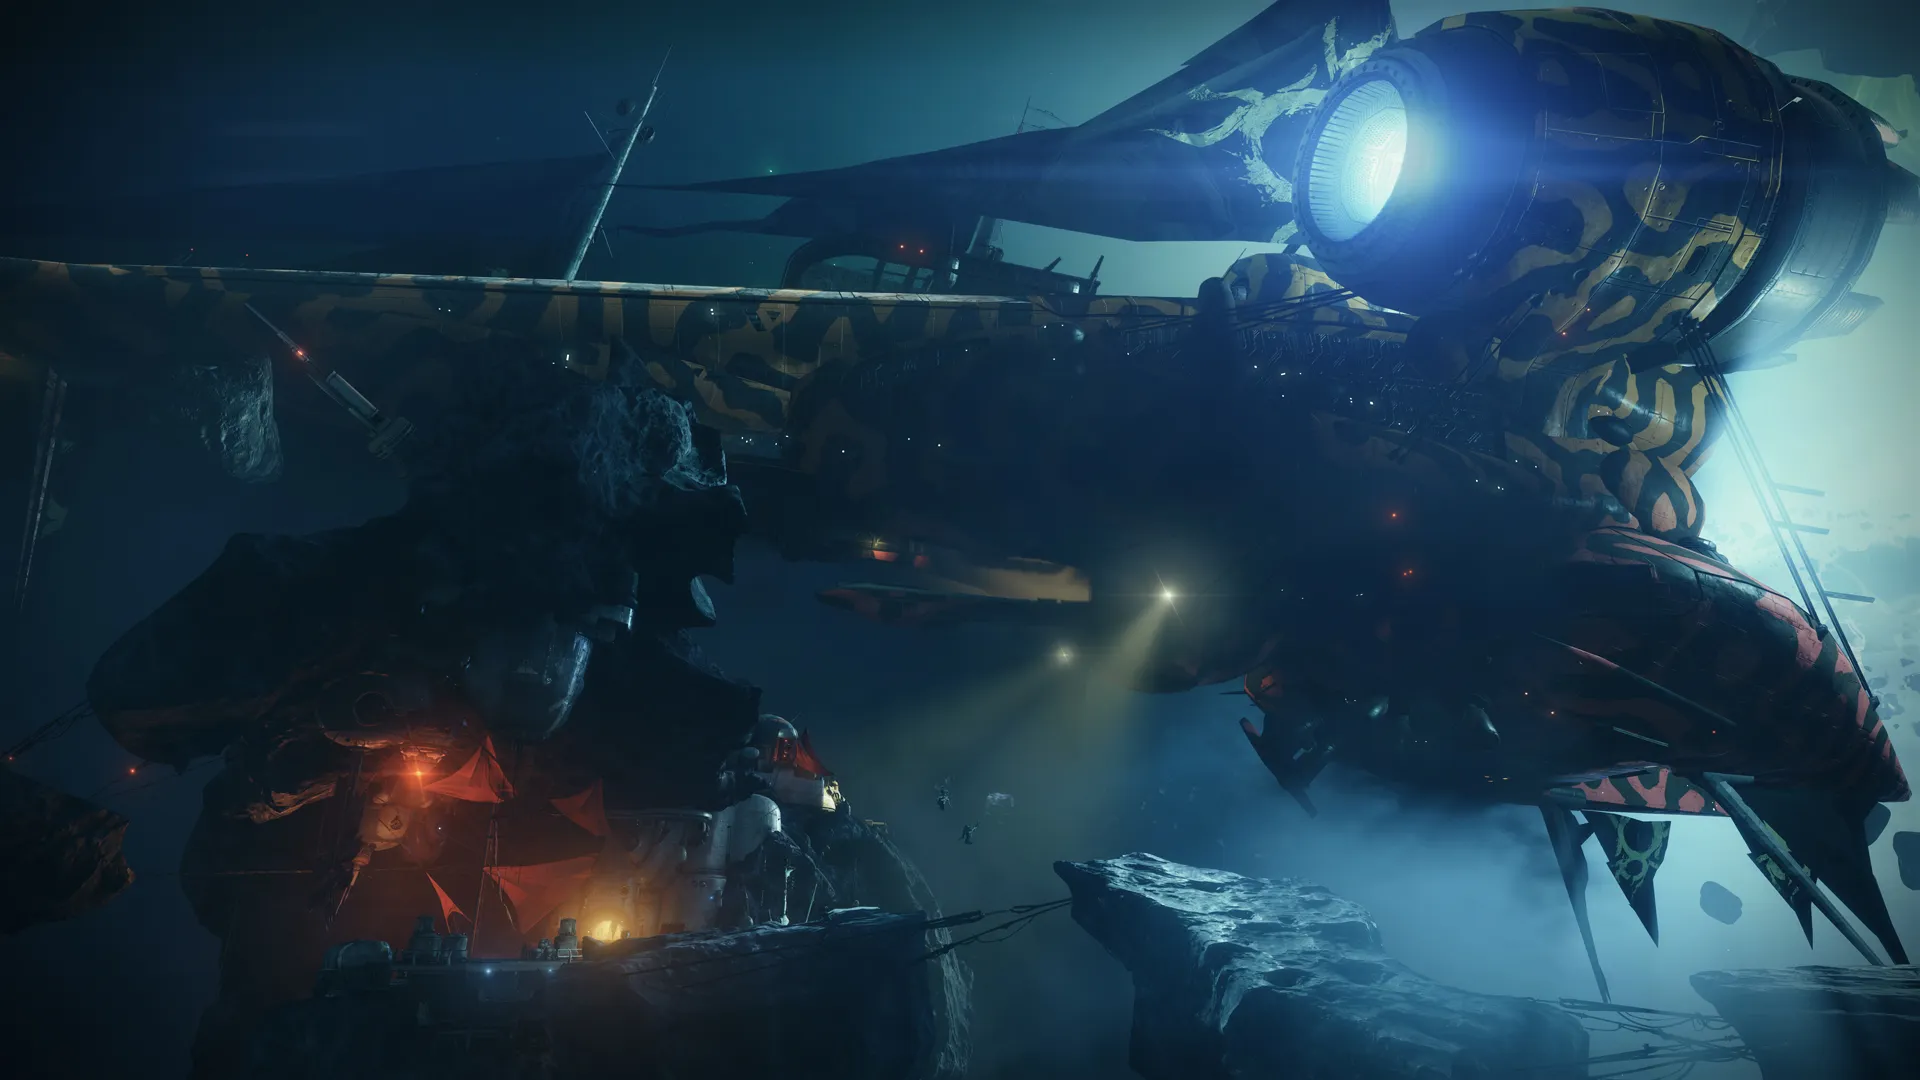
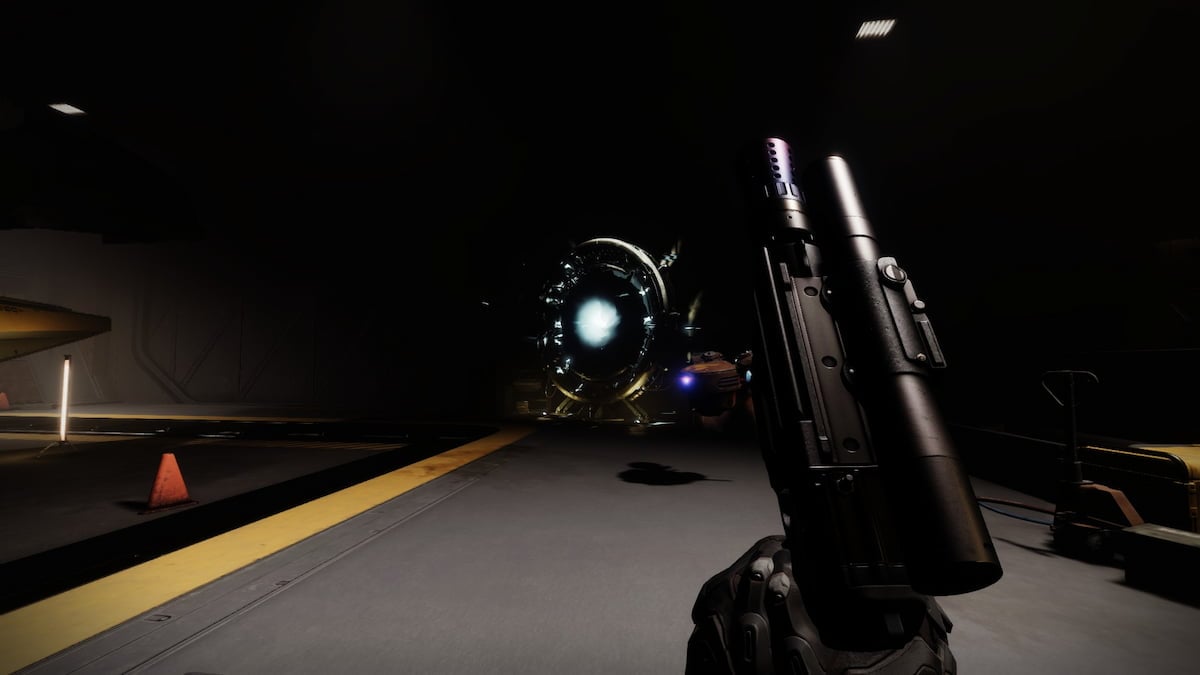
Destiny 2’s Season of Plunder has all the hallmarks of a classic pirate adventure: ship-to-ship combat, buried loot, pirate lords to take down, and a ragtag crew to hire. All that was missing was the mysterious riddles leading to hidden treasure, which Season of Plunder now has through the Cryptic Quatrains quests.
The Cryptic Quatrain quest is split up into multiple parts, with each available at the Star Chart vendor in the H.E.L.M. Each successive part of Cryptic Quatrain requires a certain reputation level to be met through playing the seasonal activities, with part one requiring rank seven, part two requiring rank 10, and part three requiring rank 16.
While parts one and two of the quest award players with fragments of a Crude Cipher to slot into the Captain’s Atlas, part three instead includes what is listed as a “buried Exotic accessory.” That buried Exotic accessory is the key needed to piece together the Crude Cipher fragments, and completion of all three stages of Cryptic Quatrains will reward players with a new Exotic sparrow: Charge of Light. Completion also grants you a triumph needed to acquire the seasonal ‘Scallywag’ title.
But those same riddles might potentially trip up some players in their pursuit of the treasure hidden behind them, so here are our solutions for the pirate riddles in Destiny 2’s Cryptic Quatrains quest.
All pirate riddle solutions for Cryptic Quatrains in Destiny 2
How to complete Cryptic Quatrains I
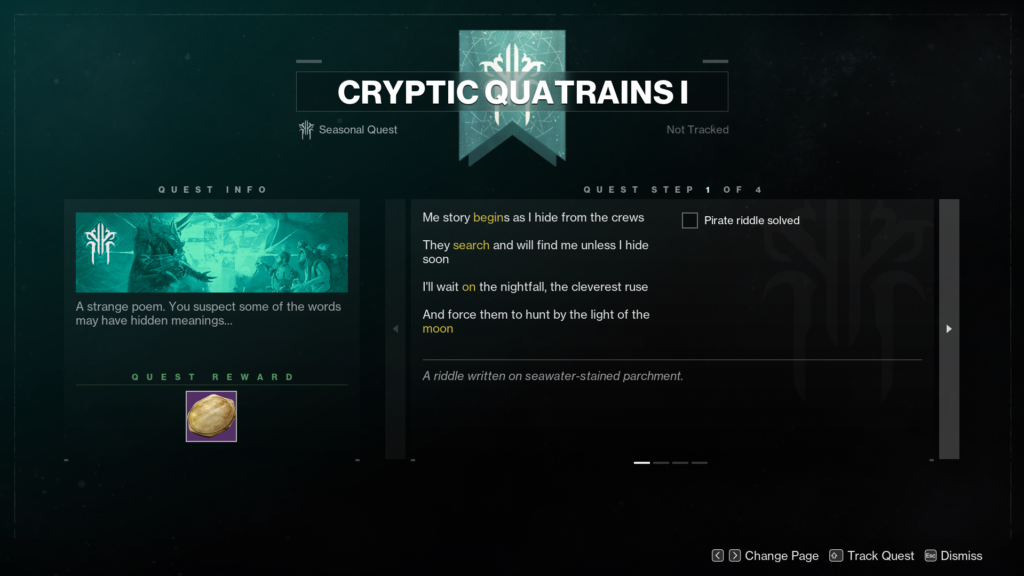
After picking up the Small Treasure Beacon reward from the Star Chart vendor in the H.E.L.M, you’ll be presented with the first of four riddles in your quest inventory. Each of these riddles has purposefully deceptive lines, but the solution is tied to the words highlighted in gold. This first riddle in Cryptic Qautrains I is fairly simple, with the highlighted words lining up perfectly to give you your first step: “begin search on moon.”
To complete the riddle, travel to either of the Moon’s landing zones—Sanctuary and Sorrow’s Harbor—and you will be automatically granted the second step of the quest.

The second riddle gives you a specific location on the Moon to investigate. The highlighted “harbor” and “sorrow” point you in the direction of Sorrow’s Harbor, while “lost” and “revelation” reference Sorrow’s Harbor’s Lost Sector called K1 Revelation. To solve this riddle and get the next step, simply head to the Lost Sector and loot the chest upon completing a run of it. Opening the chest will grant you the next riddle.

Step three of Cryptic Quatrains I will have you completing a Strike. For this riddle, the four highlighted words piece together a clear picture of the intended destination, which is the Fallen S.A.B.E.R strike that is available in the Cosmodrome. Completing this riddle only requires a single run through the strike, the fourth and final riddle will be made available once the strike boss has been defeated and the final chest looted.

Unlike the previous pirate riddles, each solution taking you through a pre-existing piece of gameplay, the final riddle in Cryptic Quatrains I will guide you to the buried treasure that the quest rewards. That buried treasure just so happens to be on Europa, close by to the landing zone in the Eventide Ruins. The highlighted “hook” and “cranes” text references the dormant cranes that surround the entrance to Riis Reborn, all of which overlook the location of the dig site.


The dig site itself is luckily easy to spot once you’re near to its location, donned in the same bright green paint that the treasure spots have in the seasonal Expedition activity. Search the spot marked by the X and you will uncover the first of two Crude Cipher fragments, completing the Cryptic Quatrains I quest.
How to complete Cryptic Quatrains II

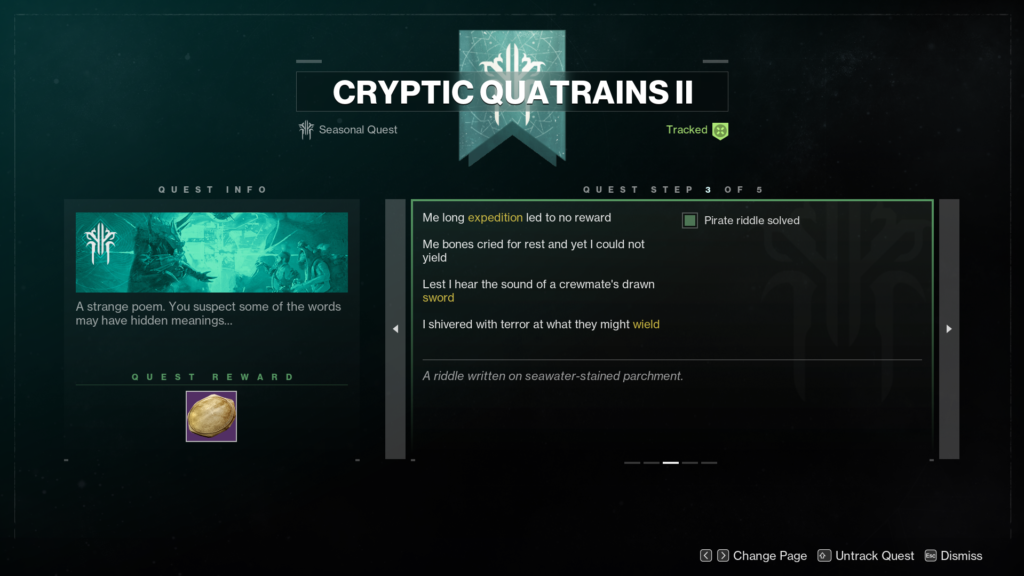
The riddles in Cryptic Quatrain’s second quest follow much of the same patterns as the riddles in the first set, focused on guiding you toward a specific activity to complete. For step one, the highlighted words are pointing you in the direction of the Dreaming City destination. To solve the riddle, head to the Divalian Mists landing zone and head into the Bay of Drowned Wishes Lost Sector that lays directly behind where you load in. Upon completion of the Lost Sector, you will complete the riddle and get the next step.

In a similar request to step three of Cryptic Quatrains I, the pirate riddle in step two of Cryptic Quatrains II pushes you toward another strike. This time, completing the riddle requires finishing the Lake of Shadows strike in the European Dead Zone. Once the boss is defeated and the loot is yours, you’ll have completed this step and can move on to the next one.
Step three’s riddle is a bit more unique than its predecessors, requesting that you both complete a run of the seasonal Expedition activity and do so with a sword equipped. A single Expedition run doesn’t take long though, so slot a map into your Captain’s Atlas, equip any sword of your choosing, and blast your way toward the final reward chest. Once the activity is completed, you will have successfully solved the pirate riddle.


Both step four and step five of Cryptic Quatrains II take place on Nessus, and you can easily go straight from the location of step four to step five afterward. Step four’s pirate riddle hints toward a specific spot tucked away in the tall column that is located in The Cistern—specifically, at the area called the Well of Flame.
On the side of the large column is a pyramid-shaped doorway you can access from the outside. Head over to it, and you’ll find a glowing green “X marks the spot” location that you can search right beyond the entrance. Search it and you’ll acquire the final riddle you need to get to the buried treasure.


The final step of Cryptic Quatrains II finally offers a location for the buried treasure. It’s also in The Cistern, meaning that travel from the location of step four won’t take long, but you’ll be trekking over to the northern area of the patrol sector to reach the “fluid” that fell “from the sky.” By the edge of the Vex milk lake, the glowing location of the treasure can be found nestled just behind a small, dilapidated ‘broken sphere’ on the shoreline. Search the highlighted spot and you’ll get access to the second of the two Crude Cipher fragments.
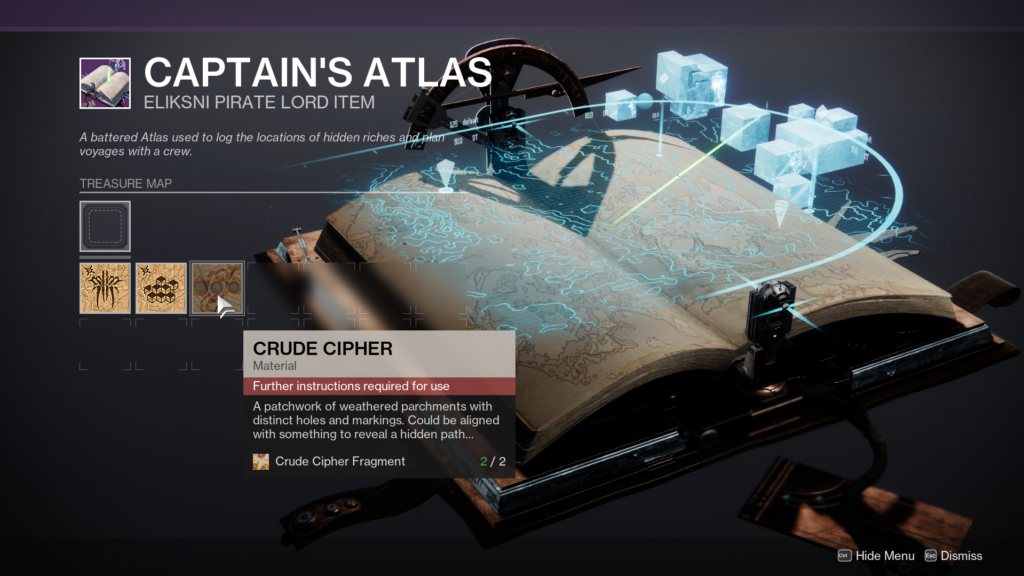
You will now have both of the Crude Cipher fragments in your possession, but the ability to craft a map and location from them continues to be elusive since “further instructions” are required to use them.
How to complete Cryptic Quatrains III


Once you reach rank 16 at the Star Chart, you can pick up the final treasure beacon and put the final pieces in place to acquire your new Exotic sparrow. Part one’s riddle of Cryptic Quatrains III presents you with another lost sector to plunder, this time located in the European Dead Zone. The lost section in question is The Quarry, which is found in the Sunken Isles area to the far north of the destination. Complete the lost sector and loot the final chest, and you’ll be handed another riddle to follow.

The pirate riddle for part two requires completion of the Exodus Crash strike, located on Nessus. You only need to complete the basic difficulty version of the strike, but the “one life to live” phrasing of the riddle means that you must complete it flawlessly to successfully solve the riddle. Any death means you’ll need to try again.
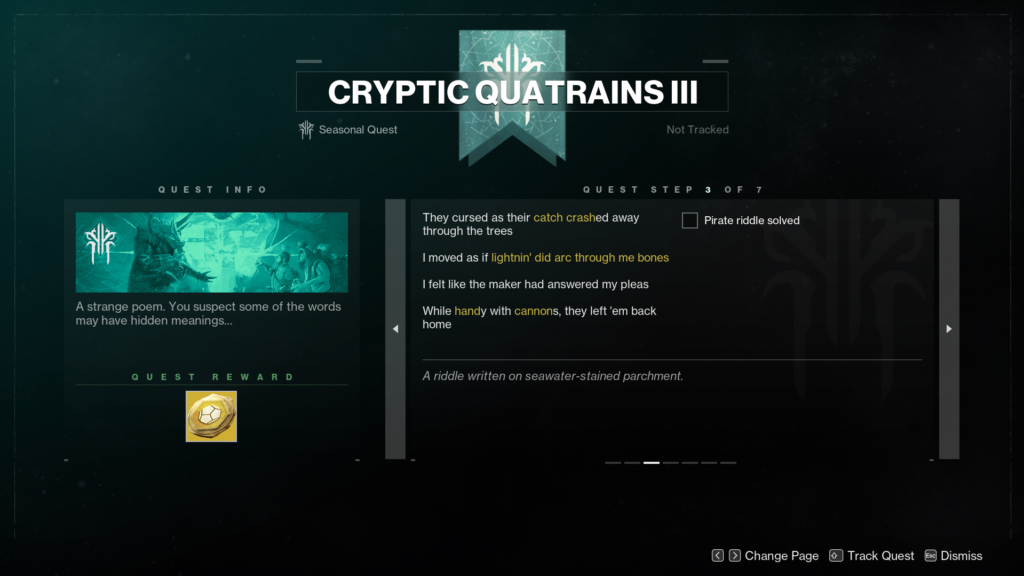
Riddle number three in Cryptic Quatrains III asks you for yet another activity completion, with a new set of modifiers to successfully solve it. This time, it’s a run of the seasonal Ketchcrash activity, and you will need to have both the Arc subclass equipped as well as a handcannon of your choosing. Do both and you will successfully solve the riddle upon looting the final activity chest.


Parts four and five of the quest are interlinked, offering up riddles that detail how to make use of the Crude Cipher fragments that you accrued through the previous two Cryptic Quatrains quests. Part four only requires you to equip the Crude Cipher in your Captain’s Atlas, in the same spot you would usually slot a treasure map.
To understand the location that map is taking you to, though, you will need to slot three Eliksni sigils into it in the correct order. The riddle holds the answer: the House of Dusk sigil slots into the left compartment, House Salvation goes in the middle, and then finally you can place House of Light on the right side. With the Cipher figured out, you now have access to the final set of locations for the buried treasure.


Your first stop is on the southern side of the Forgotten Shore for part six, located in the Cosmodrome. The ship that also houses the Veles Labyrinth lost sector is the one being referred to in the riddle, and you will find the bright green treasure spot atop the front of the boat. Interact with the spot and you will acquire the final riddle and the final location of the Exotic sparrow.


The seventh and final riddle still leads to another location on the Forgotten Shore, but this time on the opposite side of the zone. The cryptic description is leading you to the river that snakes into the Forgotten Shore from the exit in the direction of the Mothyards, and more specifically to the three large pillars that serve as a landmark between it and the road that leads toward the Terrestrial Complex.
Between two of those three pillars is a small cave, and upon entry to the cave, the glow of the buried treasure spot will be immediately noticeable. Interact with the spot and you will have completed the Cryptic Quatrains III quest and acquired the Charge of Light Exotic sparrow.


Published: Sep 1, 2022 02:12 pm