
Whilst you are playing as Saga in Alan Wake 2, there will be various cult stashes scattered across Bright Falls and the surrounding areas that contain useful supplies to help you on your journey.
One of these cult stashes can be found around the back of the Kalevala Workshop in Watery, but you will need to fight back some Taken to open it up.
We are going to be looking at how to open this particular Alan Wake 2 cult stash, as well as what rewards you can get from it and how to best fight off the Taken that will appear.
Where is the Kalevala Workshop cult stash in Alan Wake 2?
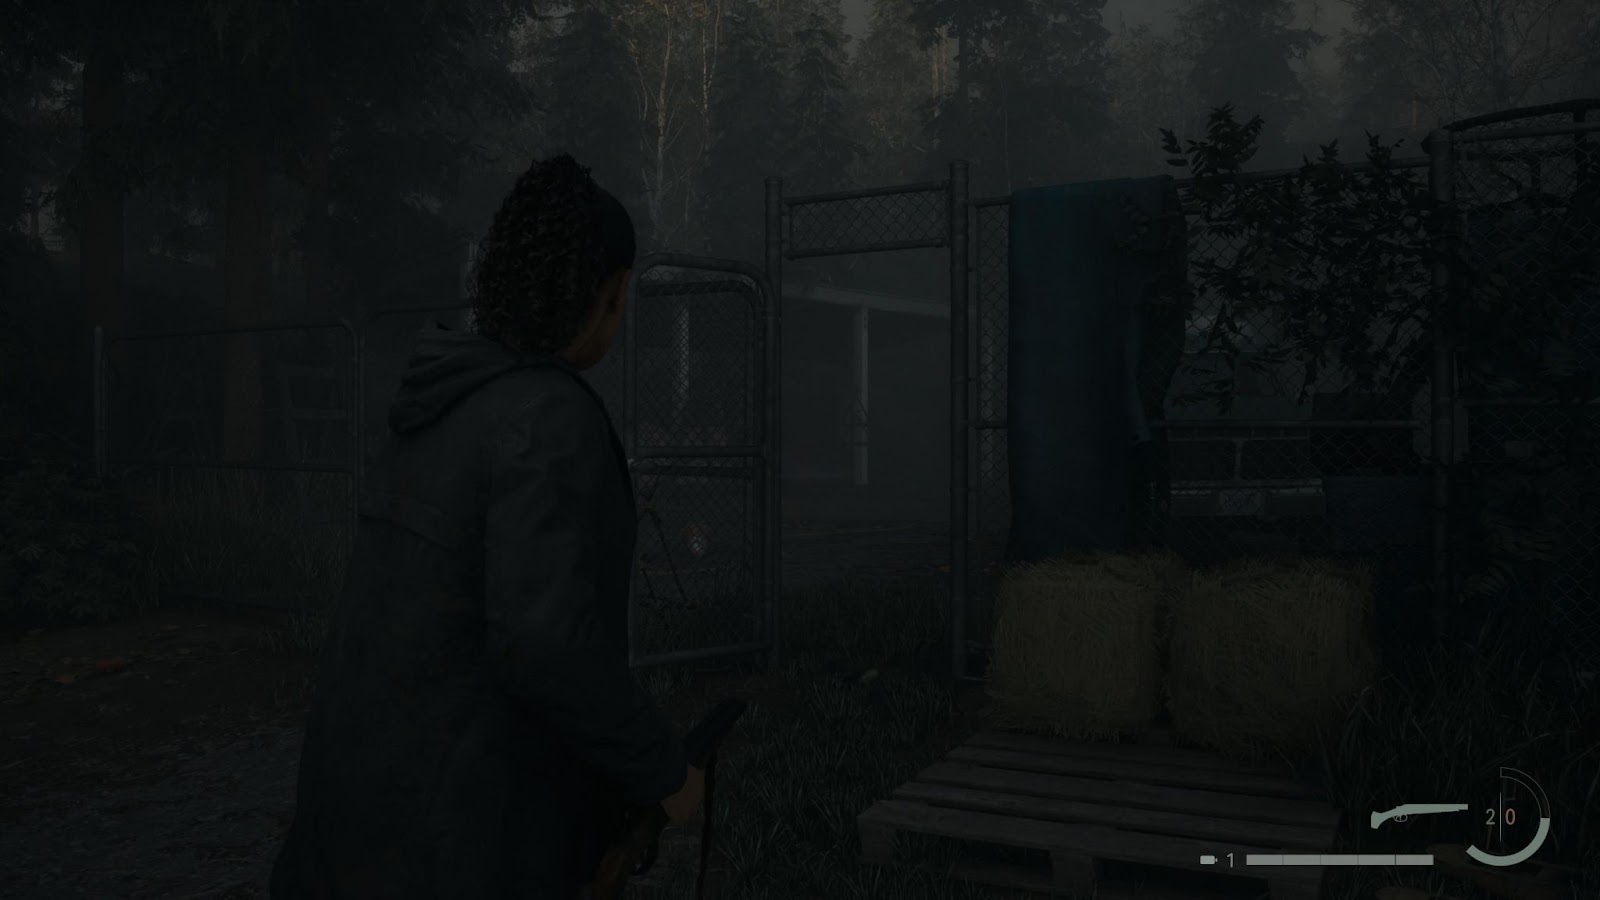
The Kalevala Workshop cult stash can be found around the back of the Kalevala Workshop in Watery. However, you won’t be able to access the area until you have obtained the boltcutters. You will gain access to this tool once you have completed the part of the story that takes Saga to the Valhalla Nursing Home.
You will have already been to Watery at this point in the narrative, but you can return there by going to Saga’s car and selecting the Watery option. When you have returned with the boltcutters in hand, head over to the workshop and go to the gate on the left-hand side of the workshop entrance. Interact with the padlock on the gate and select the boltcutters from Saga’s inventory to cut it open.
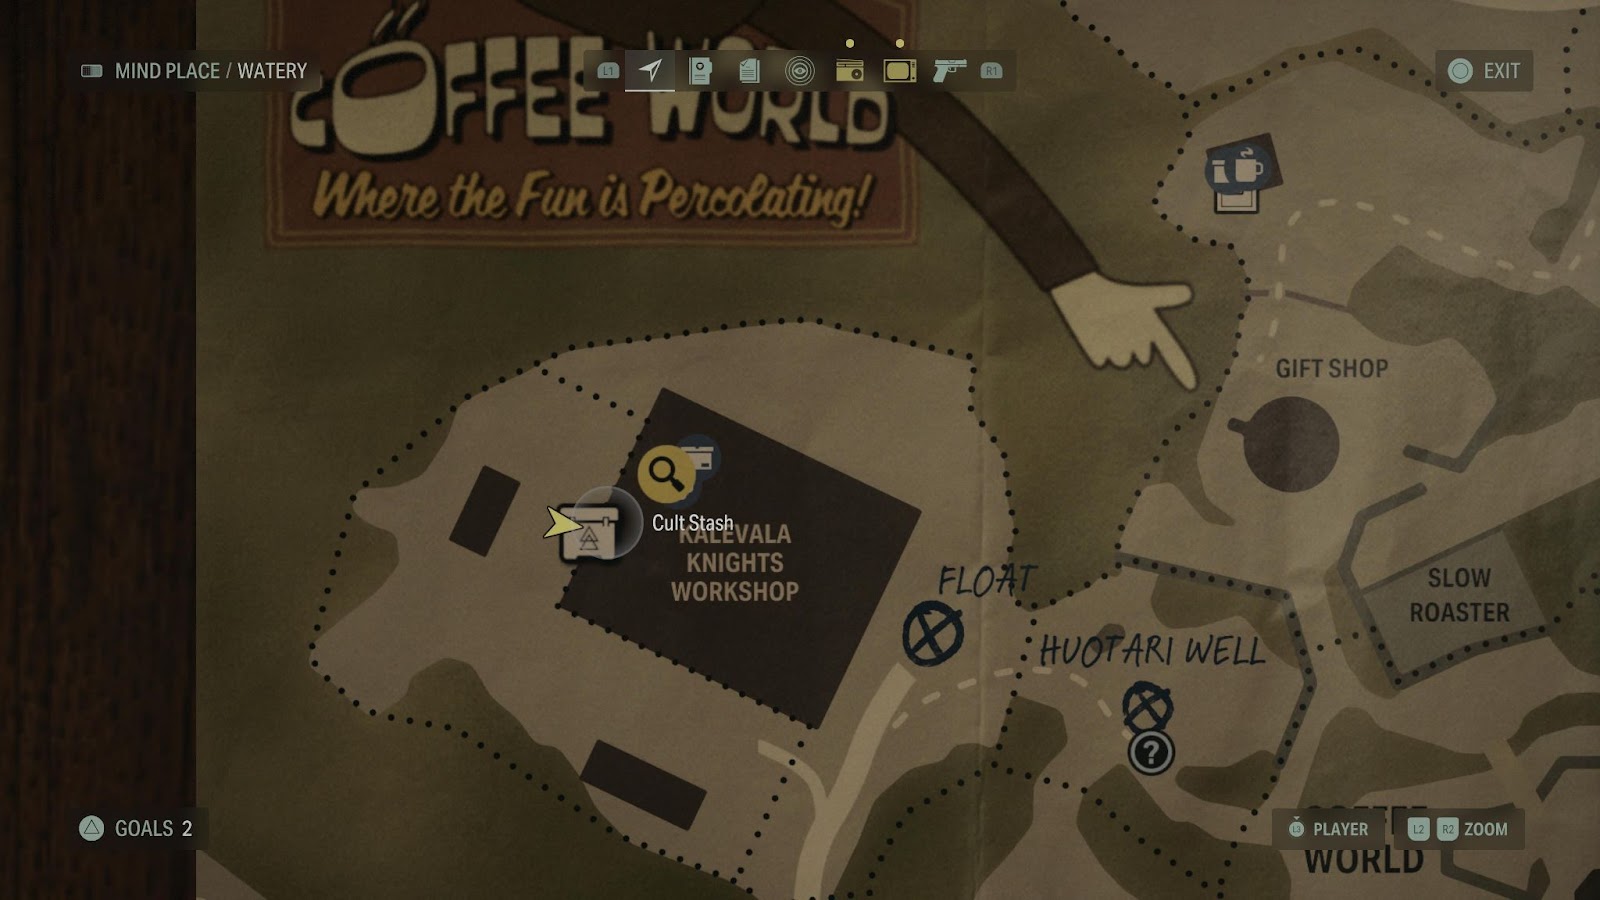
When the gate is open, walk straight through them and keep following the path around to the back of the workshop. You will find the cult stash at the location as per the map above, next to a shining light that you can use to boost your health if needed.
Fighting the Taken after discovering the Kalevala Workshop Cult Stash in Alan Wake 2
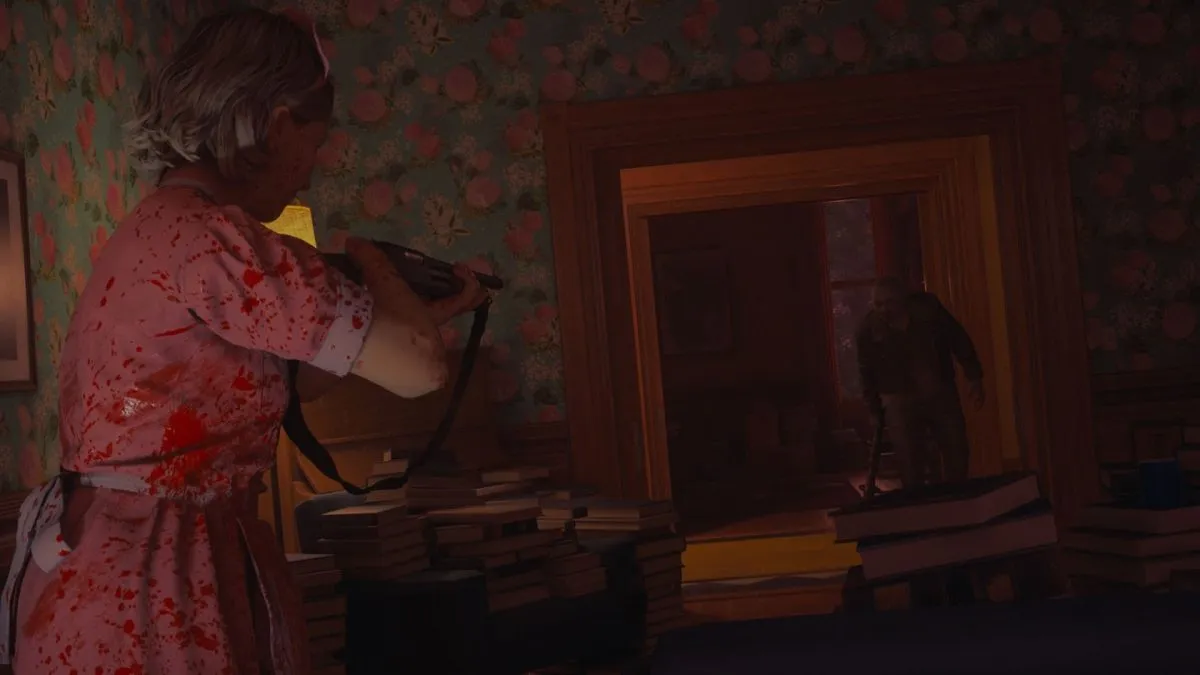
I would highly advise being prepared for a fight before you even approach this cult stash because as soon as you interact with it by looking at the clue on the piece of paper, two Taken will appear behind you.
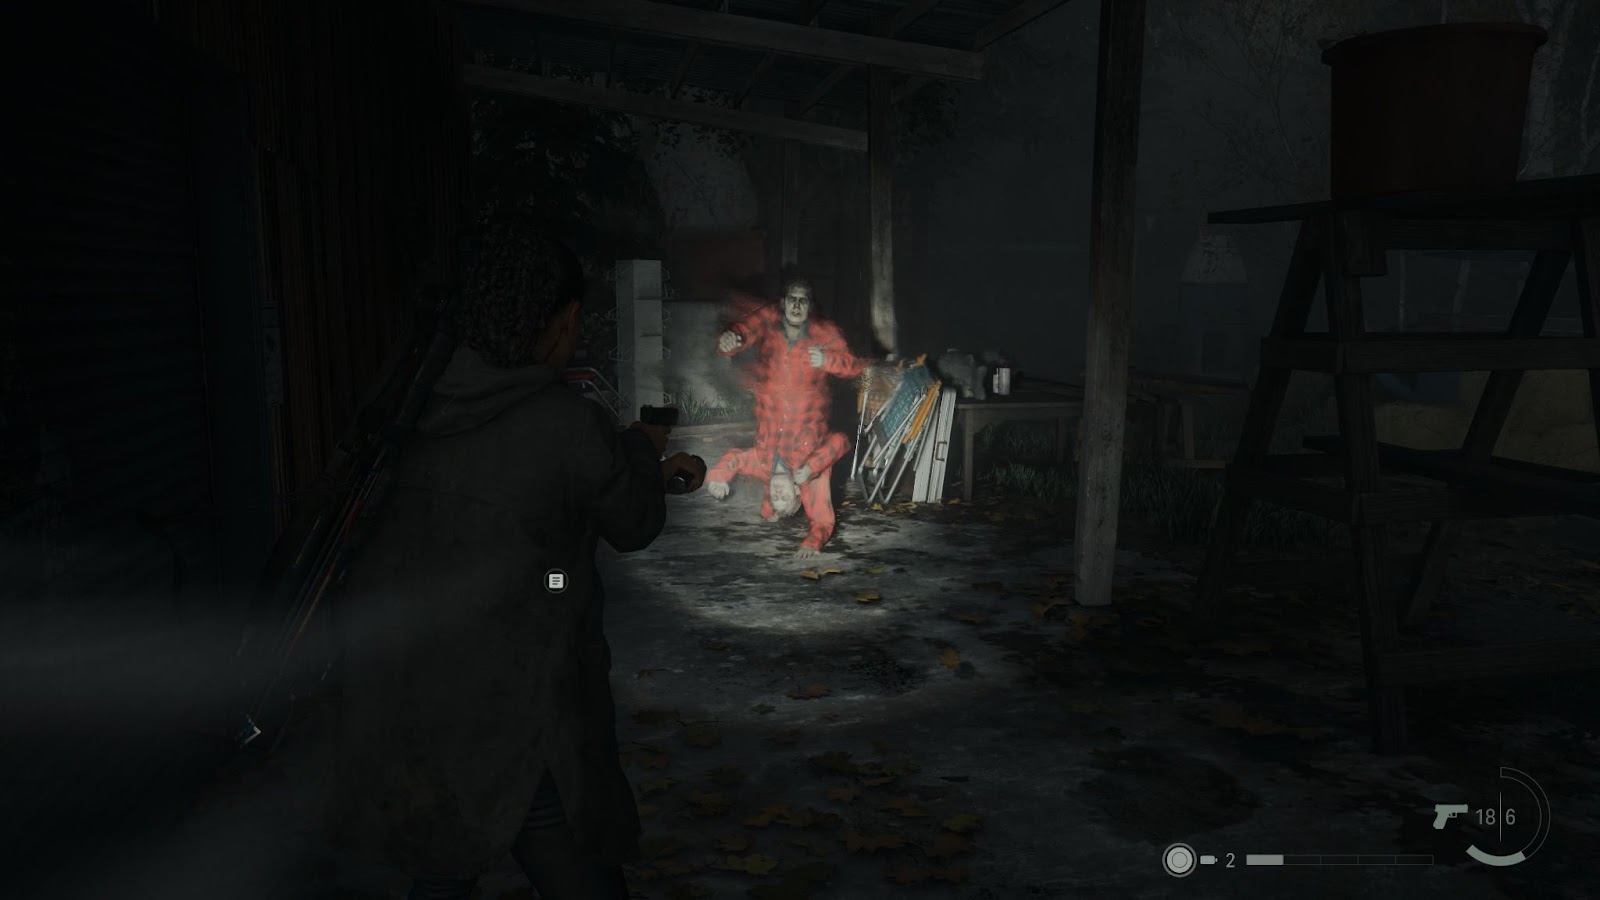
These Taken are the nightmarish horrors that have two upper bodies rather than legs. Not only are they terrifying to look at, but these particular types of Taken have an ability that can drain your health very quickly if you don’t dodge fast enough and get behind cover. This attack involves hurling a wave of darkness at you in a move that will knock you off your feet if you are out in the open. They will then take the opportunity while you are down to approach very quickly and grab you, lowering your health even further. I died a couple of times in this fight simply because I didn’t have good enough supplies, so don’t be like me and forget to stock up.
When I did manage to take down these unholy abominations, I did so by hitting them with as much power as I could as quickly as possible. If you hit them hard enough, you might be able to take them down before they even unleash the weird shadow shockwave attack. To do this, I used a combination of flashbang grenades with rocket flares. The rocket flares were particularly useful and helped me kill the first Taken before they could use their special attack, so I would definitely suggest using them if you have any in your inventory. Don’t forget to use the nearby light to hide in and regain your health if you need it, too.
Once the Taken have been dealt with, you can go back to the cult stash and start figuring out the puzzle to unlock the combination lock.
How to solve the Kalevala Workshop Cult Stash combination code lock in Alan Wake 2
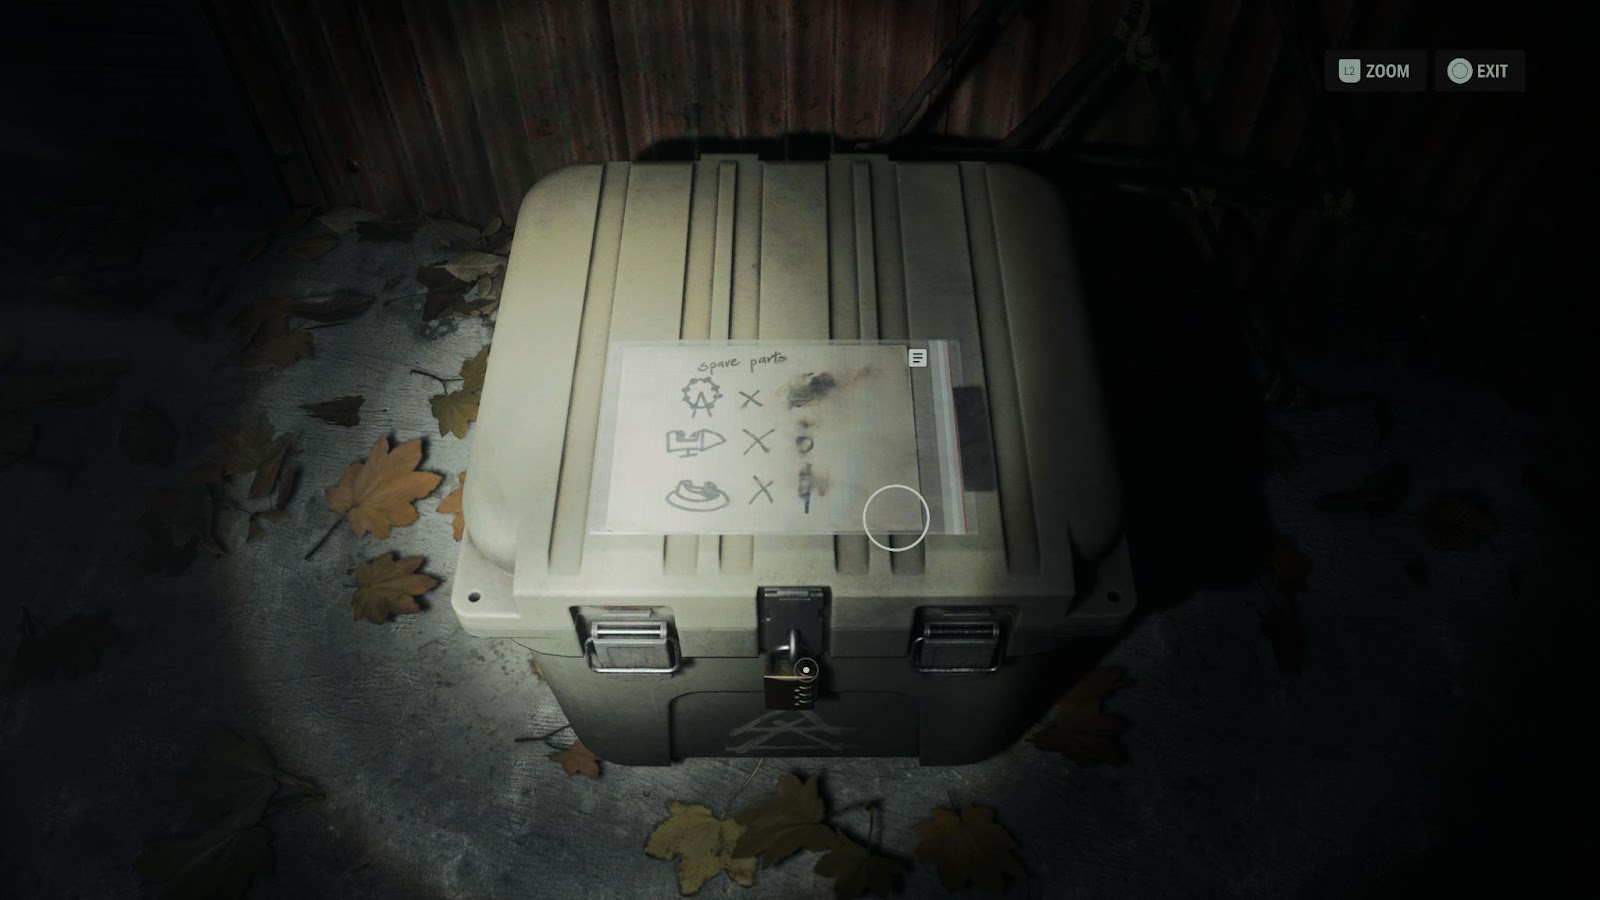
You will find a clue on how to figure out the code for the Kalevala Workshop cult stash on the top of the box itself. As per the image above, you will see a drawing that depicts three of the attractions at the Coffee World theme park. The attractions referenced are the Slow Roaster Ferris wheel, the Espresso Express, and the Latte Lagoon.
The top of the paper has a note about spare parts. There are also numbers that have been written next to each drawing, though they have been smudged out. These numbers are the code for the cult stash.
To solve the code, you need to figure out how many spare parts there are in the workshop for each of the rides. The spare parts in question are the mug-shaped passenger cars from the Slow Roaster, the thermos-shaped pods from the Espresso Express, and the passenger boats from the Latte Lagoon. These parts can be found spread around the area past the gate that you unlocked with the boltcutters.
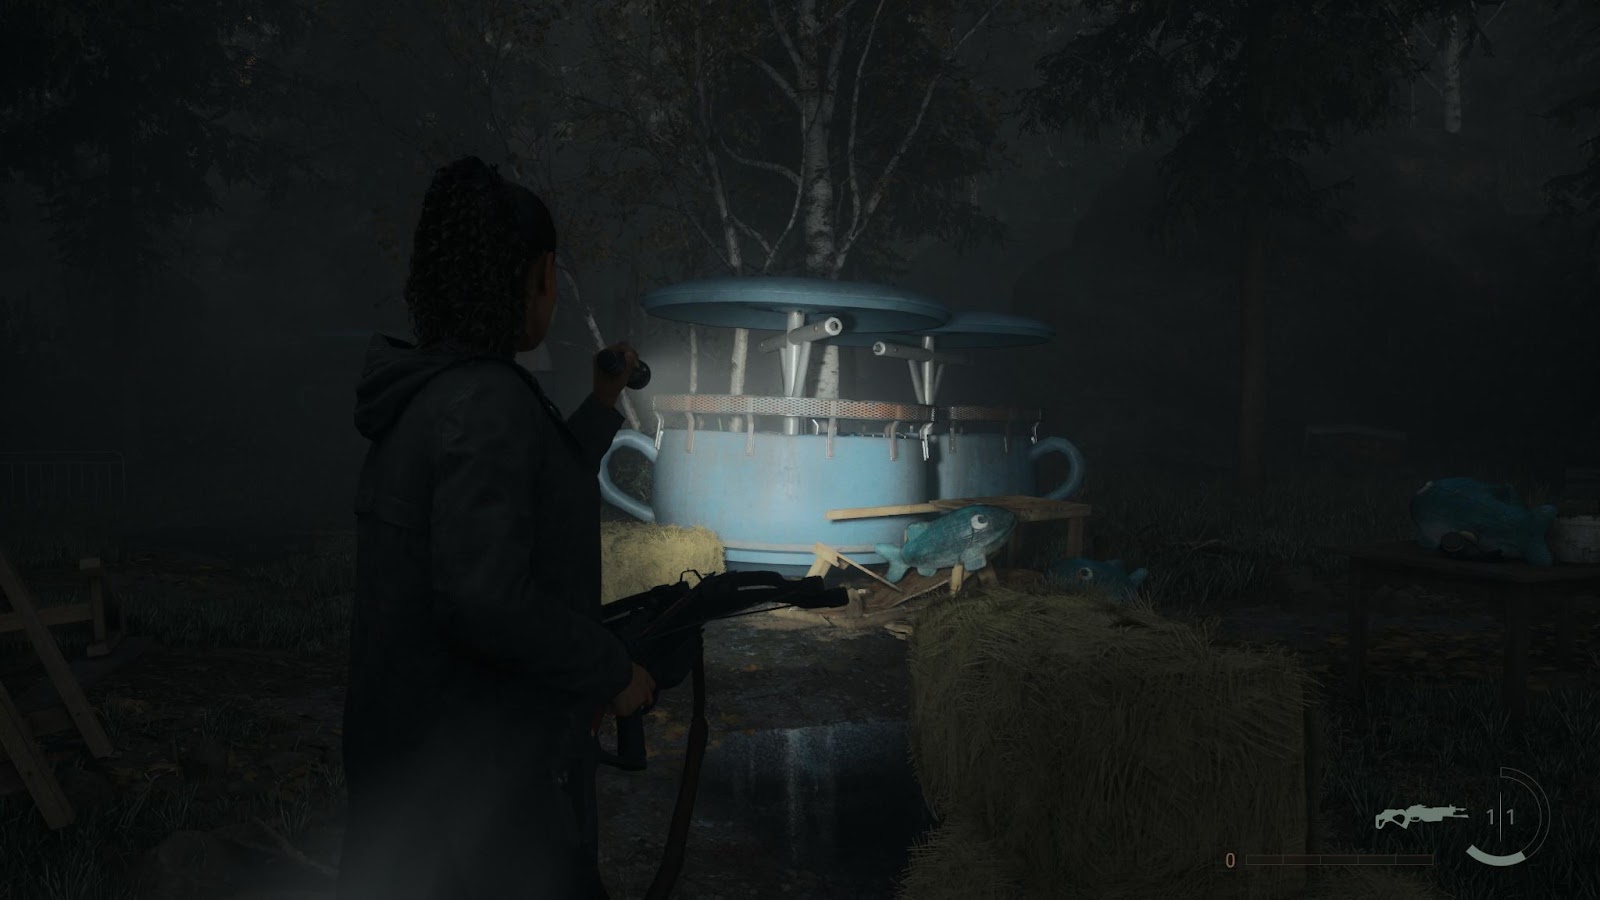
In the immediate area around the cult stash, you will find three Slow Roaster passenger cabins and two Espresso Express spare parts.
In the immediate area that you find yourself in when you first go through the gate, you’ll find another Slow Roaster part, two more Espresso Express parts, and two spare parts for the Latte Lagoon.
As per the note on the top of the cult stash, the order of the combination code is the Slow Roaster parts, the Espresso Express parts, and the Latte Lagoon parts. Therefore, the combination code for the stash is five, four, two.
One thing to keep in mind here is that once you have interacted with the cult stash and initiated the fight with the Taken, you can’t go back to the entrance area until you have removed the darkness blocking the way with your flashlight. You can easily blast this away by boosting your flashlight, but I’m bringing this up so that you don’t make the same mistake I did when I first tried to open the cult stash.
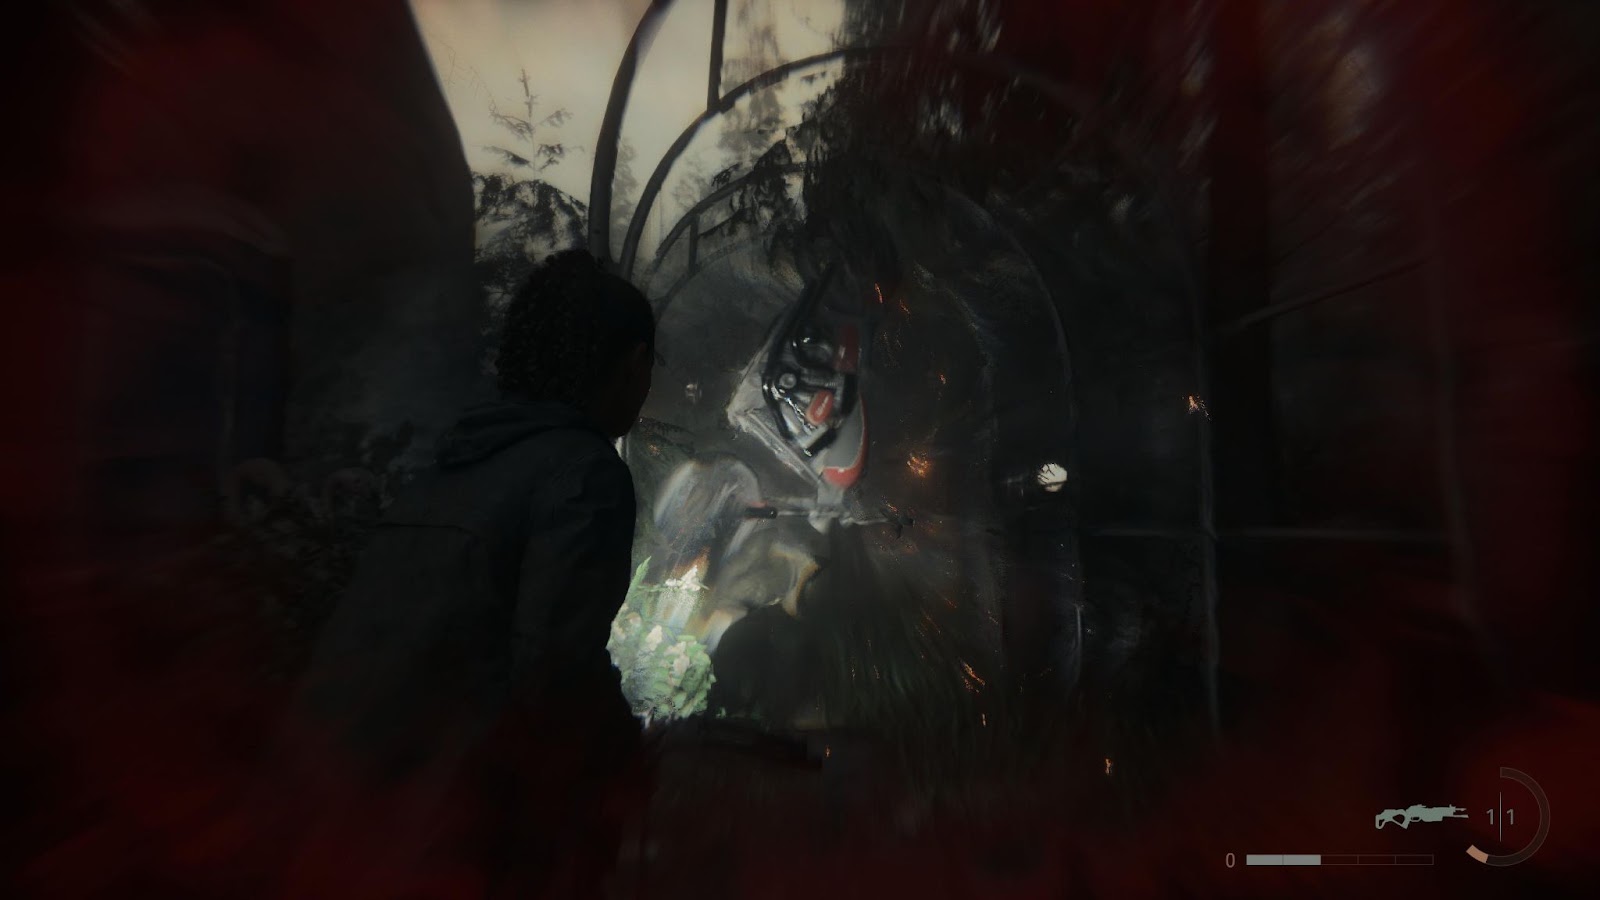
During my first attempt, I survived the fight with the Taken. However, I used up all of my flashlight batteries in the process. I hadn’t taken note of the amount of parts in the first area beforehand, so when I tried to go back, I couldn’t get through the darkness as I didn’t have any batteries left in my flashlight.
I had to run into the shadows to kill myself and start again, as I was completely stuck. A tragic and embarrassing moment, to say the least. Try not to wear out all of your batteries during your fight with the Taken to avoid having to start over again like I did.
What do you get from the Kalevala Workshop Cult Stash in Alan Wake 2?
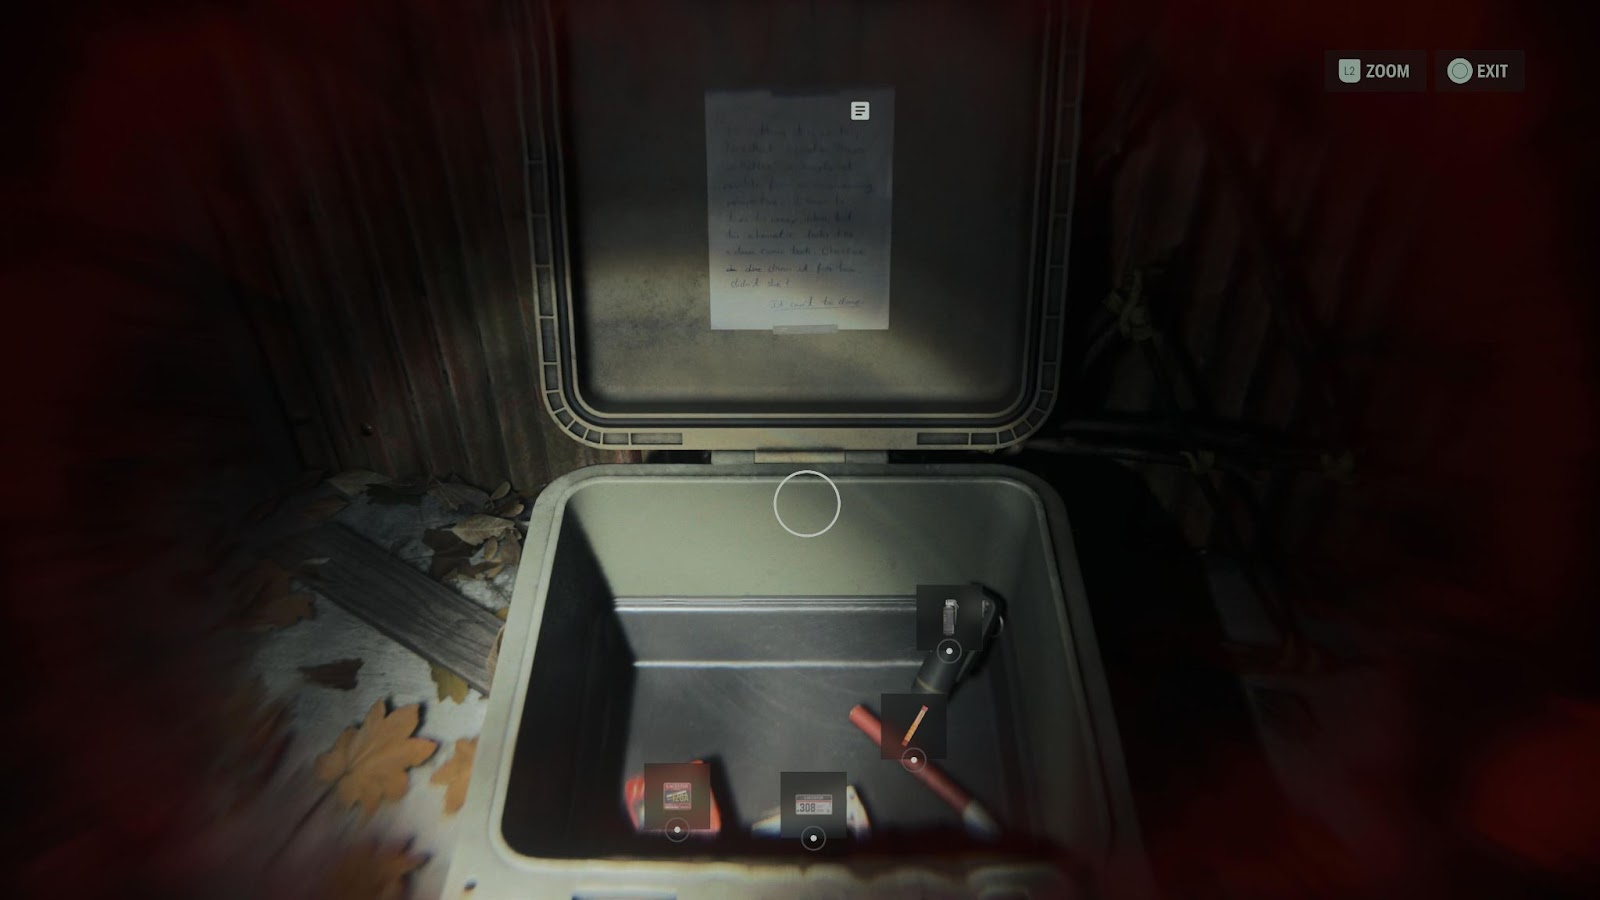
With the code to hand, head back to the cult stash, input the code—five, four, two—and claim the rewards inside. You will find a rocket flare, a flashbang, and two lots of ammo inside. Ammo is always necessary, as it is easy to use up a huge amount of your stockpile without even noticing due to how many shots that Taken can absorb. They can be rather spongy, so collect any and all ammo that you can as you go during the game.
All in all, you get a fair amount of supplies from this particular cult stash. They are also supplies that are very useful, thanks to the powerful nature of the flashbangs, the rocket flares, and the necessity of the spare ammo.
Final thoughts on the Kalevala Workshop Cult Stash in Alan Wake 2
The puzzle of the Kalevala Workshop cult stash isn’t too hard to figure out, though it did take me a minute or two for the penny to drop and to realize the spare parts in question were the carriages and cabins from the Coffee World rides. It all starts to make sense when you think about it, as you will pass the carriages as you enter the area.
The fight with the Taken is a tough one due to them being particular kinds of enemies that have a certain move that can easily sweep you off your feet and lower your health. It’s a fight that isn’t for the faint of heart, so make sure to take out the creepy ghouls as quickly as you can so that you don’t have to deal with their special attacks (or look at their nightmarish designs for too long).
Be wary of the darkness blocking the way out too so that you don’t get trapped like I did. If you have rocket flares, regular flares, or flashbangs, use them to your advantage in the Taken fight, and try to use your flashlight as sparingly as possible to avoid this. Otherwise, you will have to kill yourself like I did and load back the game. Never a fun thing to do.
Despite featuring a tough Taken fight—and risking the possibility of becoming trapped—this is a cult stash that is definitely worth the effort. It contains twice the amount of supplies as your run-of-the-mill cult stash and includes both flashbangs and rocket flares. All you need to do to ensure that solving this puzzle goes as smoothly as possible is make sure that you are thoroughly prepared before you approach the cult stash and initiate the Taken fight.

Published: Nov 24, 2023 11:38 pm