Fancy a challenge that will test you to your limits? The Last of Us Part 2 Remastered No Return mode features permadeath, beloved characters, and a whole bunch of challenges to sink your teeth into.
If you’re unsure how to tackle this new roguelike, permadeath mode then here are our tips and tricks for The Last of Us Part 2 Remastered No Return mode.
The Last of Us Part 2 Remastered: No Return mode tips and tricks

Use allies whenever you can
Some encounters in The Last of Us Part 2 Remastered‘s No Return mode have allies. Just like the main game, the allies are incredibly useful. I found myself relying on them a lot in moments of desperation when I ran out of ammo; they dish out a ton of damage, warn you if any enemies are close but outside of your vision, and they never die.
Depending on the difficulty you set at the beginning of No Return will determine just how effective your ally is mid-encounter. In my own testing, however, I found that my ally has often annihilated enemies in a clean one-versus-one on the 2.0x modifier setting. Their strengths seem to lie in melee battles. Allies rarely need your help, allowing you to conserve a few bullets in the process.
Keep in mind—enemies can also spot allies roaming around the map. So if you are trying to play stealthily, it is important to be mindful of your ally’s position.
Plan your route according to each encounter
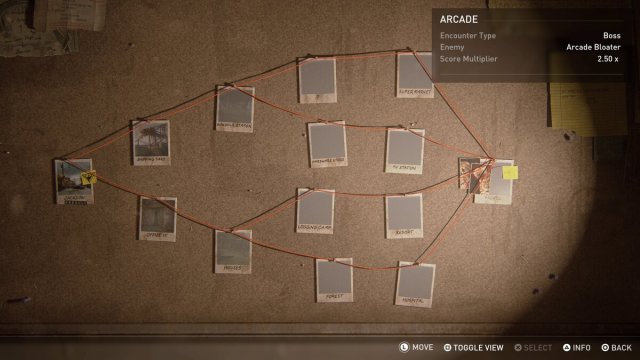
Each encounter is short if you’re playing on default settings. You must be mindful of the type of encounter you are heading into; make sure to check the type, faction, and state the enemies spawn in (search or combat mode). Each piece of information will help you at the beginning of an encounter.
The encounter areas (setting) remain the same regardless of the difficulty, number of runs you’ve completed, or the character you’ve selected. Remember these factors are randomized per encounter, so I advise you to practice as much as you can on a lower difficulty to learn what you are best at. Some encounters focus on stealth while others force you into an all-out battle from start to finish. However, there is no set rule on how you need to take each encounter.
There are four encounter types. These are:
- Assault: Defeat waves of enemies.
- Hunted: Survive until the timer runs out.
- Capture: Clear the enemies guarding the safe.
- Holdout: Defend against a swarm of infected while protecting your ally.
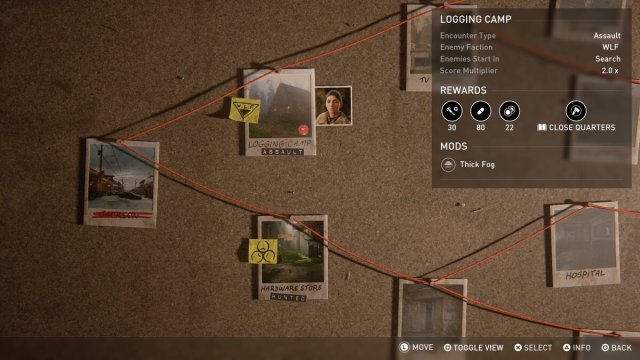
Notice environmental mods like Thick Fog. These affect gameplay like lower visibility and inability to use the hearing mechanic. Adapt to each encounter type and use the mods to your advantage. For instance, a thick fog invites stealthy gameplay. Use this against the enemy to conserve ammunition and build resources that you may have previously spent by going in, guns blazing.
There are also other encounter mods like Melee Weapons Set Enemies On Fire. These impact your encounter so you should always make note of the mod before heading in. Mods can be used to your advantage like the example I just gave.
Save as much ammo as you can for late game
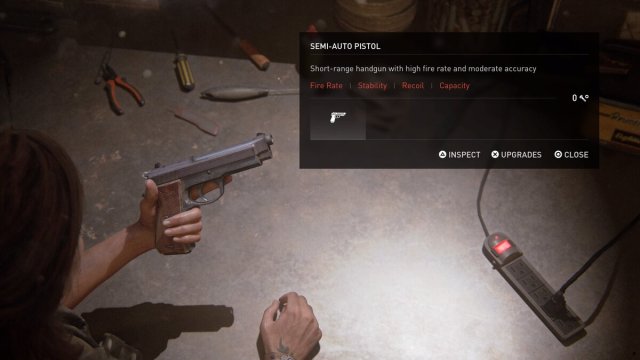
The next tip is to save ammunition whenever you can as this roguelike is leading to a final boss fight. Your resources, including ammo, are saved and used in the following encounter. Therefore, it is imperative that you hold onto as much ammo as possible as you progress through the rounds. You cannot get ammunition at the beginning of an encounter. The only way to get ammo is to kill enemies.
Make sure to loot all dead enemies before you loot the reward cache after clearing a wave on Assault. Remember the loot cache location by looking at the icon that’ll pop up on your screen after a wave. Immediately look to loot the corpses and then open the cache for more ammo. You’ll have to adapt to your positioning as the wave will likely start after you open the cache so look at the surrounding area and decide where you’ll take cover before the next wave begins.
Buy better weapons at the Trading Post
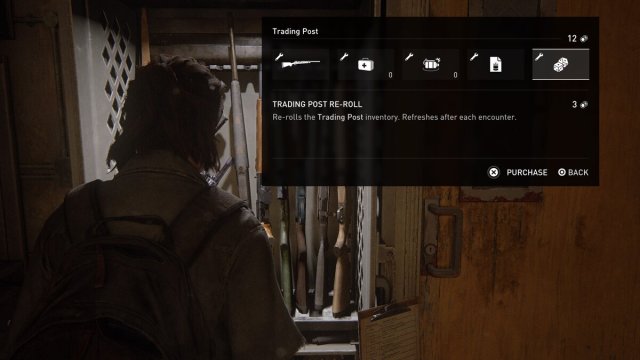
The Trading Post is available at all times inside the Hideout. It is best to visit this every time you complete an encounter as there are a lot of great resources here to utilize. You can pick up extra medkits so you don’t have to craft them in the middle of an encounter or upgrade your starting weapon with something that packs a bit more firepower.
The Trading Post rotates its stock per encounter so if you see a weapon you like you should buy it before it rotates out of the Post for new items. We recommend checking the Trading Post before the Workbench for weapon upgrades. However, both require different materials that are only obtained by completing encounters. Spend your coins where you can and don’t get too greedy as something better might come along down the track.
Remember the previous tip about encounter types. Look at what is coming up and think about what you had in the previous round. Will an unsilenced pistol help you in a stealth encounter? Do you have enough medkits to take on clickers and bloaters? These are things you need to think about.
Utilize the listening mechanic for all encounters
As allies aren’t available for every encounter, the listening mechanic will save you most of the time. This will not only keep track of the enemy’s position should you lose it but it’ll also tell you the type of state the enemies are currently in. The listening mechanic will spot enemies running around the map looking for you in case you miss their comms after finding one of their fallen comrades you previously killed.
The listening mechanic isn’t only available when you want to use stealth. You can easily use this mid-fight to spot flanking enemies or keep track of multiple at once if you lose sight of any incoming targets. It is incredibly helpful for zombie encounters.
But you shouldn’t neglect your own hearing, especially for differentiating between the infected. Listen to their groans, shrieks, and footsteps. This will tell you how you need to approach the next section, depending on your current resources.






Published: Jan 18, 2024 05:29 pm